Last updated on April 26, 2023
A file server provides organizations with a system to centrally store, manage, and access files within a network, such as documents, images, videos, logs, etc. With file servers, users can easily share and collaborate on files with others.
Azure Files is a fully managed file share solution that aims to replace or supplement on-premises file servers. It is a platform as a service (PaaS) offering by Microsoft Azure that is accessible by SMB and NFS protocol and Azure Files Rest API. You can mount Azure files using Windows, Linux, and macOS workstations. Azure files have many benefits, including the following:
- Cost efficiency: Instead of procuring additional hardware that will take months to arrive, you can create your file share within minutes and only pay for the storage and bandwidth consumption.
- Scalability: You can quickly increase or decrease the size of your file share for premium file shares. You only pay for what you use in other tiers.
- Availability: Built-in redundancy for high availability and disaster recovery. You have the option to replicate your data to another region for business continuity.
- Ease of use: You can configure file shares and set permission to ensure that only the right people can access the files.
- Security: Azure Files has advanced security features such as authentication and authorization, and encryption at rest.
Creating a file share
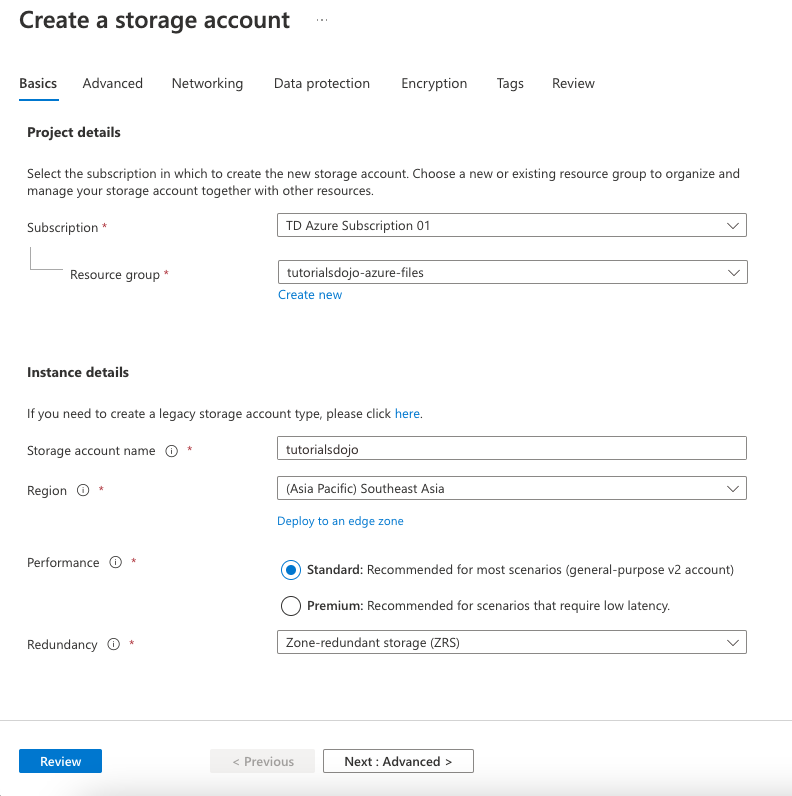
In this section, we’ll learn how to create a file share. Head over to Storage Accounts service and click “Create“
1. At the Basics pane, fill in the required fields with a red asterisk *. In this article, we will leave the other panes to their default settings.
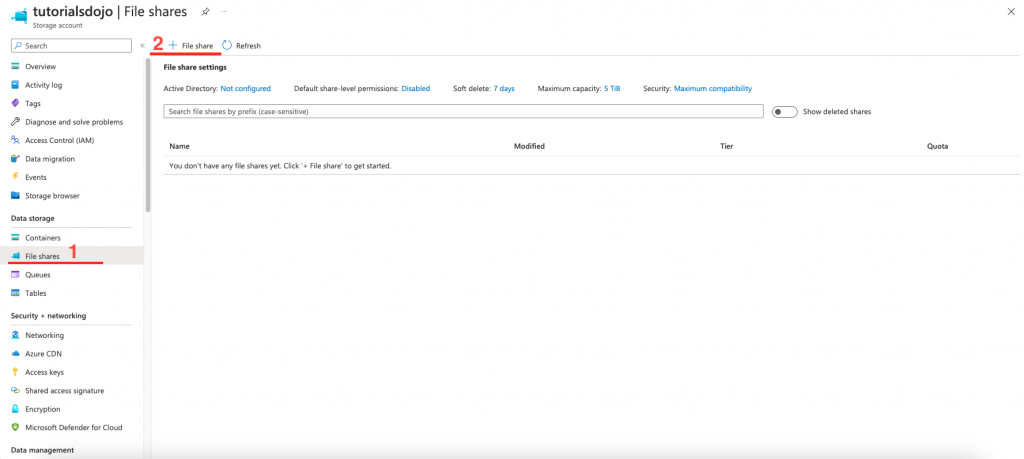
2. Go to your newly created storage account and click 1. “File Shares” and click 2. “+ File share “.
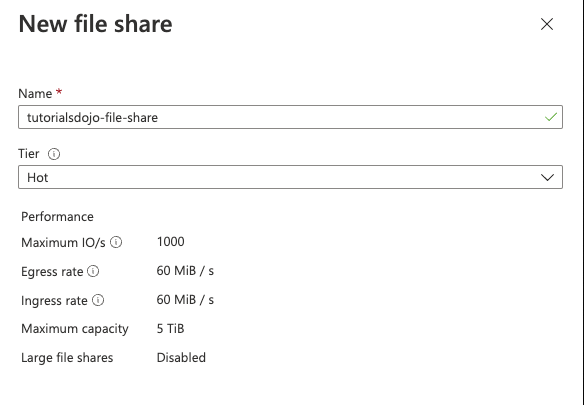
3. At the create file share tab, enter your preferred file share name and the tier type and click “Create“. The following storage tier types are:
- Premium – for workloads with application that requires consistent high performance and low latency, within single-digit milliseconds for most IO operations, for IO-intensive workloads.
- Transaction optimized – transaction-heavy workloads that don’t need the latency offered by premium file shares.
- Hot – optimized for general purpose file sharing scenarios such as team shares.
- Cool – optimized for online archive storage scenarios.
4. You now have your file share. You can directly upload your files and change your storage tier using the Azure portal.
Mounting a file share
In this section, we’ll mount our file share created from the previous section and save a file that should appear on the Azure portal.
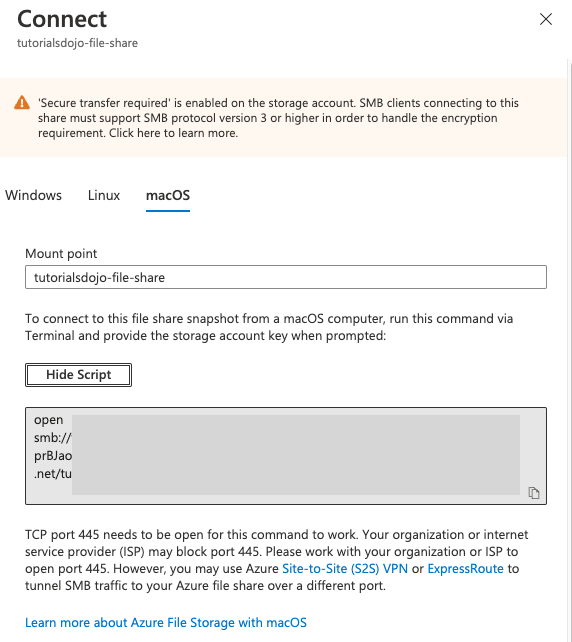
1. Head over to the file share and click “Connect“. For this tutorial, we will connect using macOS. Copy the script and paste it into your terminal.
– You may also connect using your Windows or Linux workloads. Just copy the script provided by the connect pane.
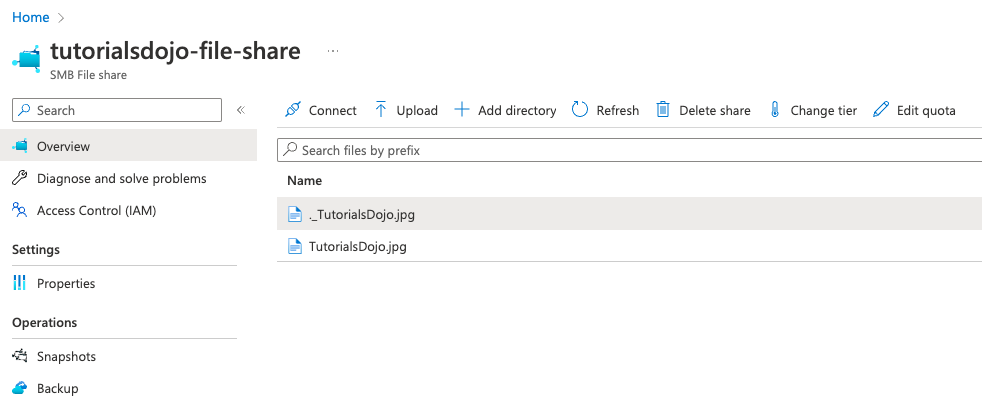
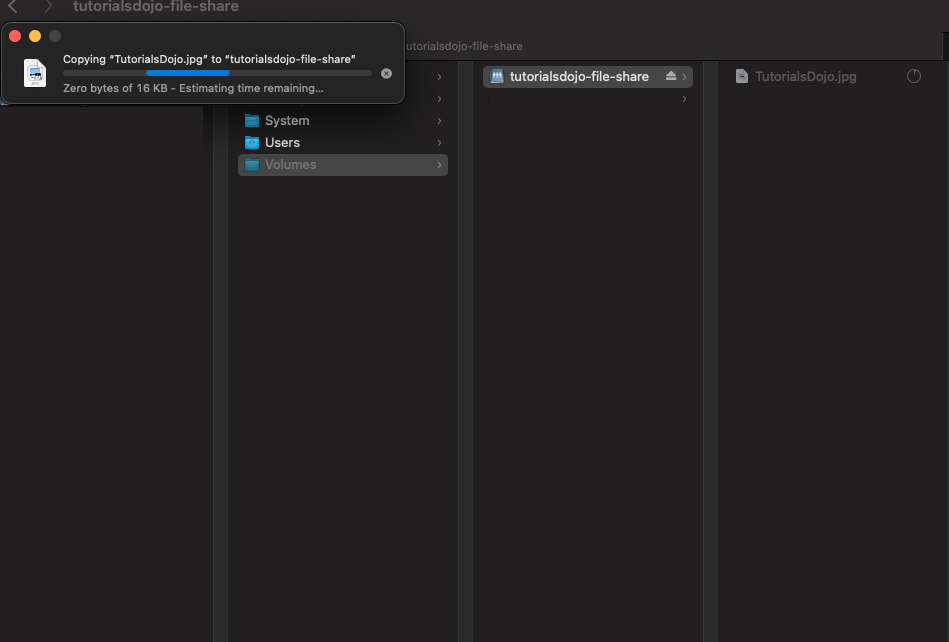
2. Once connected to your file share, we will save a TutorialsDojo logo to the file share.
3. Head over to your file share using the Azure portal. You should now see our newly uploaded TutorialsDojo logo.
