Last updated on April 26, 2023
If you use Discord, Slack, or Telegram, you’re probably familiar with those long and complicated invite links used to join servers or channels. These links can be difficult to remember and may even discourage some people from joining. With URL redirection, you can create a custom and easy-to-remember domain name for your invite links. For example, you might use a domain like “discord.mycoolsite.com” that redirects to the invitation page of your Discord server, which might look something like this: “discord.com/invite/aabbCCDD”. Inviting people thru a custom domain can reinforce your brand and make it easier for others to share and join your online community. Another advantage is that if ever the invite link expires or you need to change it, you can do so without having to update it everywhere it’s been shared. Simply update the redirection settings to point to the new link.
When it comes to URL redirection, you’ve got a few options to choose from. You could use third-party services (e.g., bit.ly, tinyurl.com) or configure your web server (e.g., Nginx, Apache) to redirect visitors automatically. In this article, we’ll look at another method, yet a simpler alternative, using Amazon S3 website hosting and Amazon Route53.
To follow the tutorial, you must:
- have created an S3 bucket.
- have an existing hosted zone in Amazon Route 53
Enabling the S3 bucket for website hosting
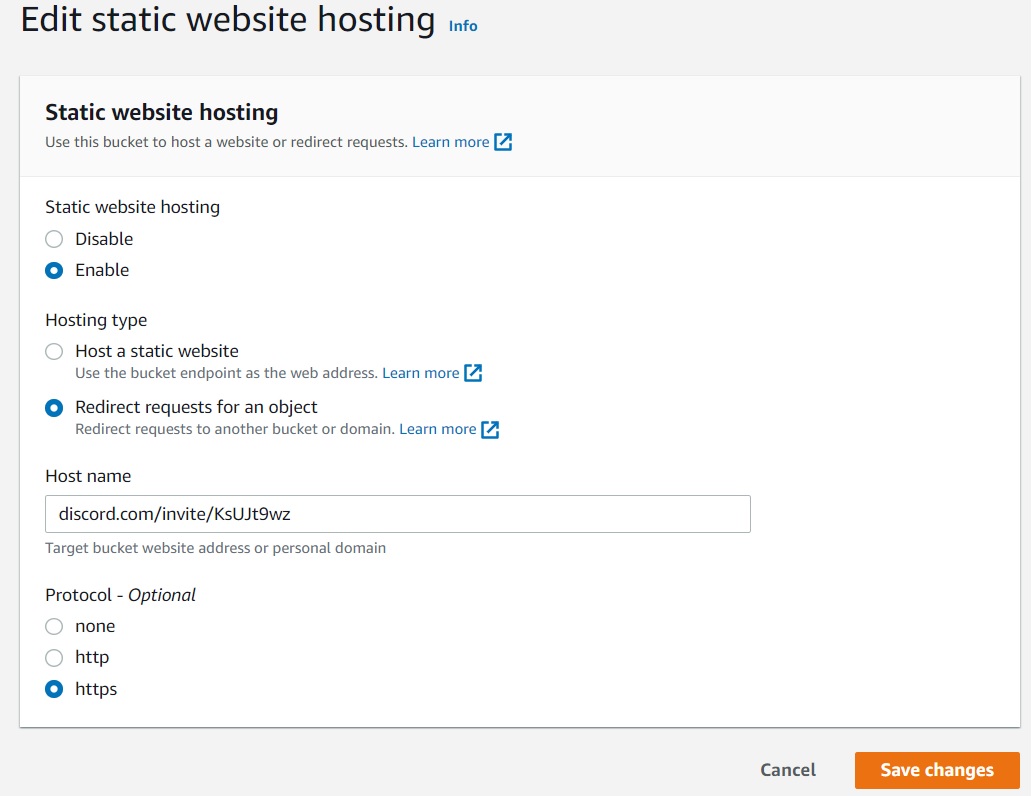
- Go to the Properties section of your S3 bucket.
- Search for the Static website hosting tab and click Edit.
- Switch the Static website hosting option to Enable.
- For hosting type, select Redirect requests for an object.
- Under Host name, enter your invite link. In this demo, I wanted to redirect to a Discord invite link.
- For Protocol, choose https.
- Click Save changes.
When you turn on website hosting, Amazon S3 automatically designates an HTTP endpoint for the bucket in the format http://<bucket-name>.s3-website-<AWS-region>.amazonaws.com, where <bucket-name> is the name of the S3 bucket and <AWS-region> is the AWS region where the bucket is located. This endpoint cannot be modified or customized.
As a workaround, we can create a CloudFront distribution that uses the S3 bucket as the origin. Then we’ll provide a custom domain name for the distribution endpoint. As a workaround, we’ll create a CloudFront distribution that uses the S3 bucket as the origin. Finally, we’ll create a Route 53 record for the custom domain name that points to the CloudFront distribution endpoint.
Creating a CloudFront distribution:
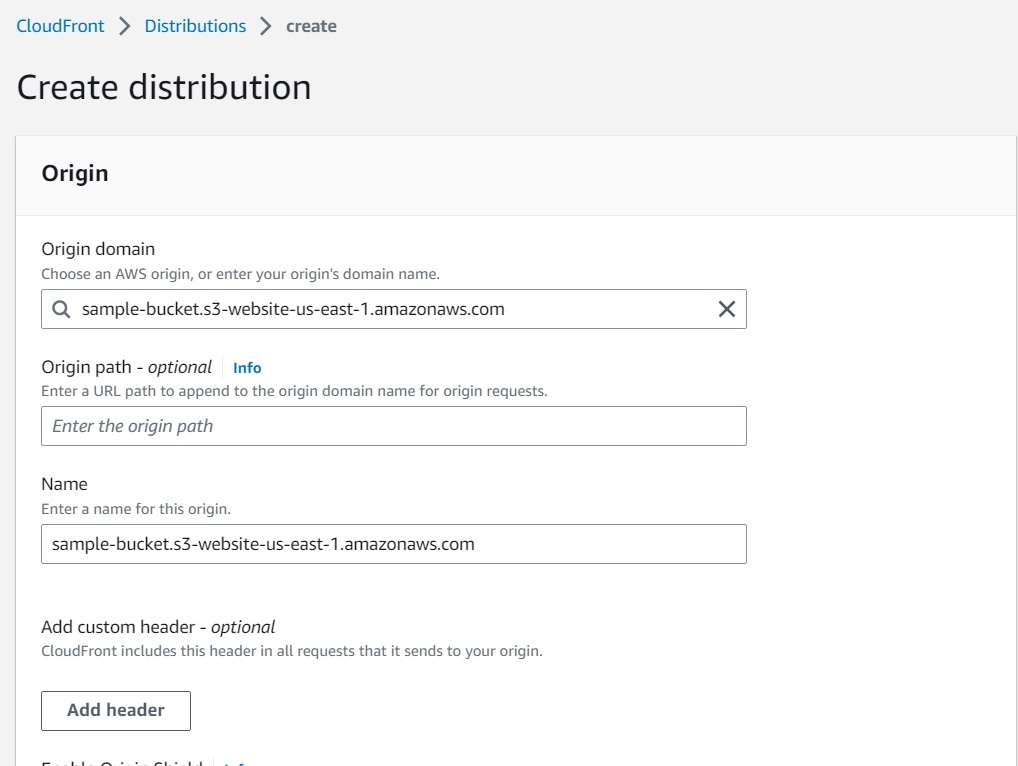
- On the left pane of the CloudFront console, click Distributions.
- Click the Create Distribution button
- In the creation wizard, paste your S3 website URL into the Origin domain.
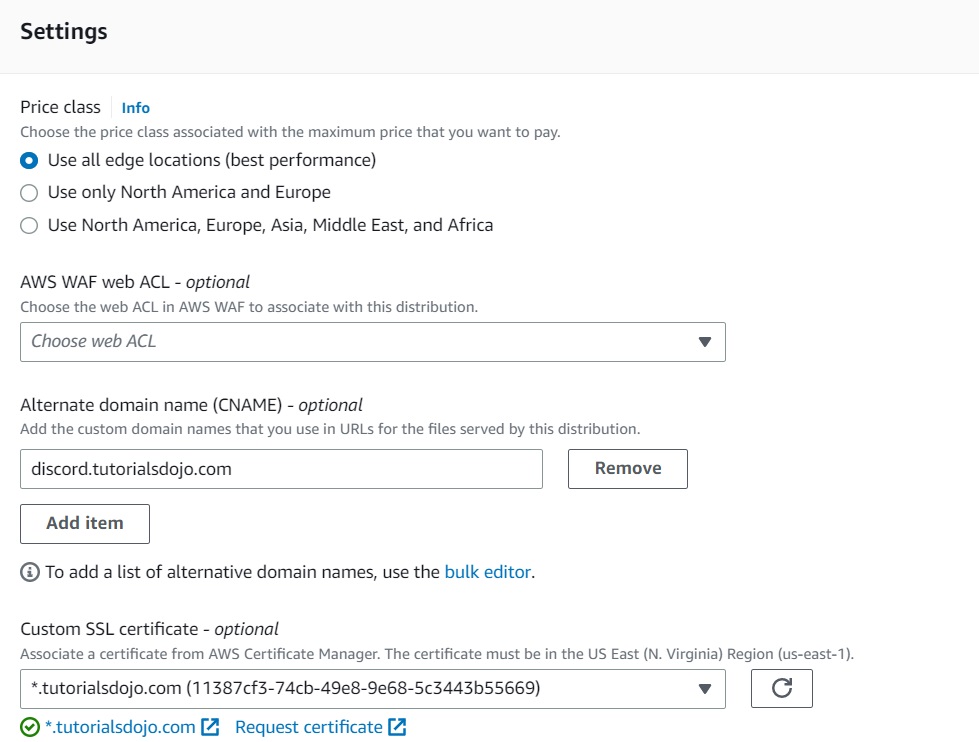
4. Scroll down to the Settings tab.
5. Enter the domain name that you like in the CNAME option.
6. Under Custom SSL certificate, select the SSL certificate associated with your domain. If you don’t have it, you can request one from AWS Certificate Manager (ACM) for free.
7. Leave everything to their default settings. Click Create distribution.
Note that it may take several minutes for the CloudFront distribution to deploy.
Creating a Route 53 record:
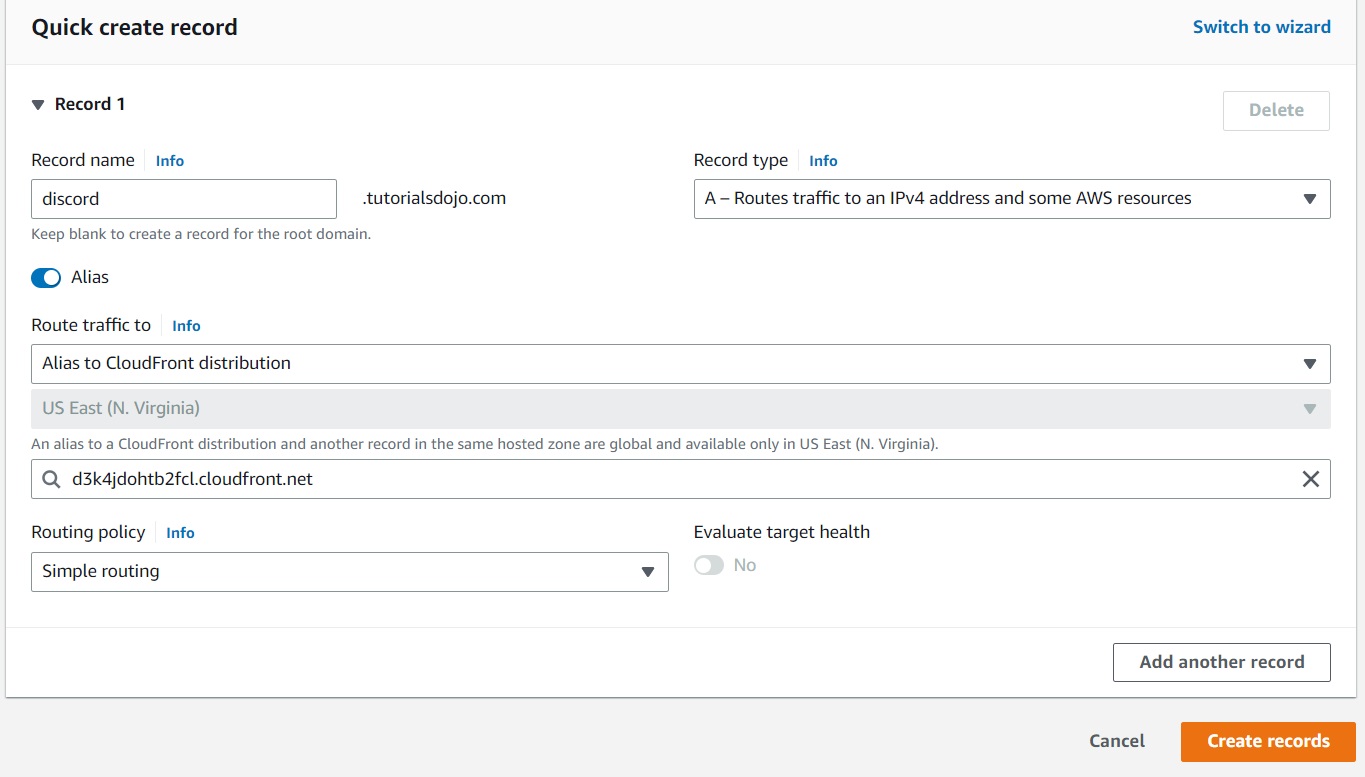
- In the Route 53 console, Choose the hosted zone for the domain you want to use.
- Click Create record.
- On the Record name, enter the custom domain that you created for your CloudFront distribution.
- Enable the Alias toggle button.
- In the Route traffic to option, select your CloudFront distribution.
- Click Create records.
Verification
Wait for the Route 53 record to propagate, which may take some time. Open a web browser and enter your custom domain name. You should now be redirected to the invitation page of your Slack, Discord, or Telegram channel.


