If you’re managing a cloud infrastructure, you understand that backups are created to safeguard critical data and ensure business continuity. In the event of a server failure, backups expedite the restoration of data and the prompt resumption of operations. It also allows you to revert to previous server states, which is helpful for version control and rollbacks. Additionally, backups are useful resources for testing, development, and creating replica environments.
In Microsoft Azure, the dedicated service for managing the backups and recovery of your resources is Azure Backup. It provides scalability, flexibility, incremental backups, point-in-time restore, and long-term retention of your data. You can use this service to backup the following:
- On-premises
-
- Microsoft Azure Recovery Services (MARS) agent
- Microsoft Azure Backup Server (MABS) agent
-
- Azure Virtual Machine (VM)
- Azure Managed Disk
- Azure Blobs
- Azure Files shares
- SQL Server in Azure VMs
- SAP HANA databases in Azure VMs
- Azure Database for PostgreSQL servers
In this tutorial, we’ll create a backup in the Azure Portal using the following:
- Azure Backup Policy – a set of rules and configurations that define backup operations’ frequency, retention, and other parameters.
- Azure Recovery Services vault – a container where backup data is stored and managed.
Backup
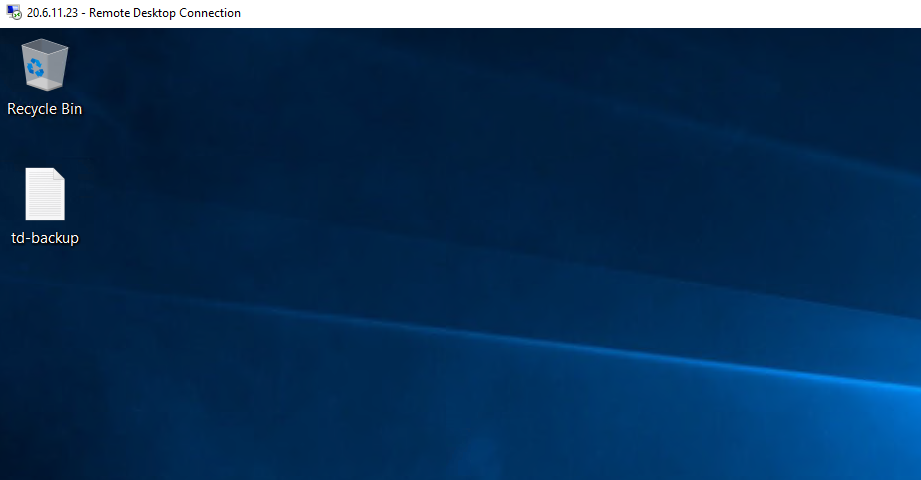
1. To understand how Azure Backup works, let’s first connect to the existing Azure Virtual Machine via Remote Desktop Connection (RDP) and then create a text file on the desktop.
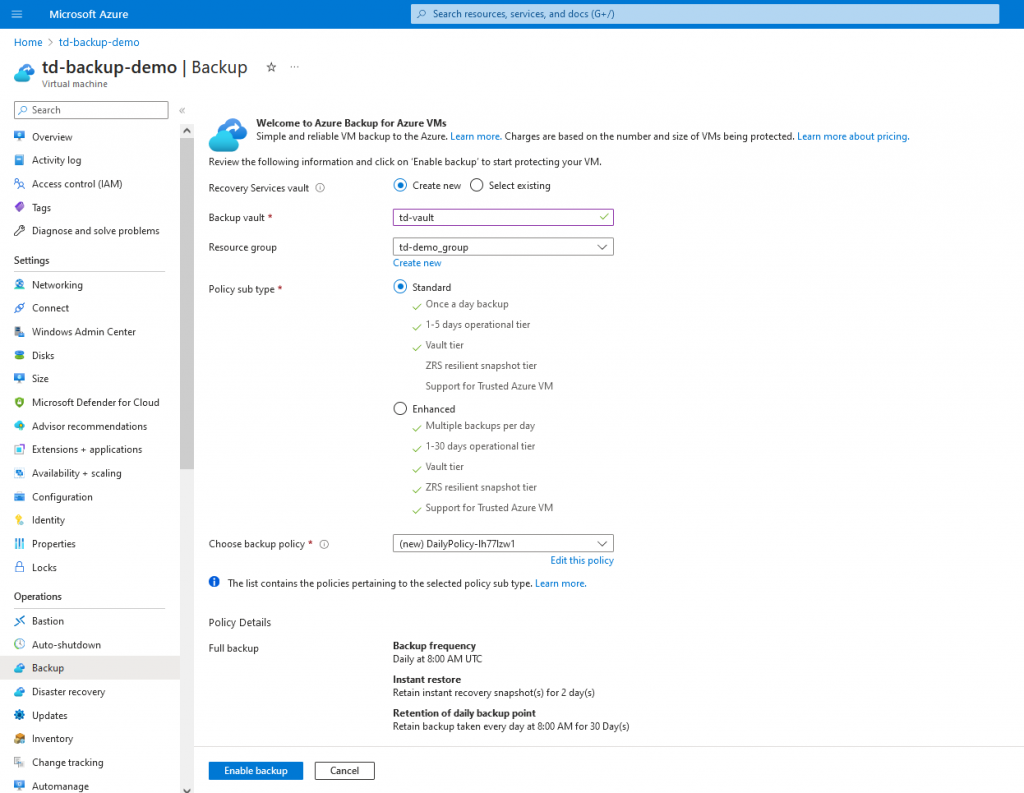
2. Configure the virtual machine to enable backup by creating a Recovery Services vault and Backup Policy.
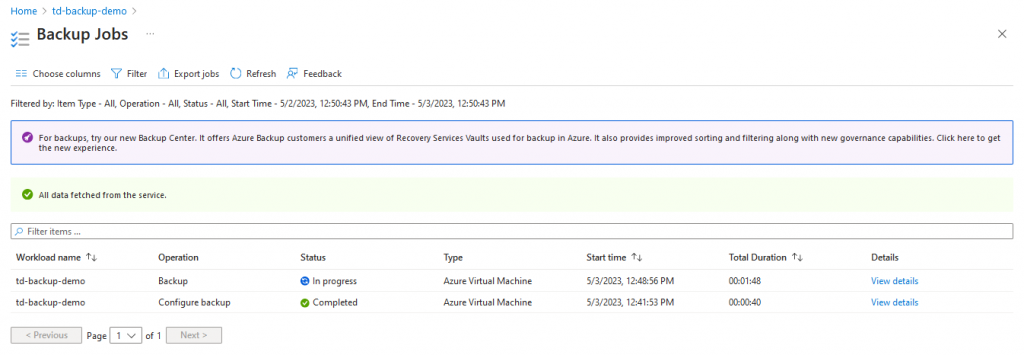
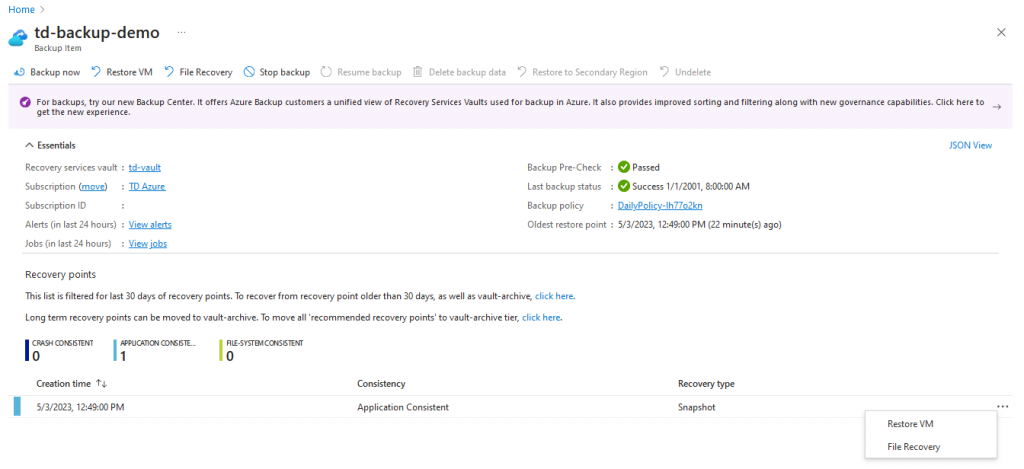
3. Once the backup is enabled, find the Recovery Services vault that you’ve just created and select Backup Items > Azure Virtual Machine under the Protected items section. Go to View details and click the Backup now button. Take note that it will take a while to create a snapshot.
4. When the backup status is completed, and a recovery point is created, you can now restore or create a new virtual machine with the same data. To know how to restore a VM, check out the Recovery section.
Recovery
Before you restore a virtual machine, make sure that you’ve already completed the Backup section above.
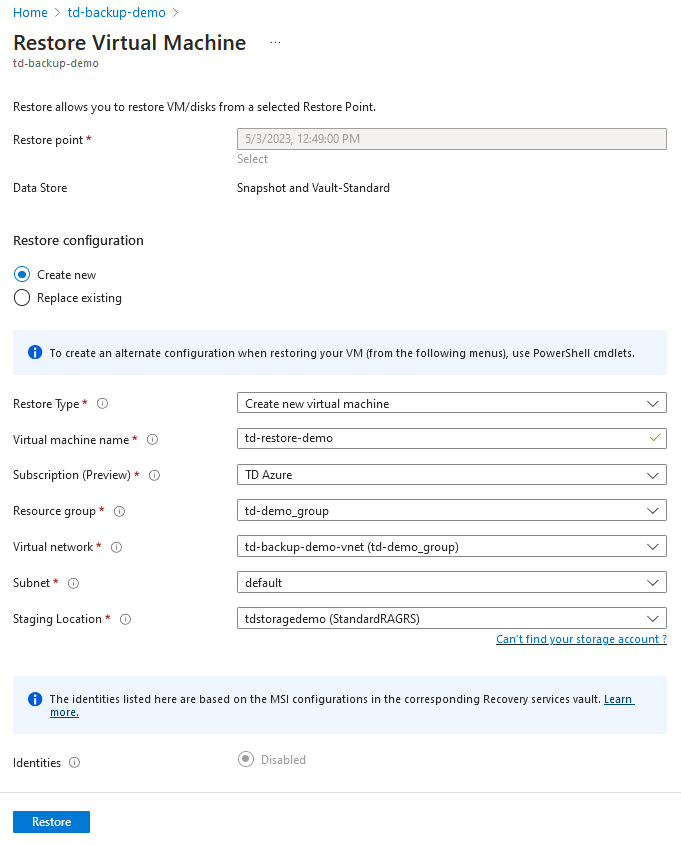
1. To restore the snapshot to a new virtual machine, you’ll need to fill up the required fields and select the Restore Type to “Create new virtual machine” then click the Restore button.
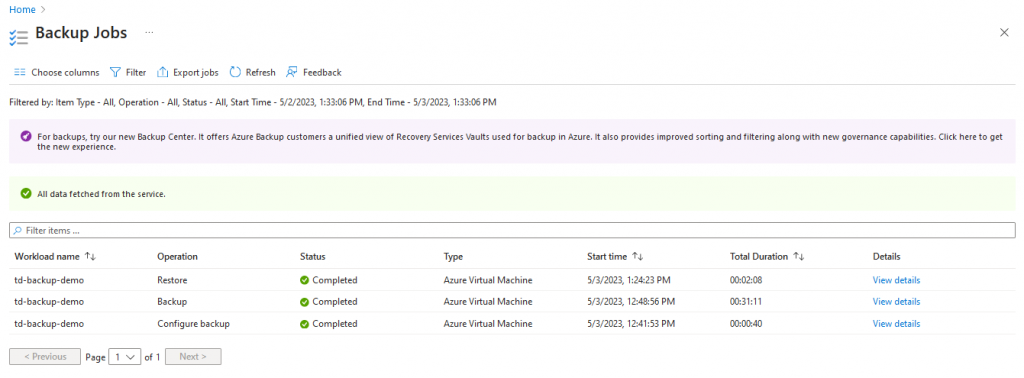
2. When the restore operation is finished, you’ll get a notification, and if you click it, you’ll be taken to the Backup Jobs page. To understand what happens during recovery, click the View details.
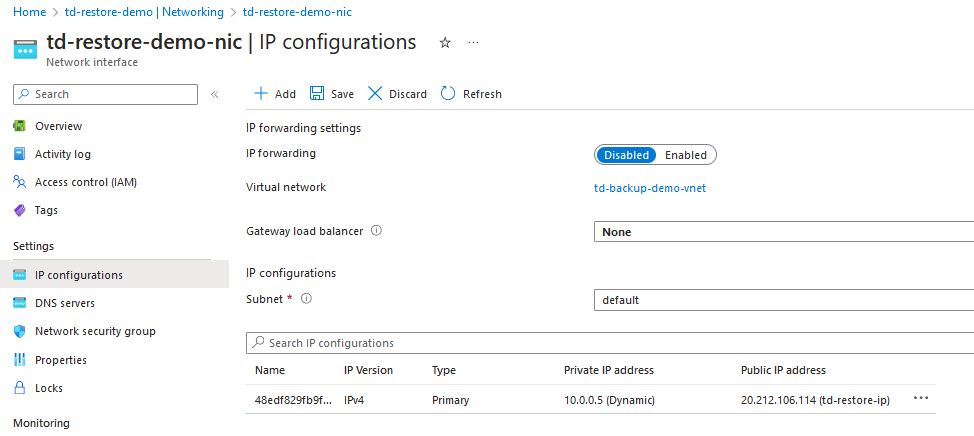
3. Go to the resource group to find the restored virtual machine. Take note that you’ll need to assign a public IP address and network security group (NSG) to connect to the virtual machine.
- Go to Settings section of VM > Networking > Click the attached network interface.
- Assign a Public IP address: IP configurations > Click the primary IP, then associate a public IP address.
- Assign an NSG: Network Security Group > Assign the same NSG.
4. After setting up the network interface of the restored virtual machine, you can now connect to it via Remote Desktop Connection. Since this is created from a snapshot, you’ll need to use the same “Username” and “Password”.
5. That’s how easy it is to set up a backup and restore a virtual machine in Azure. When you’re done using the resources, stop and delete the backup data first before deleting the resource group.


