Application Use Case
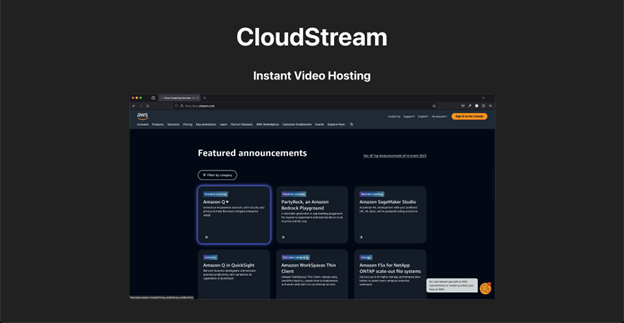
The primary purpose of this application is to share a video as a link and have it accessed by viewers with low latency. This feature is great for those who make quick videos, for example, a short demonstration on how to use an application or a group of academics sharing their explanations to mentor their peers.
Overview of the Tech Stack
Different video hosting websites cater to various features that are subjective to users. Some users prefer highly secure video hosting websites for private content, integrating one (or more) authentication layers to upload and view media at the expense of speed or ease of use. Other users may prefer speed over security for content that is not strictly confidential and can be easily viewable by anyone. This approach allows for a straightforward media-sharing process, allowing the uploader to have a shareable link with as few steps as possible.
The key parts (services) in this architecture are:
1. React app – Frontend service for users to interact with
-
-
- AWS Amplify – Service to host the React app
-
2. Amazon S3 – Storage for the videos
3. Amazon CloudFront – Content Delivery Network (CDN) to speed up the distribution of content.
This project is ideal for small-scale or personal projects. While it focuses on rapid deployment and user-friendliness, it leaves room for future enhancements such as file compression, security and authentication, and content moderation, which can be integrated using other AWS tools. This foundational setup provides a great starting point for those new to cloud services and looking to understand the basics of video hosting.
Prerequisites
The project uses a basic React app, using libraries that integrate with AWS Amplify. This library can be installed by running the following command in your CLI.
npm install -g @aws-amplify/cli
This project also requires an Access Key and Secret Access Key to an AWS account with the permissions necessary to access the above services. There are multiple ways to add the keys to the project, but to avoid typing the keys manually, one method is to install the AWS CLI, run aws configure on the CLI, and input the details there.
Implementation
The project development consists of two phases: (1) establishing storage and distribution infrastructure utilizing Amazon S3 and CloudFront, and (2) constructing and deploying a React-based application on AWS Amplify.
Phase 1: S3 + CloudFront
The application will use Amazon S3 (Simple Storage Service) to store any videos the users upload.
When creating the bucket, the most important configurations to note are:
-
-
- Check Block all public access
-
-
-
- Enable Server-side encryption with Amazon S3 managed keys (SSE-S3)
-
CORS (Cross-Origin Resource Sharing) needs to be configured to enable our React app, particularly when hosted on AWS Amplify, to upload files to the Amazon S3 bucket. This configuration is crucial as browsers, by default, prevent cross-domain interactions due to the same-origin policy. Note, however, that CORS does not secure the bucket against unauthorized access on the AWS level, it merely allows legitimate cross-origin requests like file uploads from our app, and prevents S3 from blocking these requests.
Securing the S3 bucket against unauthorized access requires more than CORS configuration; this is where bucket policies come into play. Initially, strict security measures might restrict CloudFront’s access to the bucket’s content. To resolve this, we will adjust the CloudFront configuration and attach a specific bucket policy that grants the necessary access.
Once the bucket has been created, the next step is to create a distribution in CloudFront.
Amazon CloudFront serves as the distribution network for delivering videos to users efficiently and with minimal latency, capitalizing on its extensive global network of edge locations.
CloudFront has built-in integration with S3, allowing users to designate the bucket created earlier as the origin domain.
Following best practices again to access the bucket earlier, enabling the Origin access control setting in selecting Origin access is best practice.
When linked with an Amazon S3 source, the control setting in CloudFront serves as a configuration tool that governs your content’s access, delivery, and security. This setting encompasses a range of parameters, including cache behavior controls, which dictate how CloudFront caches and serves content from your S3 bucket. It allows for detailed specification of caching policies, such as the Time to Live (TTL) for files, and can include sophisticated rules for handling query strings and cookies.
CloudFront also allows configuring Default cache behavior, Web Application Firewall (WAF), and other settings regarding pricing and support.
Since the distribution is only intended for video retrieval, Allowed HTTP Protocols should be limited to GET, HEAD only. In selecting the Viewer protocol policy, the “Redirect HTTP to HTTPS” option in CloudFront ensures all user traffic is secure by automatically upgrading HTTP requests to HTTPS. This option enhances security and user experience without blocking users who initially connect via HTTP.
After creating the distribution, a prompt will appear, suggesting that the bucket policy of the source S3 bucket needs to be updated. This bucket policy allows the distribution to access the videos from the bucket. The bucket policy would look similar to the one below.
{
        "Version": "2008-10-17",
        "Id": "PolicyForCloudFrontPrivateContent",
        "Statement": [
            {
                "Sid": "AllowCloudFrontServicePrincipal",
                "Effect": "Allow",
                "Principal": {
                    "Service": "cloudfront.amazonaws.com"
                },
                "Action": "s3:GetObject",
                "Resource": "arn:aws:s3:::source_bucket_name/*",
                "Condition": {
                    "StringEquals": {
                      "AWS:SourceArn":
"arn:aws:cloudfront::aws_acct_number:distribution/unique_dist_id"
                    }
                }
            }
        ]
      }
After updating the bucket policy, the contents of the bucket can now be accessed via the distribution. To access the files via a browser, the link would be formatted as
distribution_domain_name.cloudfront.net/folder/filename.filetype
These links will be the source of the videos in a React app dedicated for viewing.
Phase 2: React + Amplify
At this point, the application now handles videos in S3 and creates viewing links using the CloudFront distribution that returns the video when prompted. This phase is intended to create the starting point and endpoint of the user’s interactions with the app, beginning with a React app that uploads to the S3 bucket and another React app that retrieves the video from the CloudFront distribution using the link.
Amplify has a library named “Amplify CLI” that helps users create, configure, and manage AWS services for web and mobile applications, just like our video hosting app. Running the following command installs CLI onto the device.
npm install -g @aws-amplify/cli
After which, Amplify can be triggered to initialize a new AWS Amplify project in the current React library by running the following command.
<
This command sets up the fundamental configurations and environment for integrating and managing AWS cloud services with the app. This includes creating a new Amplify project in the cloud, linking it to your local project, and setting up a deployment environment.
After initialization, it is also important to install the UI React library under Amplify. The following command handles these installations.
npm install aws-amplify @aws-amplify/ui-react
The Amplify project uses AWS configuration details from a config file, named by default as aws-exports.js. The file should look like the following:
	const awsConfig = {
  	Storage: {
	    AWSS3: {
	      bucket: 'your-bucket-name',
	      region: 'your-bucket-region',
	    }
	  }
	};

	export default awsConfig;
The config file is then imported into the React app.
	import Amplify from 'aws-amplify';
	import awsConfig from './aws-exports';

Amplify.configure(awsConfig);
These steps ensure that the upload function we create in the React app identifies the specific bucket we intend to use.
To build the upload function, the aws-amplify library has a module named Storage that can upload the file to the S3 bucket configured in the aws-exports.js file. A sample upload function would look like the following
import { Storage } from 'aws-amplify';
// ...
const uploadFile = async (file) =&amp;gt; {
try {
const result = await Storage.put(file.name, file, {
contentType: file.type,
});
console.log('File uploaded successfully:', result);
} catch (error) {
console.error('Error uploading file:', error);
}
};
After this step, videos can now be uploaded to the S3 bucket through the React app. The last functionality of the application is to view the uploaded video. There are many different solutions to this, with varying complexity, but a simple approach would be to provide the link to the viewing site upon an upload.
	https://{branch-name}.{app-id}.amplifyapp.com/upload

https://{branch-name}.{app-id}.amplifyapp.com/view/cloudfront-distribution/fil
ename.mp4
This approach would use a separate page in the React app and utilize the react-router-dom to route the viewer to the view page rather than the upload page. This view page can then use the header in the link to embed the view from the CloudFront distribution into the video viewer.
Final Remarks
Developing web applications with the previously required functionalities was once a significantly complex task. Advancements in cloud services, libraries, and other technological components have streamlined the development process. This evolution has reduced the time spent on preliminary stages, enabling developers to concentrate more on enhancing features that directly benefit end-users.
It is good to note that this is only one of the many approaches to building a video hosting app. As mentioned earlier, there are various features that different users prefer. As the next exploratory steps, integrating authentication layers, compression, or other features into the app could expand the intended user base. Using other frameworks, hosting platforms, or sets of services could also alter the performance of the application.
Finally, it is important to consider the possible costs that may be incurred. Key Management Service (KMS) with the S3 bucket, WAF from the deployed Amplify app, and other services that were used may be billed. Make sure to enable the AWS Cost Explorer, thoroughly examine the pricing plans, and effectively test the project on the pricing calculator as early in the development as possible to avoid surprise billings.
Thank you for reading this article, and happy building!
Resources
https://docs.aws.amazon.com/cloudfront/


