Slack is a crucial application for most businesses. It allows the people working within to seamlessly communicate with one another. Slack offers a lot of features such as channels for text communication, huddles for group calls, canvas for a synchronized knowledge base, and more. As businesses or professionals in the tech industry, you’d be glad to know that Slack also supports app integrations, allowing you to bring your technical workflow right into your channels for ease-of-use. This blog is a guide on how you can effectively manage your AWS resources right from the Slack application with Slash Commands.
Slack Command to Automatically Create an AMI of an EC2 Instance
Imagine you are working for a company that utilizes EC2 instances for their websites. Your company knows the importance of being able to quickly create AMIs for their instances to be used as backup or for testing. For this reason, you are tasked to create a Slack Command that automatically creates an AMI of your company’s main EC2 instance so that anyone from your team can instantly and automatically create an AMI from the convenience of your Slack channel. To do this, we have prepared the following diagram:

If you can’t grasp the diagram yet, don’t worry because all of it will make sense as we go along this guide.
Requirements
Before we start, let’s first make sure that we have the necessary materials to build our project. The requirements for this project are as follows:
- AWS account; you will need the following policies attached to our user
-
- CloudWatchLogsFullAccess – To create a custom log group. This will be very useful for debugging.
- IAMFullAccess – To create IAM roles for our Lambda functions.
- AWSLambda_FullAccess – To fully customize the configuration settings of our Lambda functions.
-
- Slack account and workspace
Easy right? This is just the start, we’ll do more exciting things from here on out. We’ll split the entire process into 3 parts: 1) Setting up a Slack application, 2) Setting up AWS resources, and 3) Integrating Slack command with AWS Lambda functions.
Setting up a Slack Application
In order for us to create Slack commands, we must first create and register a Slack application to our workspace. A Slack application is often referred to as an “app” or “bot” which is a software program that allows us to extend Slack’s functionalities. Through a Slack application, we can enable numerous integrations through Slack APIs and streamline our workflow. Through a Slack application, we can add a slash command that calls our Lambda URLs.
Note: You can skip this part if you already have a Slack Application
- Go to Slack API: Application and click the Create New App button.
- Once prompted, choose From scratch and supply the following details
-
- App Name: This will be displayed on your Slack Applications dashboard.
- Pick a workspace to develop your app in: Just choose which workspace you want to use your app in. For the testing phase, I suggest not putting your app inside your team’s main workspace.
-
That’s it! You can go back to your Slack workspace to check if you have your new application installed. You can see it on the sidebar under Apps. Once all that’s done, we can move to the next lengthier section of this guide.
Setting up AWS Resources
In this section, we will have to set up 5 different. A CloudWatch Log Group, an IAM Role, a Lambda Layer, and 2 Lambda Functions.

CloudWatch Log Group
CloudWatch is an AWS service that allows you to track various metrics for your other services and even whole applications. CloudWatch Log Groups allow us to essentially keep a record of all the logs our services or applications make during their runtime. This is extremely beneficial for us in terms of debugging our application and finding out where we went wrong. According to Murphy’s Law, anything that can go wrong, will go wrong. For this reason, we will be fully utilizing CloudWatch Log Groups to pinpoint where our Lambda Functions fail.
Note: You may skip this step if you already have a CloudWatch Log Group
- Go to your AWS Management Console and open CloudWatch.
- From the sidebar under Logs, go to Log groups
- Click the Create log group button and supply the following details
-
- Log group name: You may enter any name you want here. The name must not contain any spaces (e.g. log-group-for-handler).
- Retention setting: I suggest keeping this low at around 1 to 2 weeks since this will be used only for debugging during development.
-
Congrats! You now have a CloudWatch Log Group. Please remember the name of your log group, as we’ll be using this later on to connect our Lambda functions to the log group.
IAM Role
IAM or Identity and Access Management is an AWS service that allows you to control who and what has which permissions in your account. There are 4 important concepts in IAM which are Users, Groups, Policies, and Roles. Users are sub-accounts under your AWS account. This gives access to physical users and restricts their actions in your account through Policies. Managing the permission of tens to hundreds and even thousands of users can be really tedious, so we have Groups to group together users and give all of them identical Policies all synchronized together. Policies, as you may have noticed, are rules in the form of JSON that dictate what a User or Group is allowed and not allowed to do, as well as the resources that they may access. Policies are also applicable to Roles which are like Users but for services and applications that live inside your AWS account. We will be creating an IAM Role to give our Lambda functions access to other services like CloudWatch to write their logs, Lambda to invoke other functions, and EC2 to create an AMI.
Note: You may skip this step if you already have an IAM Role
- Go to AWS Management Console and open IAM
- From the sidebar under Access Management, go to Roles
- Click the Create role button and supply the following
-
- In the Select trusted entity page, supply the following:
- Trusted entity type: AWS service
- Use case: Lambda
- In the Add permissions page, please add the necessary permissions. The permissions required may differ from case to case but for our specific scenario, we need the following:
- CloudWatchLogsFullAccess
- AWSLambda_FullAccess
- AmazonEC2FullAccess
- In the Name, review, and create page, supply a role name for your IAM role. You may also add an optional description to help you and your team make sense of the IAM role in the future.
- In the Select trusted entity page, supply the following:
-
Now that we already have our IAM role and CloudWatch log groups, we will move on to the last 3 AWS resources that we need. Fortunately, all three can be created right from the AWS Lambda framework.
Lambda layers and functions
A Lambda layer is a .zip file that usually contains libraries, dependencies, or custom runtime environments. These help add a bit more functionality to our Lambda functions. By having Lambda layers, we don’t have to upload our Lambda functions along with their dependencies because all our dependencies are uploaded separately and are centralized.
Note: You may skip this part if you already have a configured Lambda layer
Creating a Lambda layer can be tricky because more often that not, it requires you to have basic knowledge of virtual machines or containers. Because Lambda layers are most useful for pre-compiling dependencies or custom runtimes, you’d have to be able to first compile dependencies on your chosen runtime environment before achiving everything into a .zip file. Luckily, there are various public Lambda layers for different Python dependencies for different Python versions. If ever you can’t find one to suit your needs, you can check the following repository.
The repository above has a complete tutorial on how to create a .zip archive for Python dependencies compiled on Amazon Linux 2. Once you’re done following the steps indicated inside the README.md file, take note of the .zip file that you have created. The next step is actually uploading our Lambda layer.
- Go to AWS Management Console and open Lambda
- From the sidebar under Additional resources, go to Layers
- Click the Create layer button and supply the following:
-
- Name: You may input any name for your layer
- Description: This is optional, but I highly suggest adding a description to make your Layer easier to understand for your other team members and for you in the future.
- Upload: You may choose to either upload a .zip file directly or upload through Amazon S3.
- Compatible architectures: Make sure to choose the correct compatible architectures as this will make or break your Layer
- Compatible runtimes: Please choose the language and version for your Layer
-
Congrats! You now have your first-ever Lambda layer. Now, we just have to create our two Lambda functions. From our diagram above, we will see that we have a handler and logic functions. Our handler will be one in charge of accepting requests from Slack, validating the source of the request, and acknowledging the request as it passes the payload to the logic function. The logic function will have the actual business-side source code for whatever Slack command you may need. For now, let’s focus on creating our logic function first.
For our logic function, it will be invoked by our handler function as an event. This means that the handler won’t wait for the logic to finish, therefore making the logic asynchronous.
- Open your AWS Management Console and go to Lambda.
- Click the Create function button and supply the following:
-
- Choose the author from scratch option
- Function name: You may input any function name that you wish. For this, I’ll choose logic
- Runtime: Choose the language and version for your function
- Architecture: Choose the architecture for your function
- Under Permissions, expand the Change default execution role section and supply the following:
- Execution role: Use an existing role
- Existing role: Find the role that you created inside IAM
-
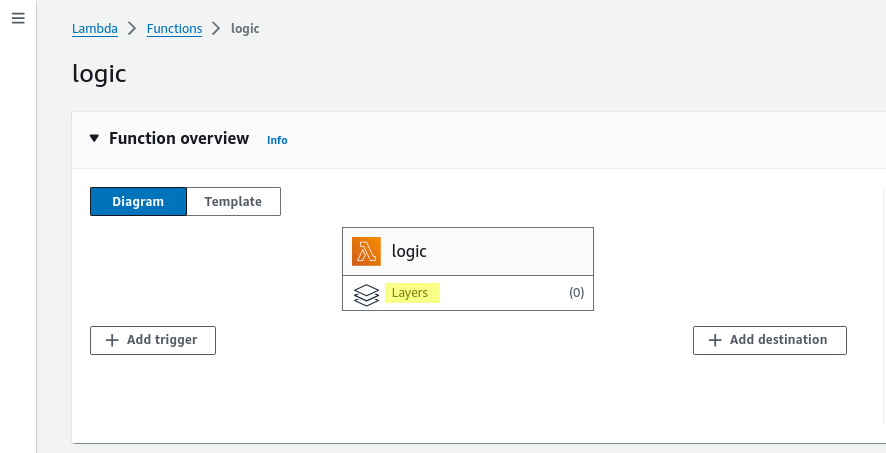
After clicking the create function button, you should be met with your function’s dashboard. Click on the Layers button under your function’s name (as highlighted in the image below).
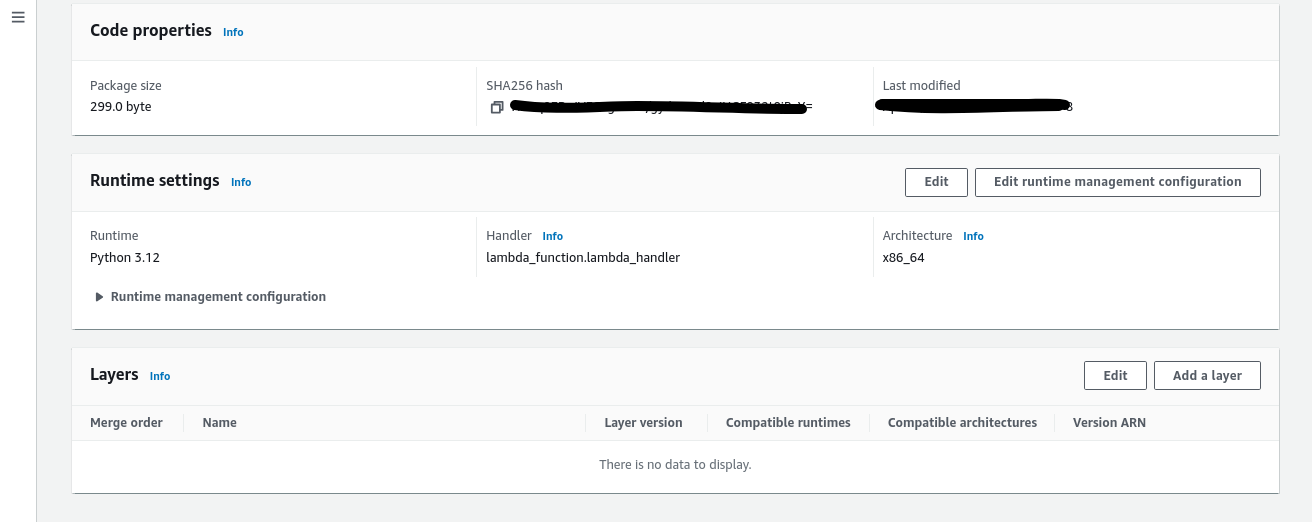
Inside the Layers table, click the Add a layer button as shown in the image below.
Supply the following:
- Layer source: Custom layers
- Custom layers: Choose the Lambda layer that you created
Note: If you can’t find your Lambda layer, double check the compatible runtimes and architecture of your Lambda layer and Lambda function to make sure that they match.
Now that we have our function setup, we can now input any type of logic that we want. If you’re unfamiliar with how to structure your logic function, here is an example.
# All imports here
import ...


# Main handler for logic
# The `lambda_handler` name is mandatory
def lambda_handler(event, context):
    # Parse event payload
    ...

    # Call logic function
    ...

    # Return response
    return {
        "statusCode": 200,
        "body": {}
    }


# logic function
def logic():
    ...
Moving on to our next function, we have the handler function. Same process as the logic function will be followed but with a few modifications.
- Open your AWS Management Console and go to Lambda.
- Click the Create function button and supply the following:
-
- Choose the author from scratch option
- Function name: You may input any function name that you wish. For this, I’ll choose handler.
- Runtime: Choose the language and version for your function
- Architecture: Choose the architecture for your function
- Under Permissions, expand the Change default execution role section and supply the following
- Execution role: Use an existing role
- Existing role: Find the role that you created inside IAM
- Expand the Advanced settings option and click the Enable function URL checkbox. This is important for connecting our Slack application to our Lambda function.
- If an Auth type field appears, choose the NONE option
-

Up next, repeat the process above with regards to adding the Lambda layer to our Lambda function.
Now that we have our function setup, we can now add our code. Here’s the structure for our handler function.
# All imports here
import boto3
import ...

lambda_client = boto3.client("lambda")


# Main handler for handler
# The `lambda_handler` name is mandatory
def lambda_handler(event, context):
    # Parse event payload
    ...

    # Verify source of request
    ...

    # Invoke logic lambda function
    payload = {
        # Sample payload here
    }
    response = lambda_client.invoke(
            FunctionName="logic",
            InvocationType="Event",
            Payload=payload
        )

    # Return response
    return {
        "statusCode": 200,
        "body": {}
    }
Great job! All our AWS resources are now ready. Let’s move on to the final step.
Integrating Slack Command with AWS Lambda Functions
All our business logic will be implemented through AWS Lambda functions. This provides us functionality without needing to setup and manage a server ourselves. The final step for this project is connecting our Slack command to our AWS Lambda function, specifically the handler function.
- Open your AWS Management Console and go to Lambda
- Search for the handler Lambda function and open it
- Look for the Function URL and copy it to your clipboard
- Go to Slack API: Applications and look for your app name
- From the sidebar under Features, go to Slash Commands
- Click the Create New Command button and supply the following
-
- Command: You can input any command here, but make sure to add the “/” prefix.
- Request URL: Paste your Function URL here.
- Description: Add a description to describe your Slash command.
- Usage Hint: This will show up when users hover your command in Slack channels.
-
- Once you’ve saved your new command, you may go to your Slack workspace to test the command.
Managing your AWS resources is as simple as that. There are plenty of topics left out in this blog such as verifying request resources and adding environment variables but there are also plenty of tutorials out there about them. Thank you for going through this tutorial and be on the look out for more!
🤖 $3.49 eBooks Start Here – Get Up to 30% OFF All AI & Machine Learning Reviewers

Turn Your Team Into Cloud-Ready Professionals Today

Learn AWS with our PlayCloud Hands-On Labs

$2.99 AWS and Azure Exam Study Guide eBooks

New Claude Certified Architect Foundations CCA-F

Learn GCP By Doing! Try Our GCP PlayCloud

Learn Azure with our Azure PlayCloud

FREE AI and AWS Digital Courses

FREE AWS, Azure, GCP Practice Test Samplers


Subscribe to our YouTube Channel

Follow Us On Linkedin


