Last updated on April 30, 2025
Hey, this is Step 3 of our 9-step website portfolio building with AWS!
Got lost? Click here to go to the main article, and here for the second step!
Now that your EC2 instance is up and running, you might have noticed something strange, every time you stop and start the instance, the public IP address changes. This means the link to your website will keep changing too, which isn’t ideal if you want people (or even just yourself) to visit your site consistently.
The solution? Elastic IP.
What Is an Elastic IP?
An Elastic IP is a static (unchanging) public IPv4 address that you can assign to your EC2 instance. Unlike the default public IP, which resets every time your instance is restarted, Elastic IP sticks with your instance until you decide otherwise.
Think of it like giving your cloud server a permanent address on the internet.
Why You Need One
- Stable access – Your EC2 instance will always be accessible at the same IP.
- Good for custom domains – If you plan to connect a domain name later, you’ll need a consistent IP.
- More control – You can move the IP between instances if needed, which is great for recovery or updates.
How to Create and Attach an Elastic IP
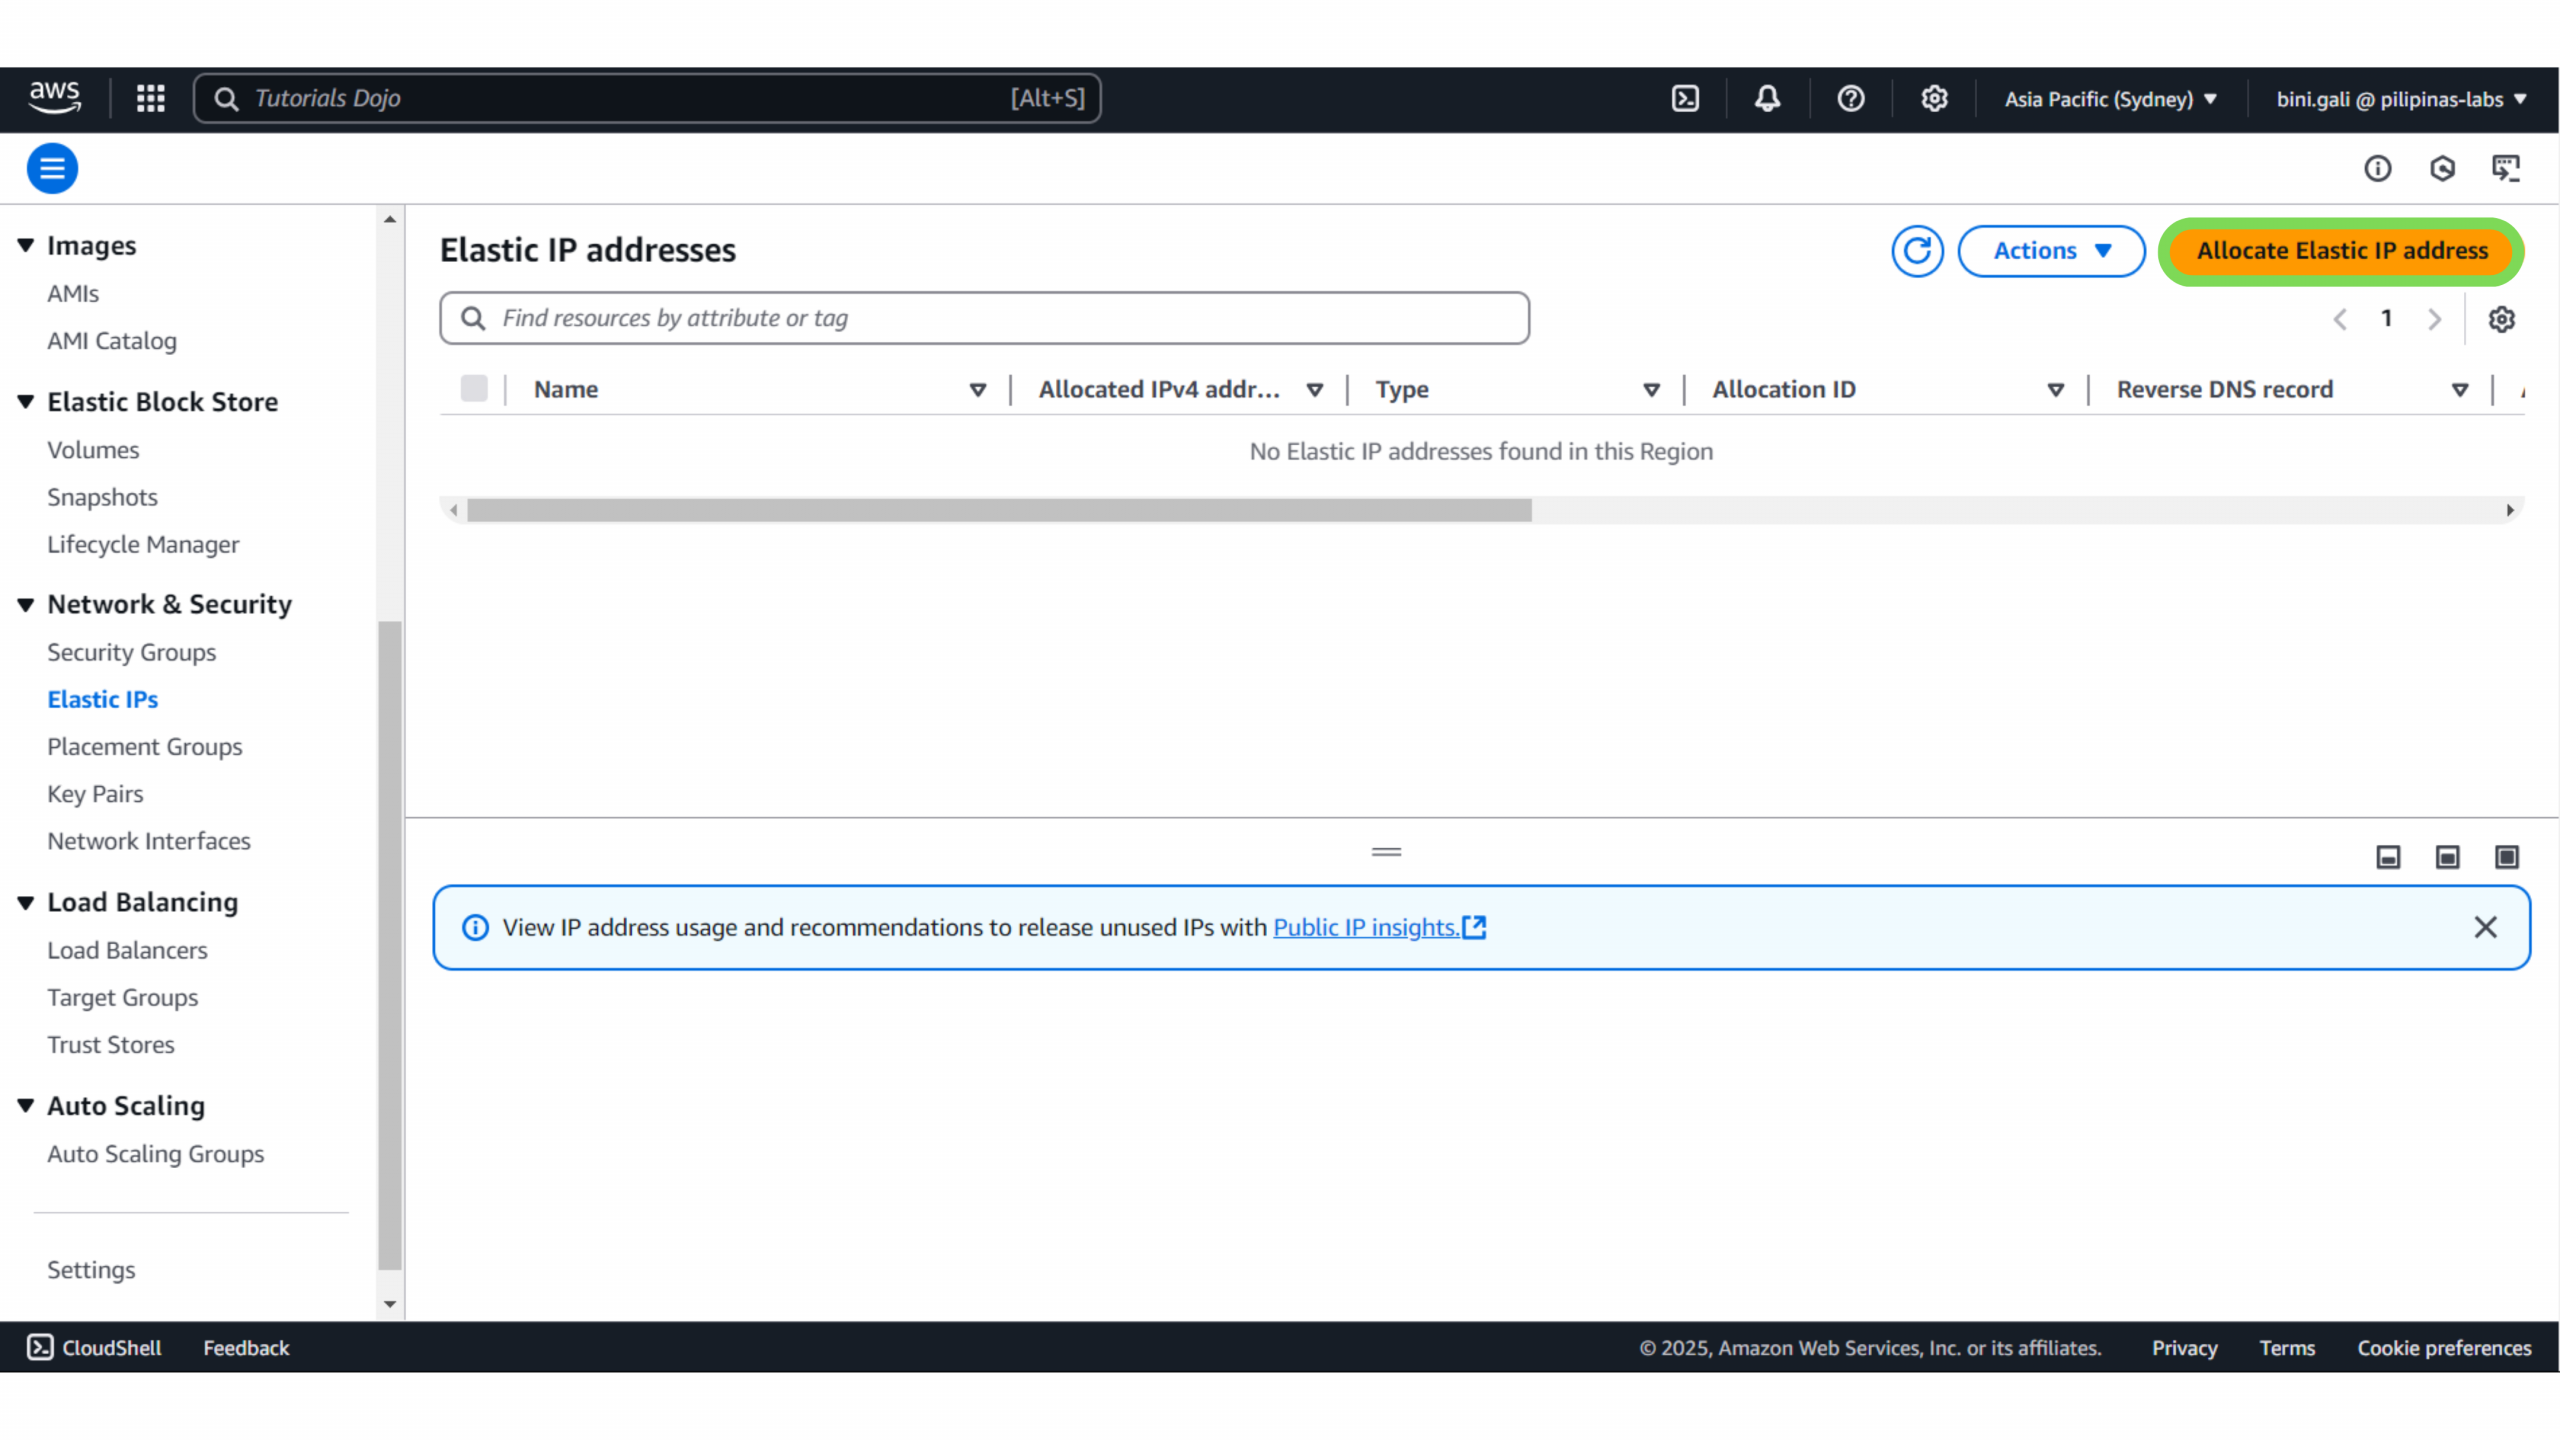
Step 1: Allocate an Elastic IP
1. Log in to AWS Console – Go to the EC2 Dashboard.
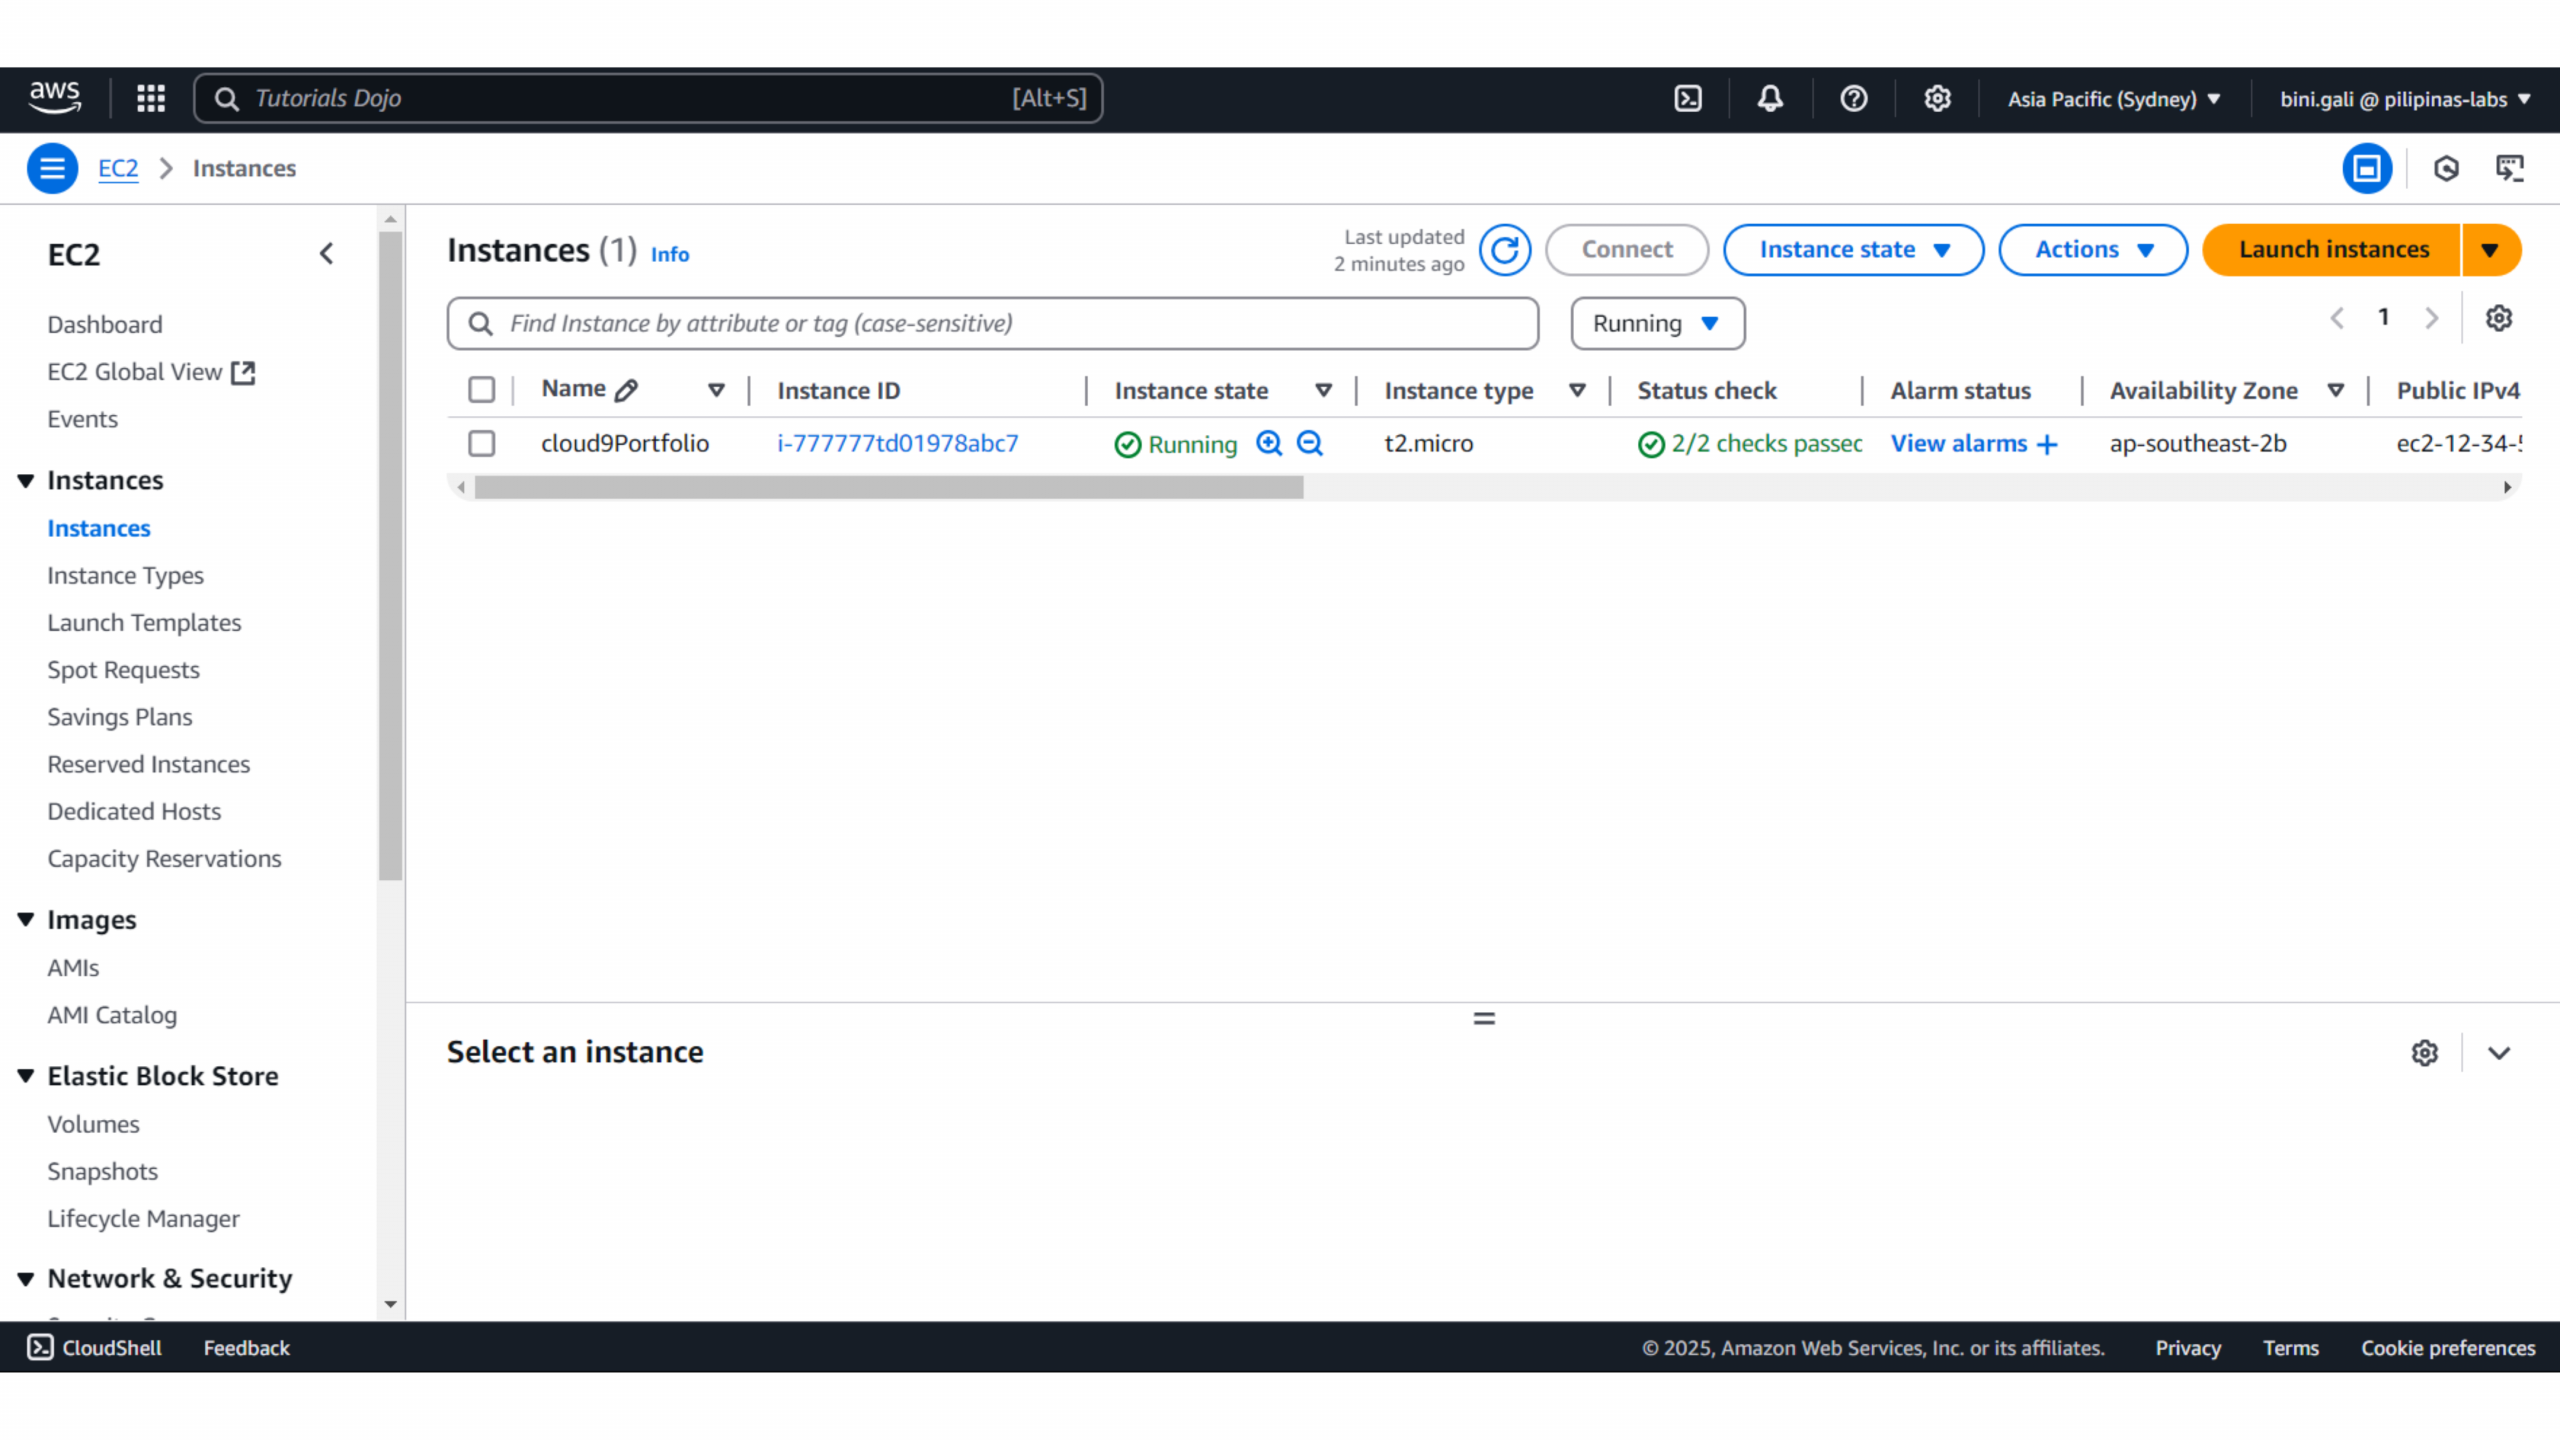
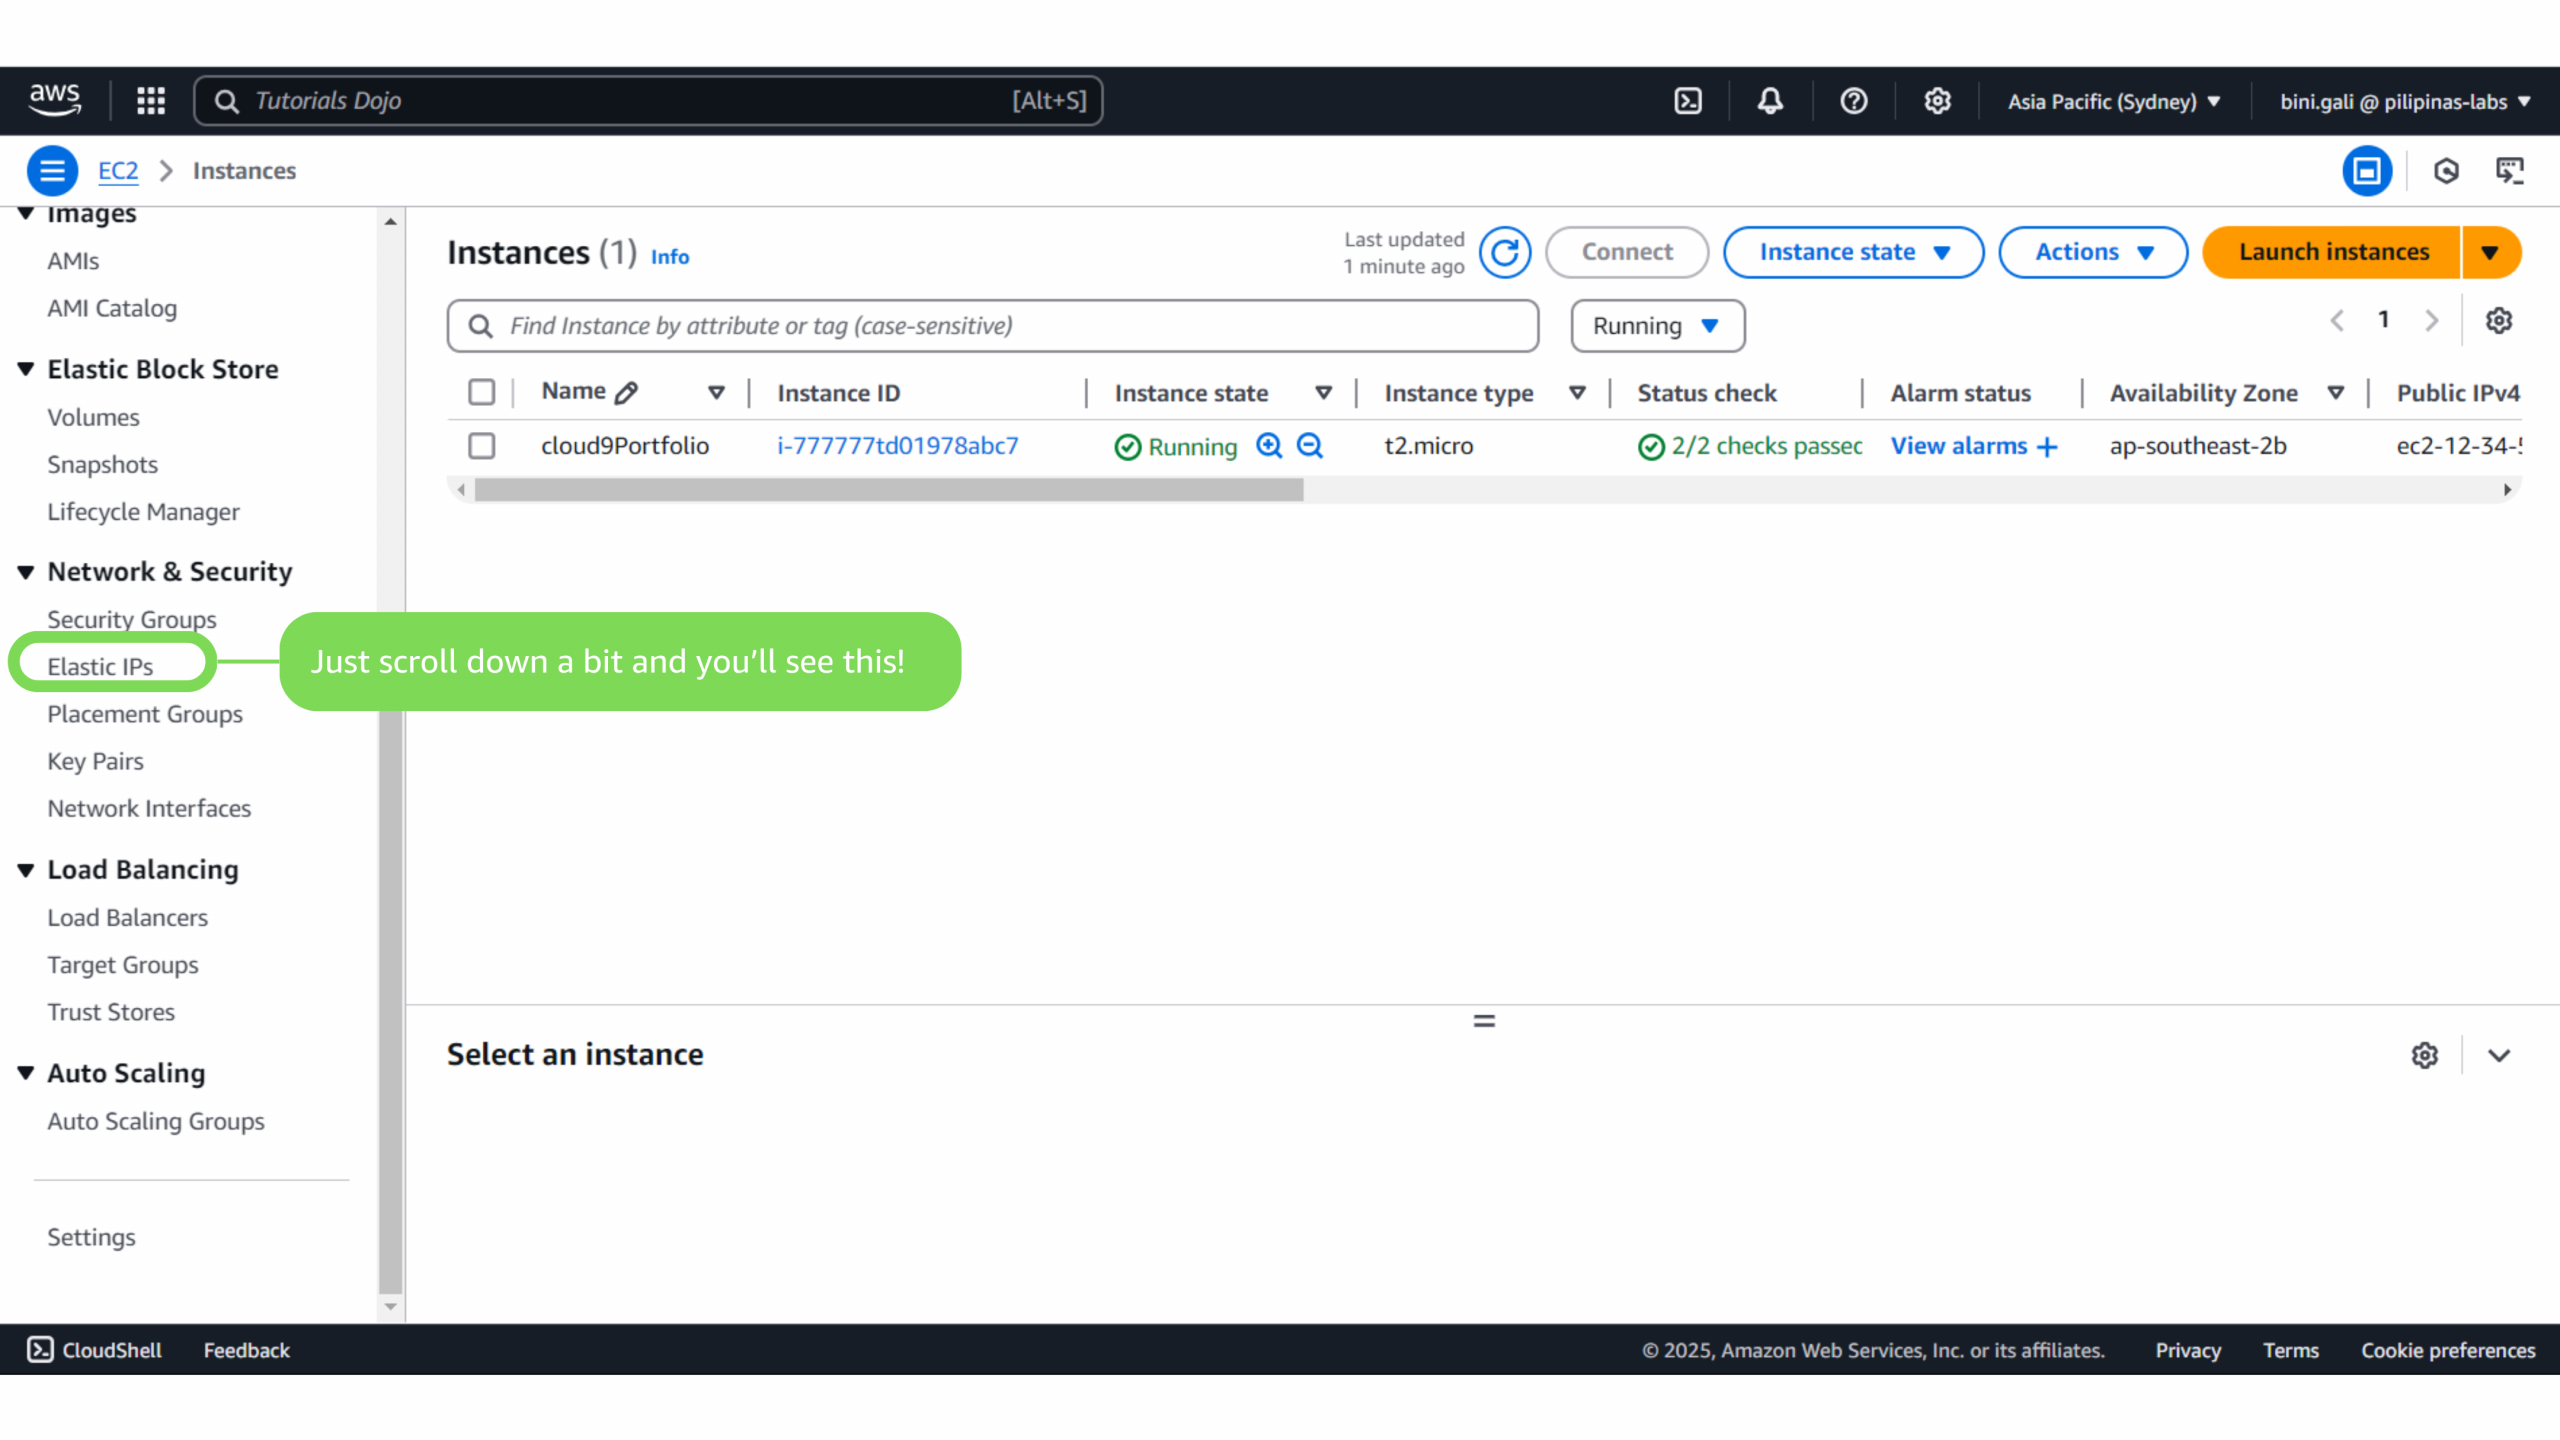
2. Go to Elastic IPs – In the left sidebar, click on “Elastic IPs” under Network & Security.
3. Click “Allocate Elastic IP address.”
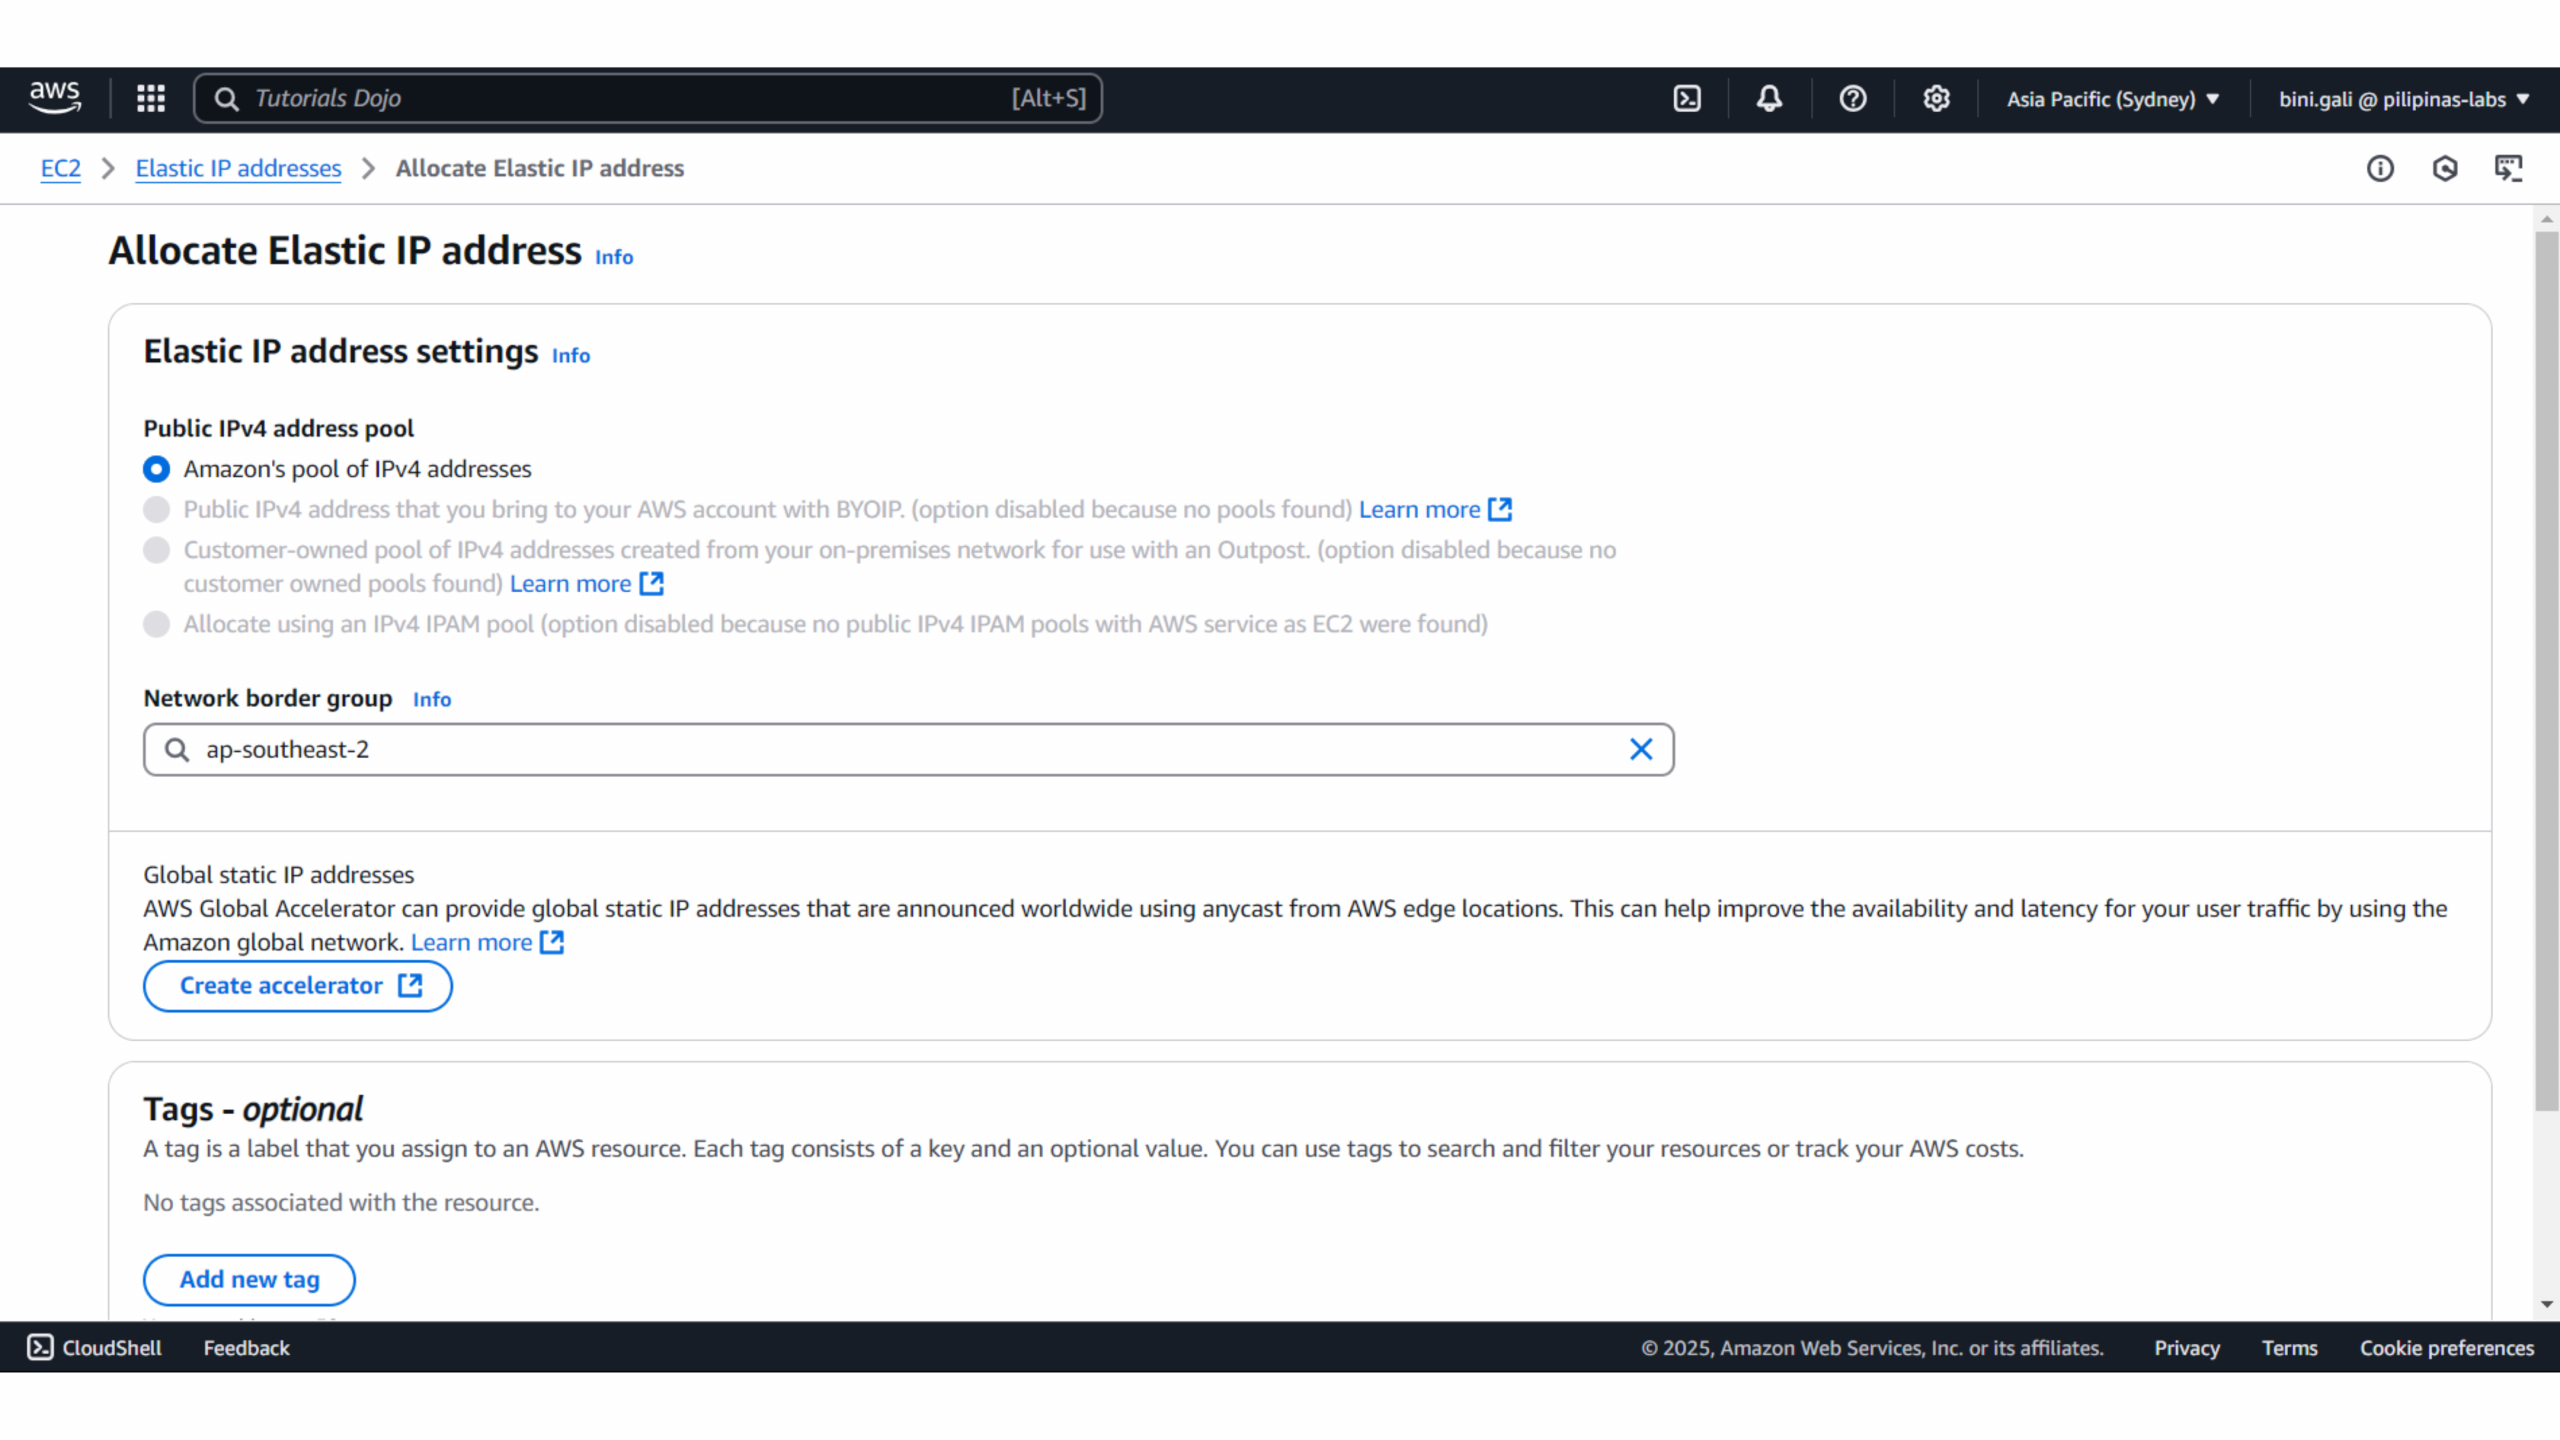
What you’re seeing in the image:
Public IPv4 address pool
-
You’ve selected “Amazon’s pool of IPv4 addresses,” which means AWS will give you a fresh public IP from their available pool.
-
Other options (grayed out) are for more advanced setups, like using your own IP addresses. You can ignore these for now.
Network border group
-
You picked
ap-southeast-2— that’s the AWS region, in this case, Sydney, Australia. -
This should match the region of your EC2 instance, otherwise you won’t be able to attach the IP.
Tags (optional)
-
Tags are just labels to help you organize or search your AWS resources later.
-
You can skip this for now, unless you’re managing many resources and want to keep things labeled.
“Create accelerator” button
-
This is for AWS Global Accelerator, which helps speed up global traffic to your app. Not needed for basic WordPress or personal sites.
Note: You can ignore these if you’re just doing a simple setup.
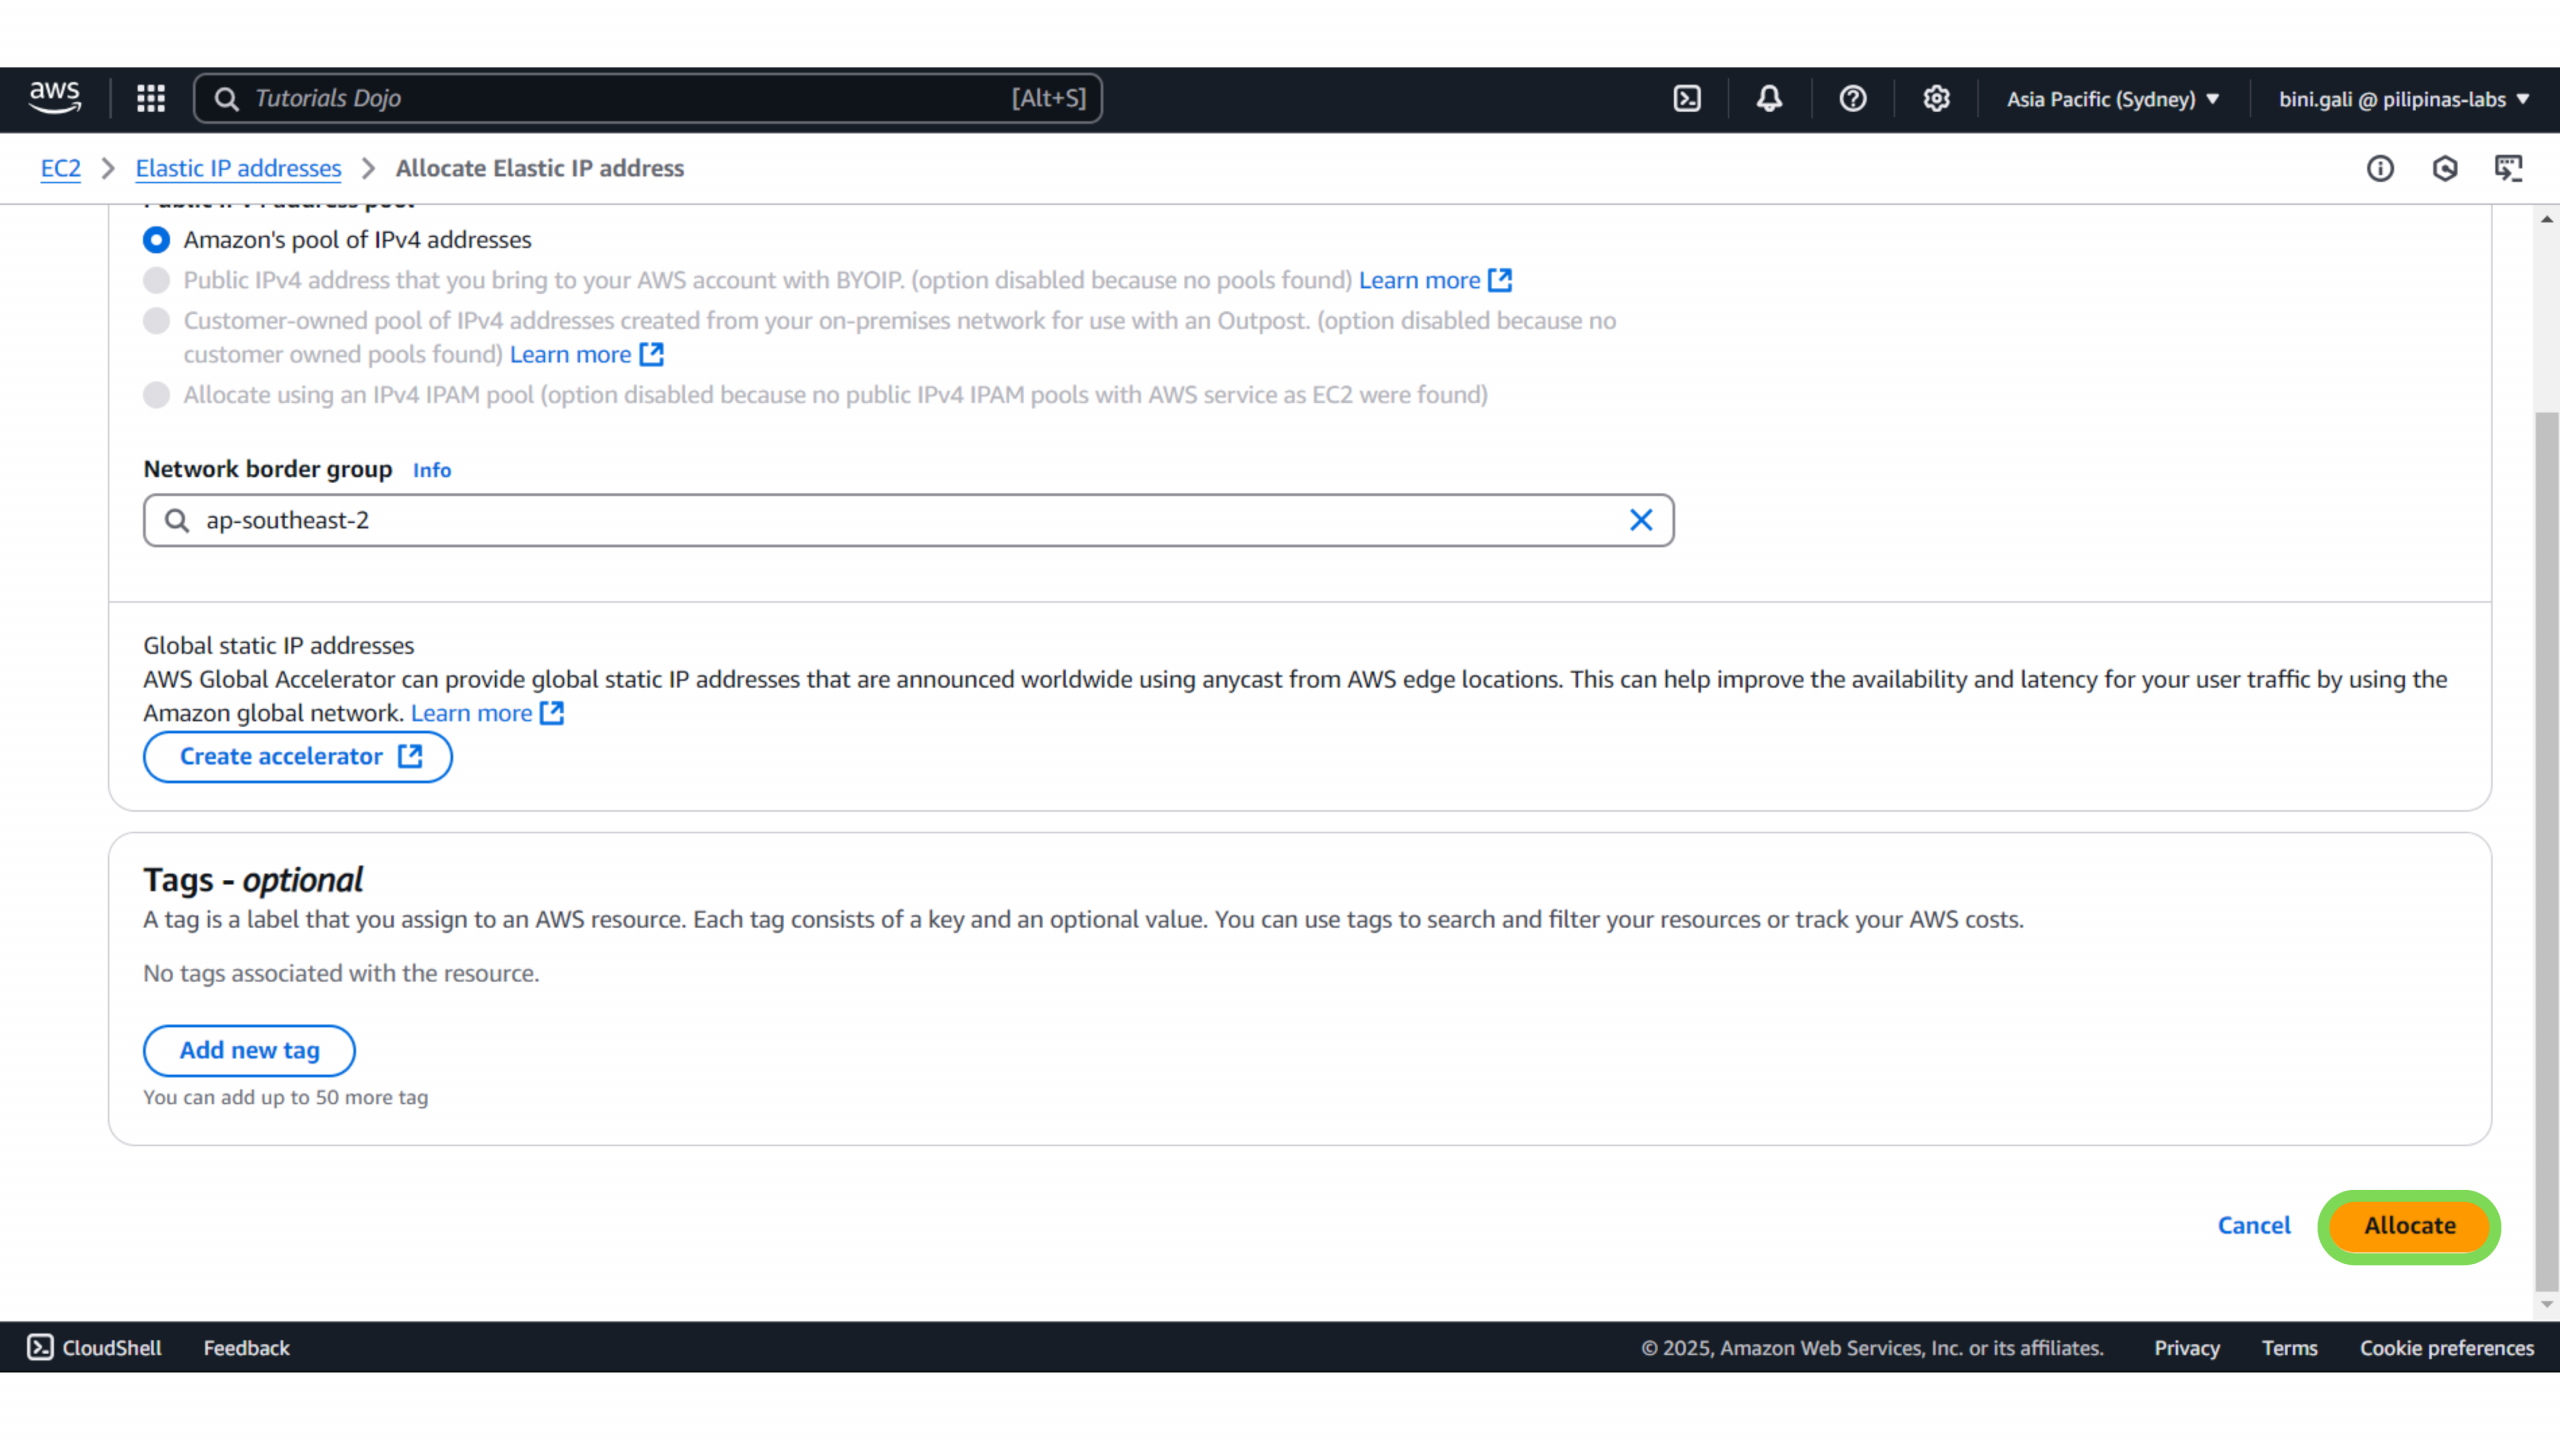
4. Allocate an Elastic IP Address – Leave the settings as-is and click “Allocate.”
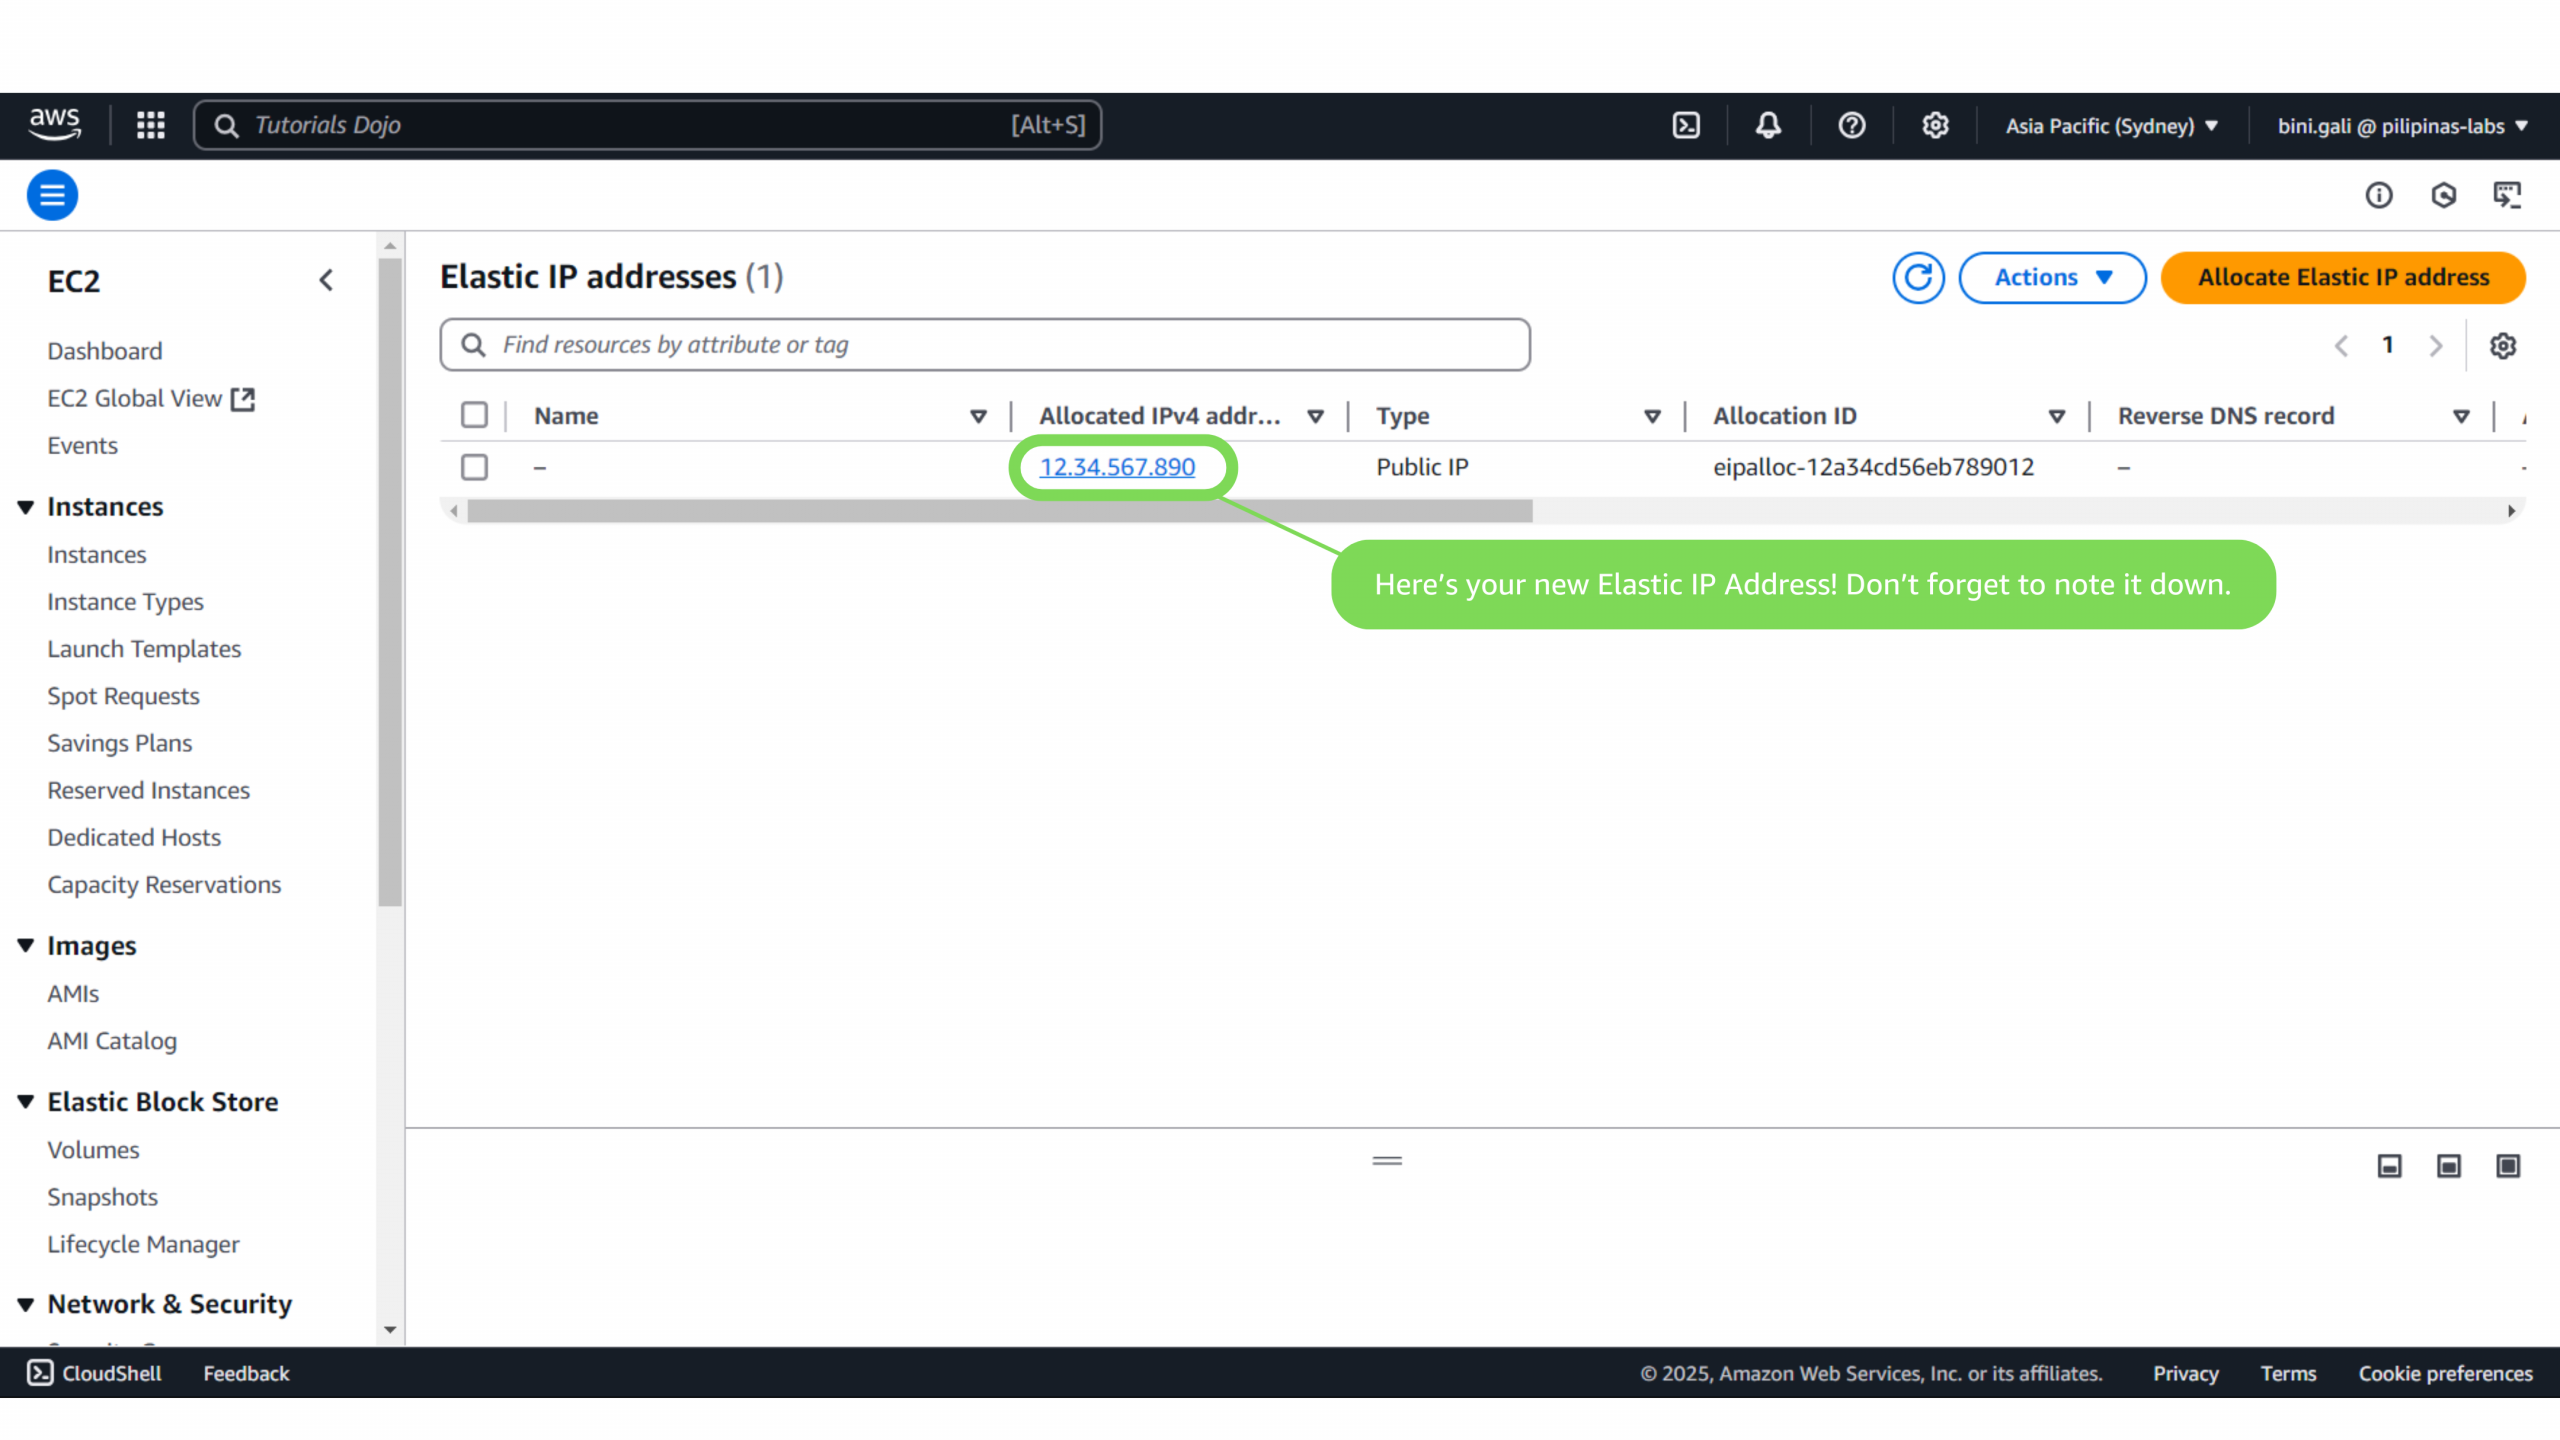
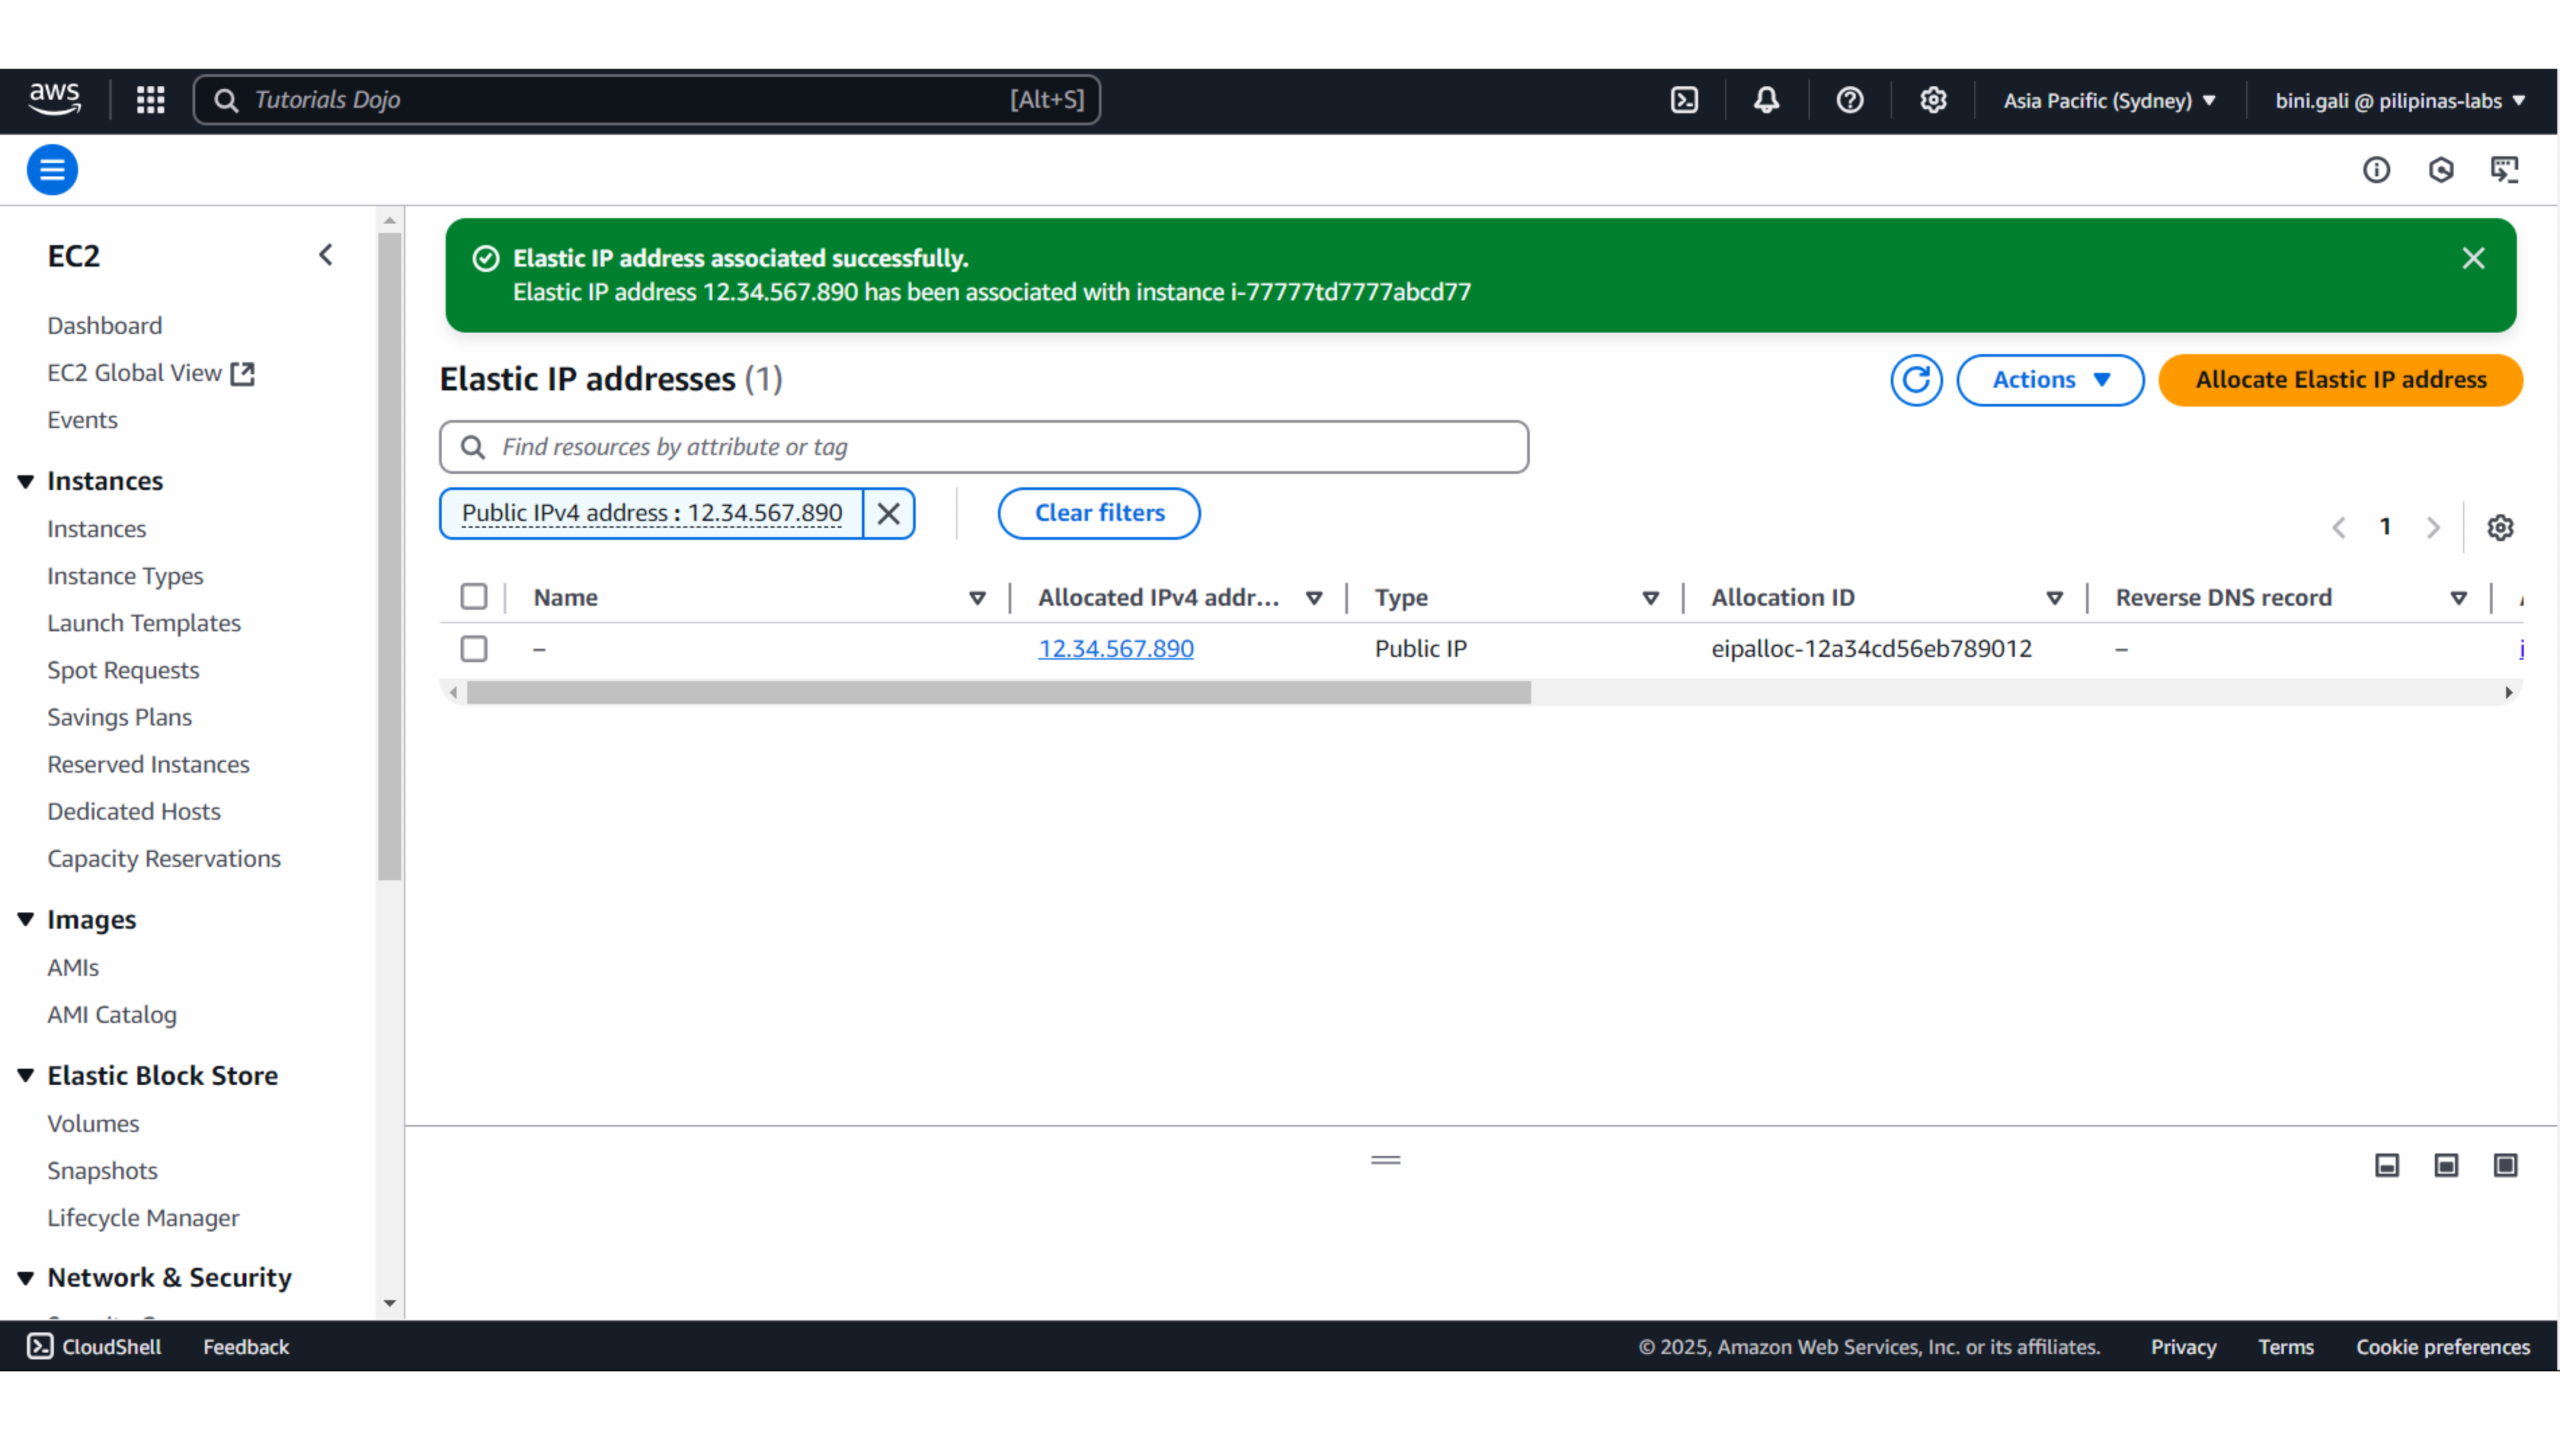
5. You’ll now see your new Elastic IP address – Copy or note it down.
Step 2: Associate the Elastic IP with Your EC2 Instance
1. Select the Newly Created IP – Choose the newly allocated Elastic IP from the list.
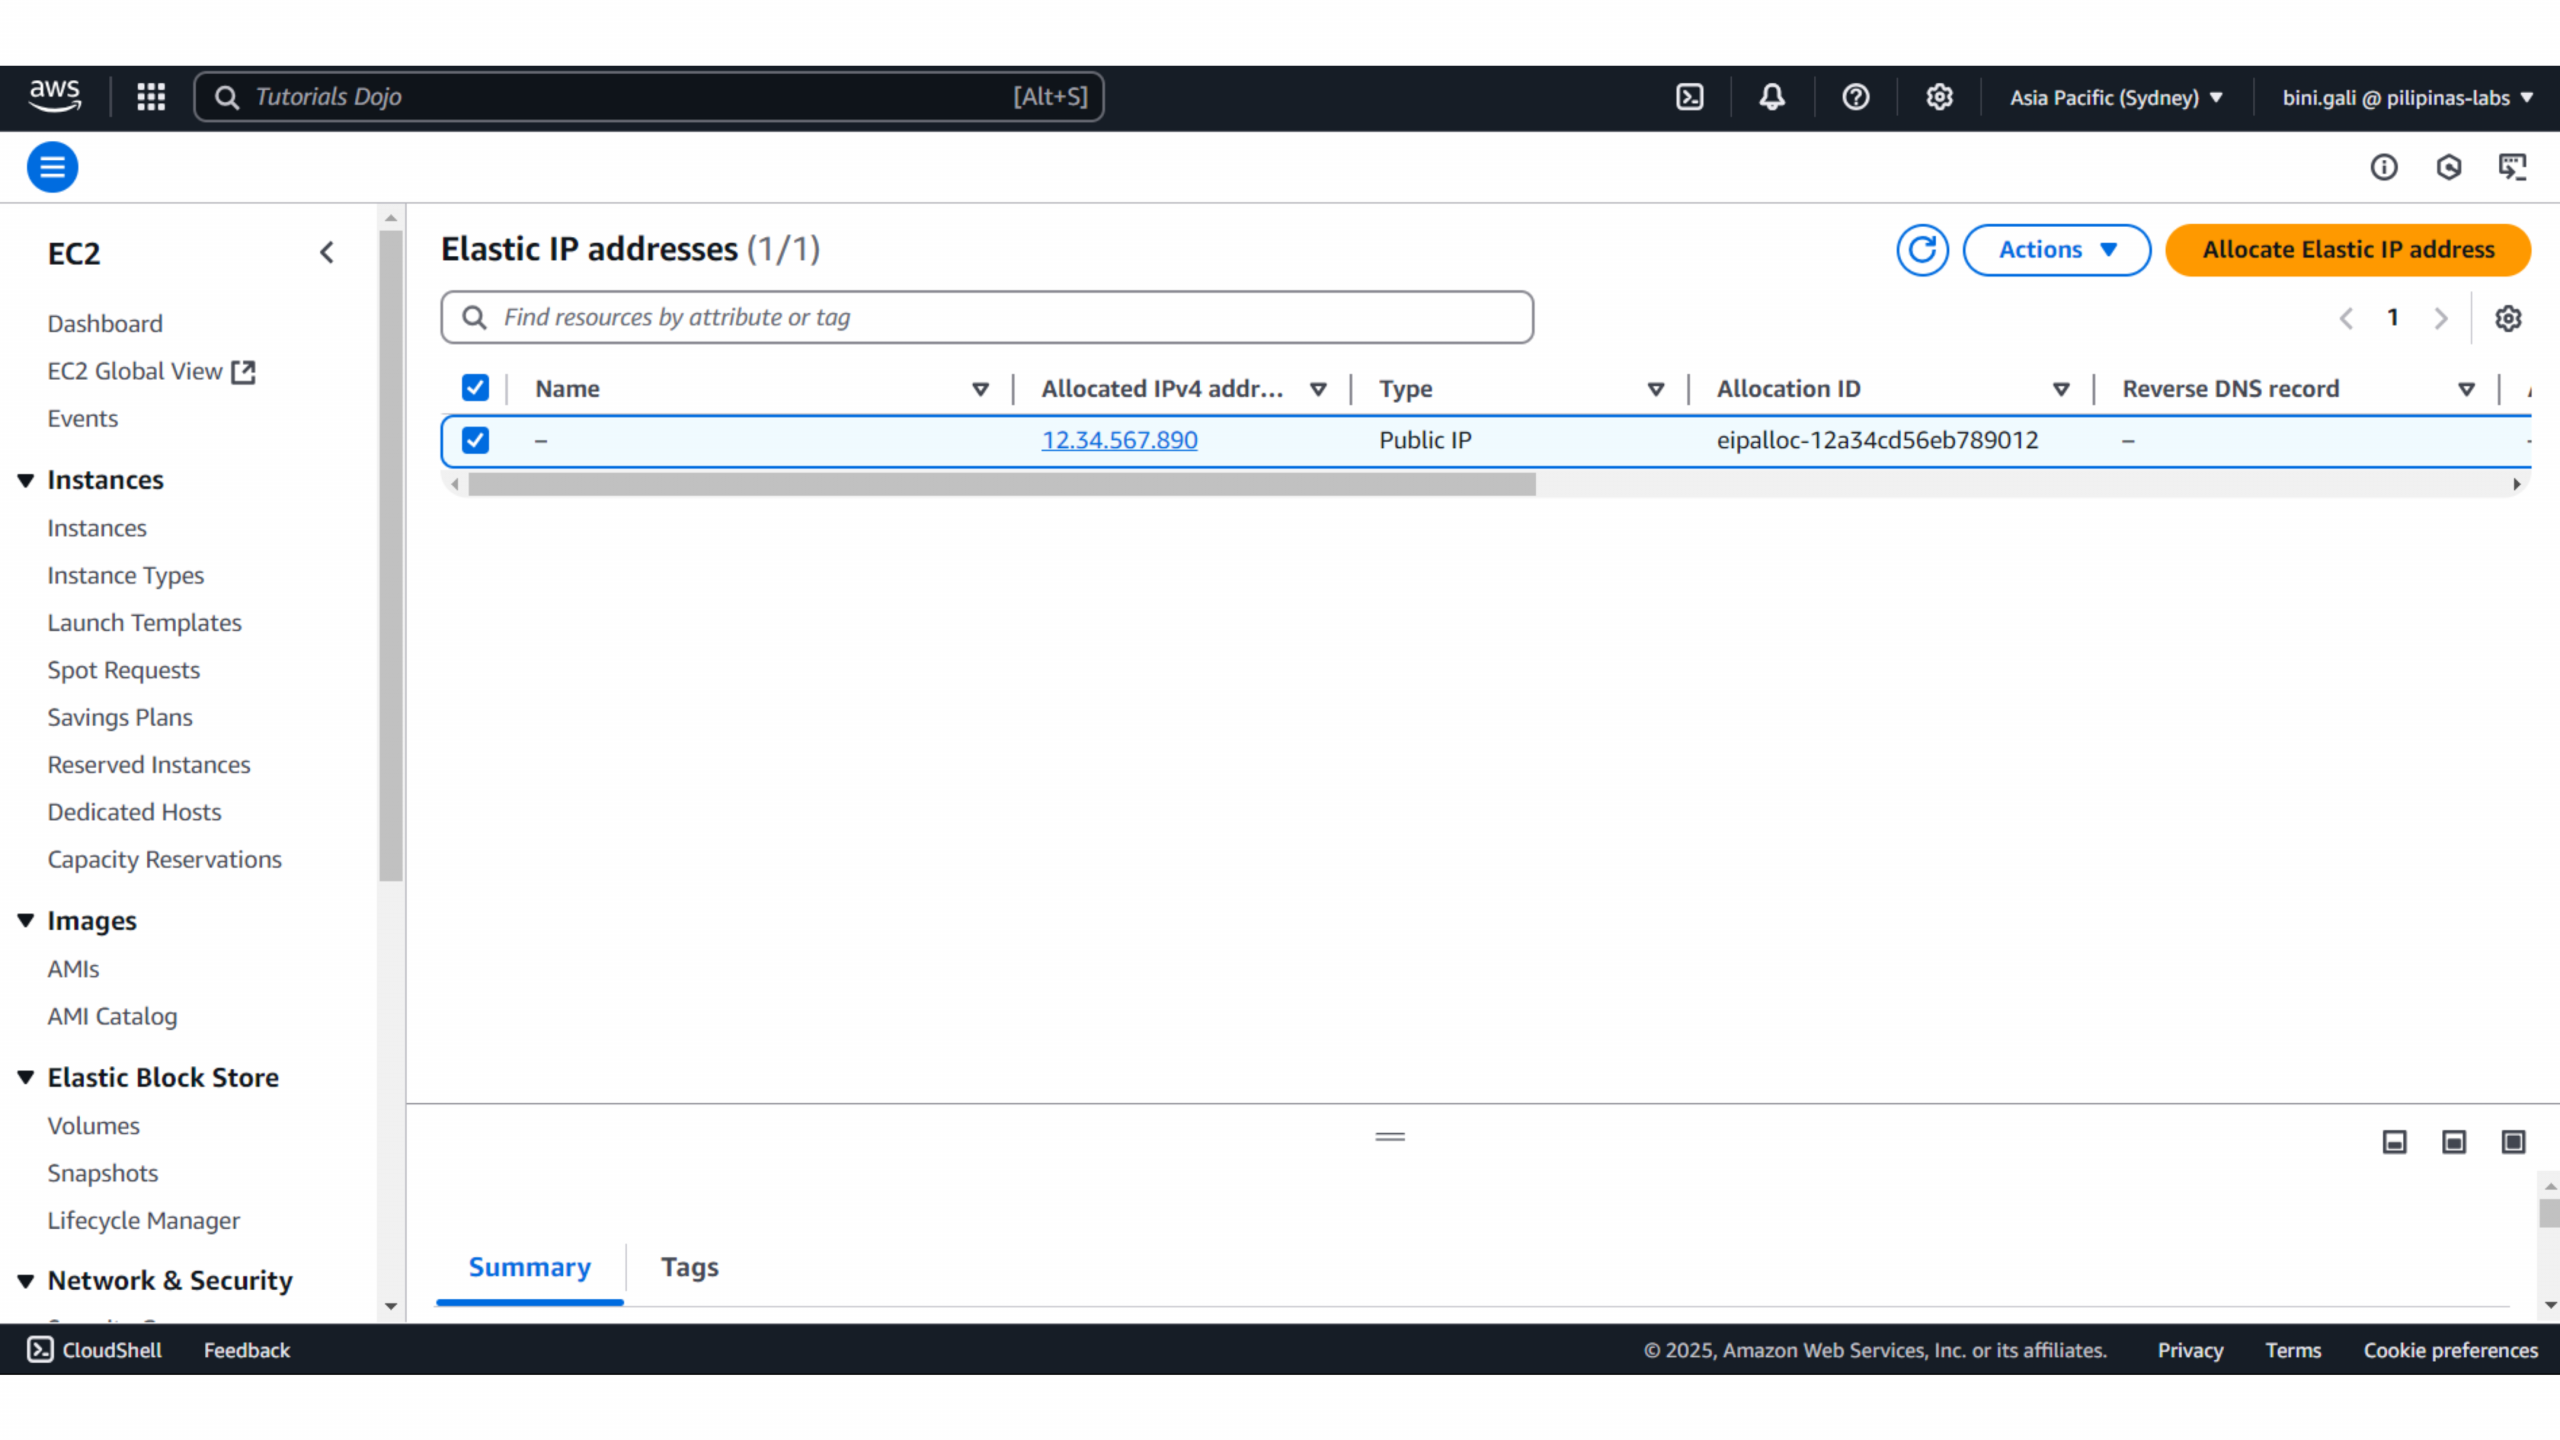
2. Associate the IP – Click on “Actions” and choose “Associate Elastic IP address.”
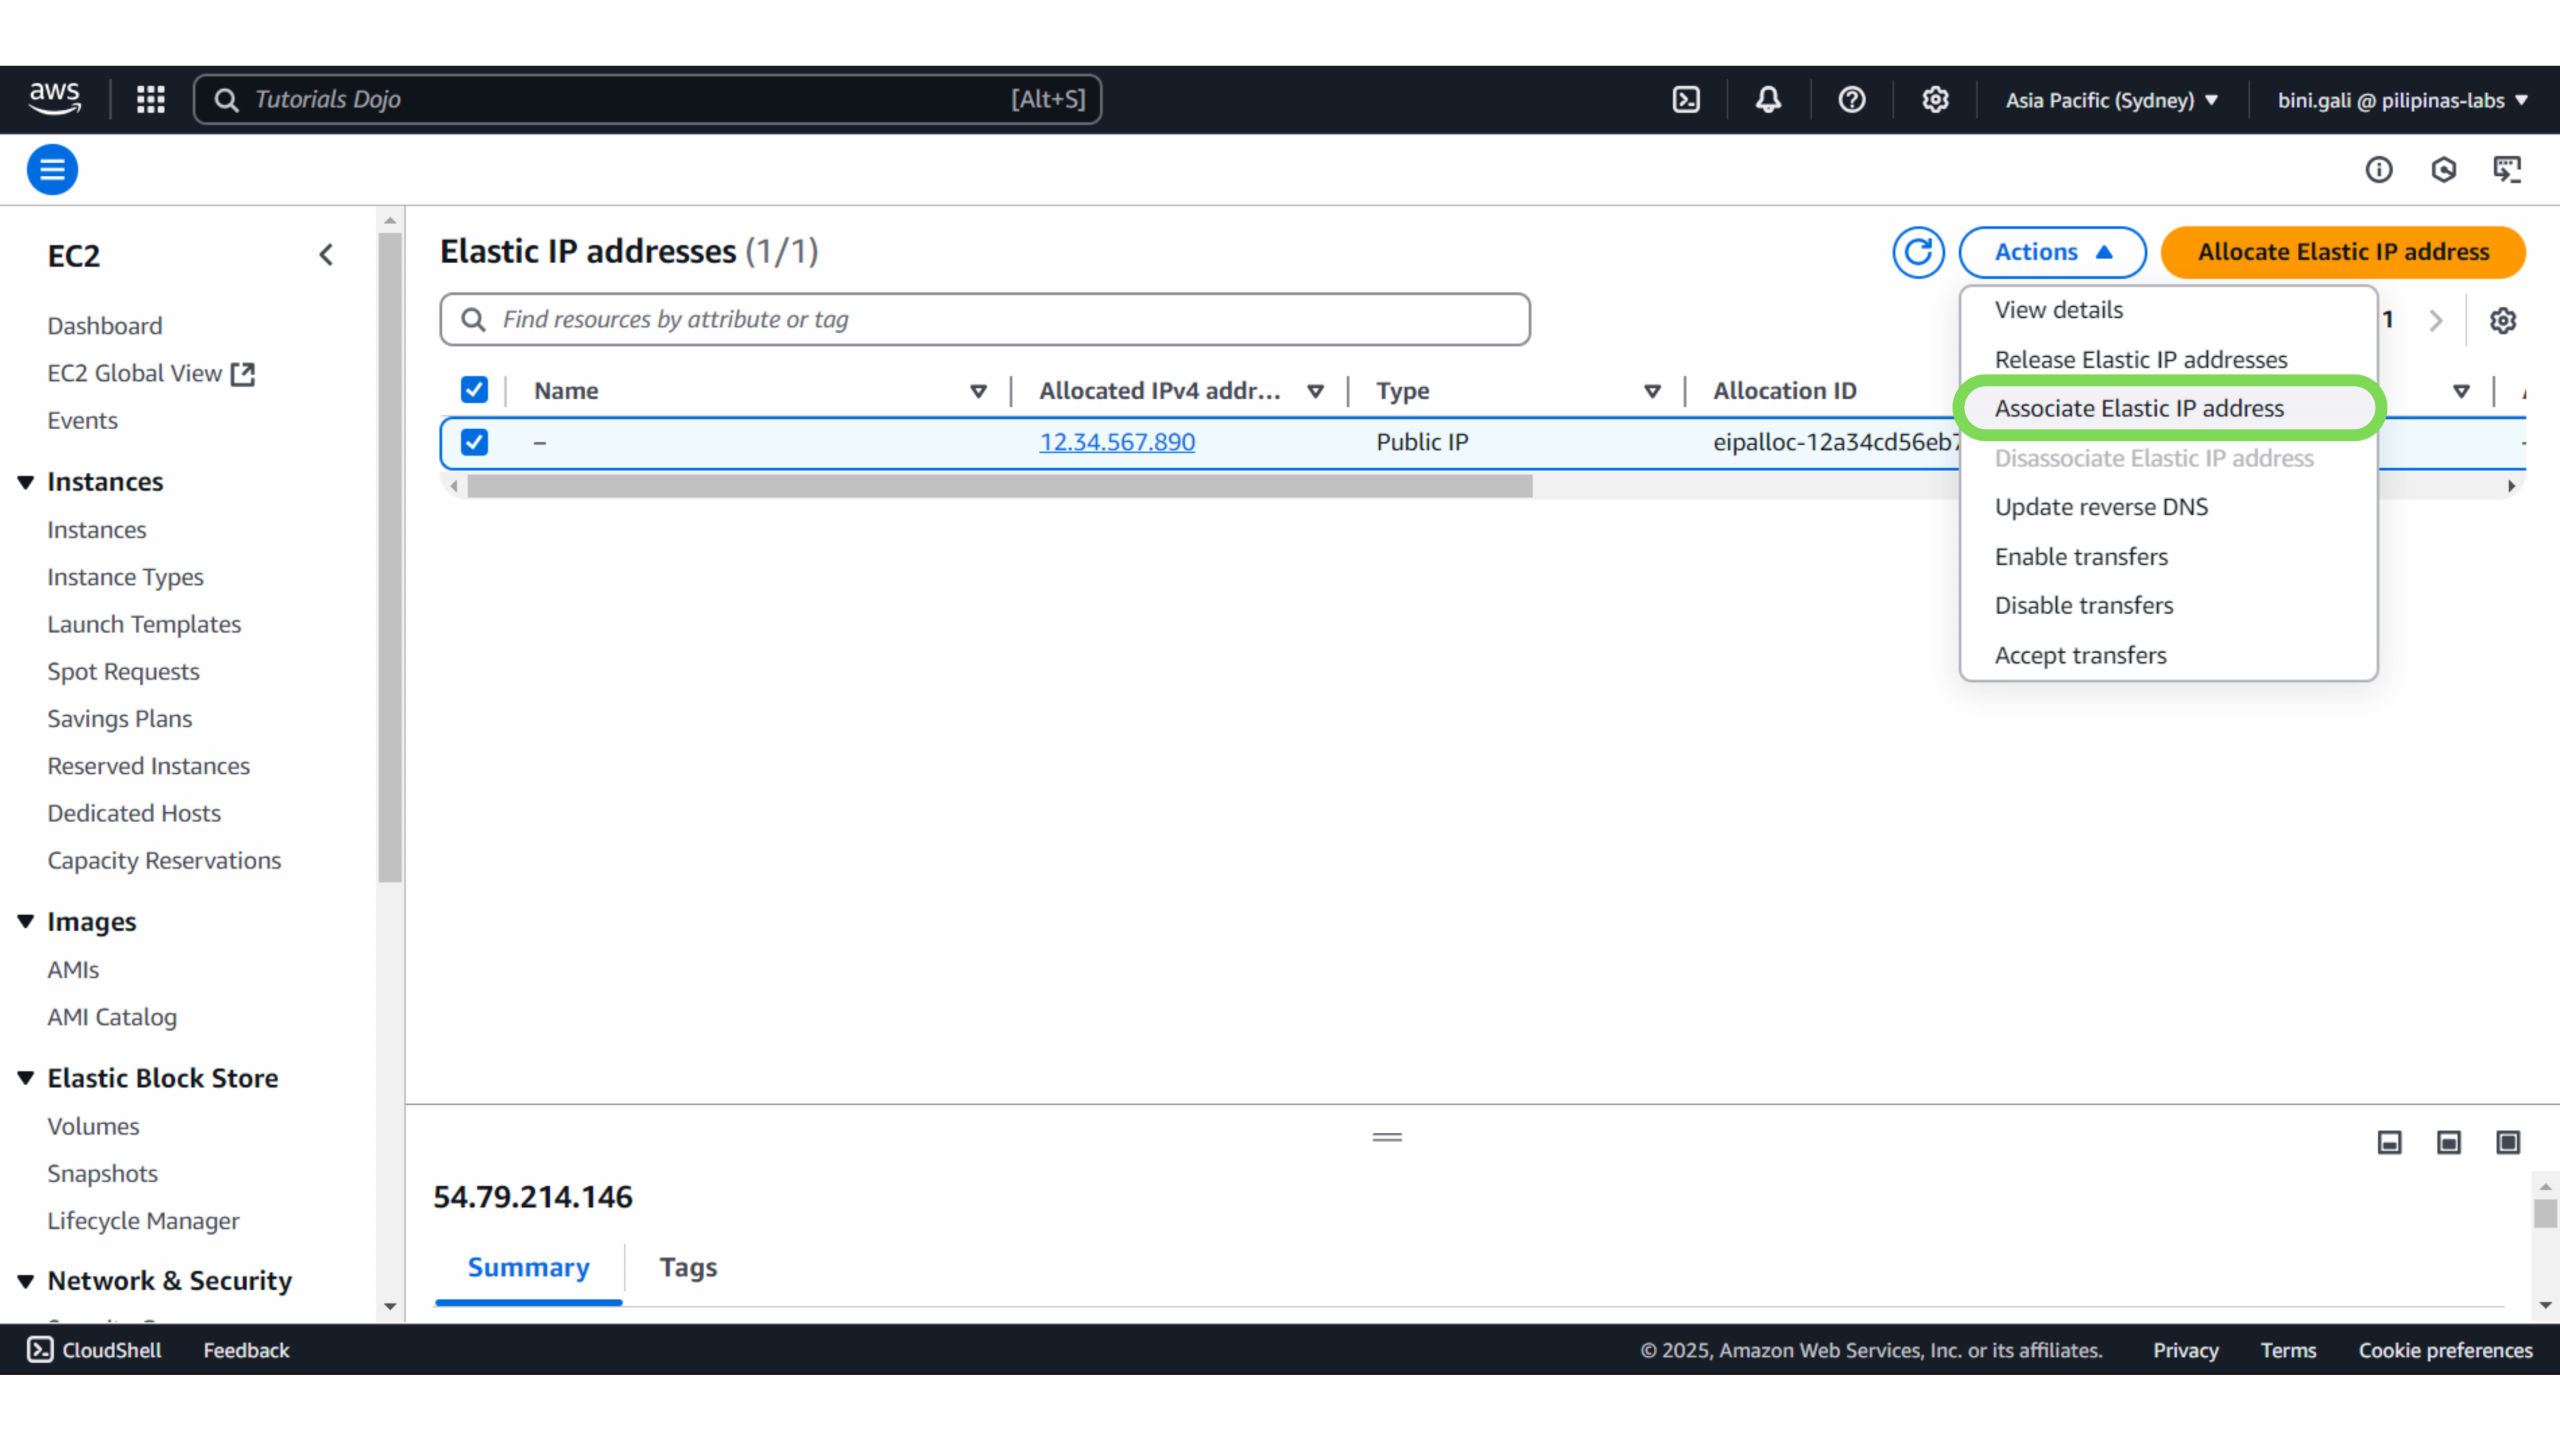
What’s happening here?
You are telling AWS:
“Hey, I want to attach this public IP to my EC2 server so I can access it from the internet.”
3. Leave “Instance” selected – This just means you’re attaching the IP to a virtual server, not a network interface, which is more advanced.

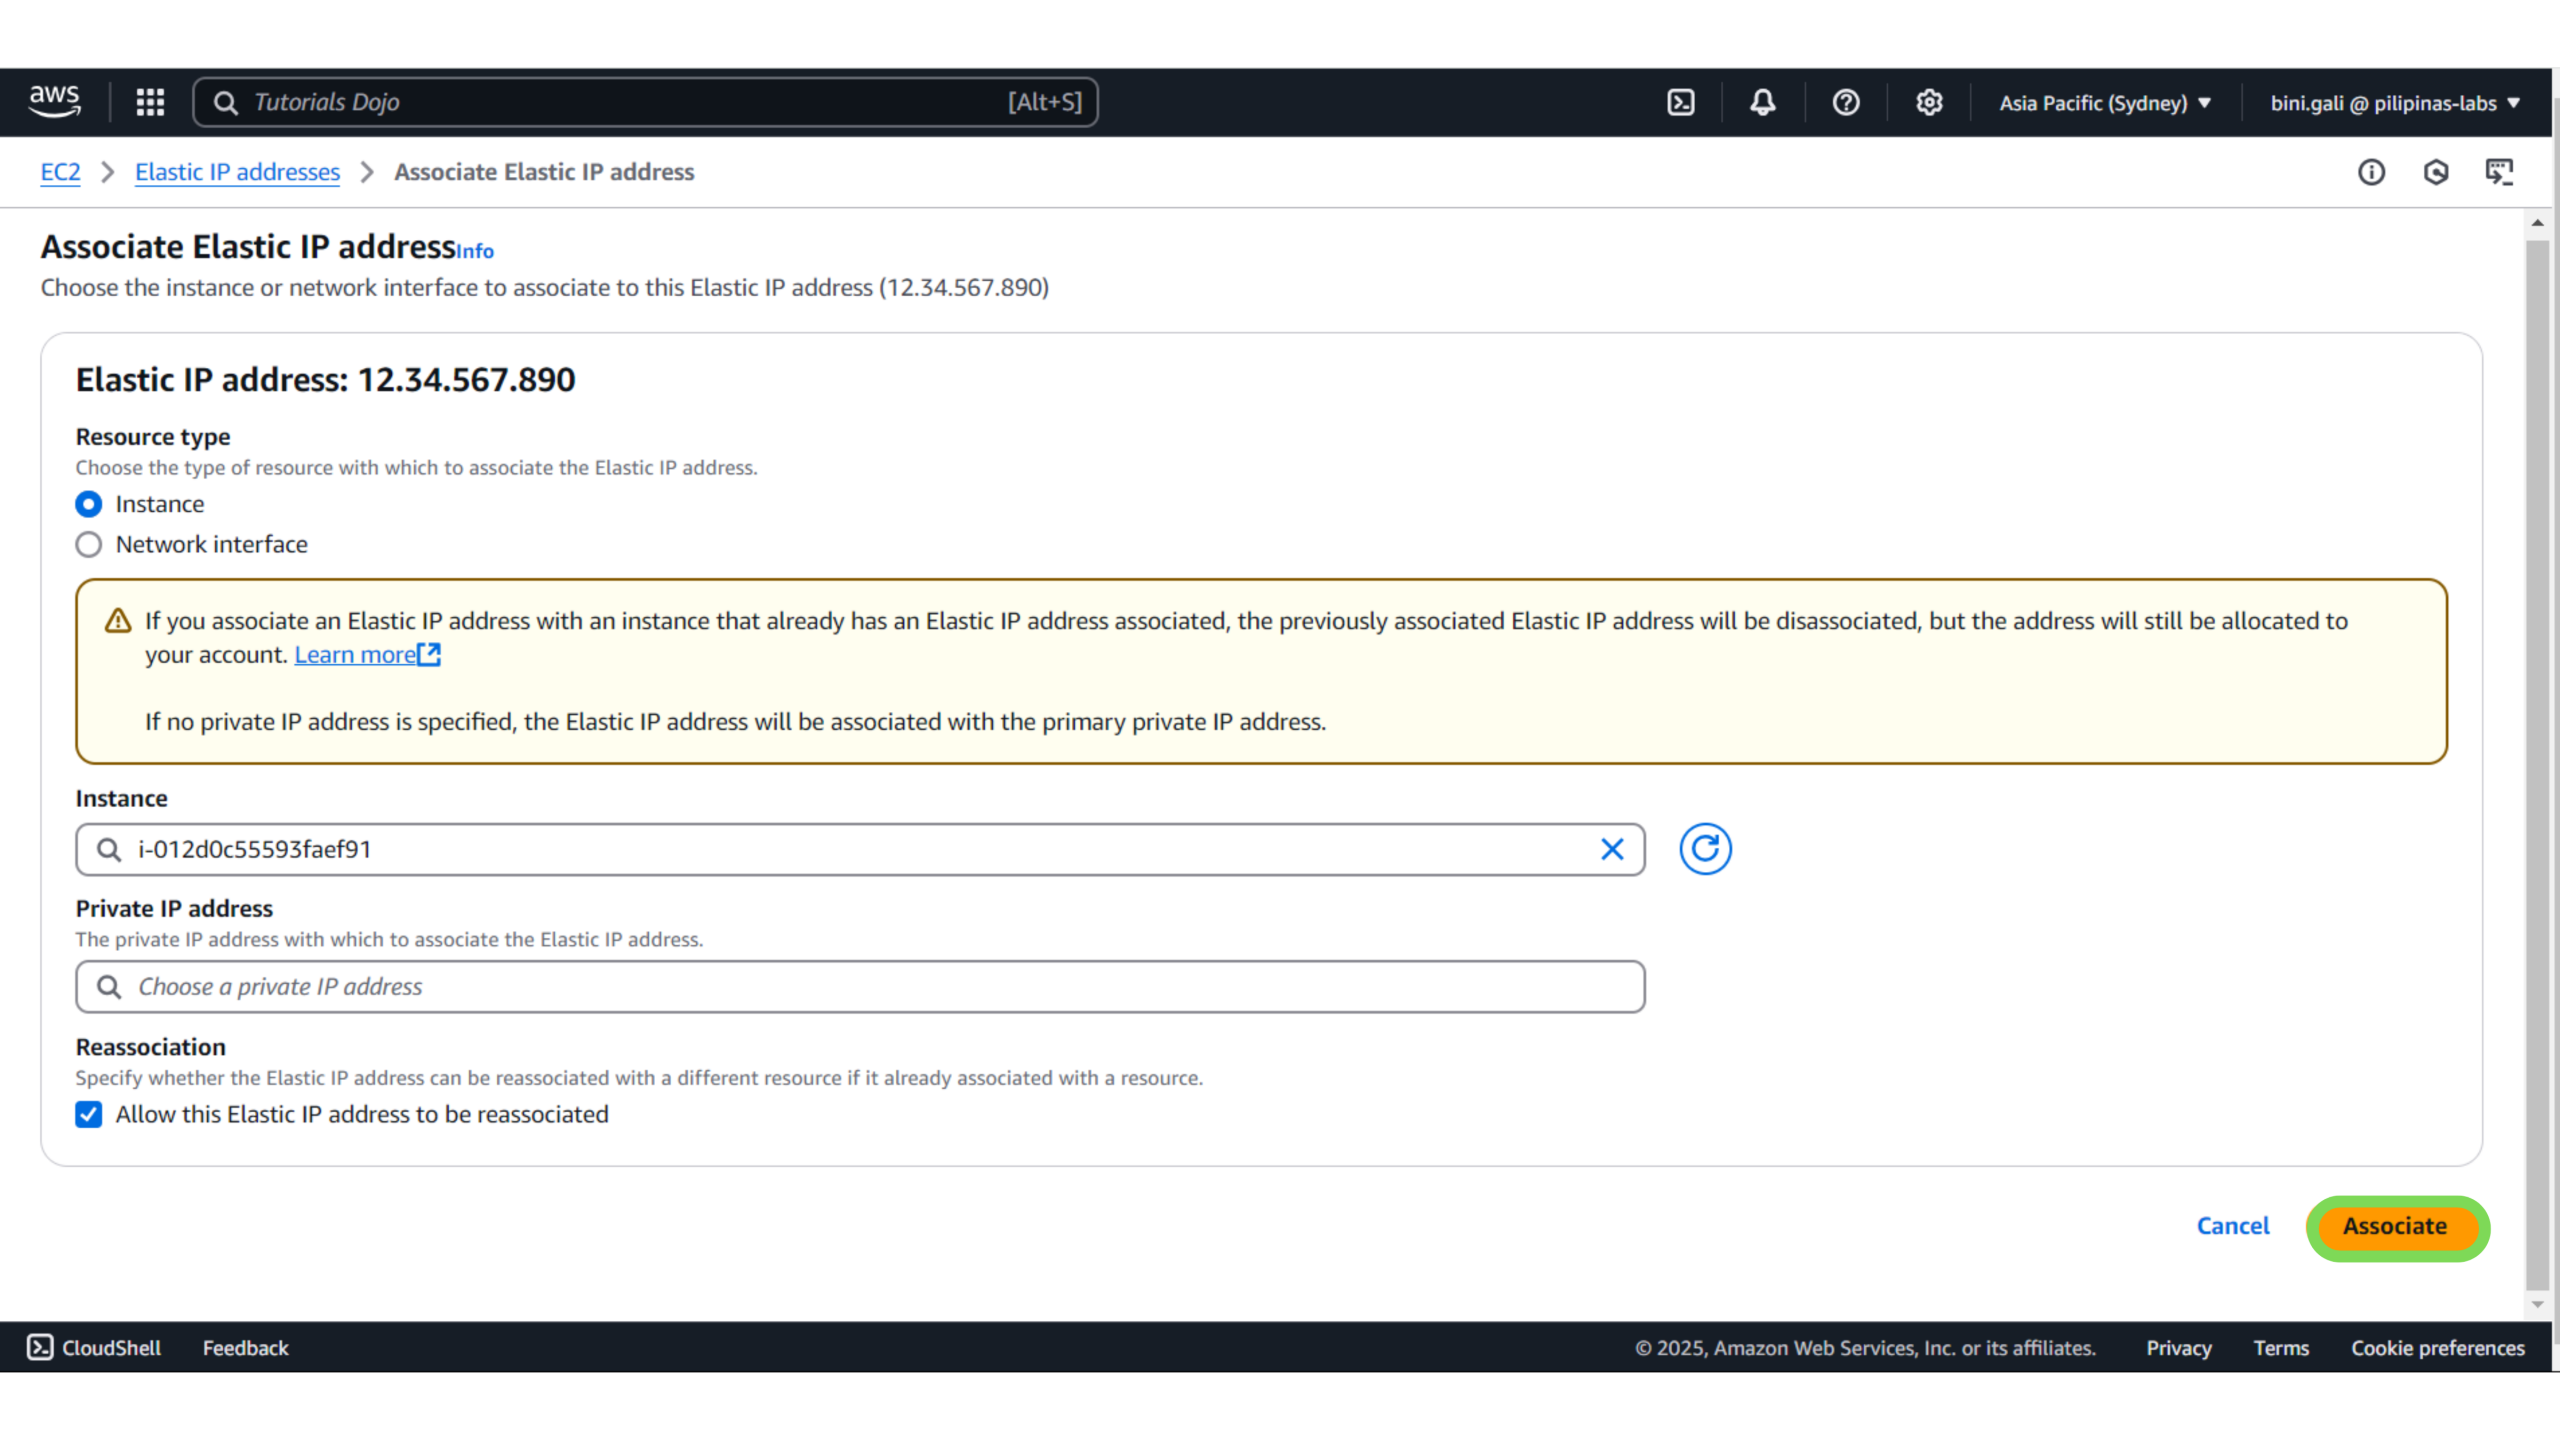
4. Choose your EC2 instance – Click the box under “Instance,” then select your running EC2 server from the list.
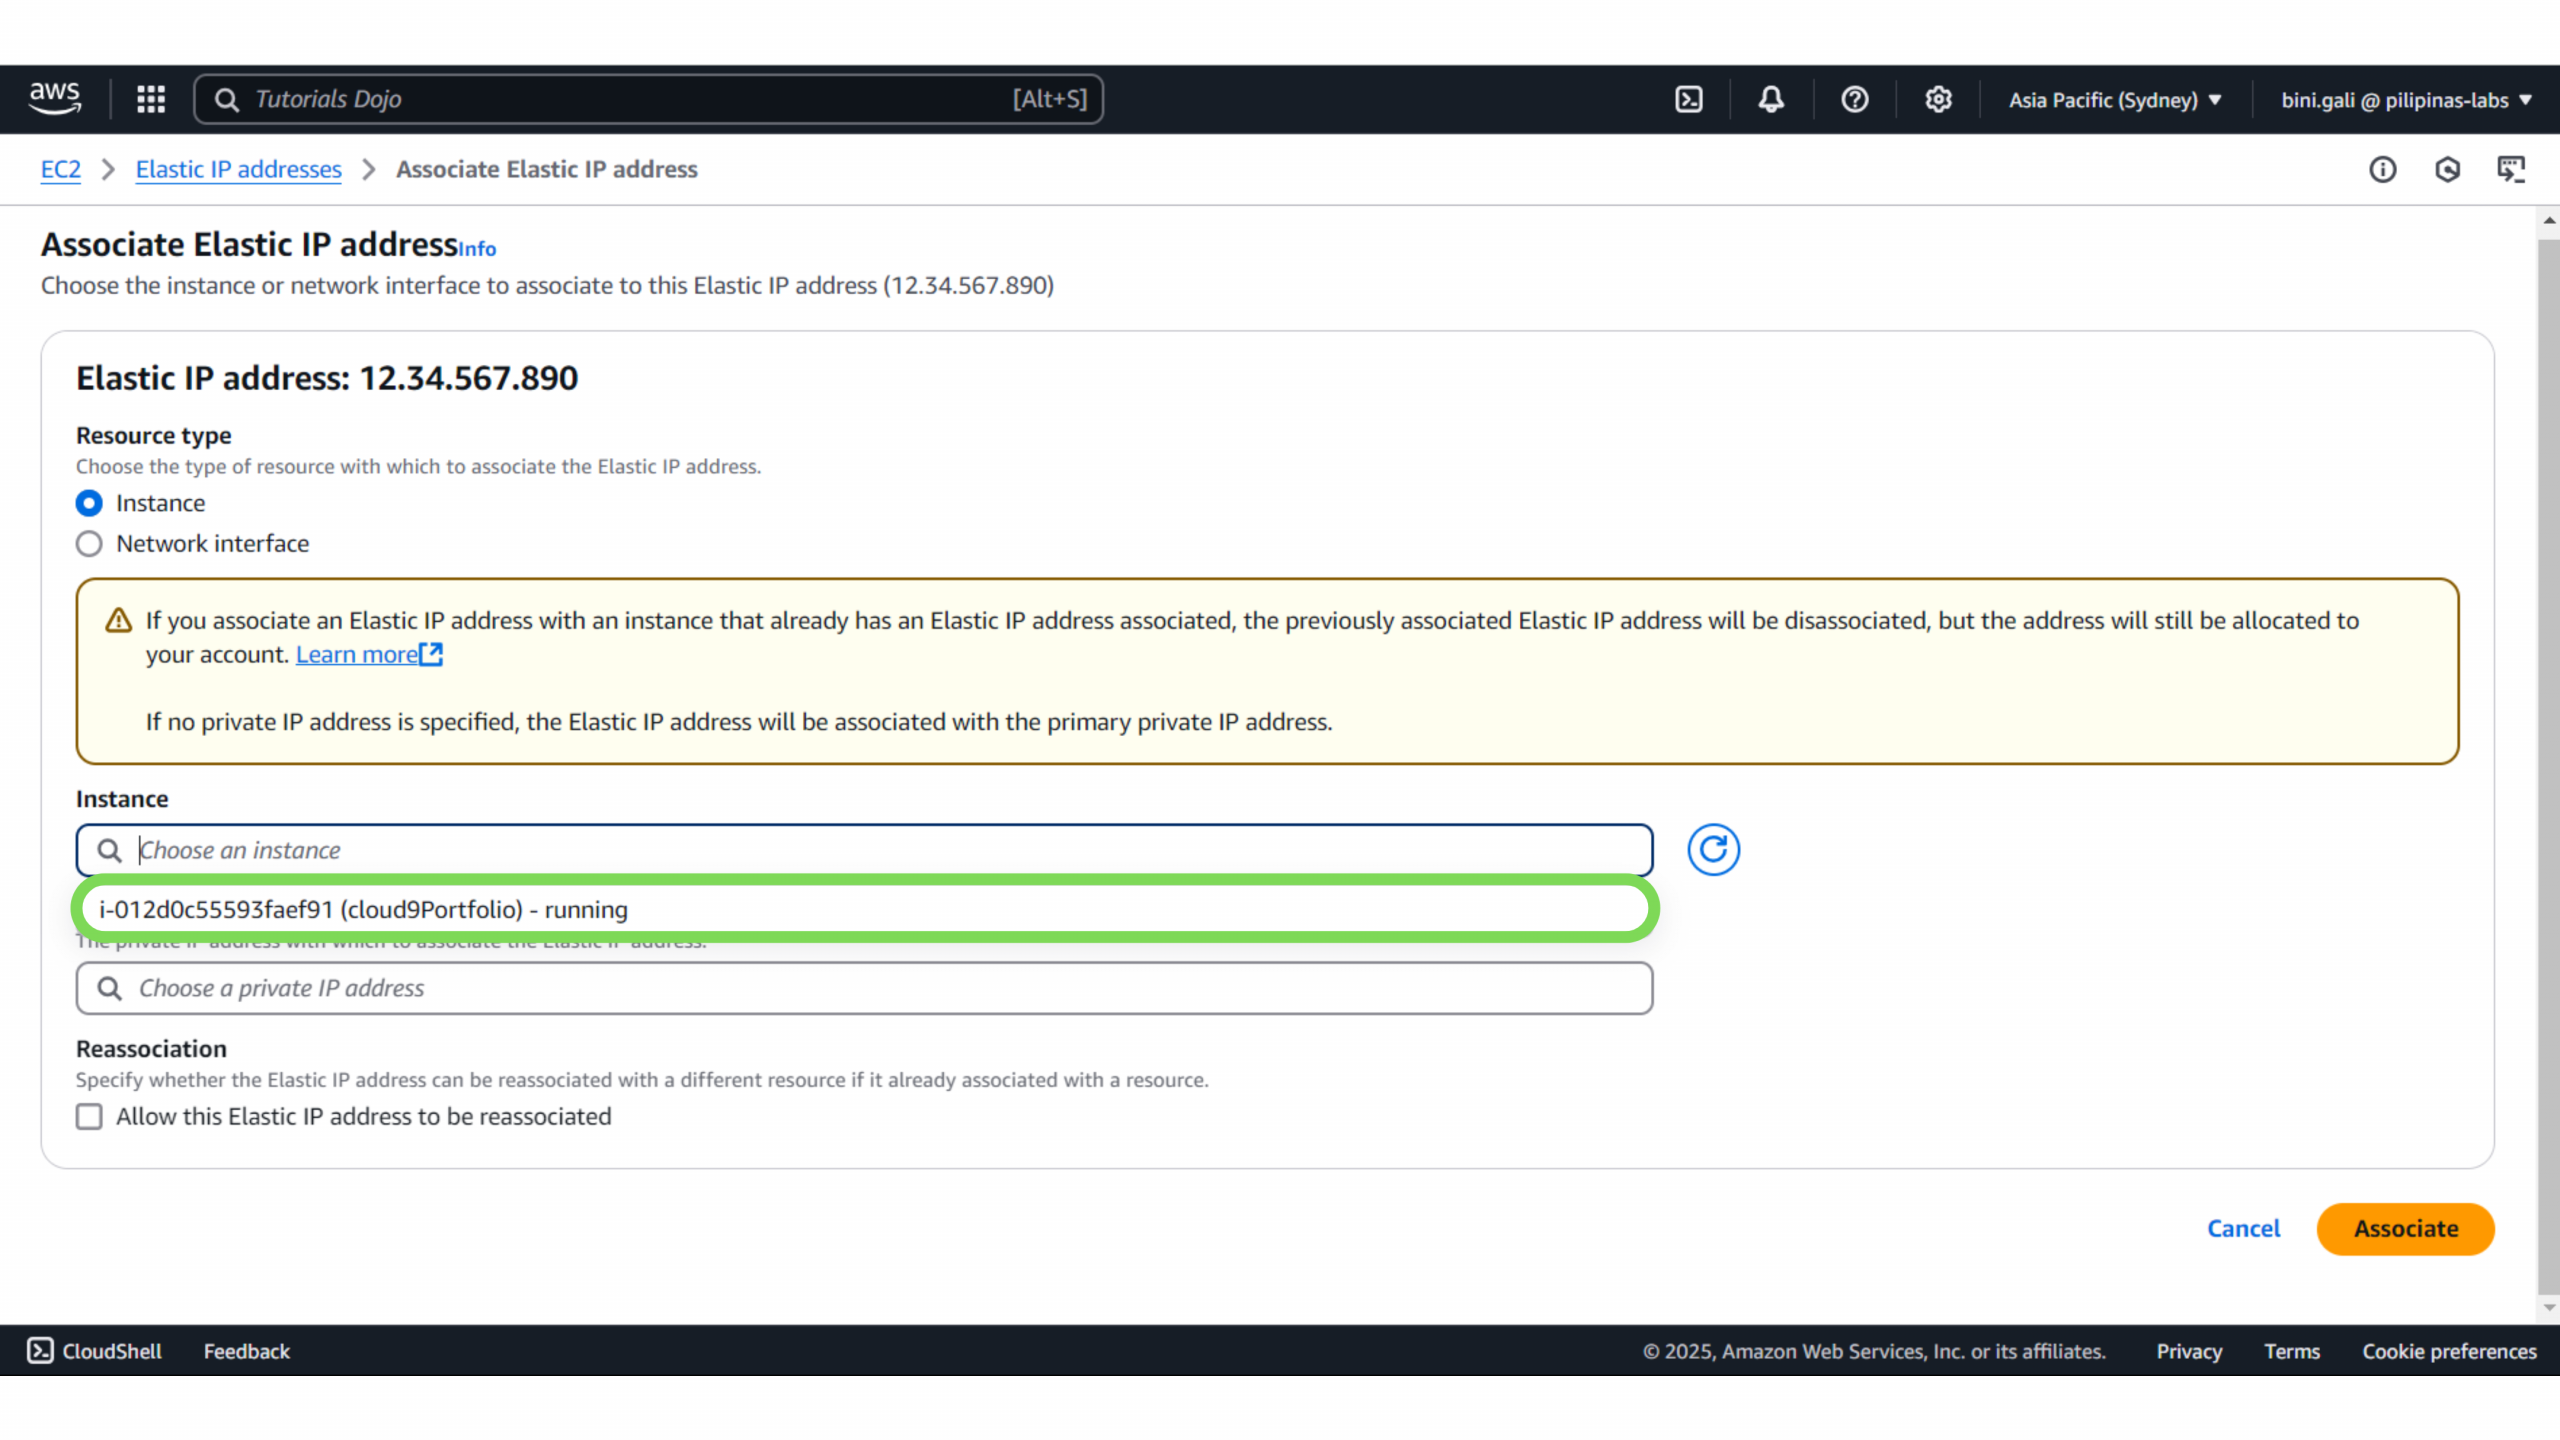
5. Leave “Private IP address” as it is – It will auto-fill. Just leave it alone unless you know exactly what you’re doing.
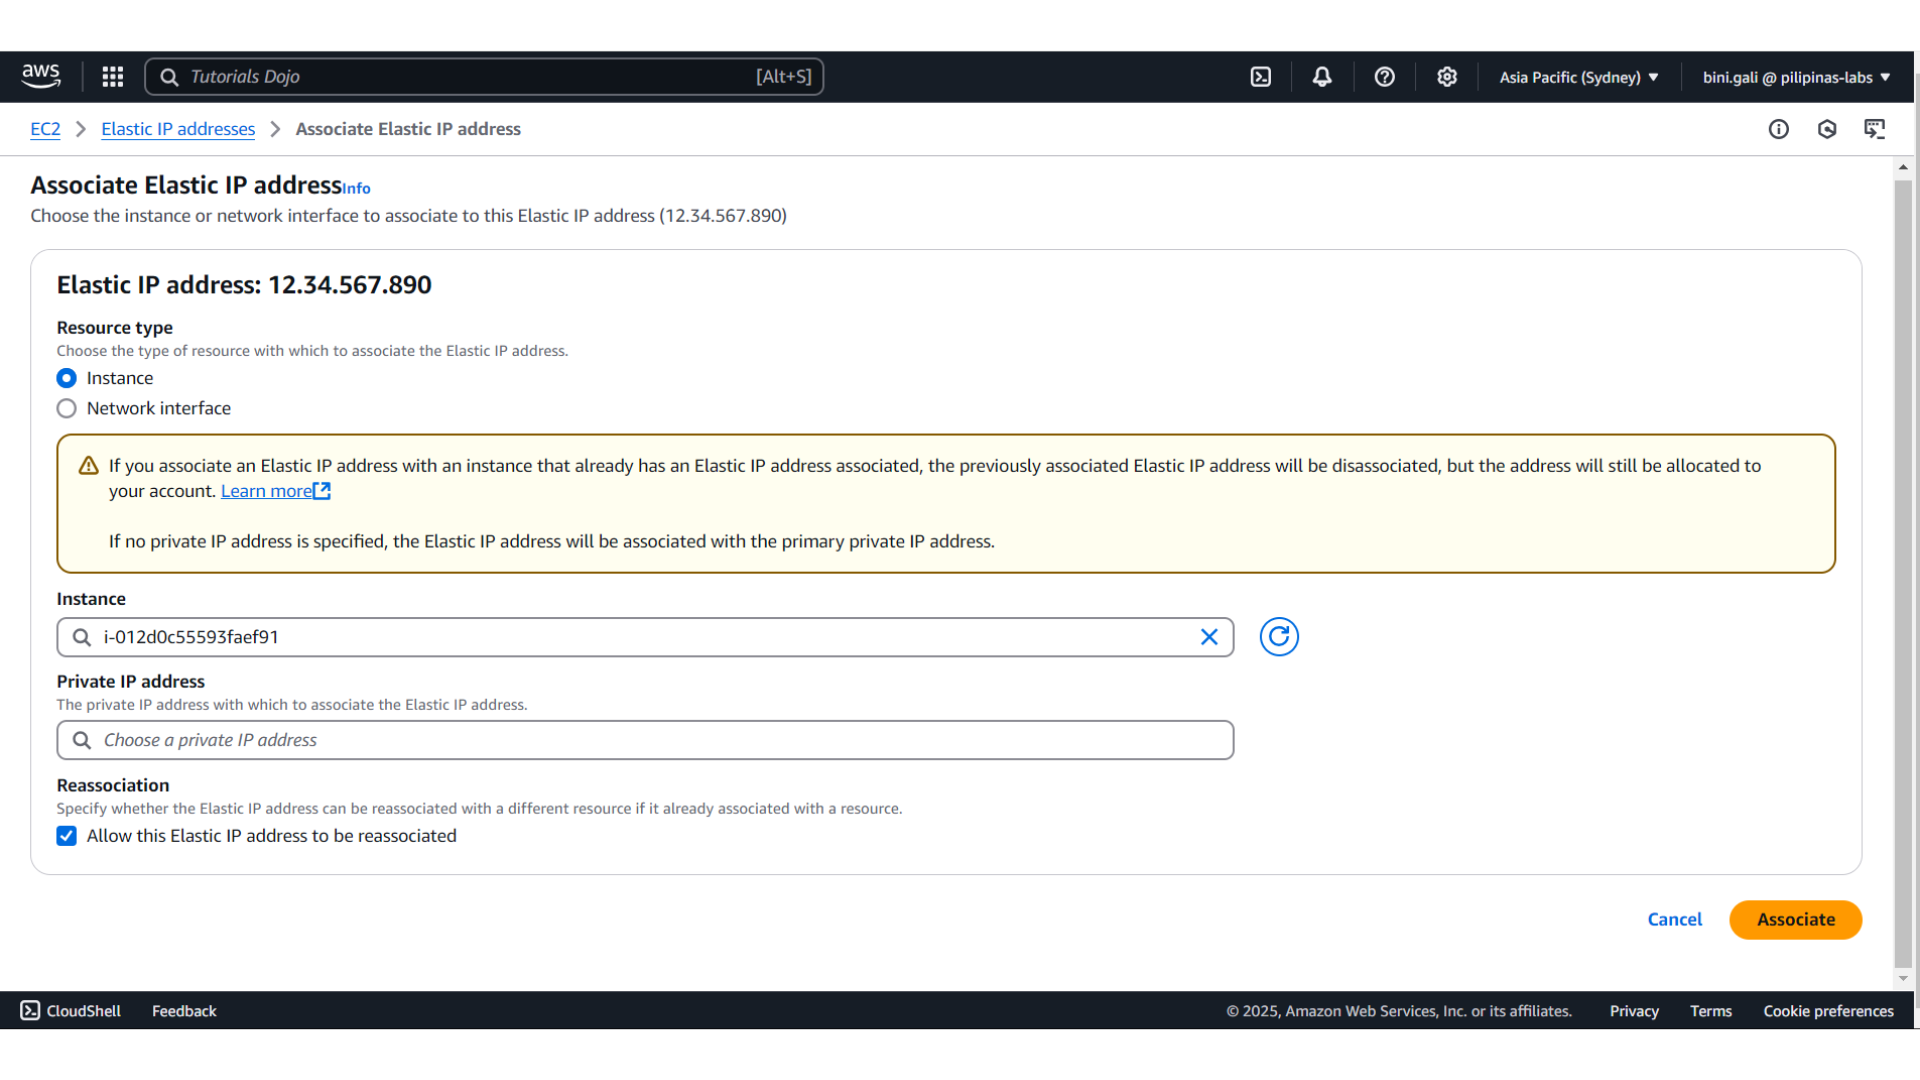
5.5 (Optional) You can check the box for:
“Allow this Elastic IP address to be reassociated.” This option lets your Elastic IP be moved to a different EC2 instance in the future without errors or blocking you.
In simple terms:
Imagine your Elastic IP is like a street address for your server.
If you:
-
Shut down your current server
-
Or create a new EC2 instance later
-
Or want to switch your website to a different server
Then checking this box allows you to easily move your IP to that new server. That way, your website visitors won’t notice anything, they’ll still go to the same IP (and domain).
Example:
-
You attached IP
12.34.567.890to EC2 instance A. -
A month later, you launch EC2 instance B (maybe to upgrade or fix something).
-
You want that same IP (
12.34.567.890) on B instead of A.
If this box was checked, you can do that quickly and smoothly.
If it’s not checked, AWS might block the move, and you’d need to manually release/re-assign the IP, which would be more of a hassle.
Should you check it?
Yes, it’s safe and helpful to check this box. It won’t change anything now, but it gives you flexibility in the future.
6. Click “Associate.”
7. Optional – Give your Elastic IP a name to stay organized!
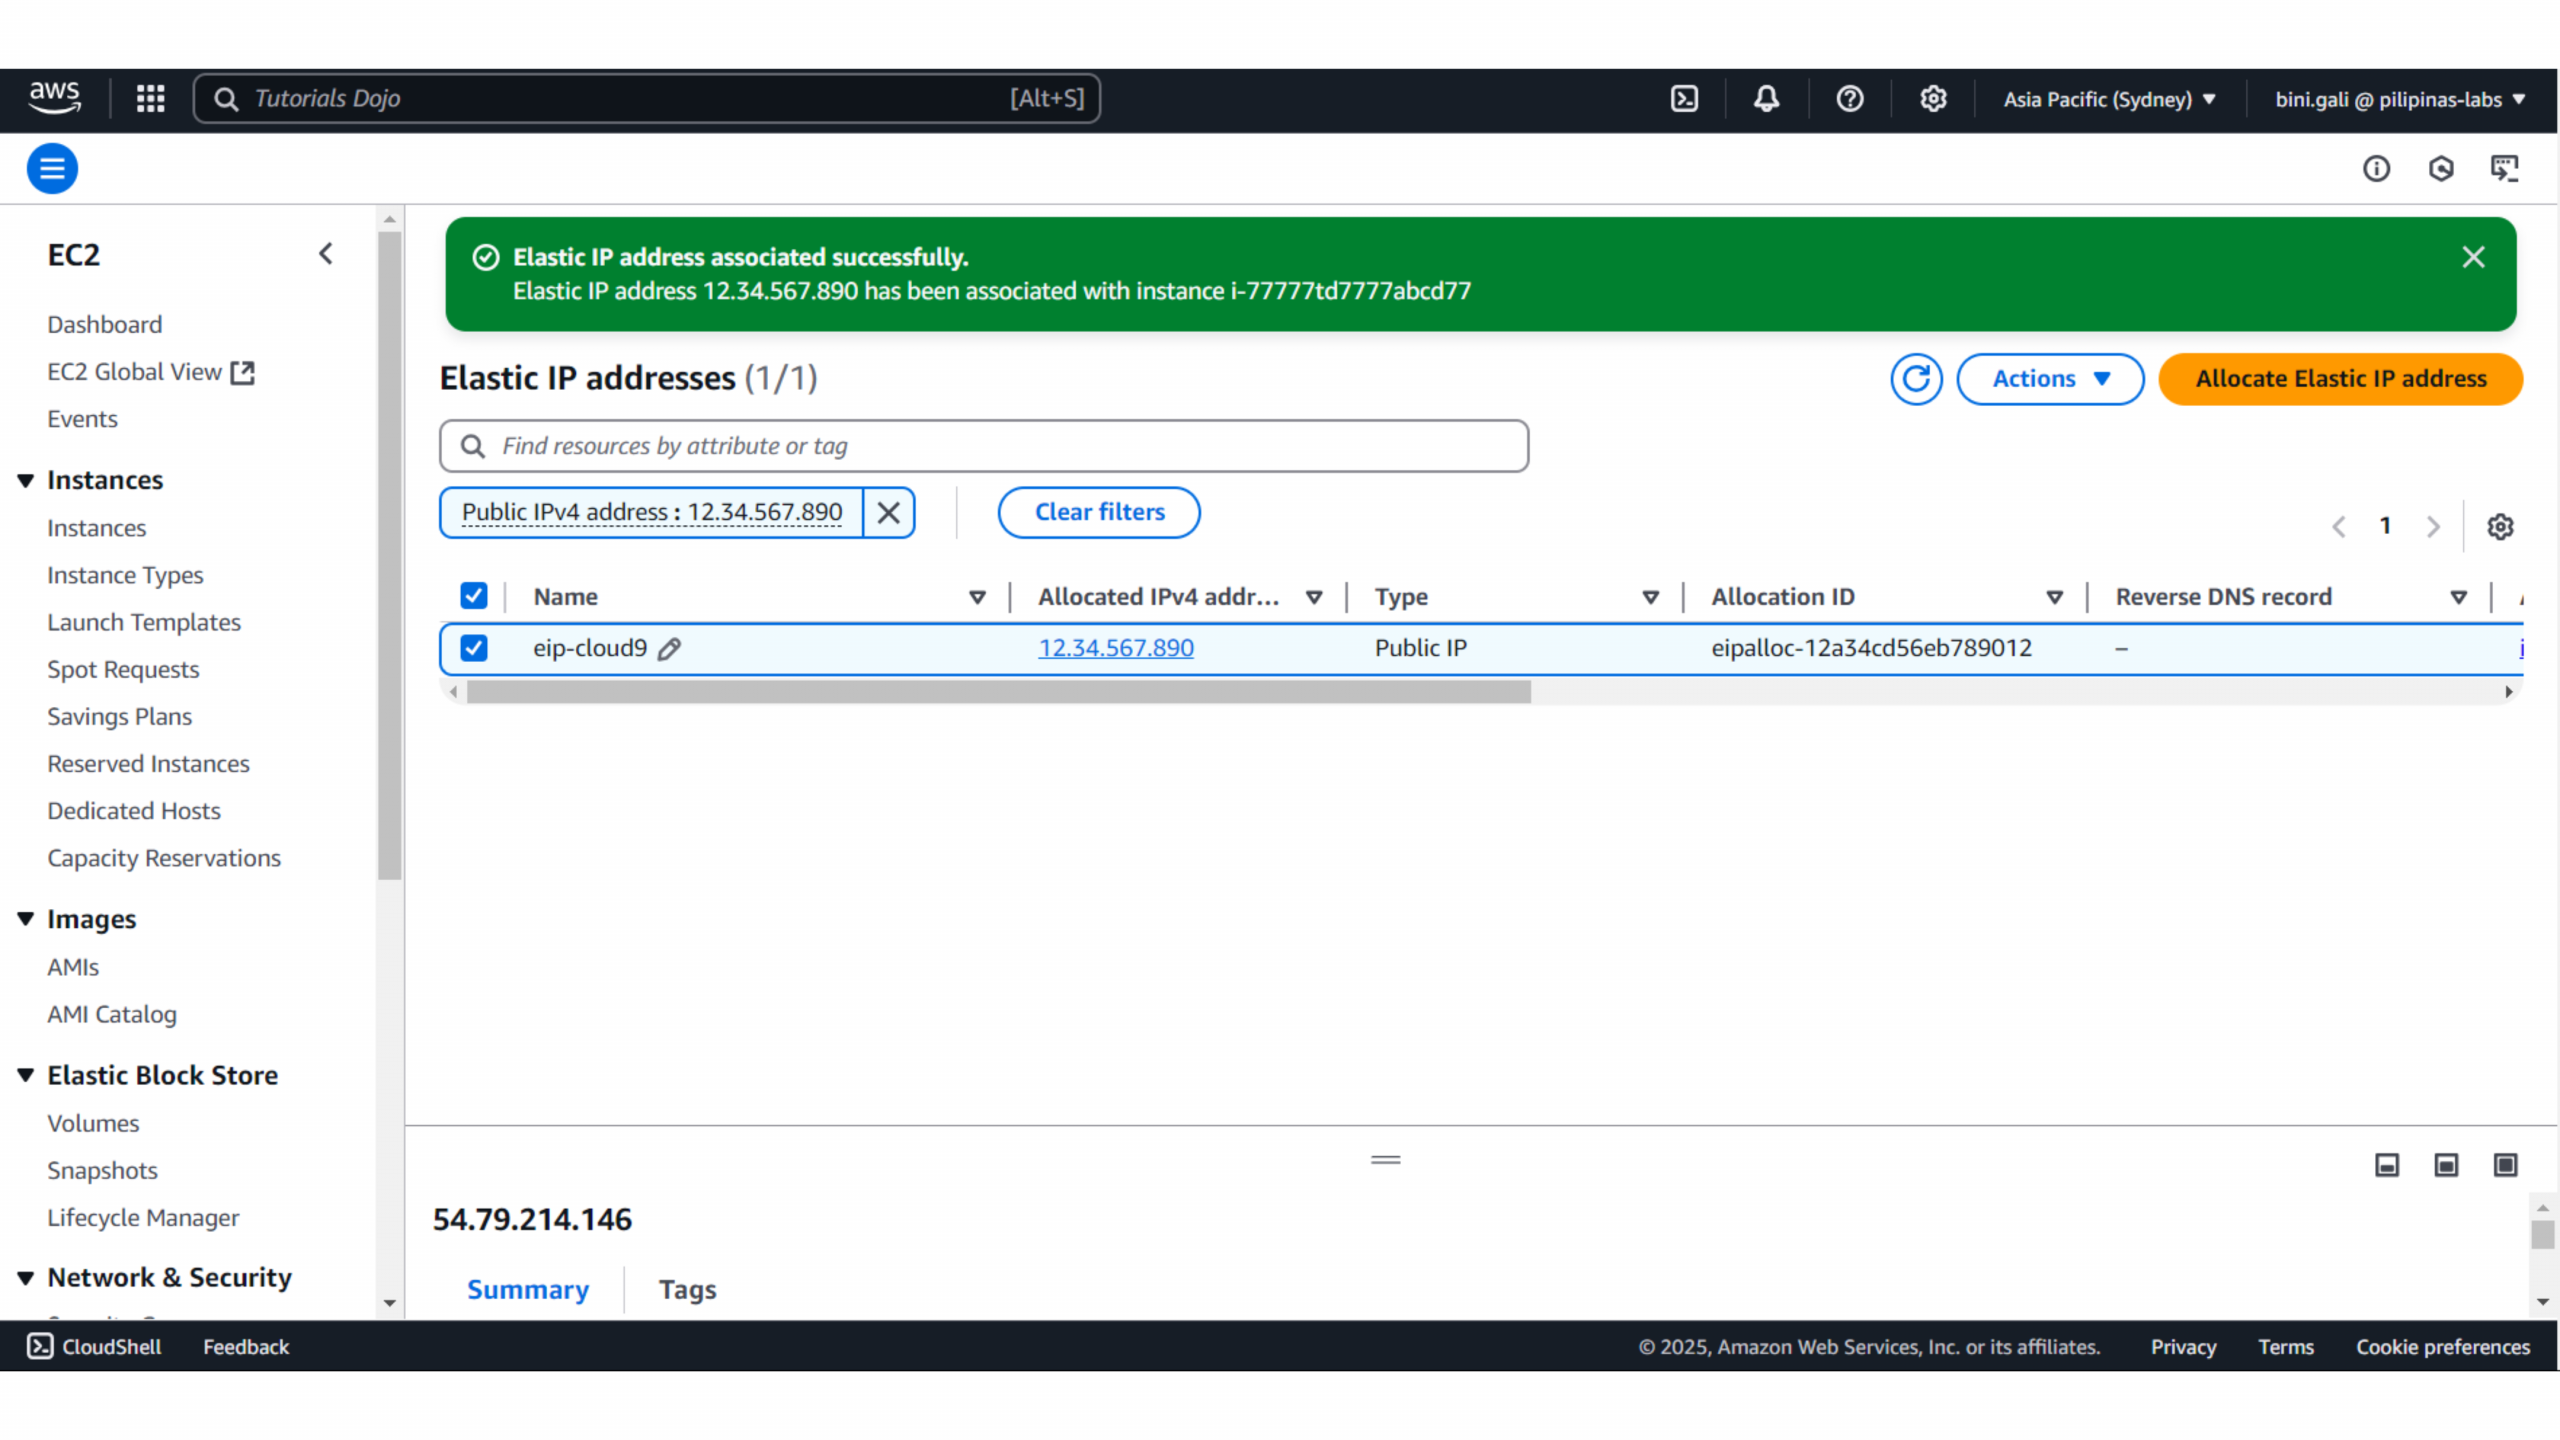
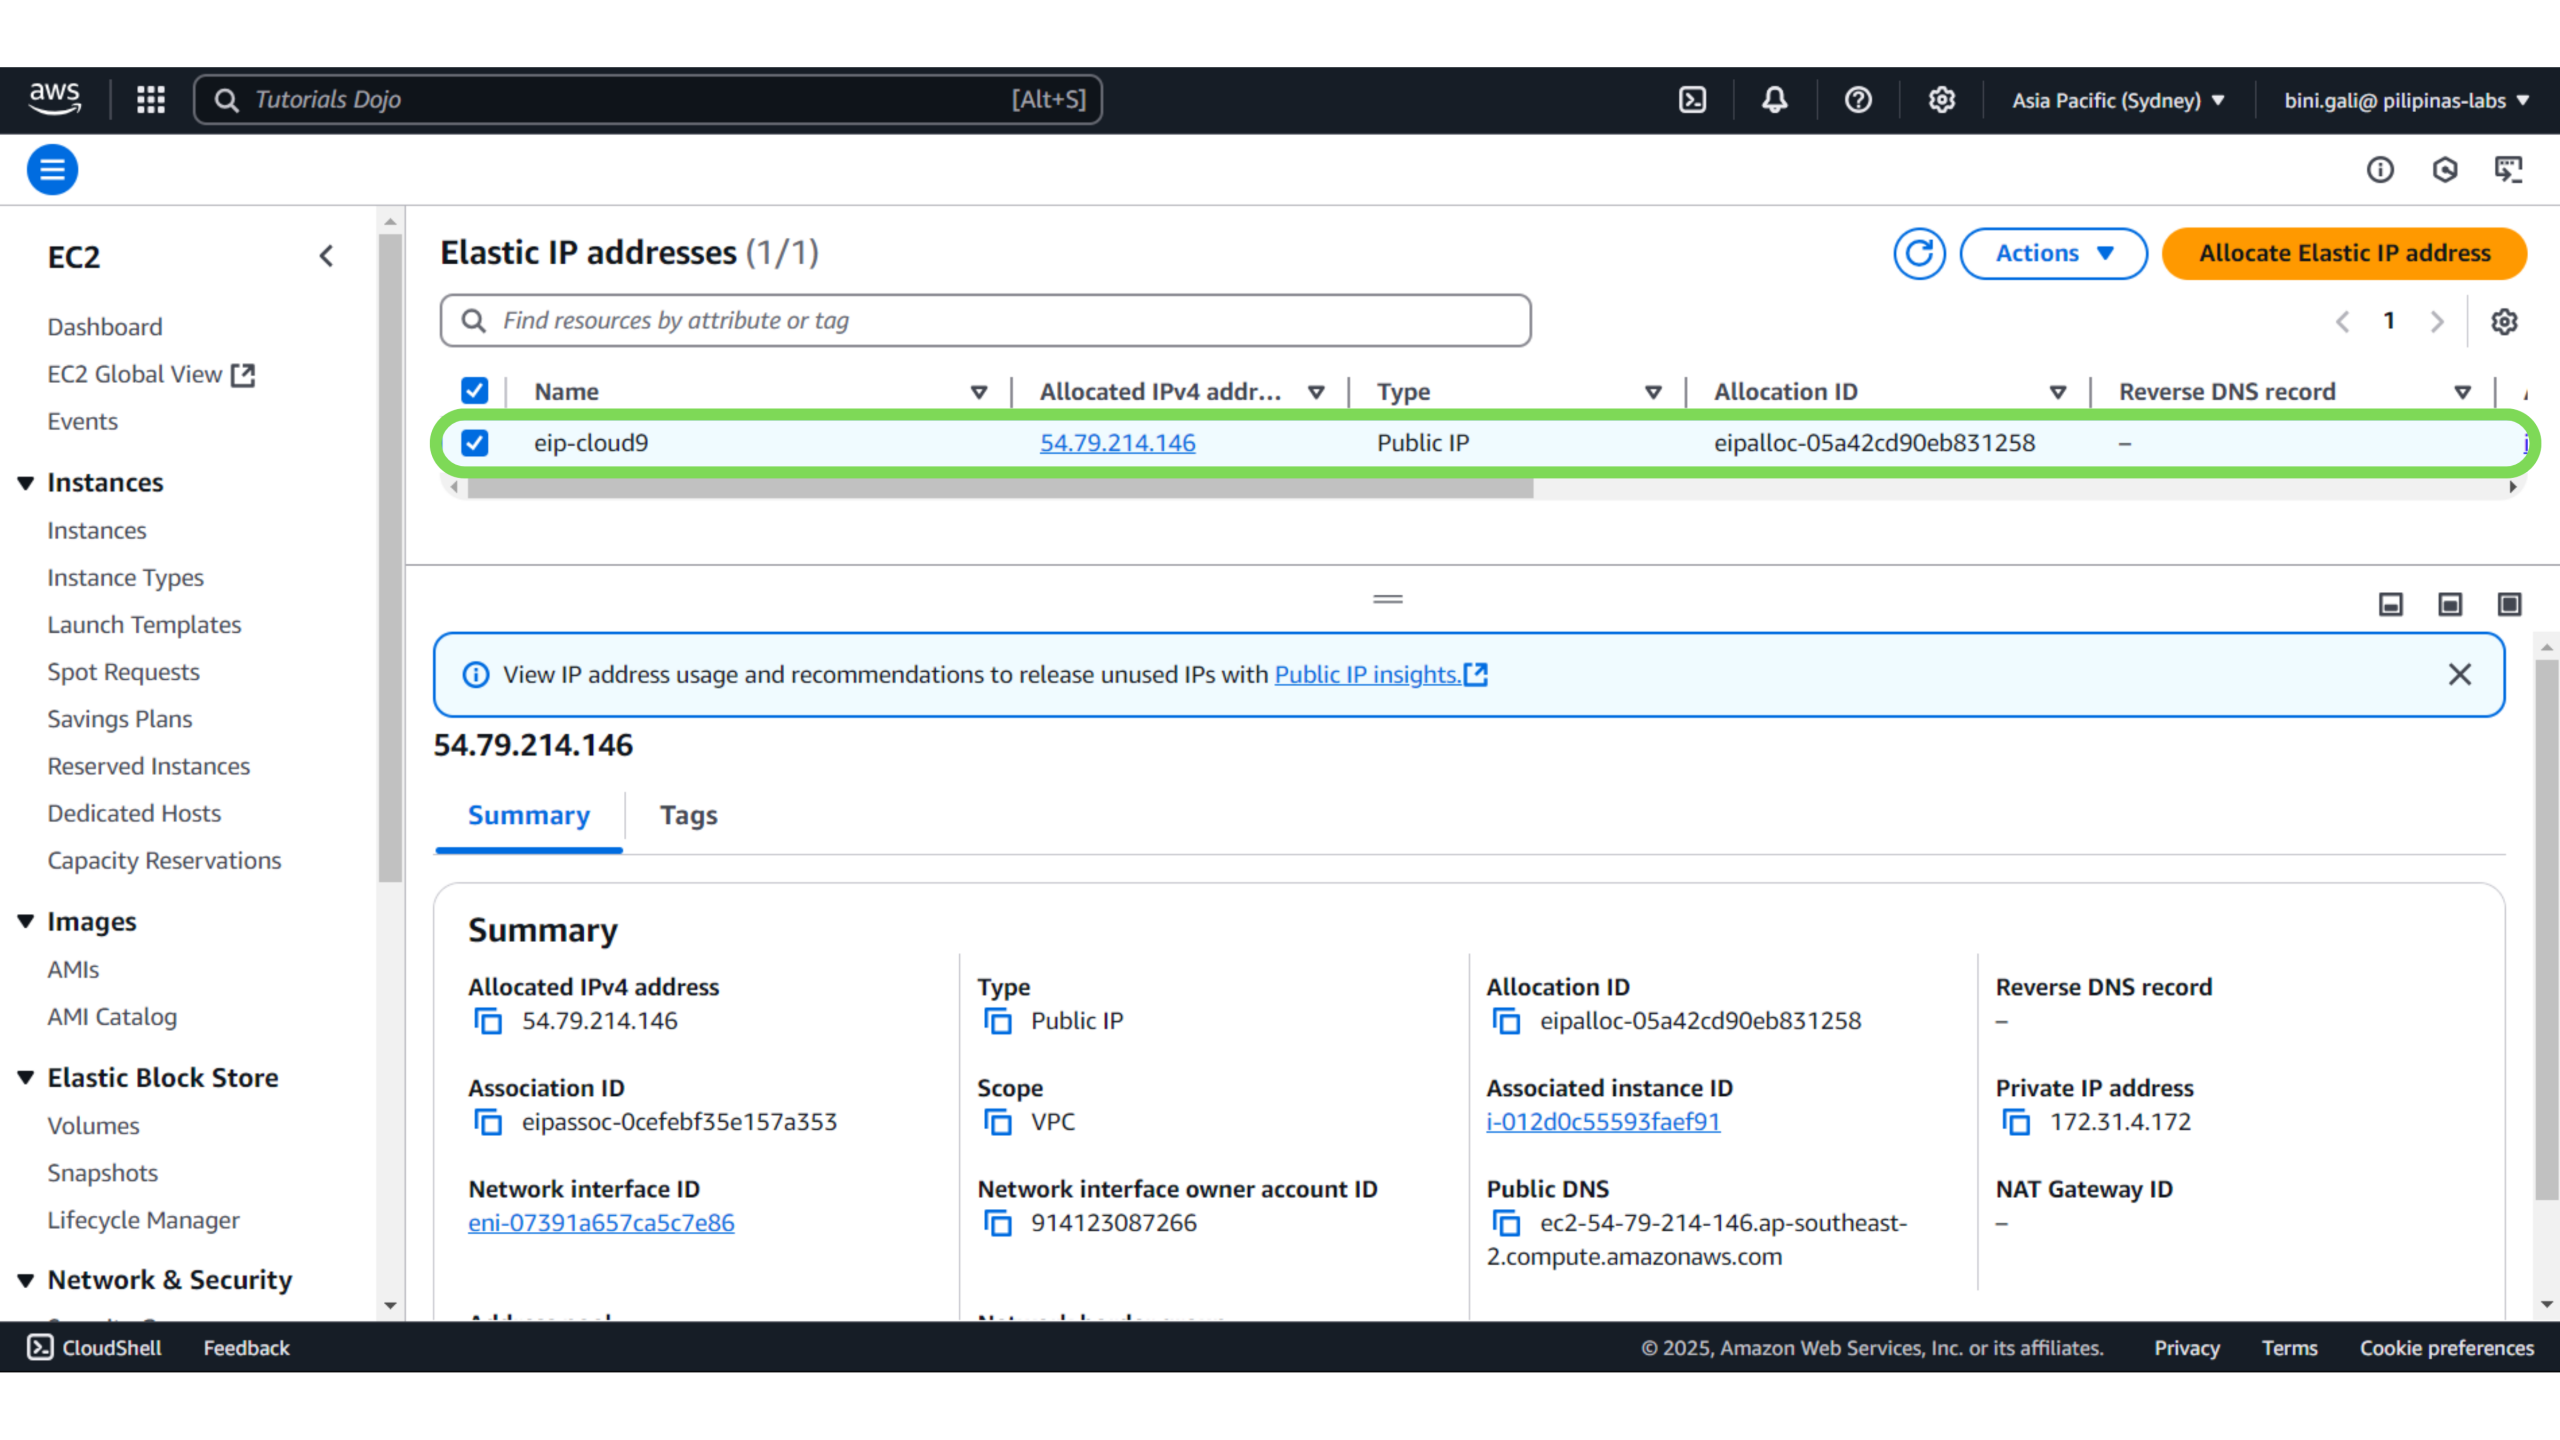
Now, your instance has a fixed IP address you can use to access your website! This IP address is now permanent as long as you keep the instance and the Elastic IP associated.
A Few Things to Remember for Elastic IP
-
AWS allows one Elastic IP per running EC2 instance for free. If the Elastic IP is unused (not attached), you may be charged.
-
If you terminate the instance, don’t forget to release the Elastic IP or associate it with another instance.
-
Elastic IPs are specific to the region you’re working in. You can’t use one from a different AWS region.
- AWS allows up to 5 Elastic IPs per region by default, but you can request more if needed. Remember, AWS charges extra for unused Elastic IPs, so it’s best to only use them when necessary
Next Step: Pointing the “A” Record of the Domain in Amazon Route 53 to the Elastic IP Address
Now that you have your Elastic IP address, let’s point your domain to it by updating your “A” record in Route 53.
What’s an A Record?
An “A” record (Address Record) is used in DNS (Domain Name System) to map a domain name to an IP address. This lets users access your website by typing the domain name (like example.com), instead of needing to remember an IP address.
Steps to Point the “A” Record of Your Domain in Amazon Route 53 to the Elastic IP Address
1. Find Your Elastic IP – Go to your EC2 console and locate the Elastic IP address you want to use.
2. Create a Hosted Zone in Route 53 – If you don’t have a hosted zone for your domain yet, create one in Route 53.
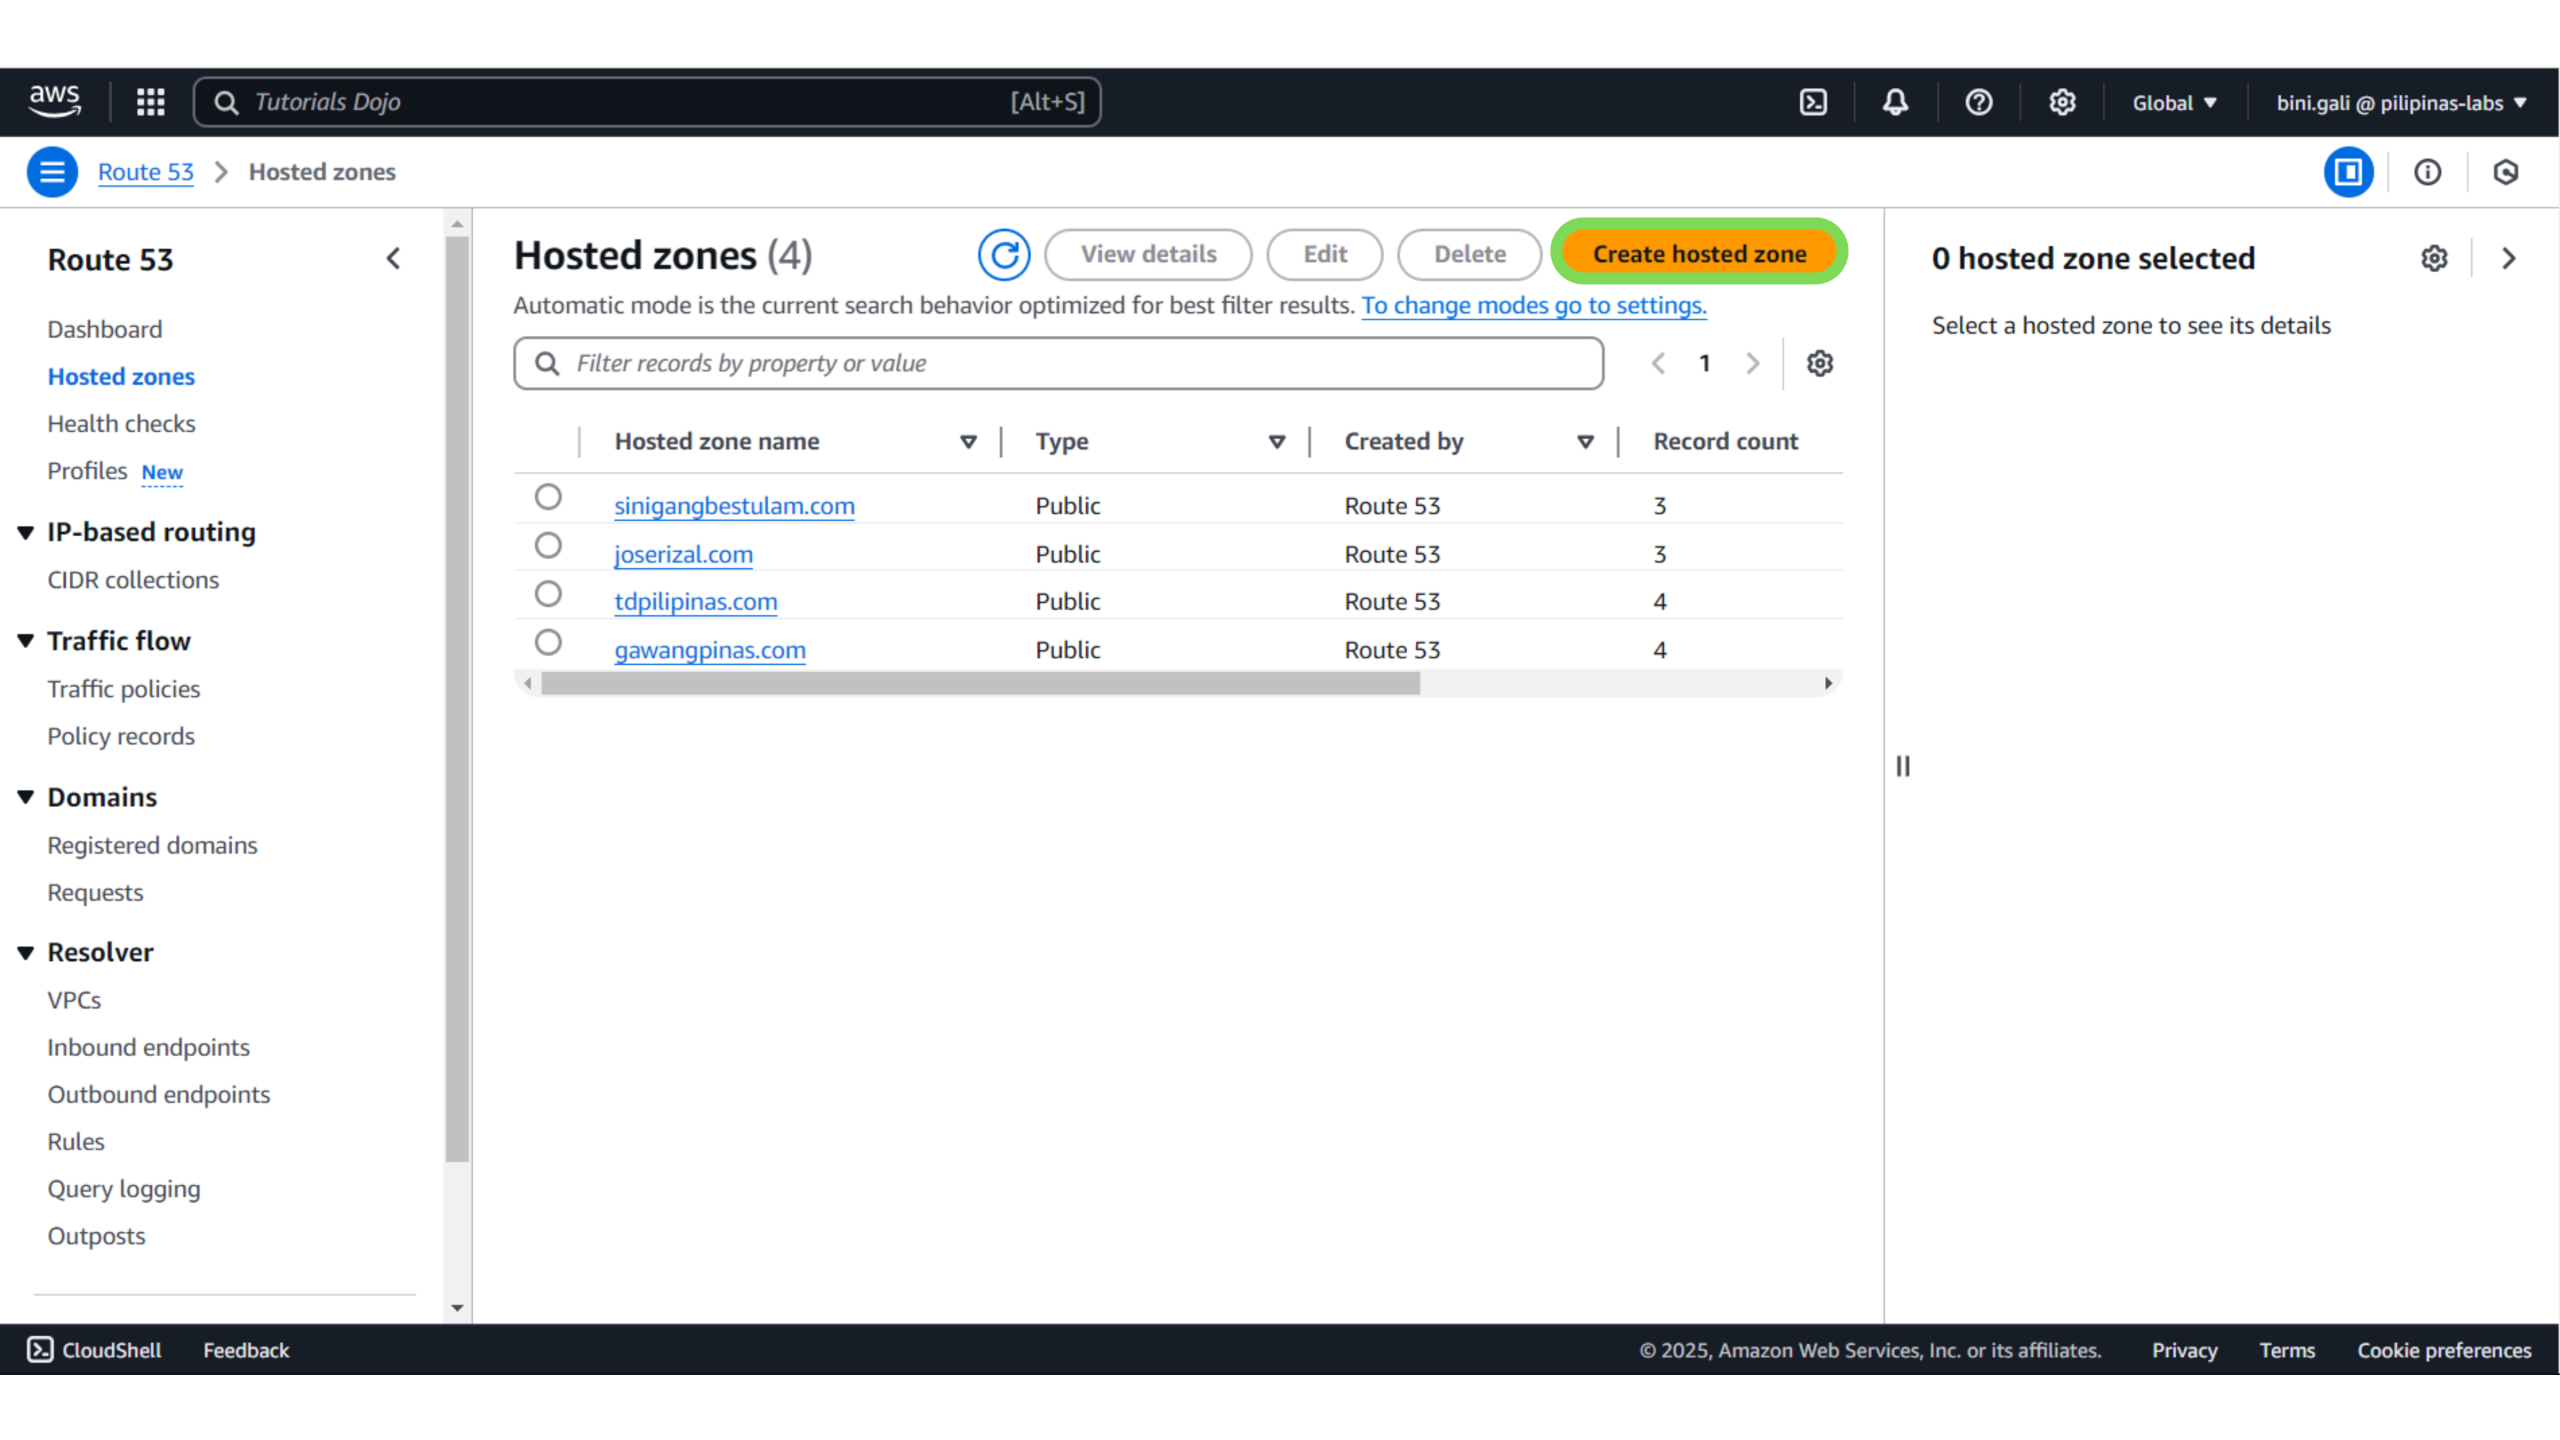
3. Domain Name – Enter your domain name in the “Domain name” field when creating the hosted zone.
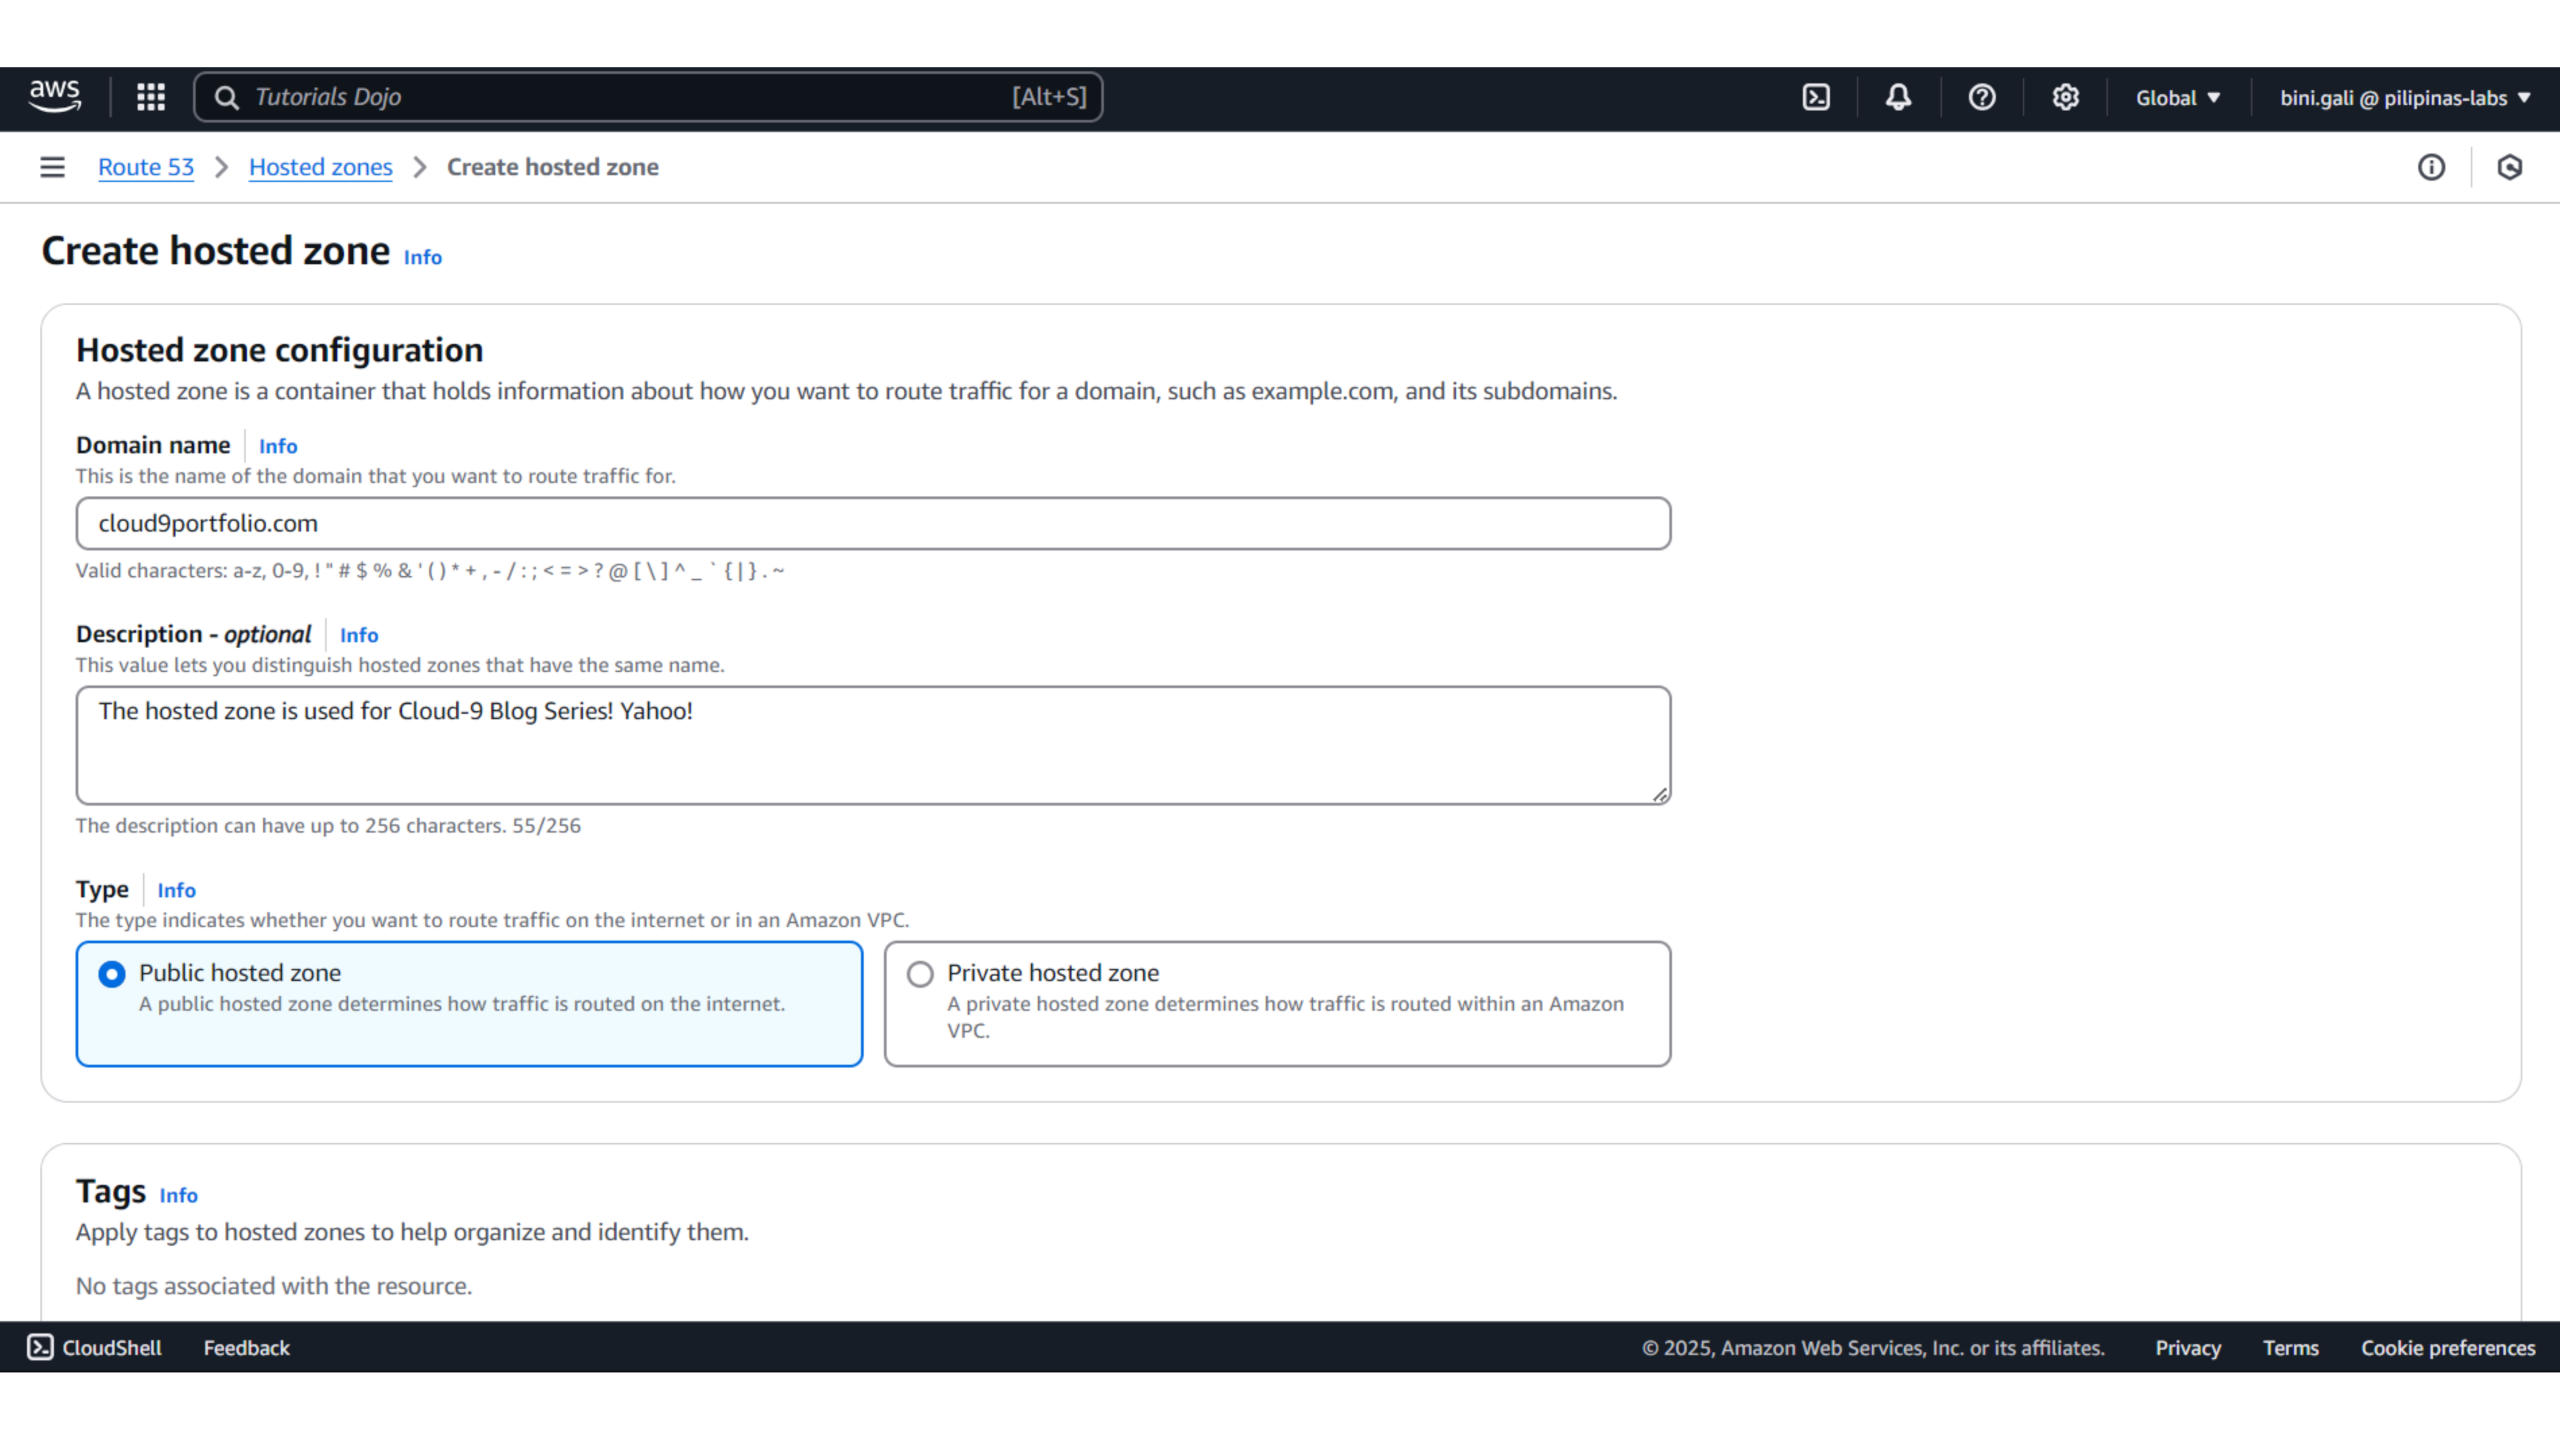
What are the other things I’m seeing right now?
- Description: This optional field lets you add a short note to explain the purpose of the hosted zone.
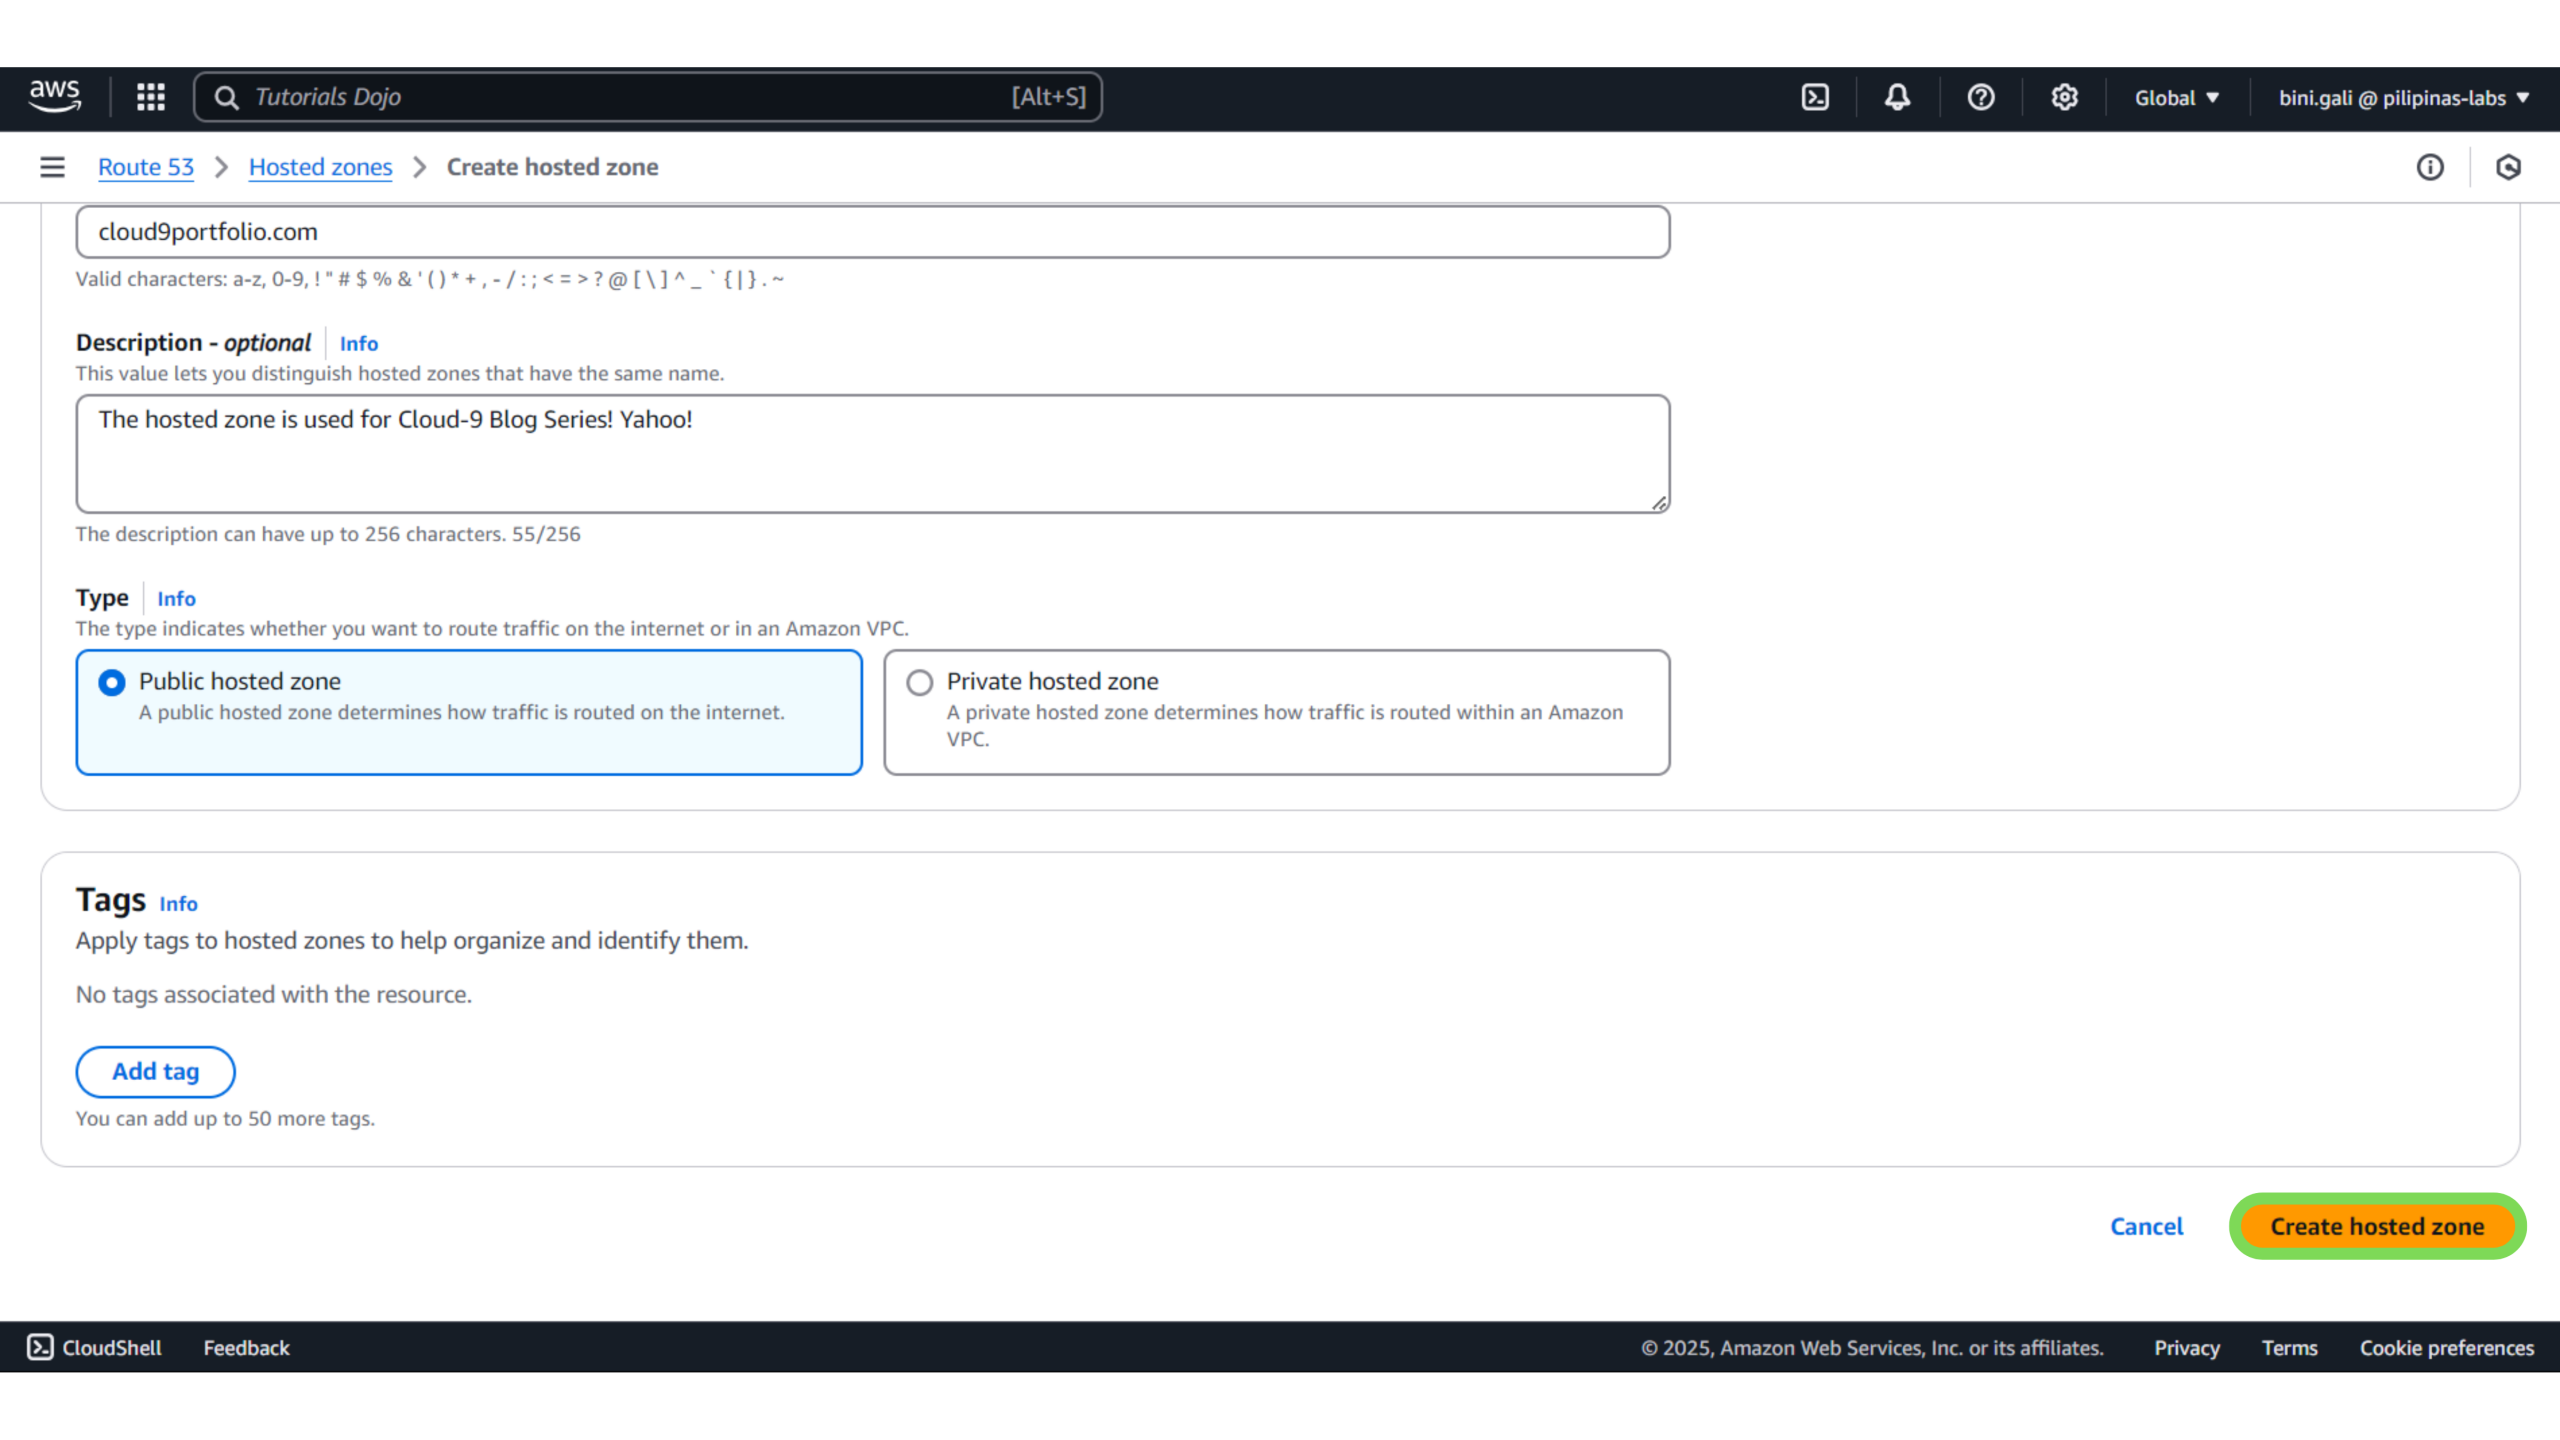
- Type: Choose between a Public hosted zone (for websites on the internet) or a Private hosted zone (for internal network traffic in Amazon’s cloud).
- Tags: You can add tags to organize and identify your hosted zones (useful if you have multiple zones).
When creating a hosted zone for your website, you’ll typically select a public-hosted zone to make your site accessible on the internet. Once you’ve filled in these details, click Create Hosted Zone to finalize the setup and begin managing your domain’s DNS records.
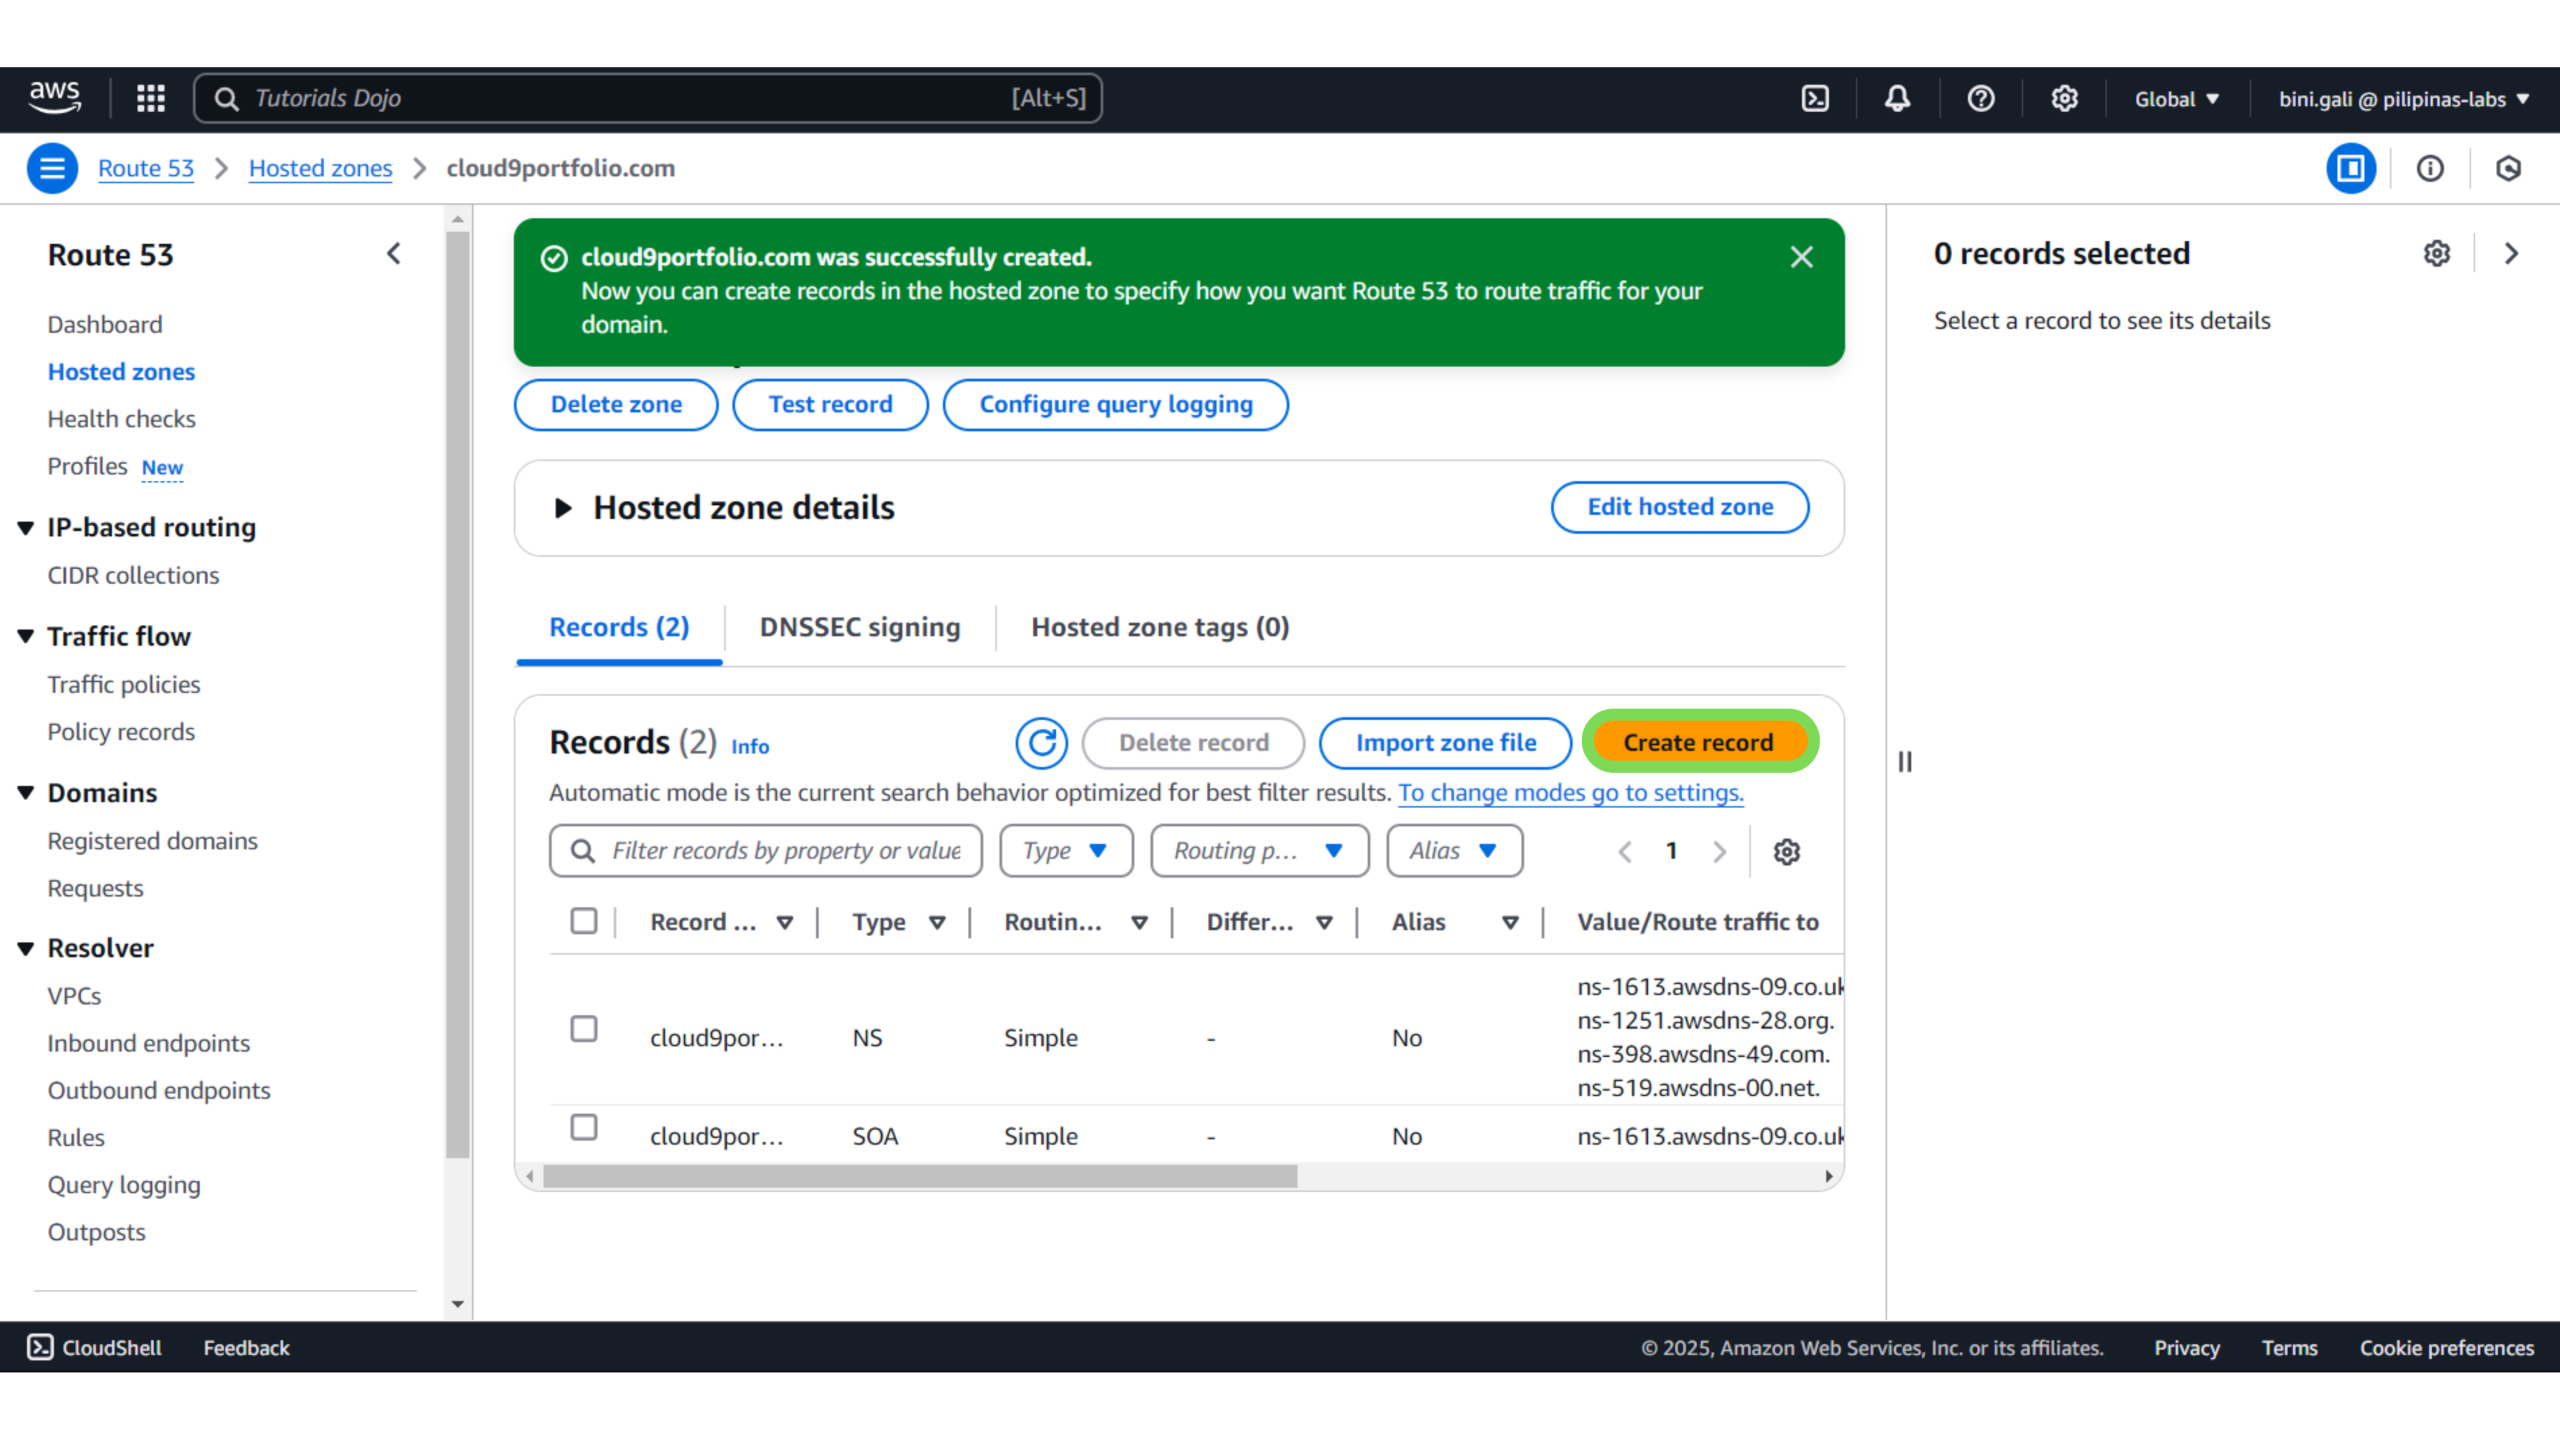
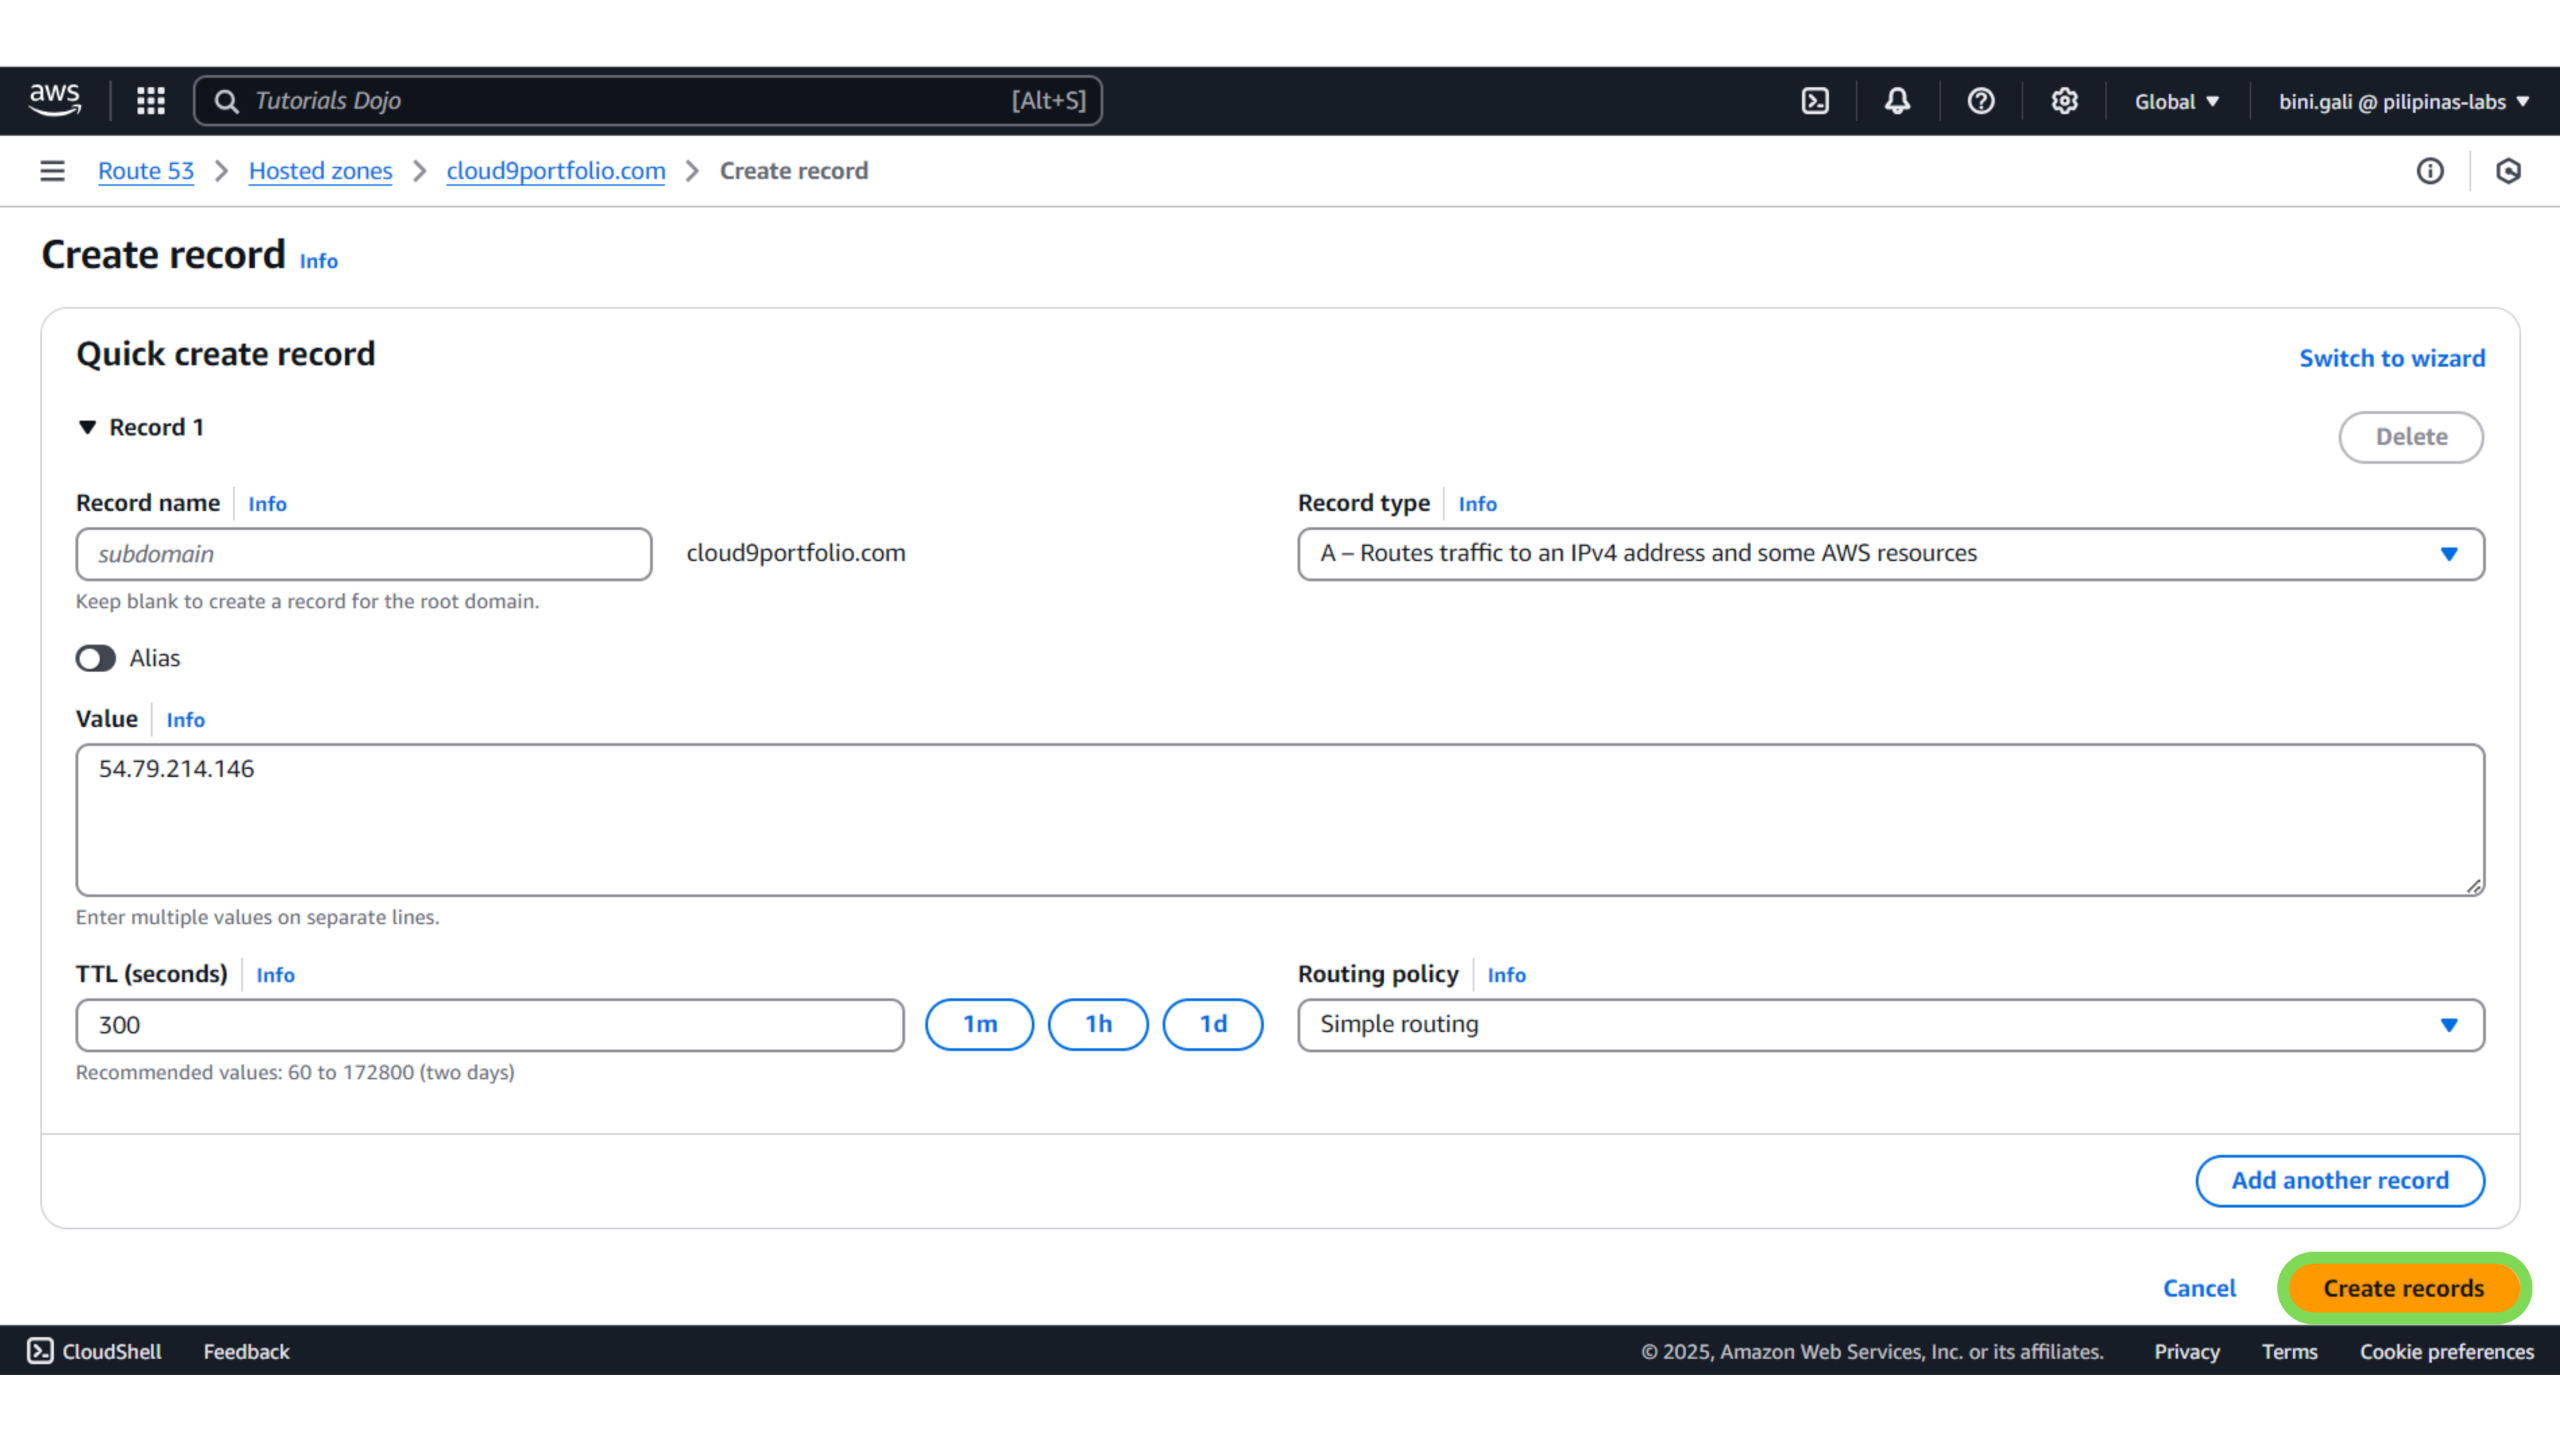
4. Create an A Record in Your Hosted Zone – Click “Create Record”
5. Record Name – Leave the “Name” field blank if you’re pointing to the main domain (e.g., example.com). If you’re pointing to a subdomain, like www.example.com, enter the subdomain name in the “Name” field.
For our website, we’ll be adding two records: one for “www” and one with the “Name” field left blank for the main domain. This ensures both the main domain and the subdomain are correctly pointed to your Elastic IP.
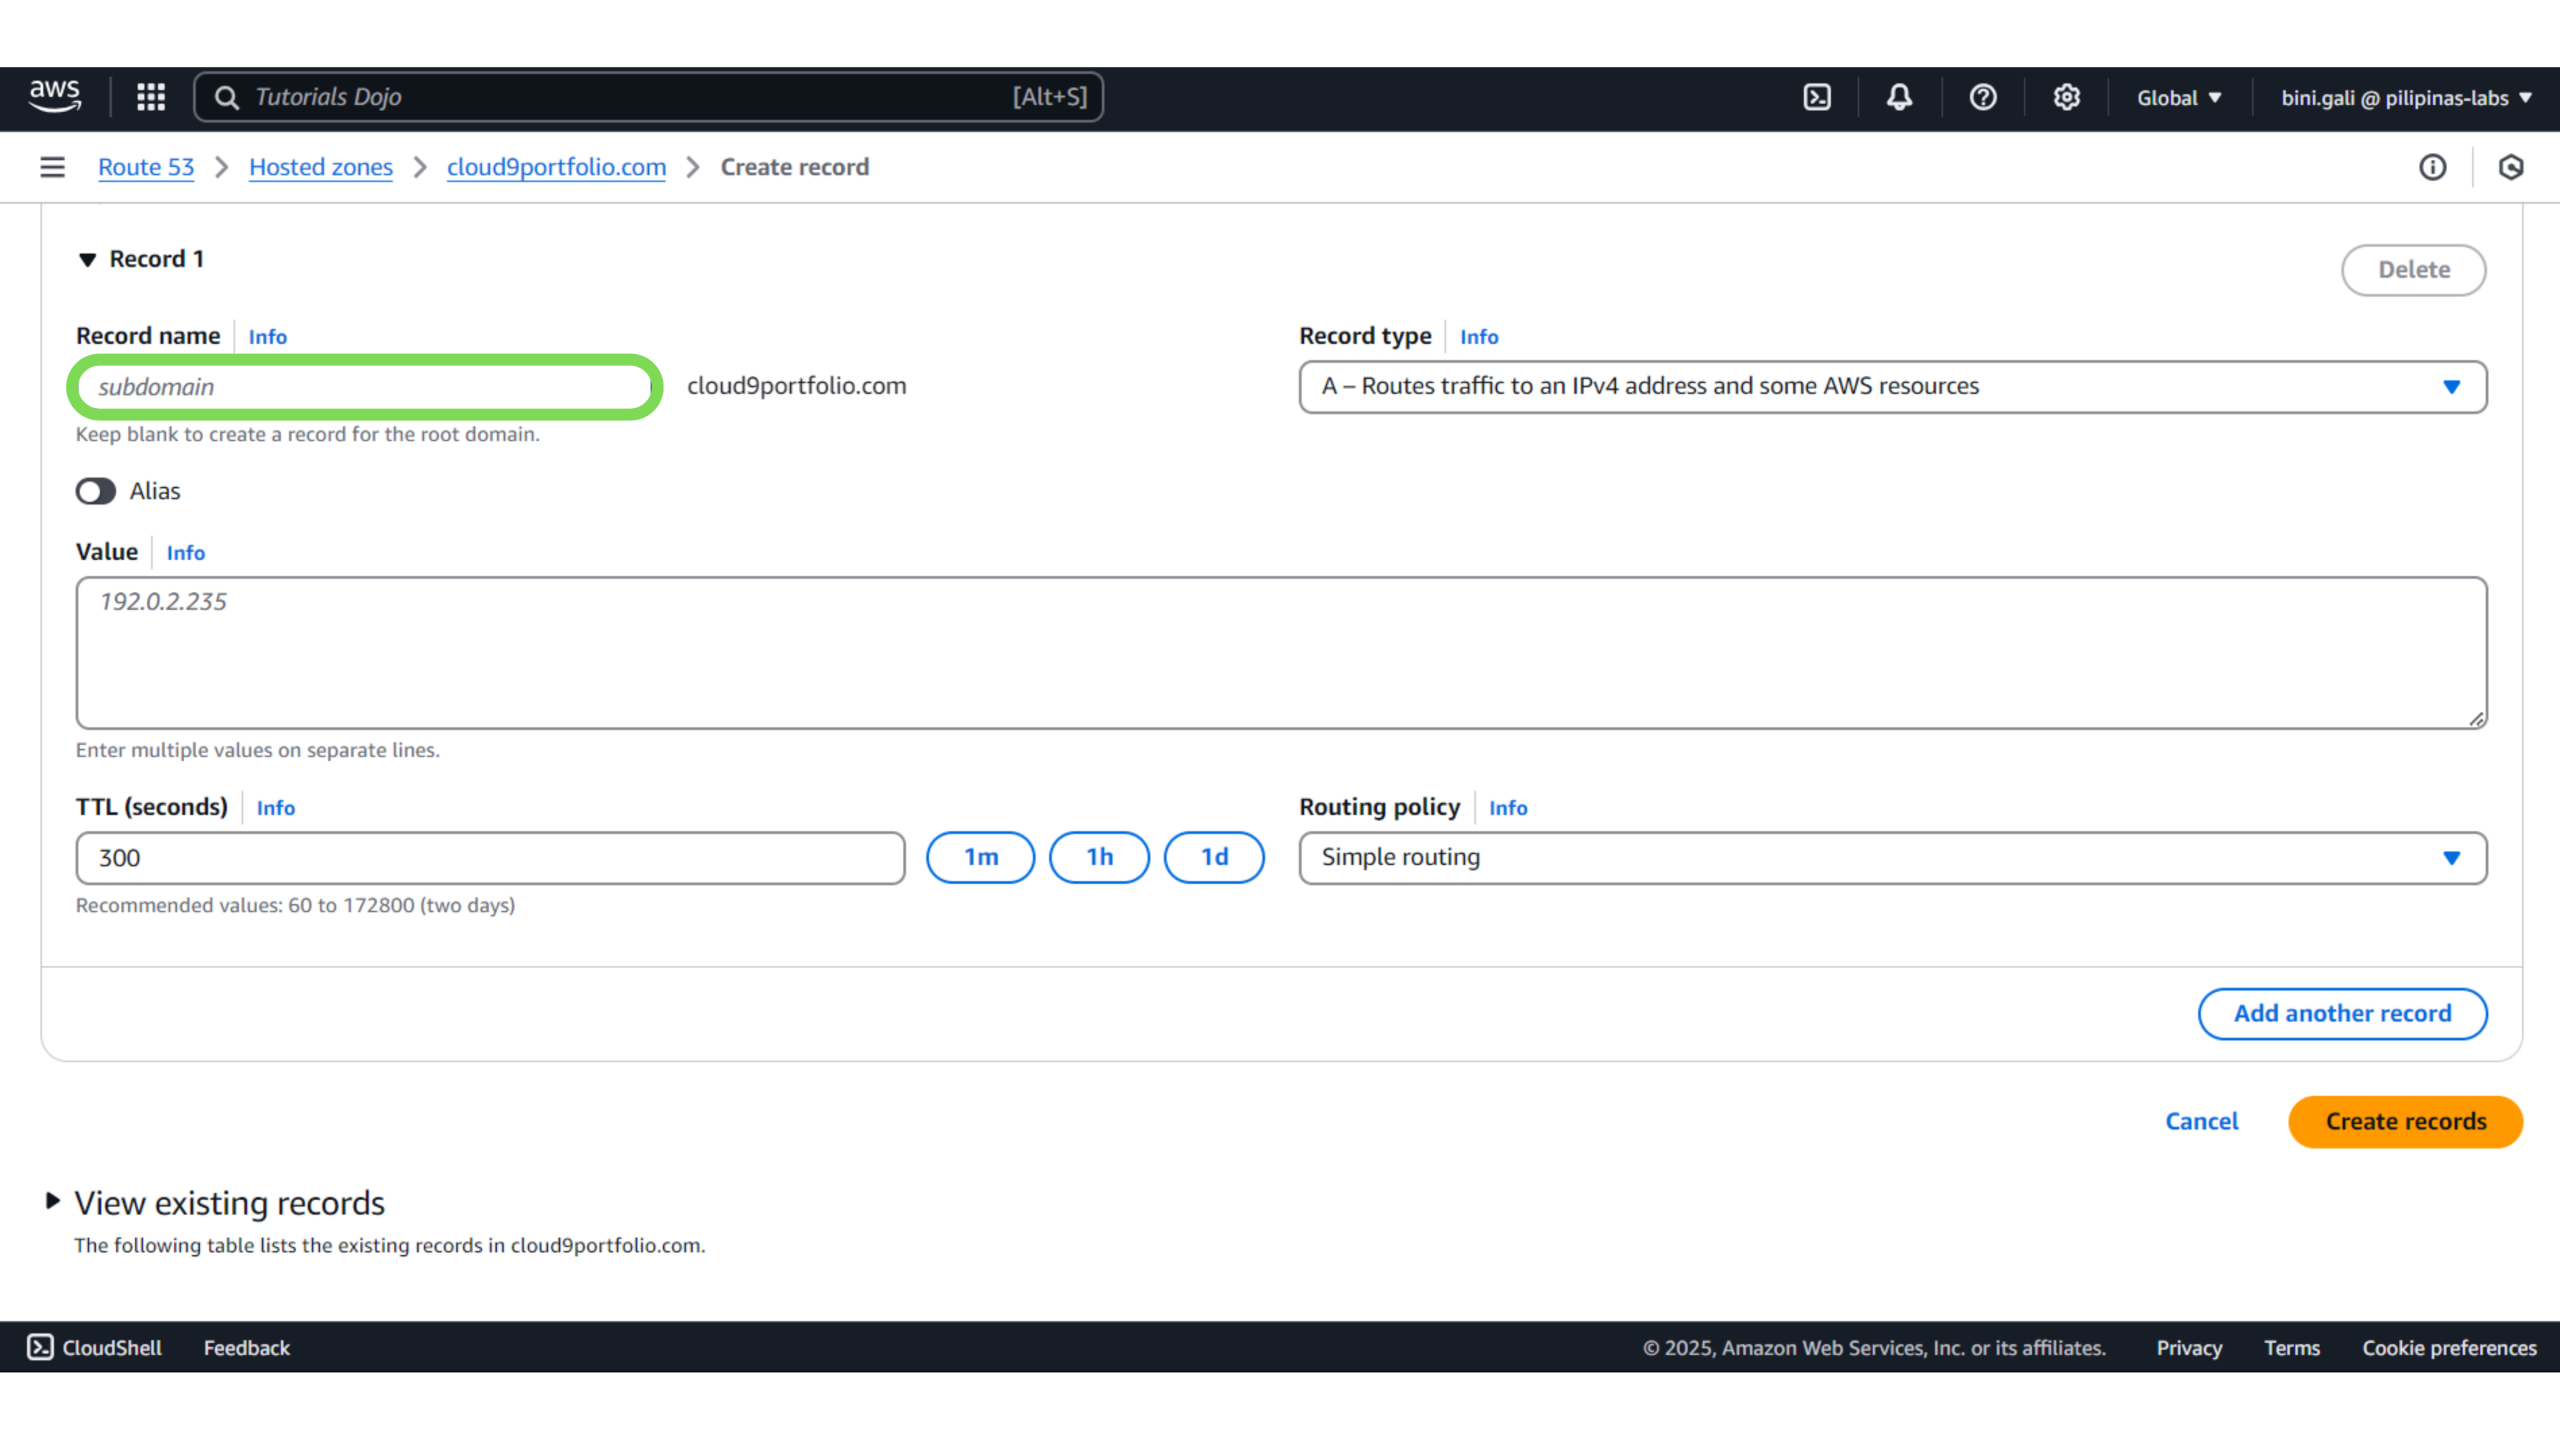
6. Record Type – Select “A” for the record type
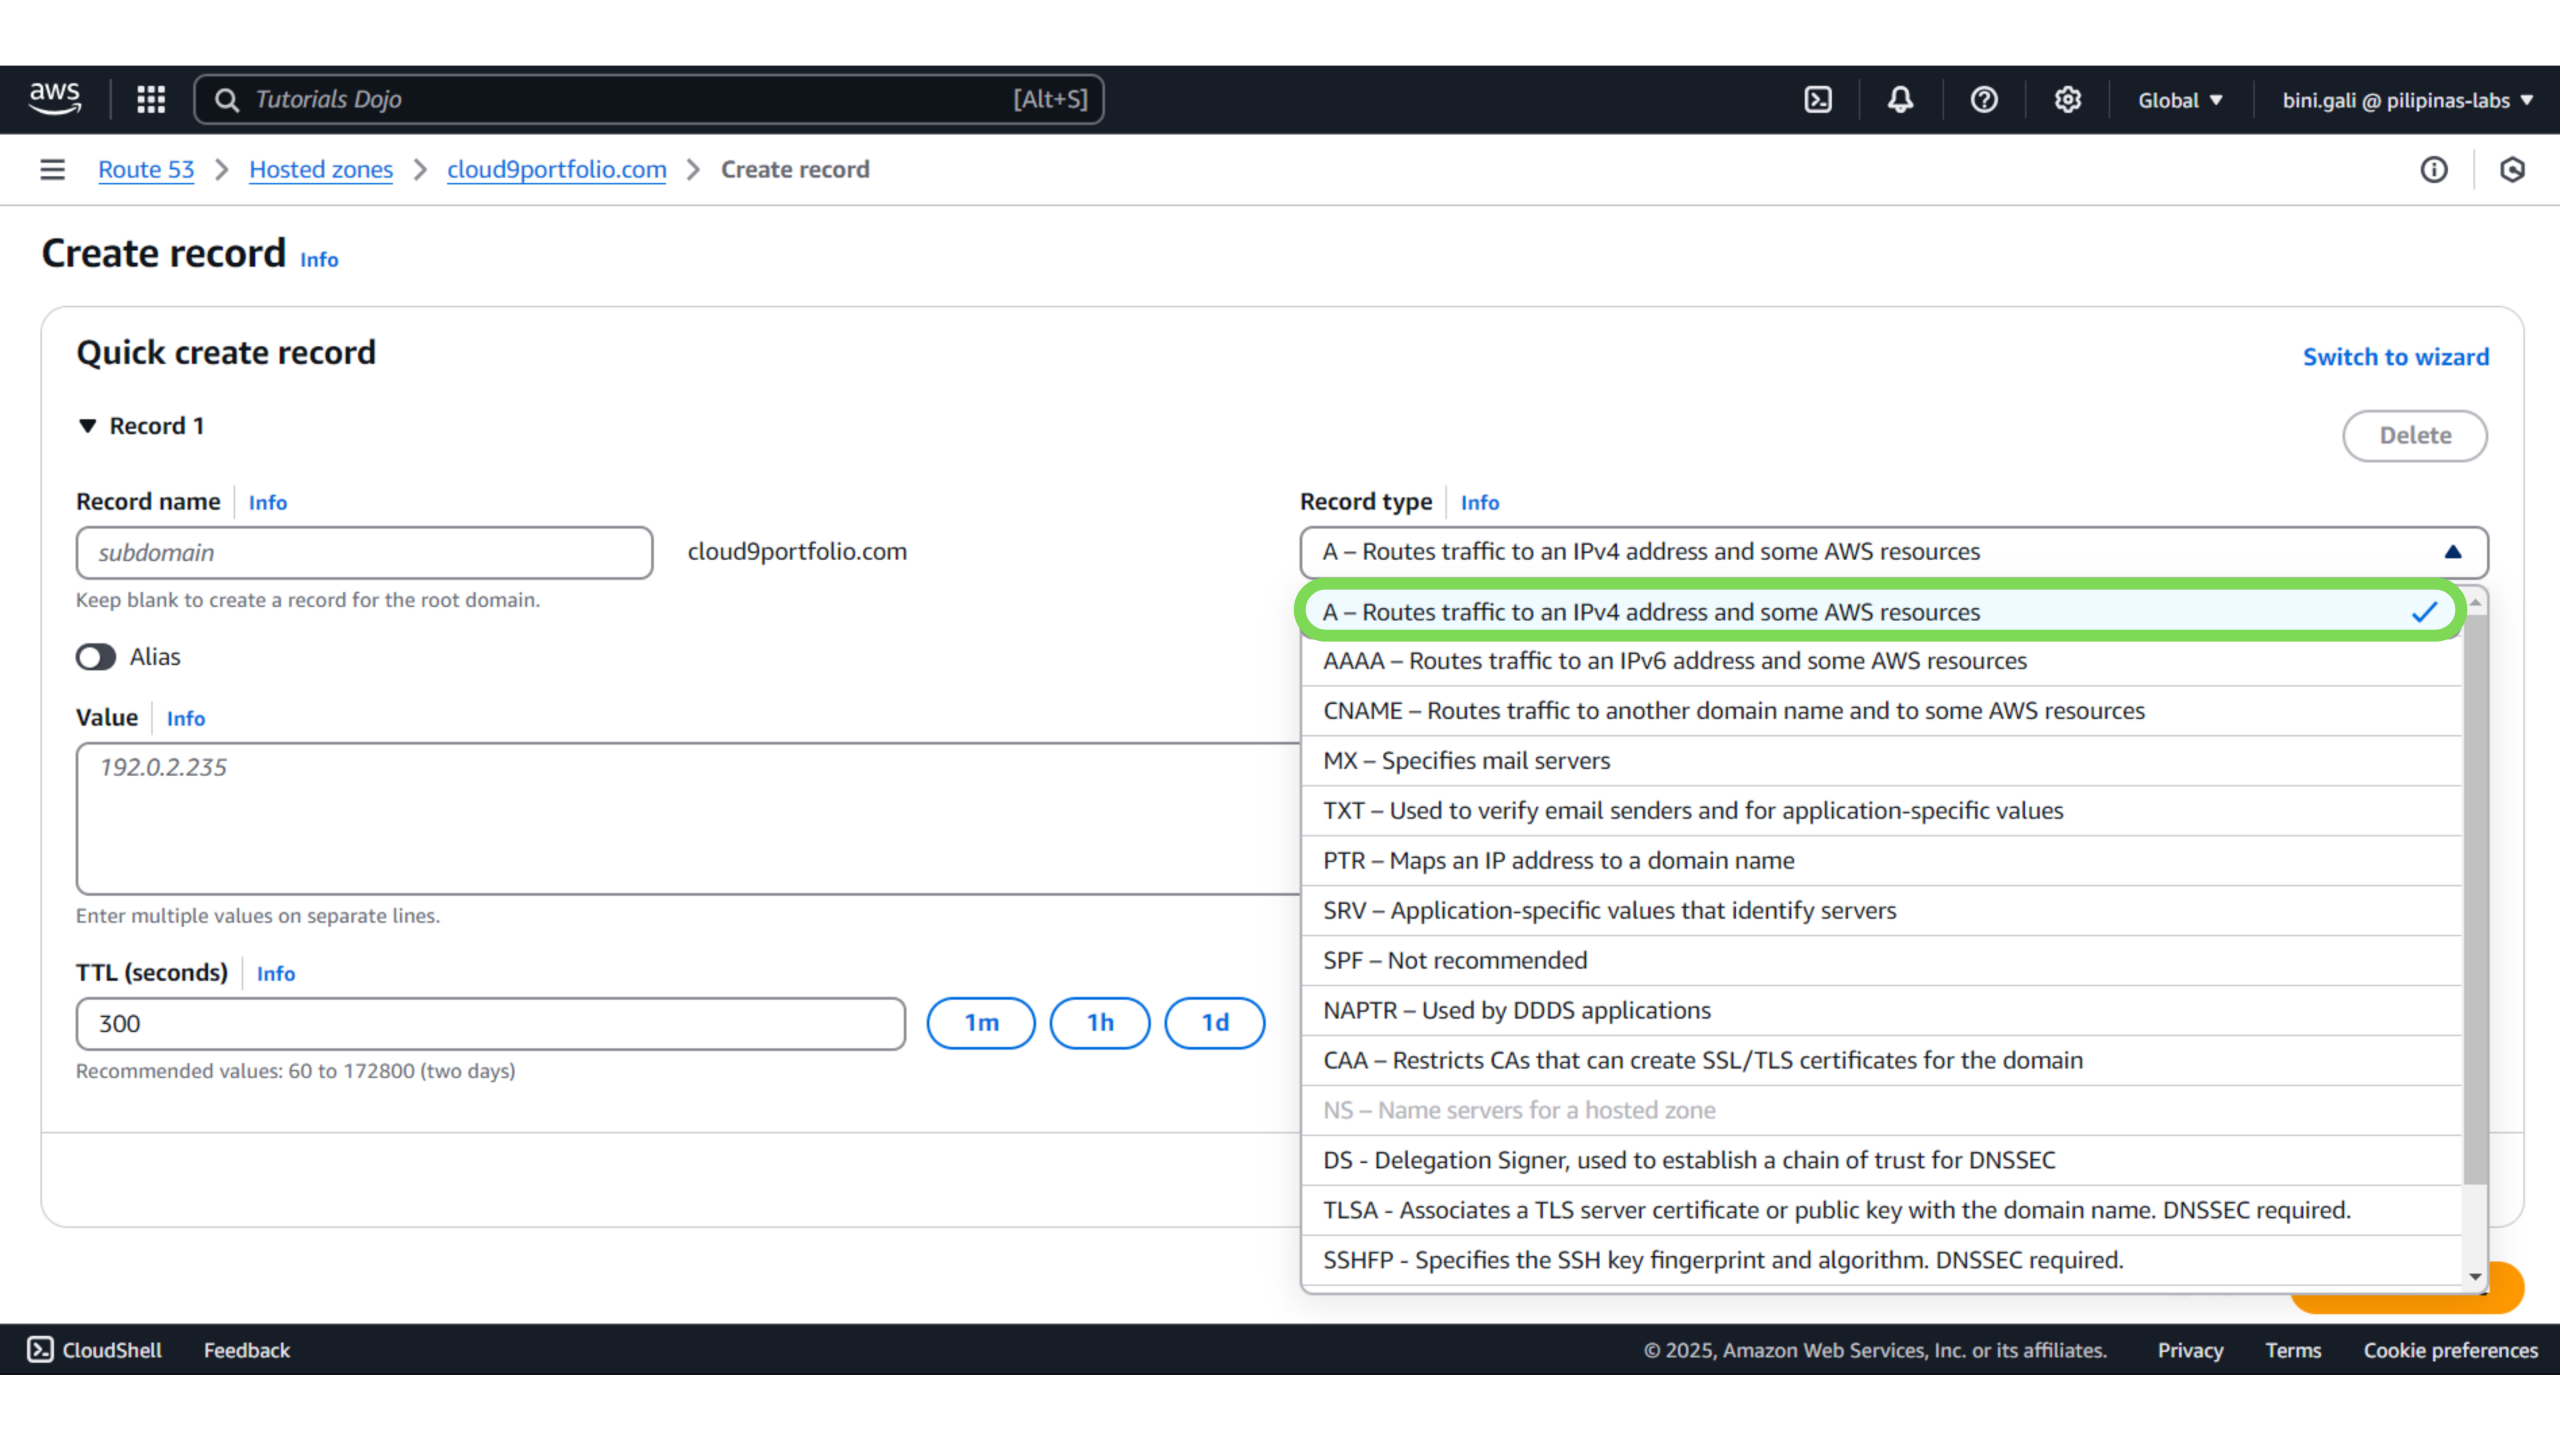
7. Value – In the “Value” field, enter your Elastic IP address.
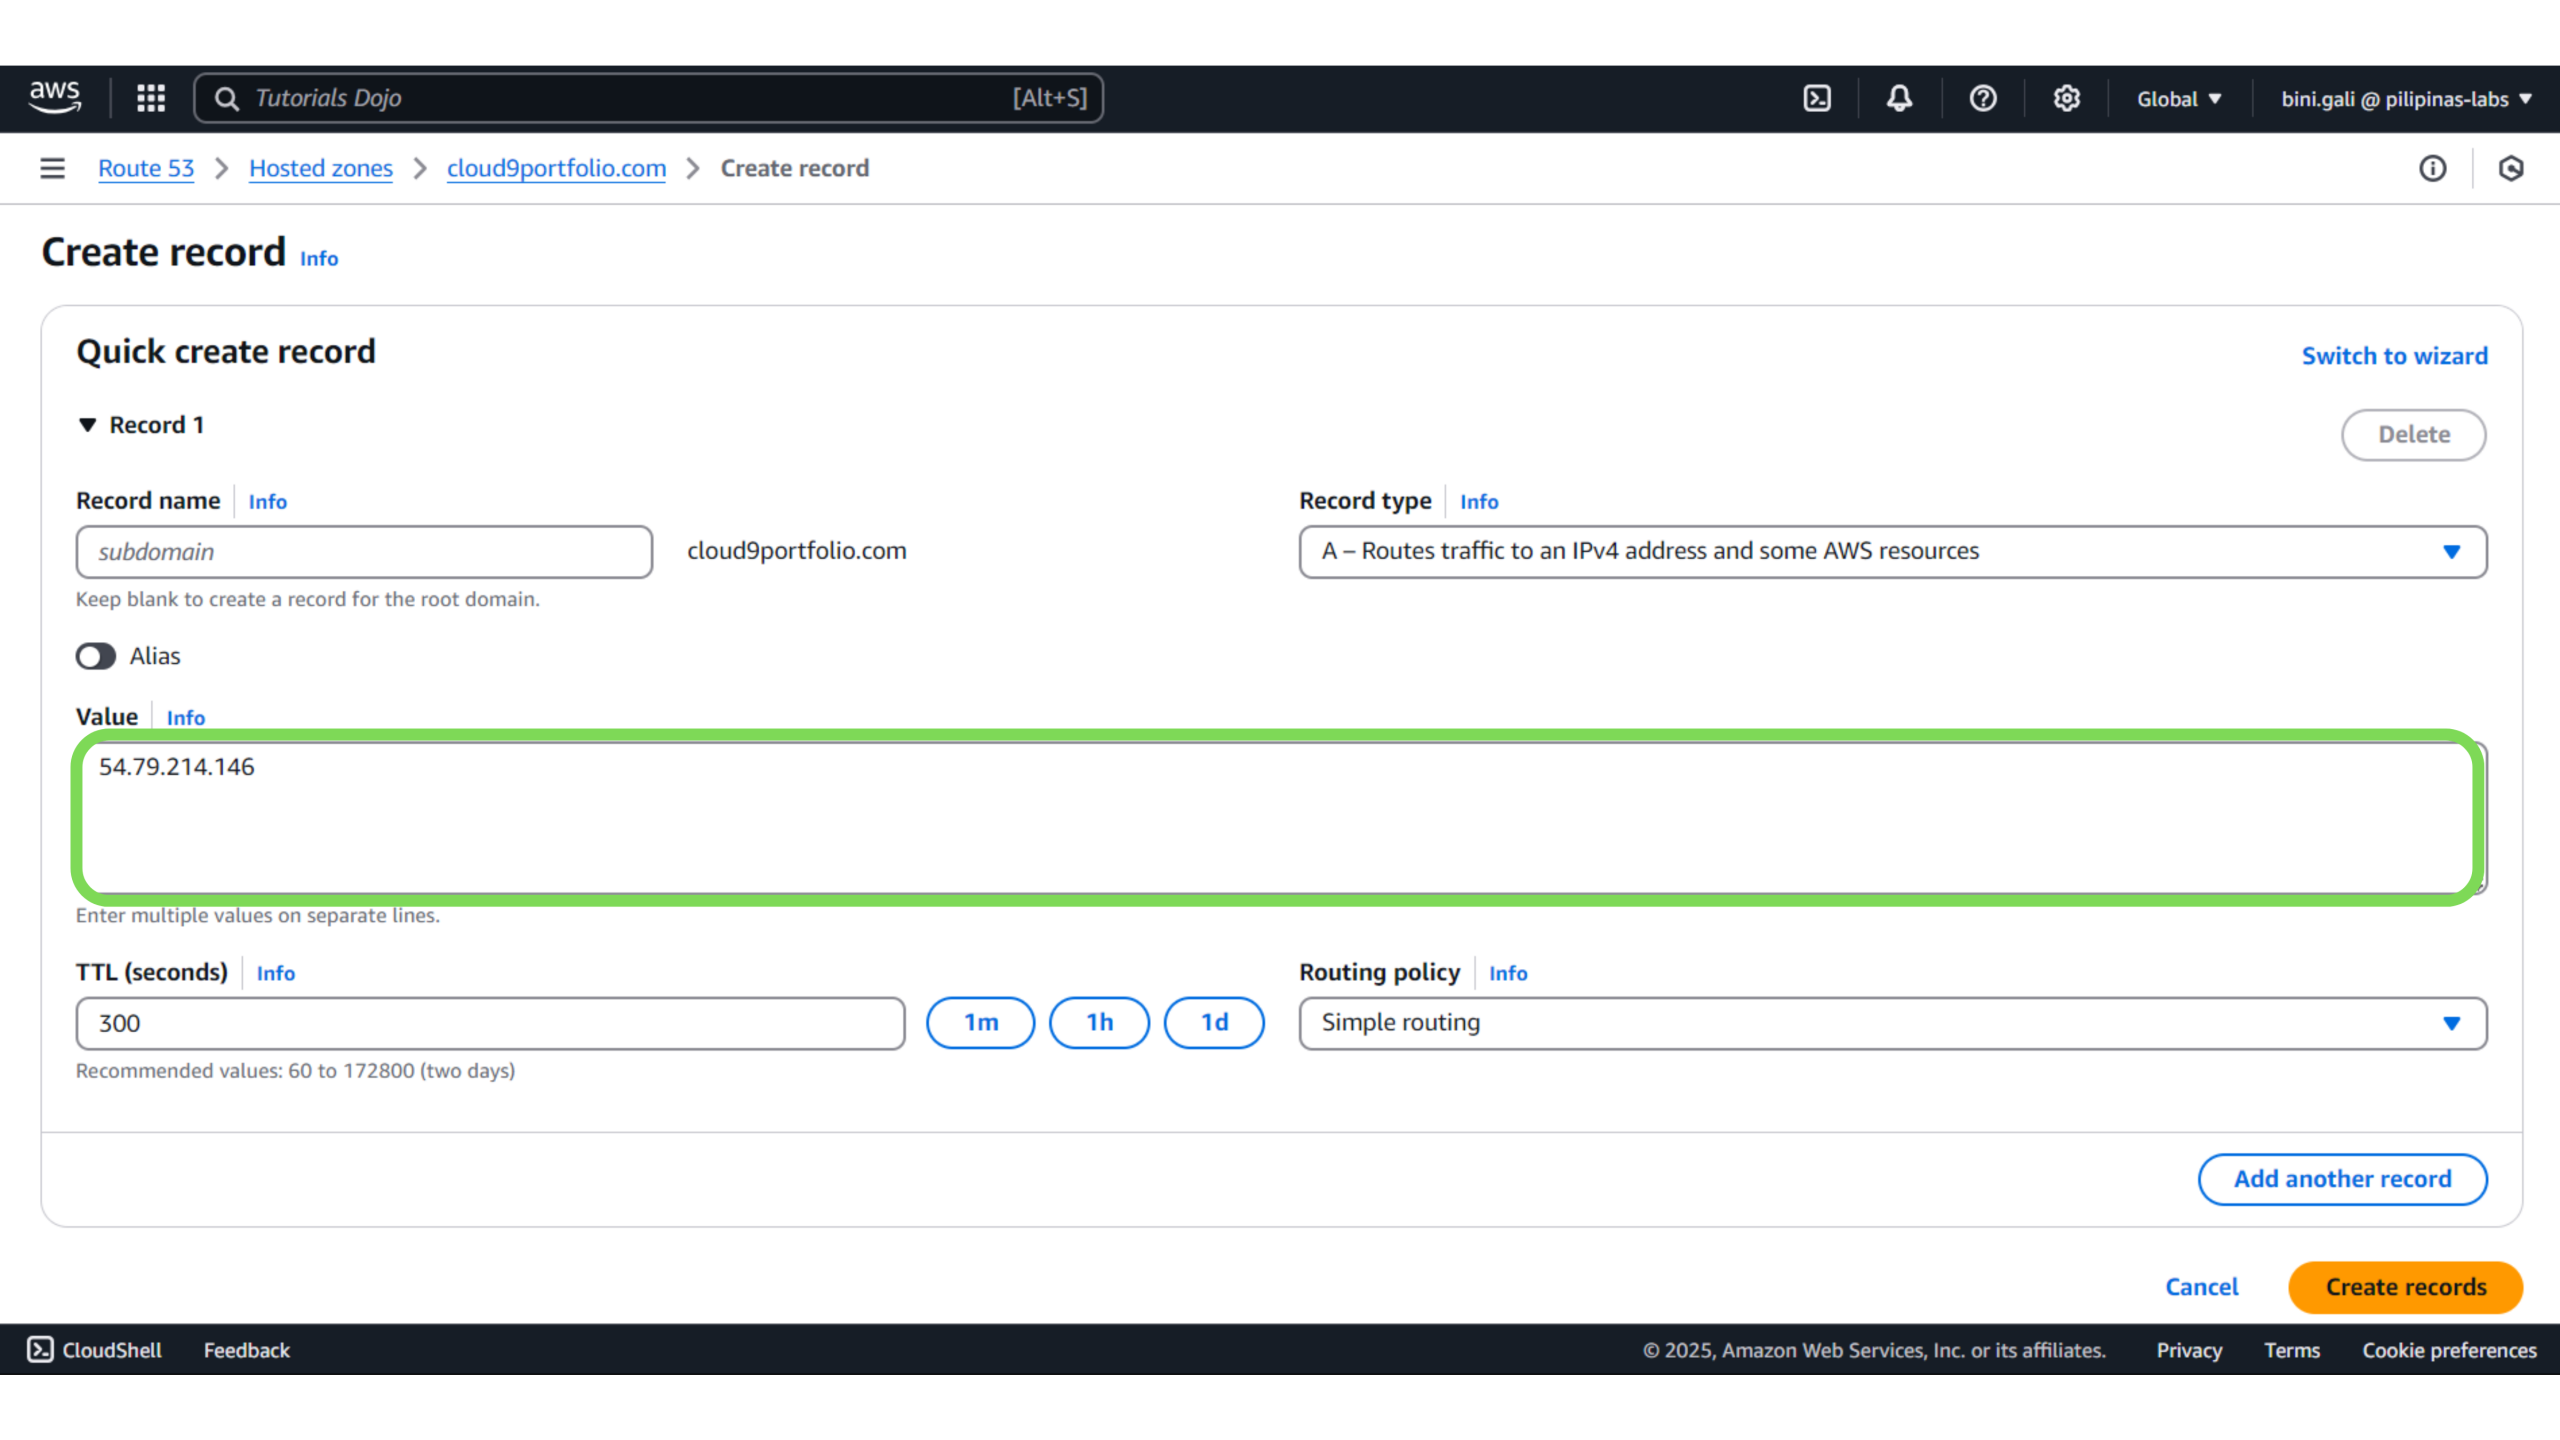
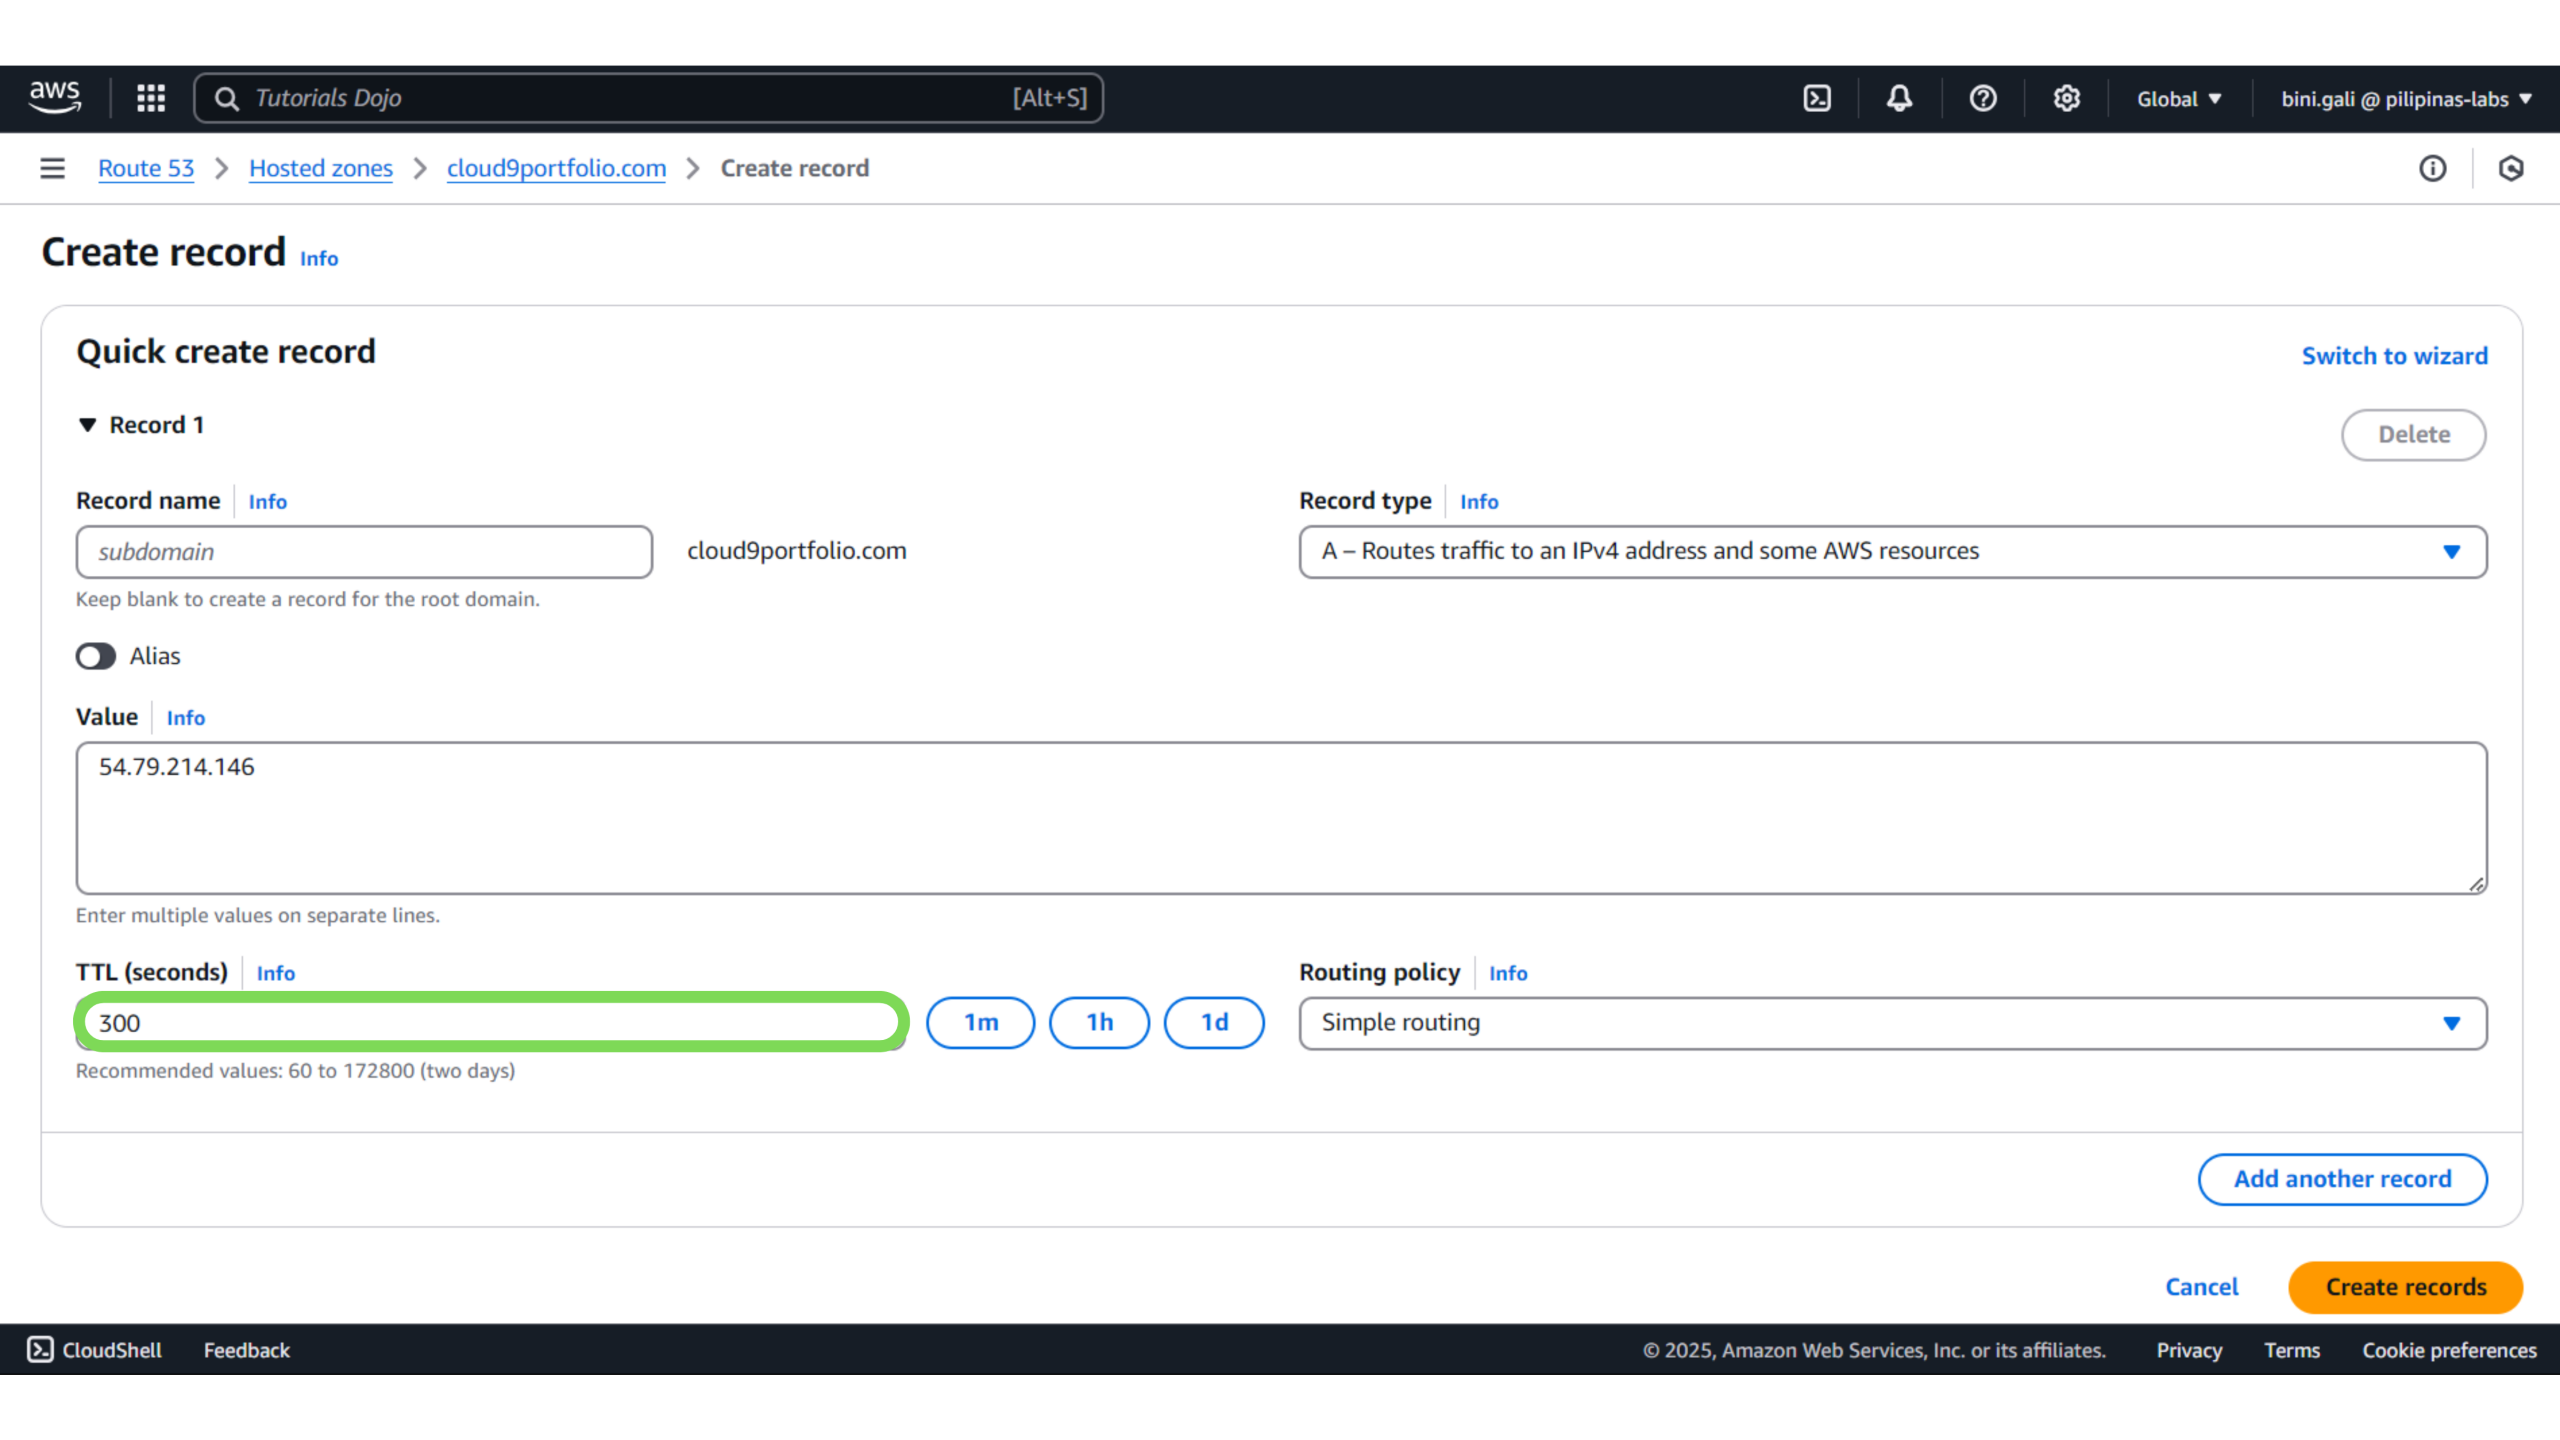
8. Time To Live – TTL sets how long DNS servers cache your record. A common value is 300 seconds, meaning changes take up to 5 minutes to update.
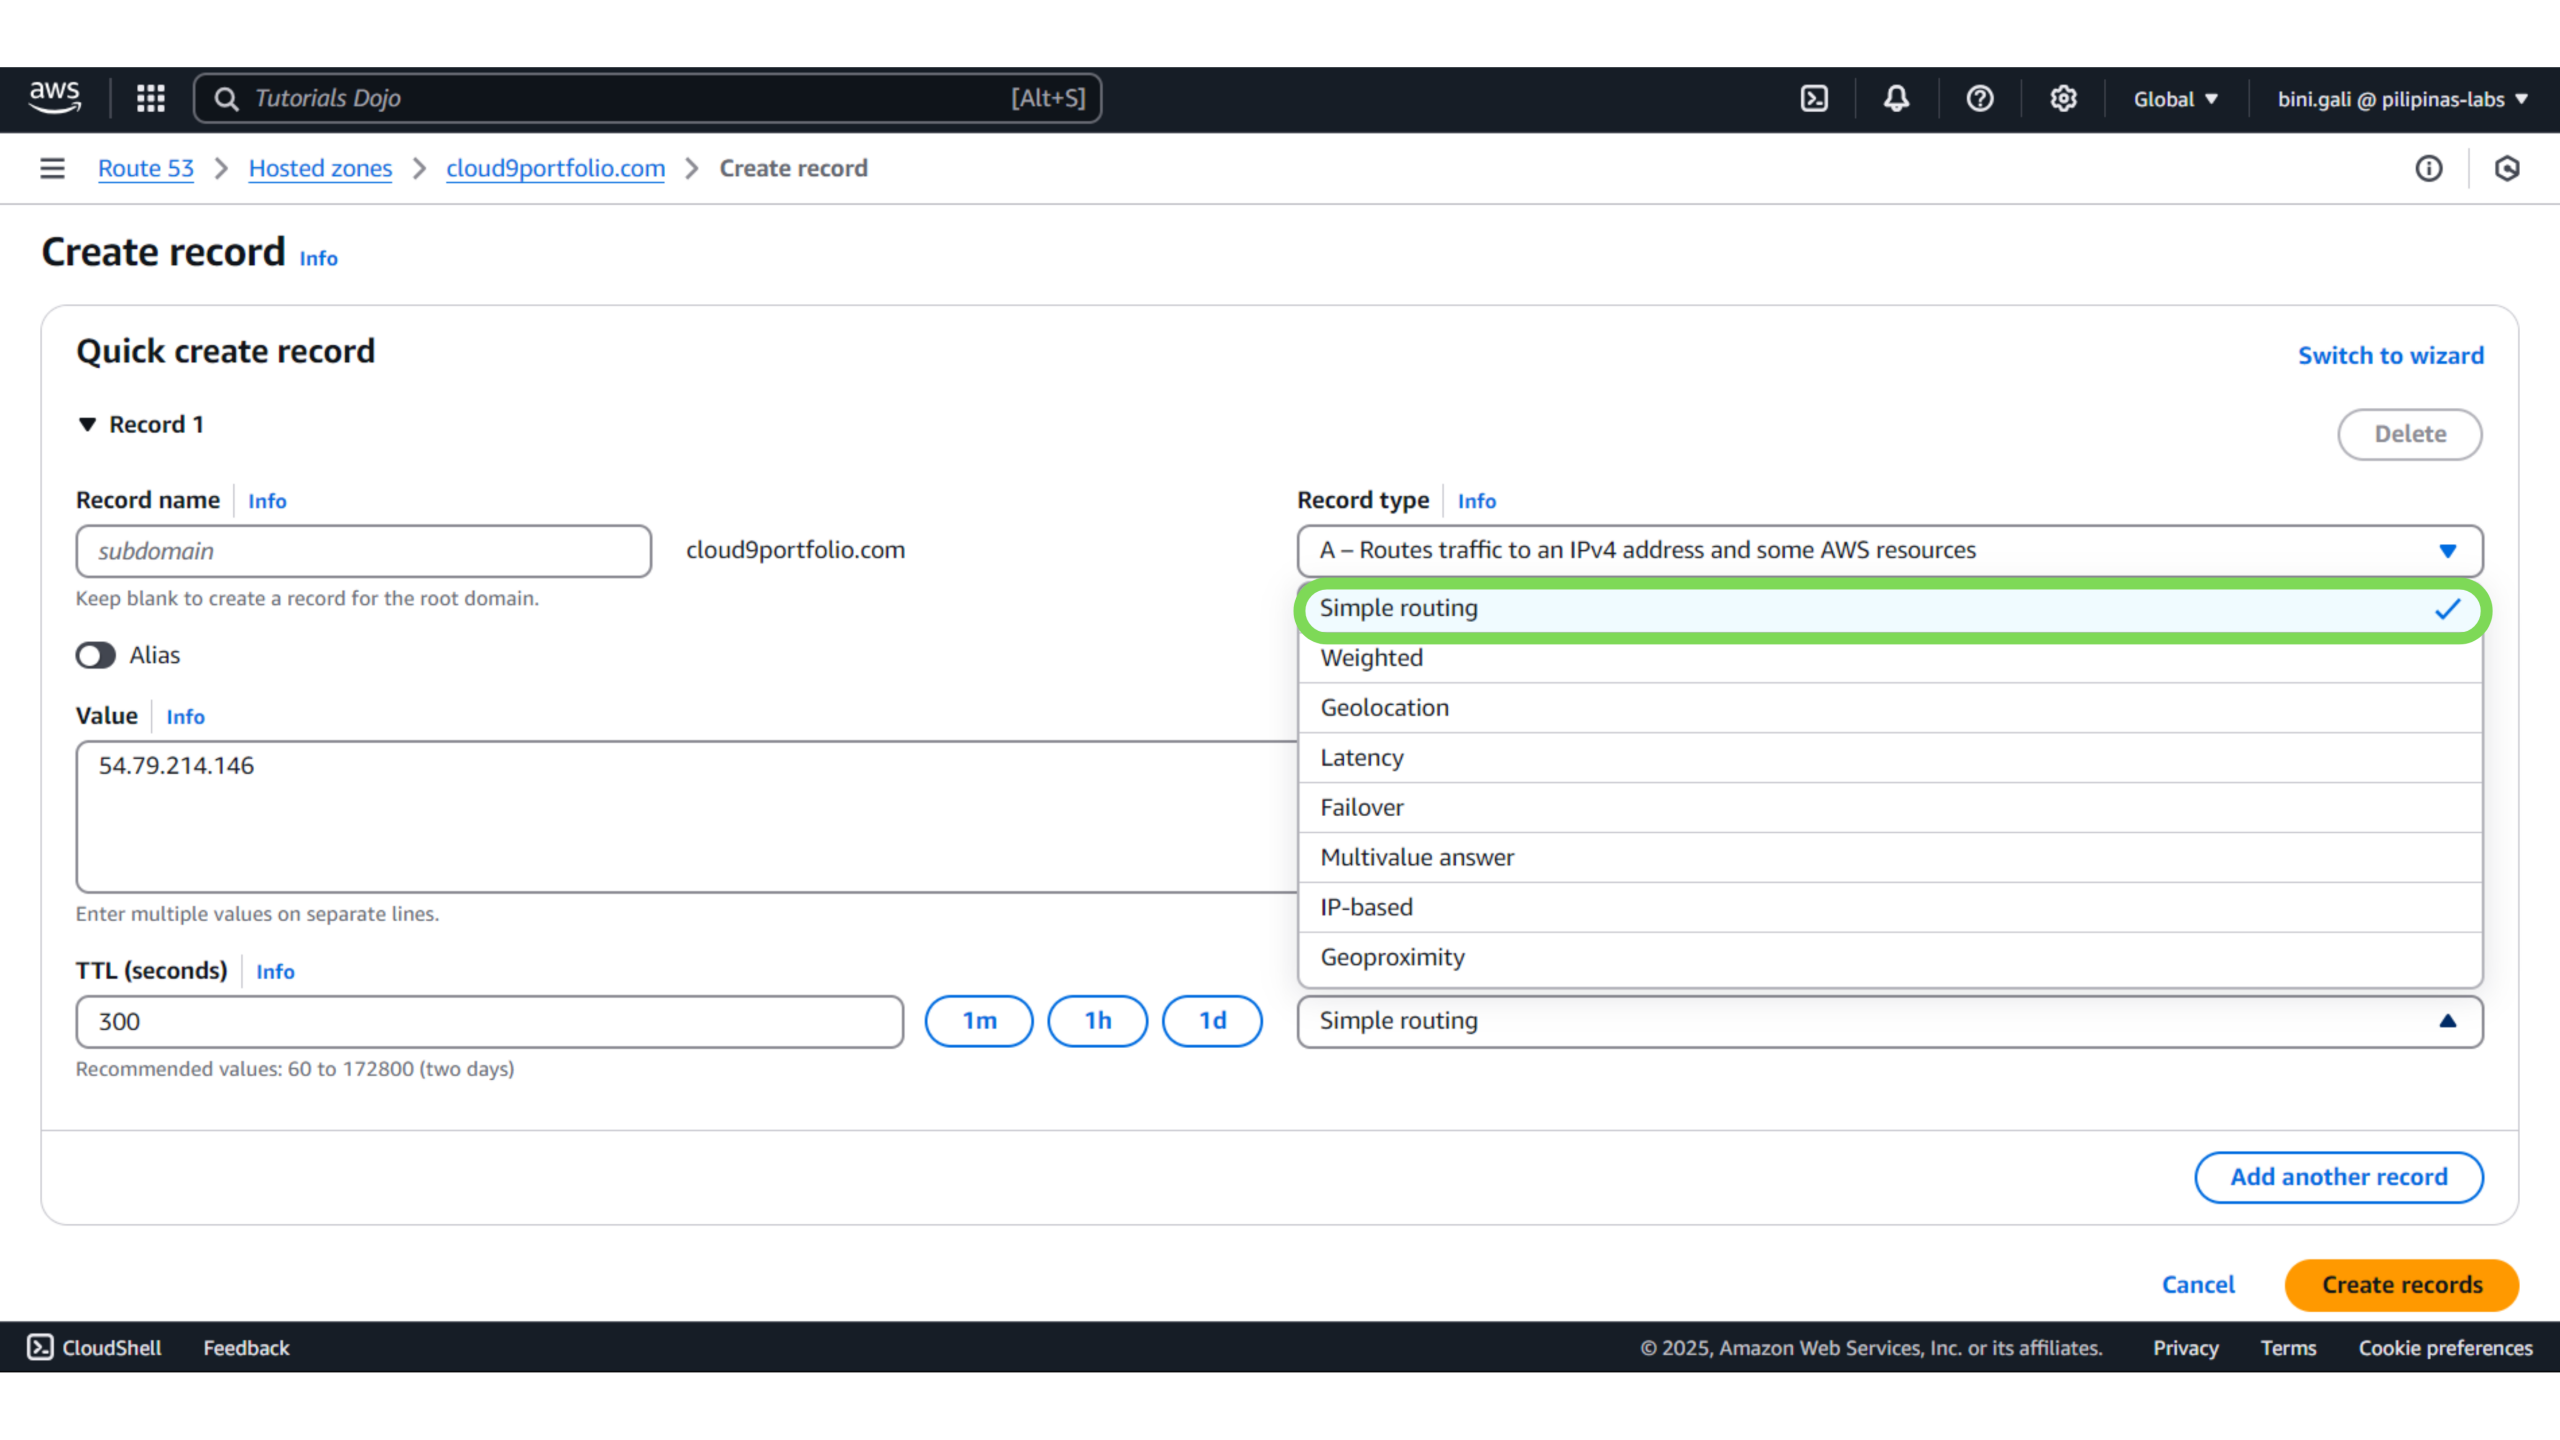
9. Routing Policy – Select “Simple routing”, This is the default option and is used when you want to route all traffic to a single resource, such as your Elastic IP. It’s straightforward and ideal for most basic use cases where you don’t need complex traffic management.
10. Finalize – Once you’ve completed the setup, click “Create records” to save your changes. We’ll repeat the process for the second record (for “www”).
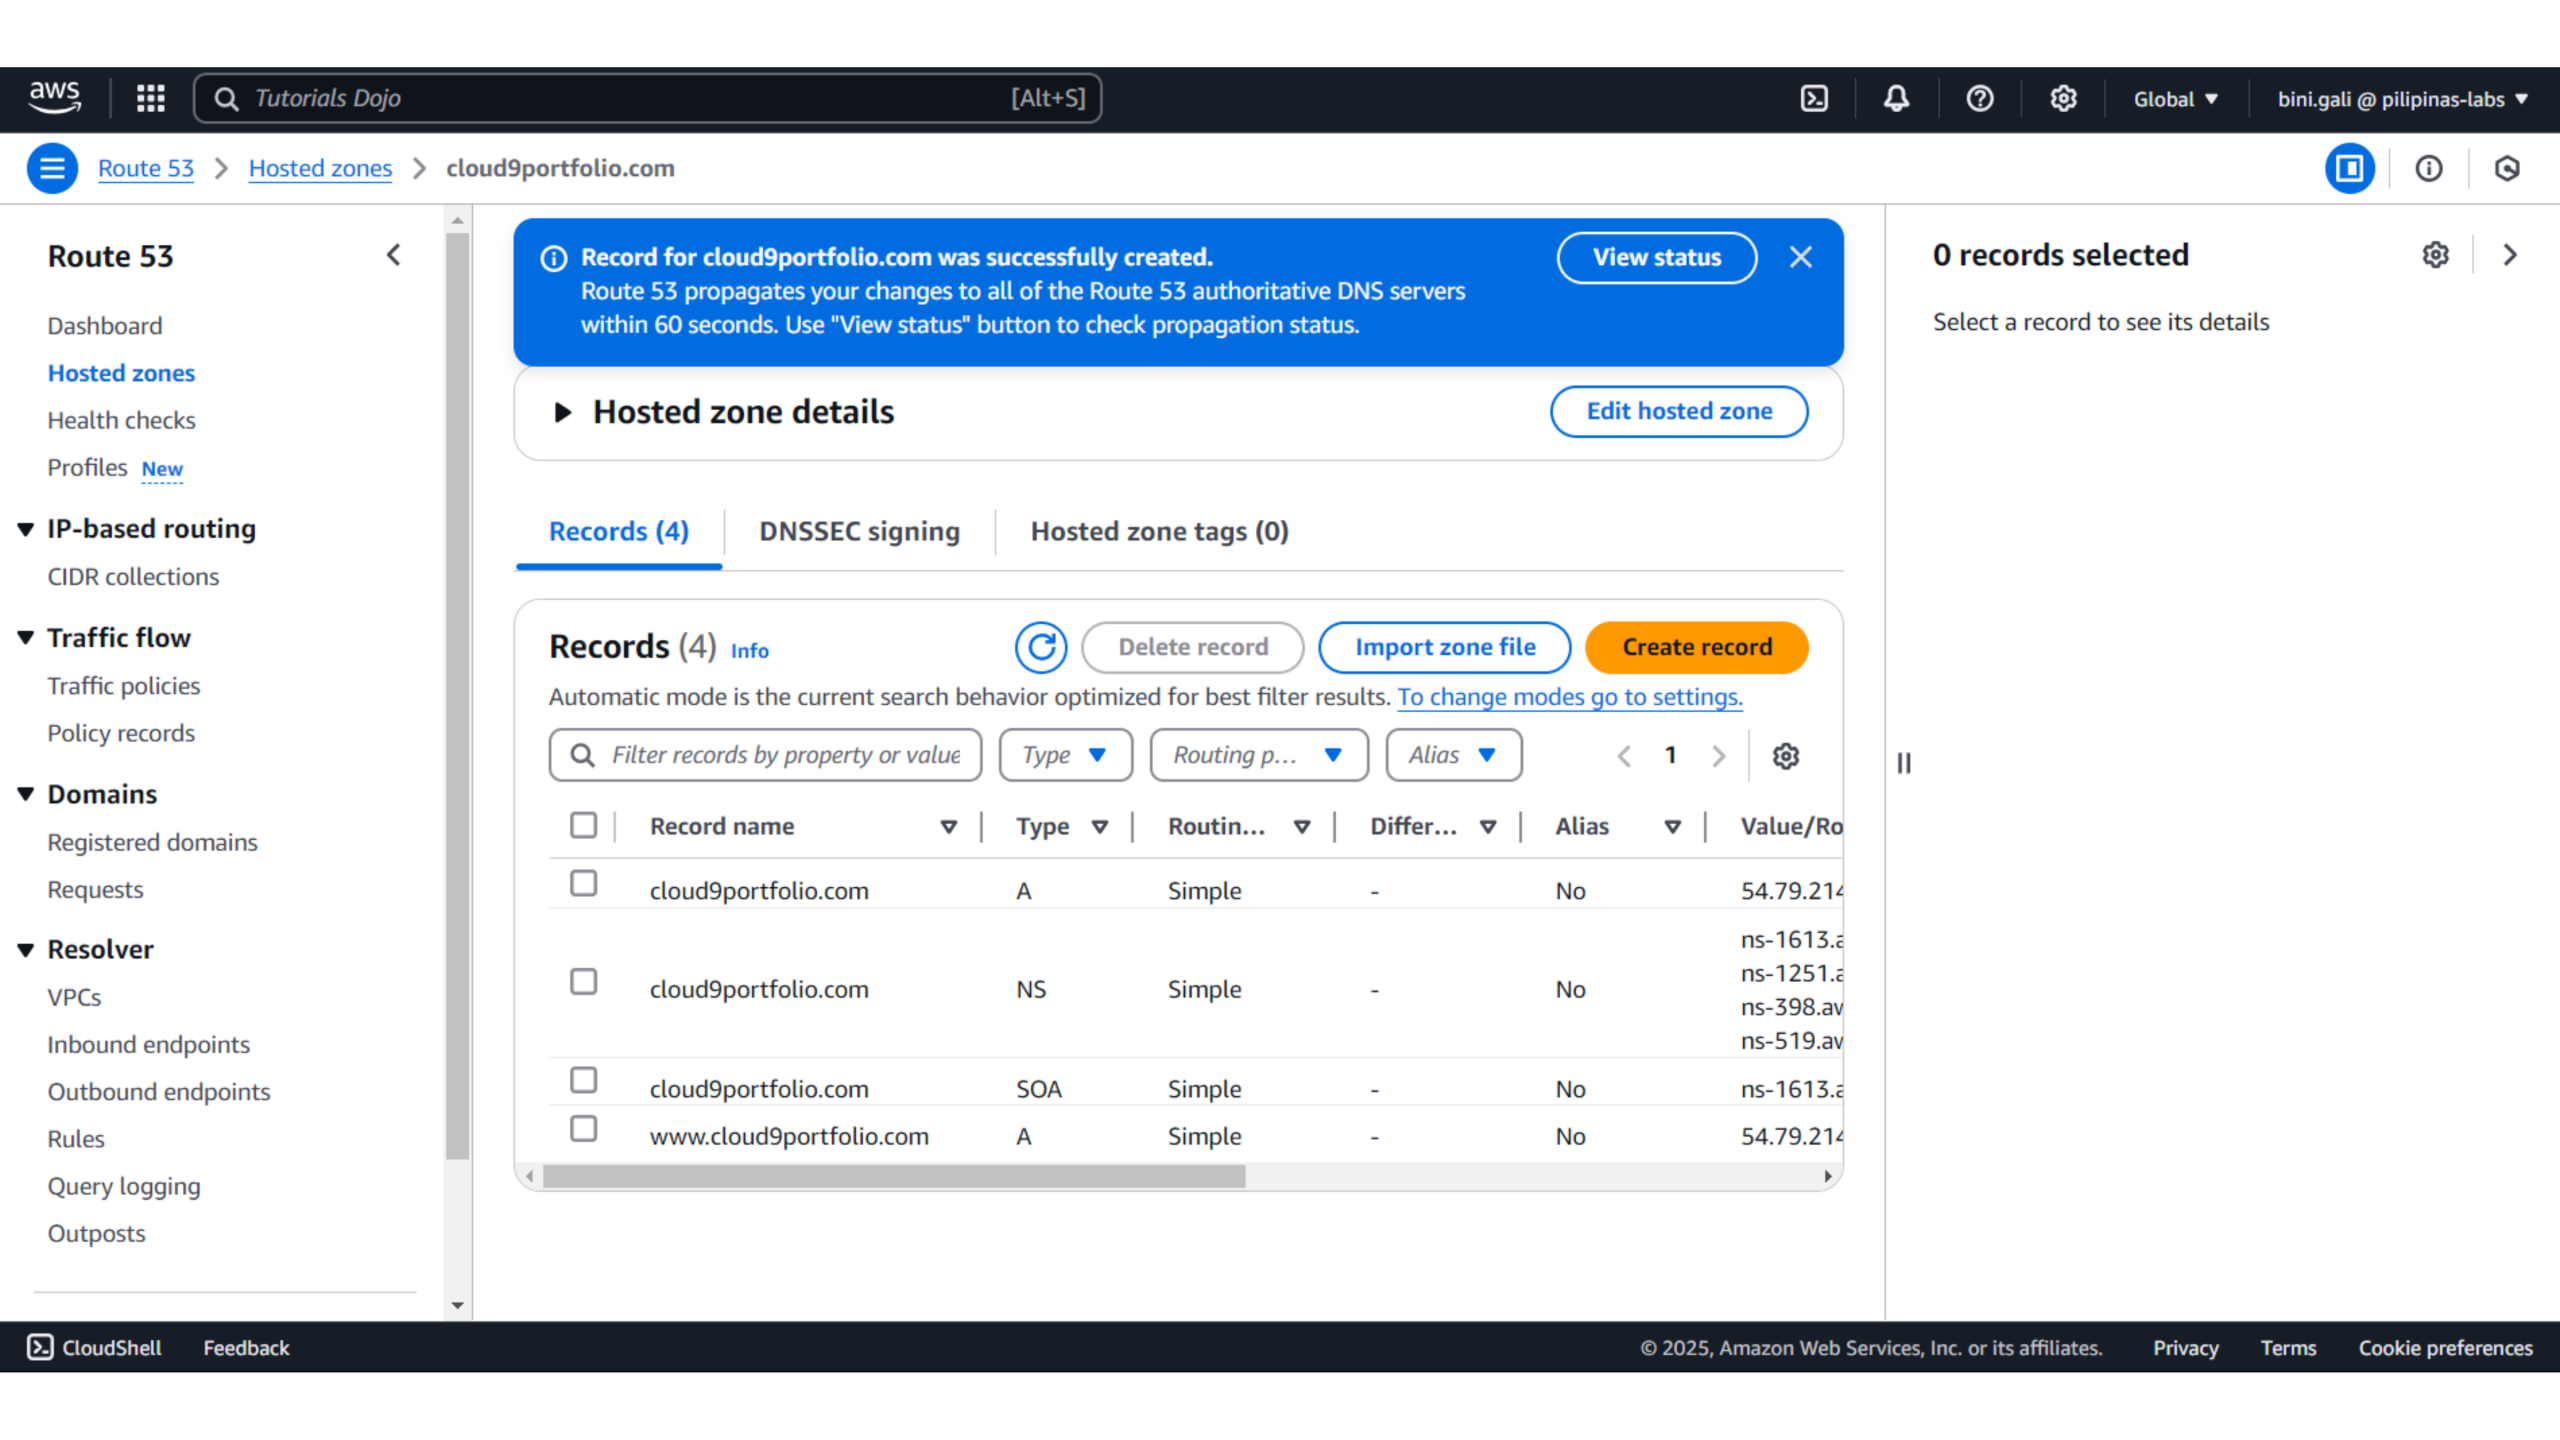
Now we have successfully created the necessary DNS records in Route 53! The “A” records for both your main domain and subdomain (www) are pointing to your Elastic IP.
Important Notes:
-
Name Servers: Ensure your domain’s name servers are correctly pointing to Route 53’s name servers.
-
Delegation: Your domain must be delegated to Route 53 for the setup to work.
-
Propagation: DNS changes may take time to spread across the internet. This means it could take a few minutes or longer for the changes to take effect.
Last Step: Connect to Your EC2 Instance via SSH (Secure Shell)
Now, it’s time to log in to your server and begin setting it up — starting with SSH.
What Is SSH, and Why Do You Need It?
SSH (Secure Shell) is a way to safely connect to your remote server from your own computer.
It opens a command-line window into your EC2 instance so you can install software, run updates, and configure your site, all without needing to be physically near the server. Everything happens right from your local terminal.
If that sounds a little abstract, picture this:
Your EC2 instance is a tiny server house floating in the cloud. You don’t go there yourself.
Instead, you send your trusted duck butler.
-
He wears a bowtie (just for fun)
-
Carries your golden keycard (your
.pemfile) -
And only takes commands from you

You say:
“Go to my cloud house, open the door with this key, and install WordPress.”
The duck flies up, shows the key, the server opens the door, and he gets to work: installing software, making updates, and setting things up exactly as you asked — all while you relax behind your keyboard.
This is essentially what SSH does: it’s your secure, invisible assistant that connects you to a remote machine, ready to do your bidding.
What You’ll Need
Before we begin, make sure you have:
-
Your Elastic IP address (e.g.,
12.34.567.890) -
Your
.pemkey file (the private key you downloaded when creating the EC2 instance) -
A terminal:
-
Mac/Linux: Use Terminal
-
Windows: Use Git Bash, Windows Terminal, or Powershell
- Note: Please be reminded that in PowerShell, a different set of commands will need to be entered. In this blog, we’ll be using Git Bash!
-
Steps to Connect to Your EC2 Instance via SSH
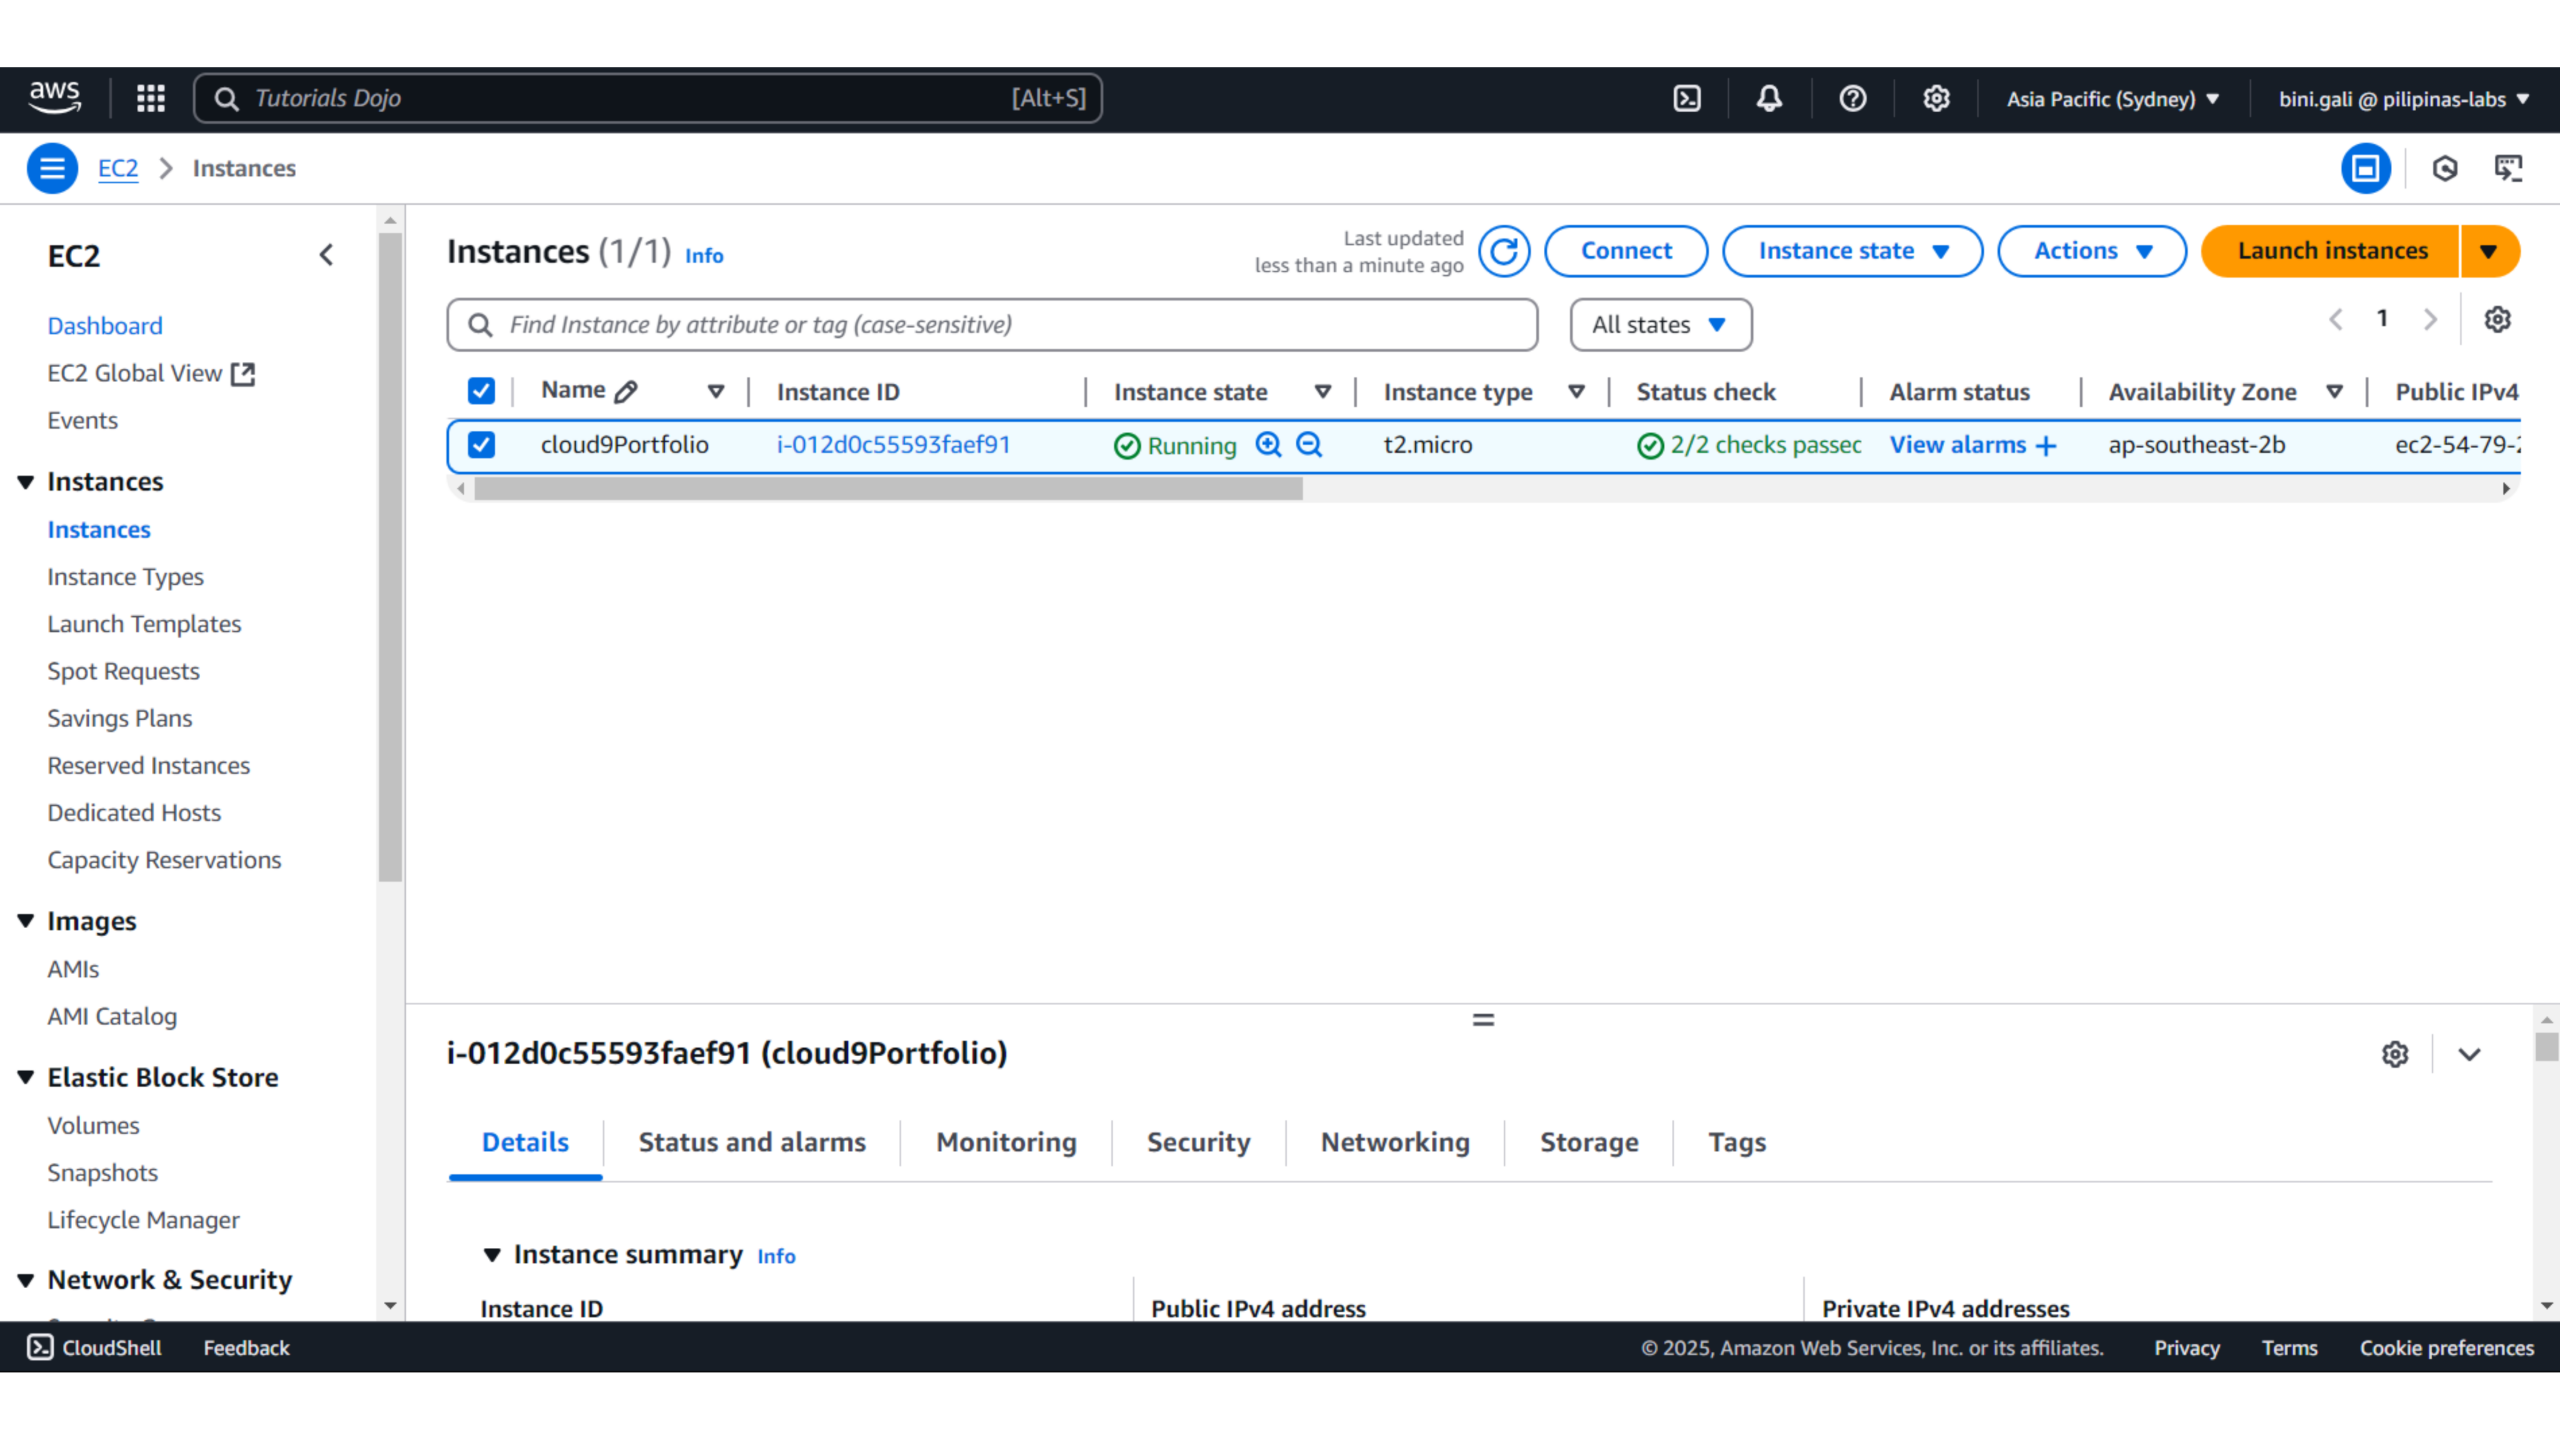
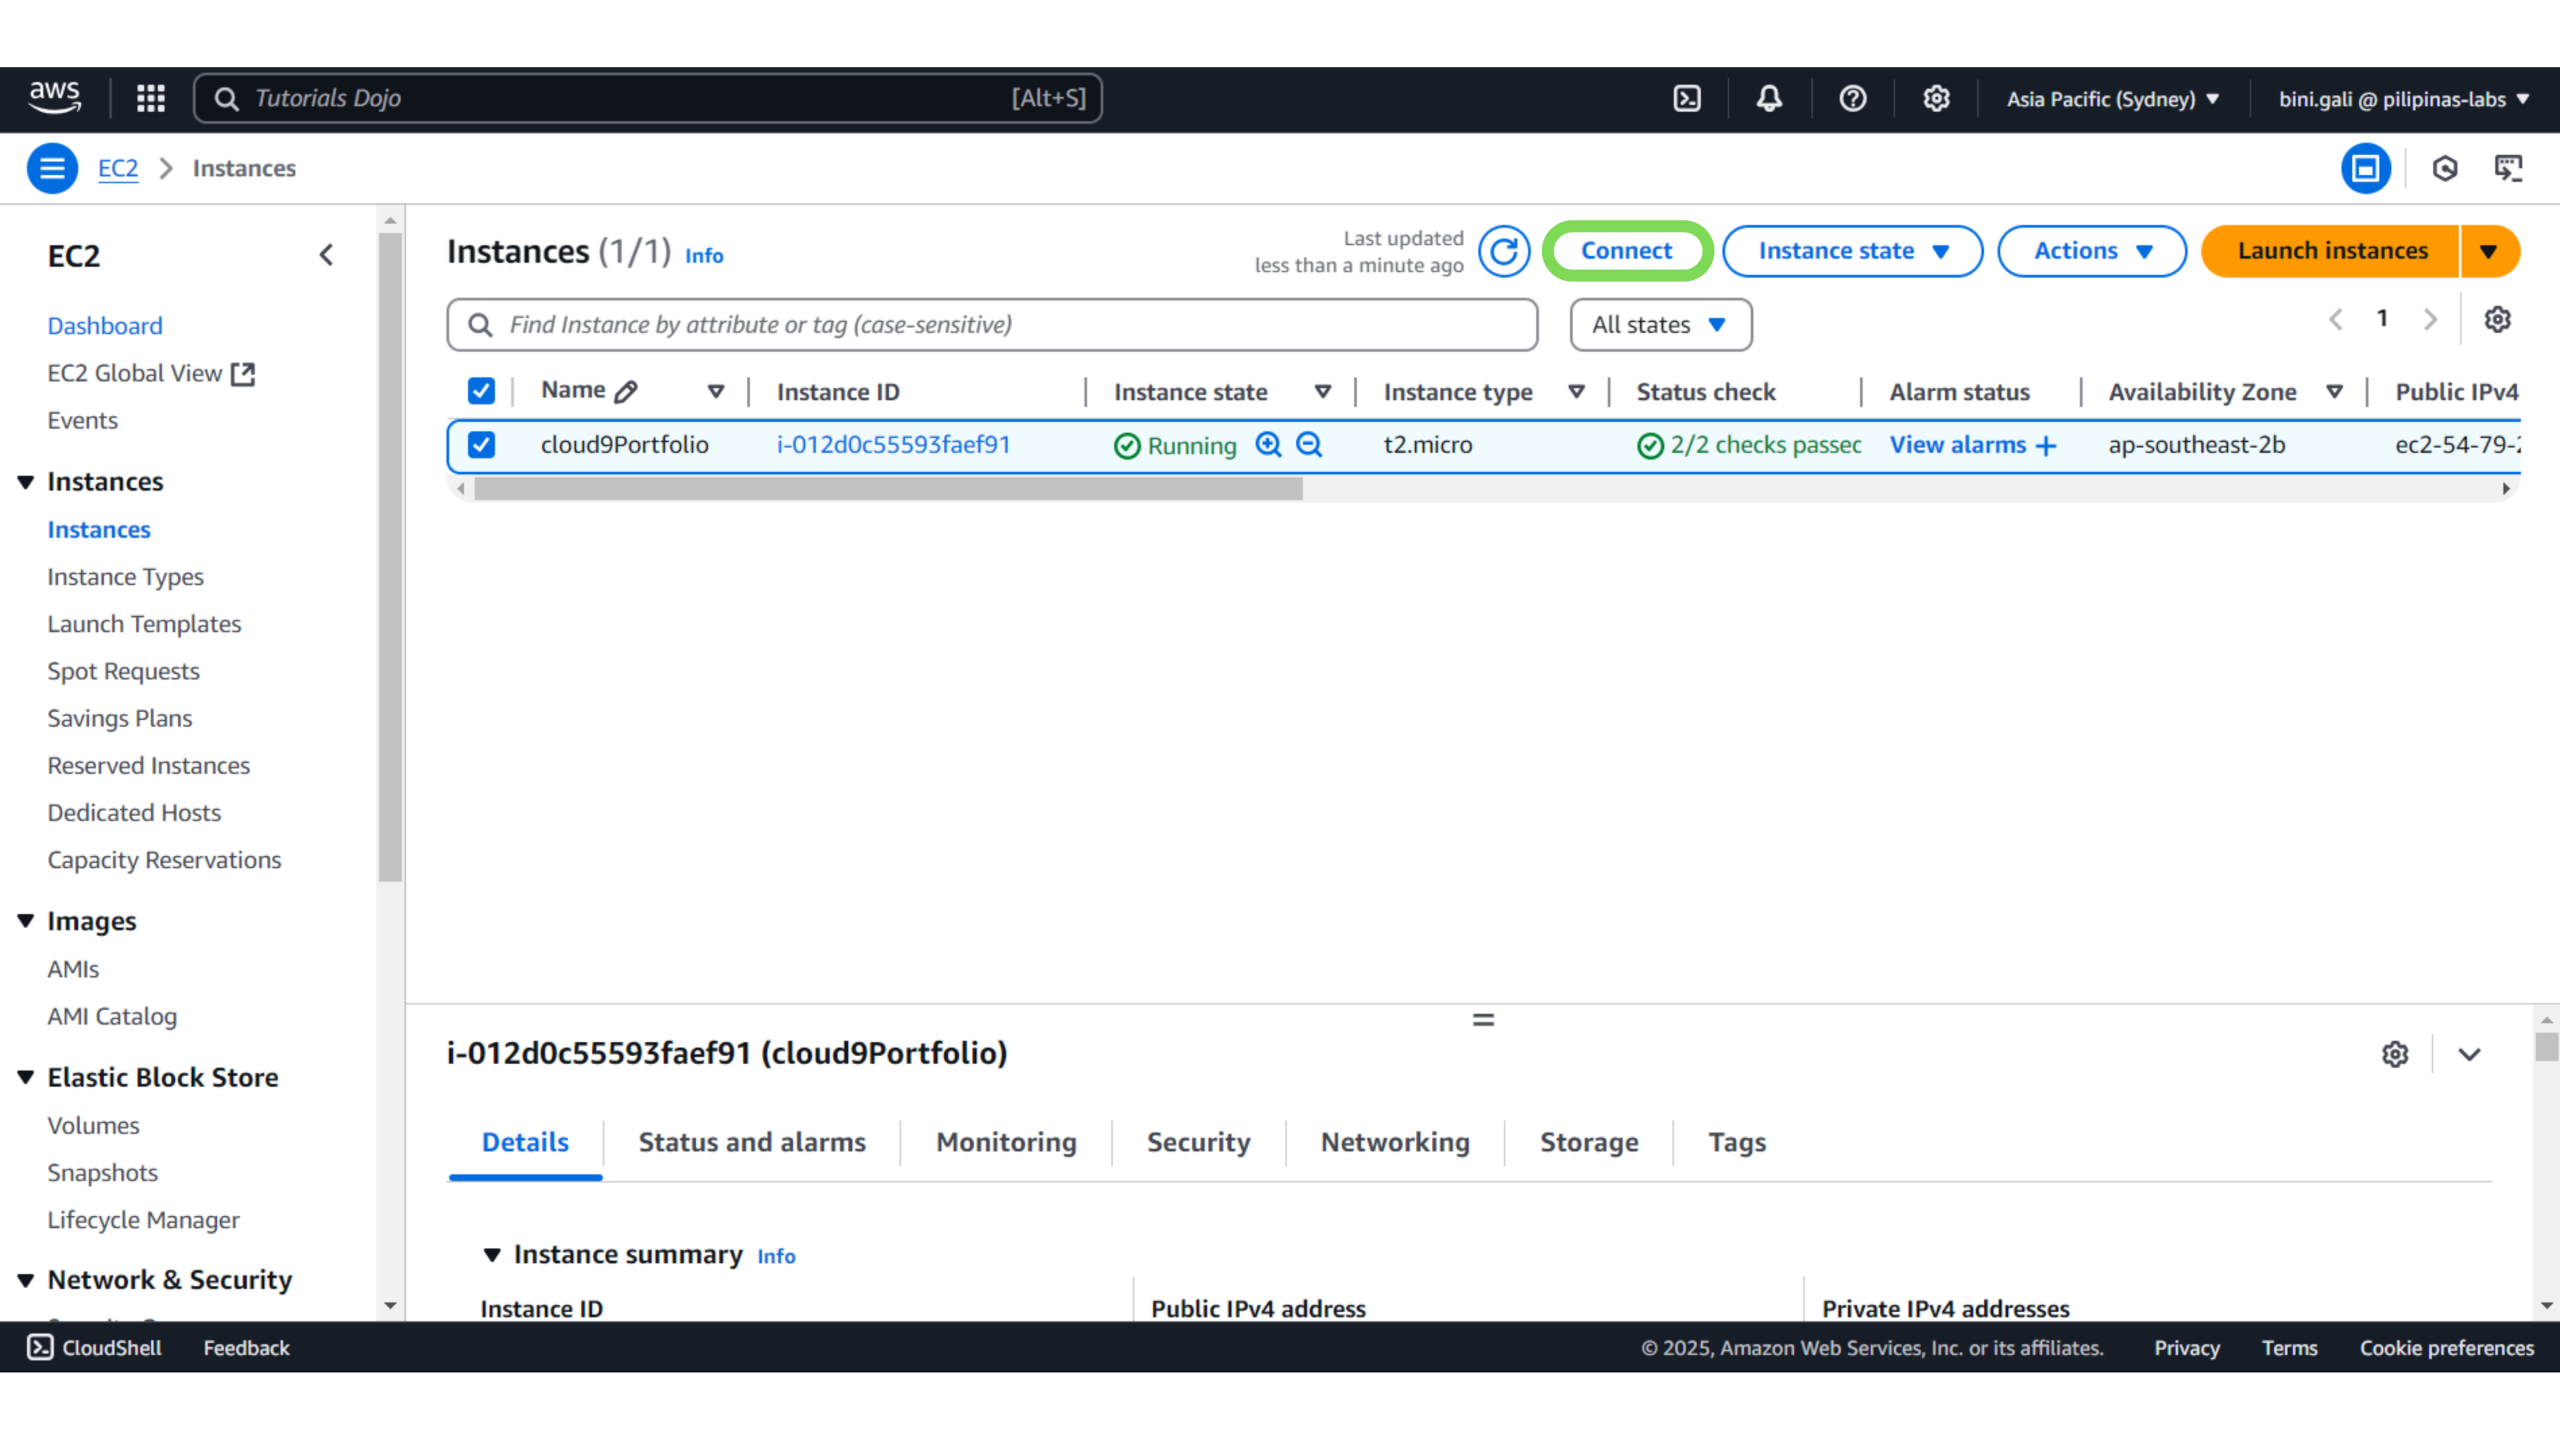
1. Go back to the EC2 Dashboard – Click on the Instance ID of the EC2 server you launched.
2. Click on “Connect”
3. Connect to Instance – Under “Connect to instance,” click the SSH Client tab and follow the instructions provided. (Don’t worry, we’ll walk through each part together, step by step!)
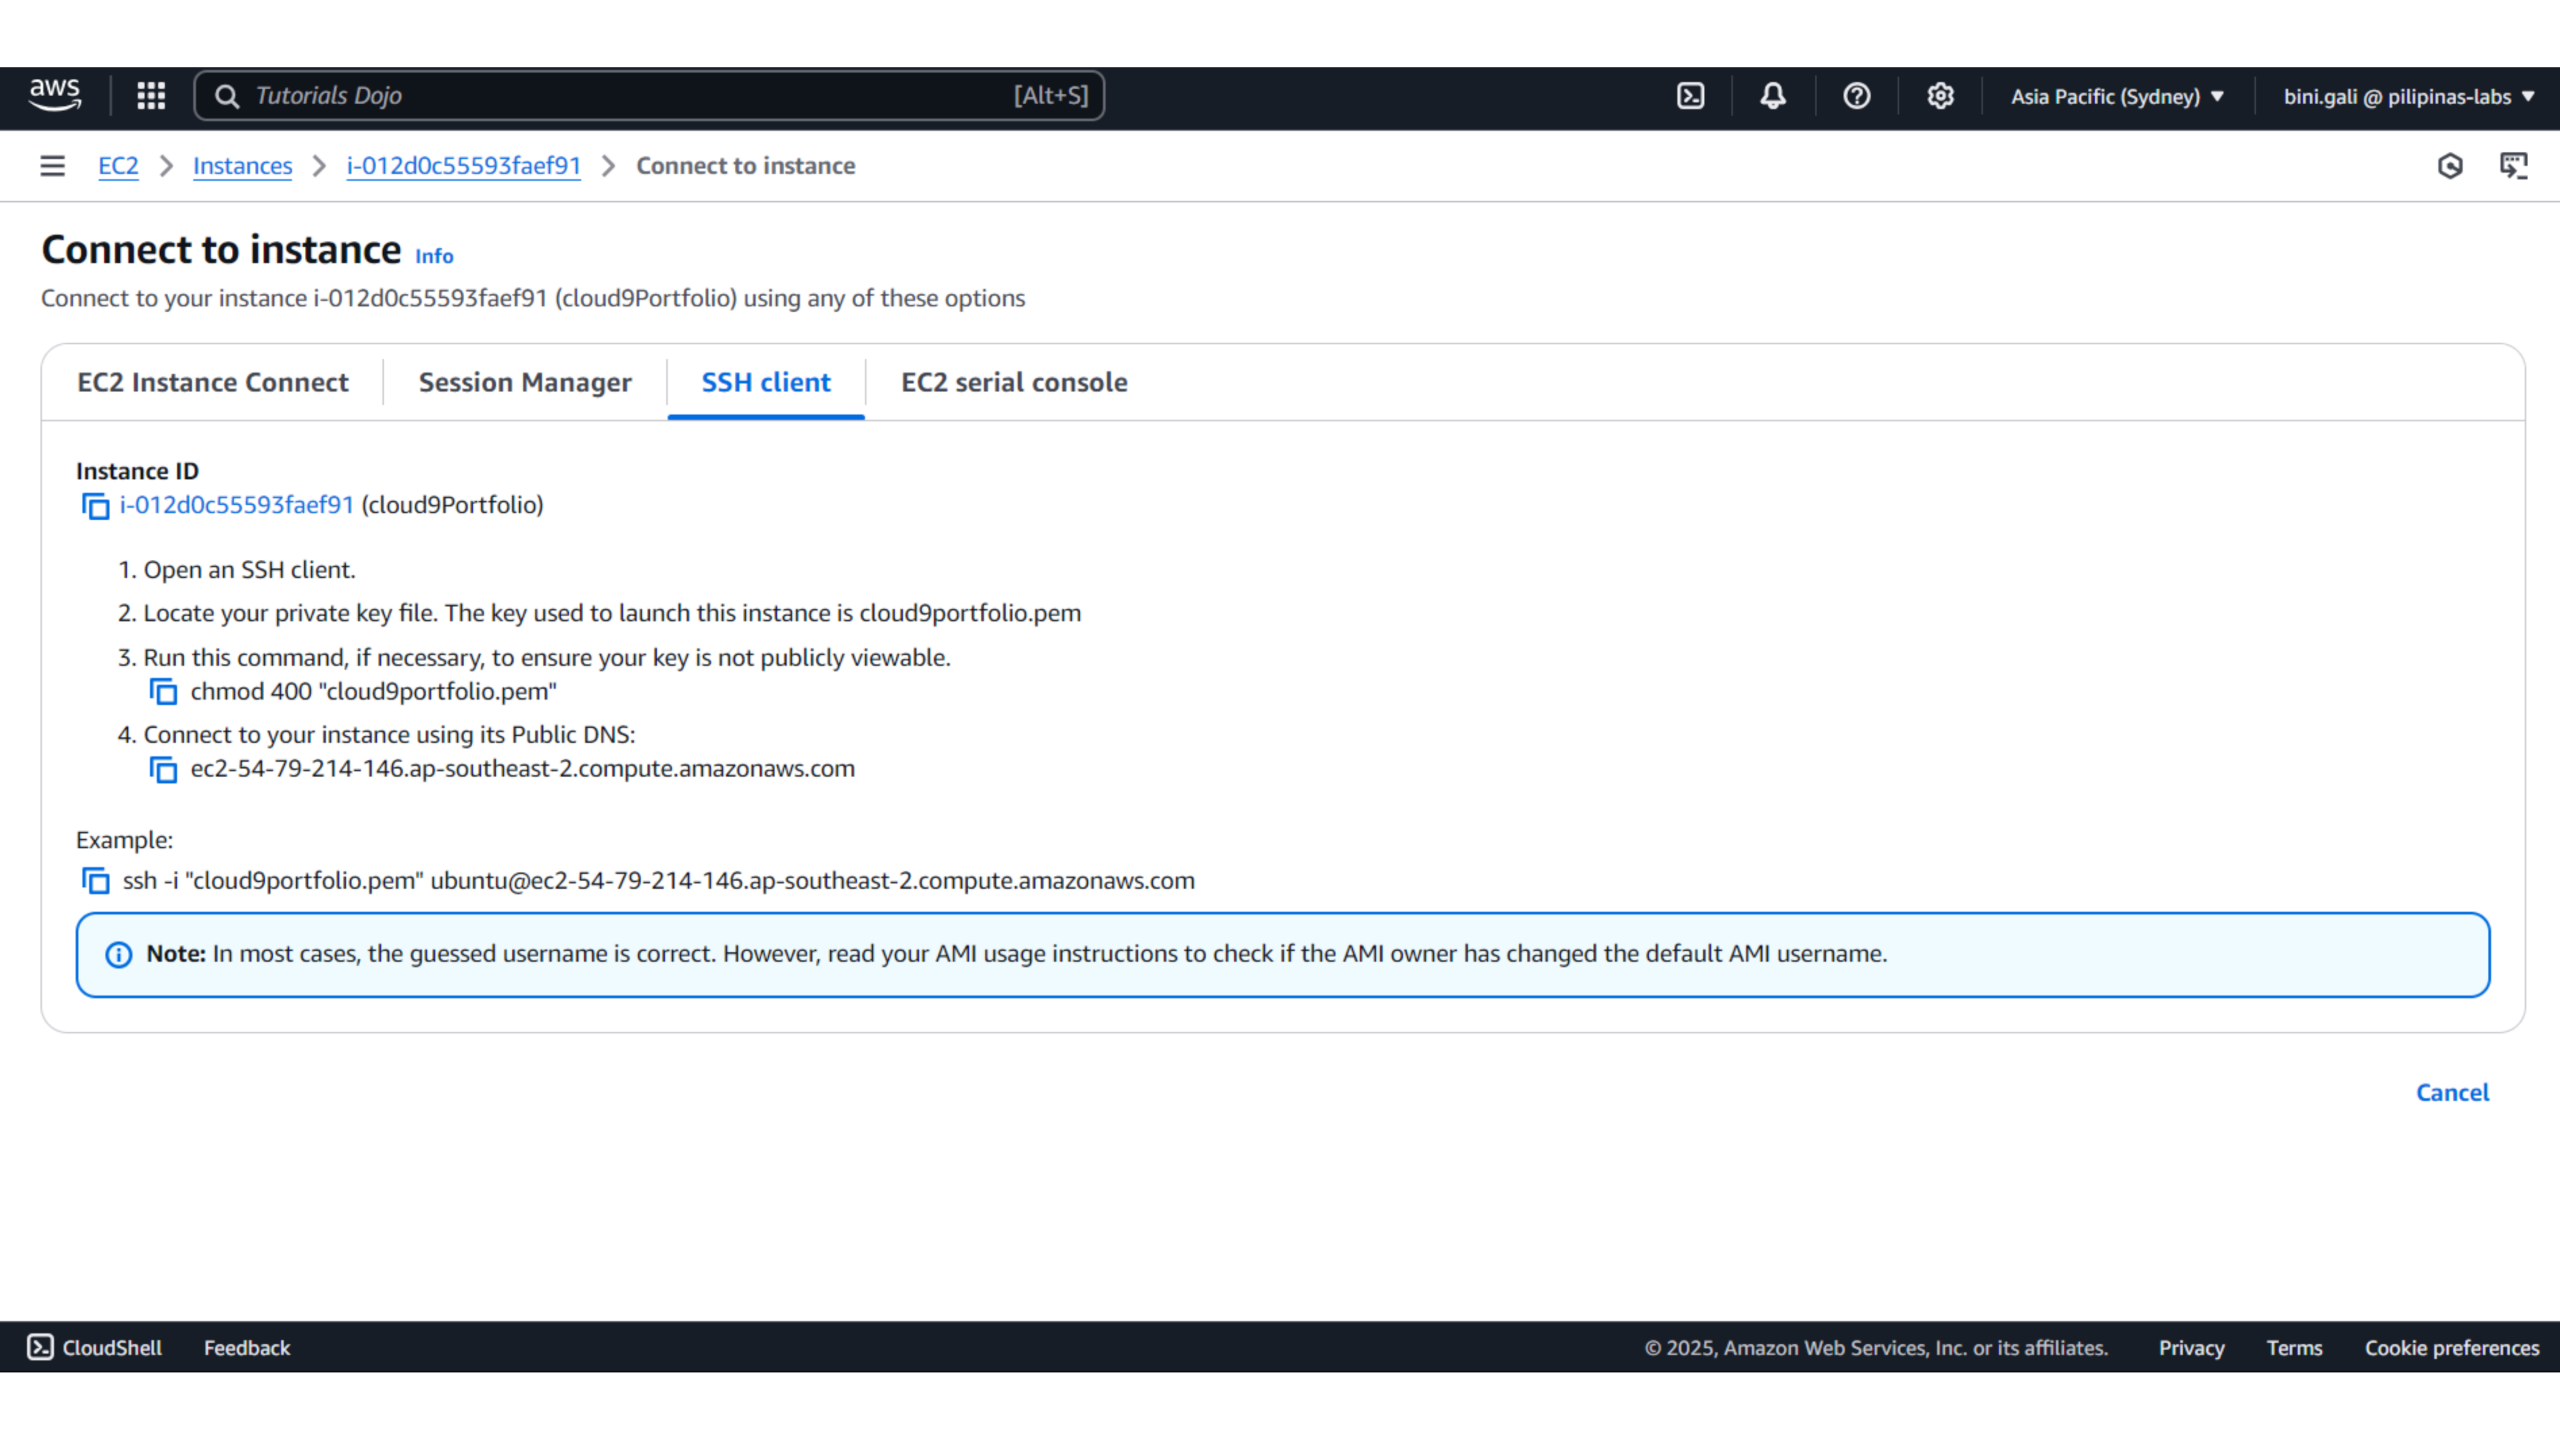
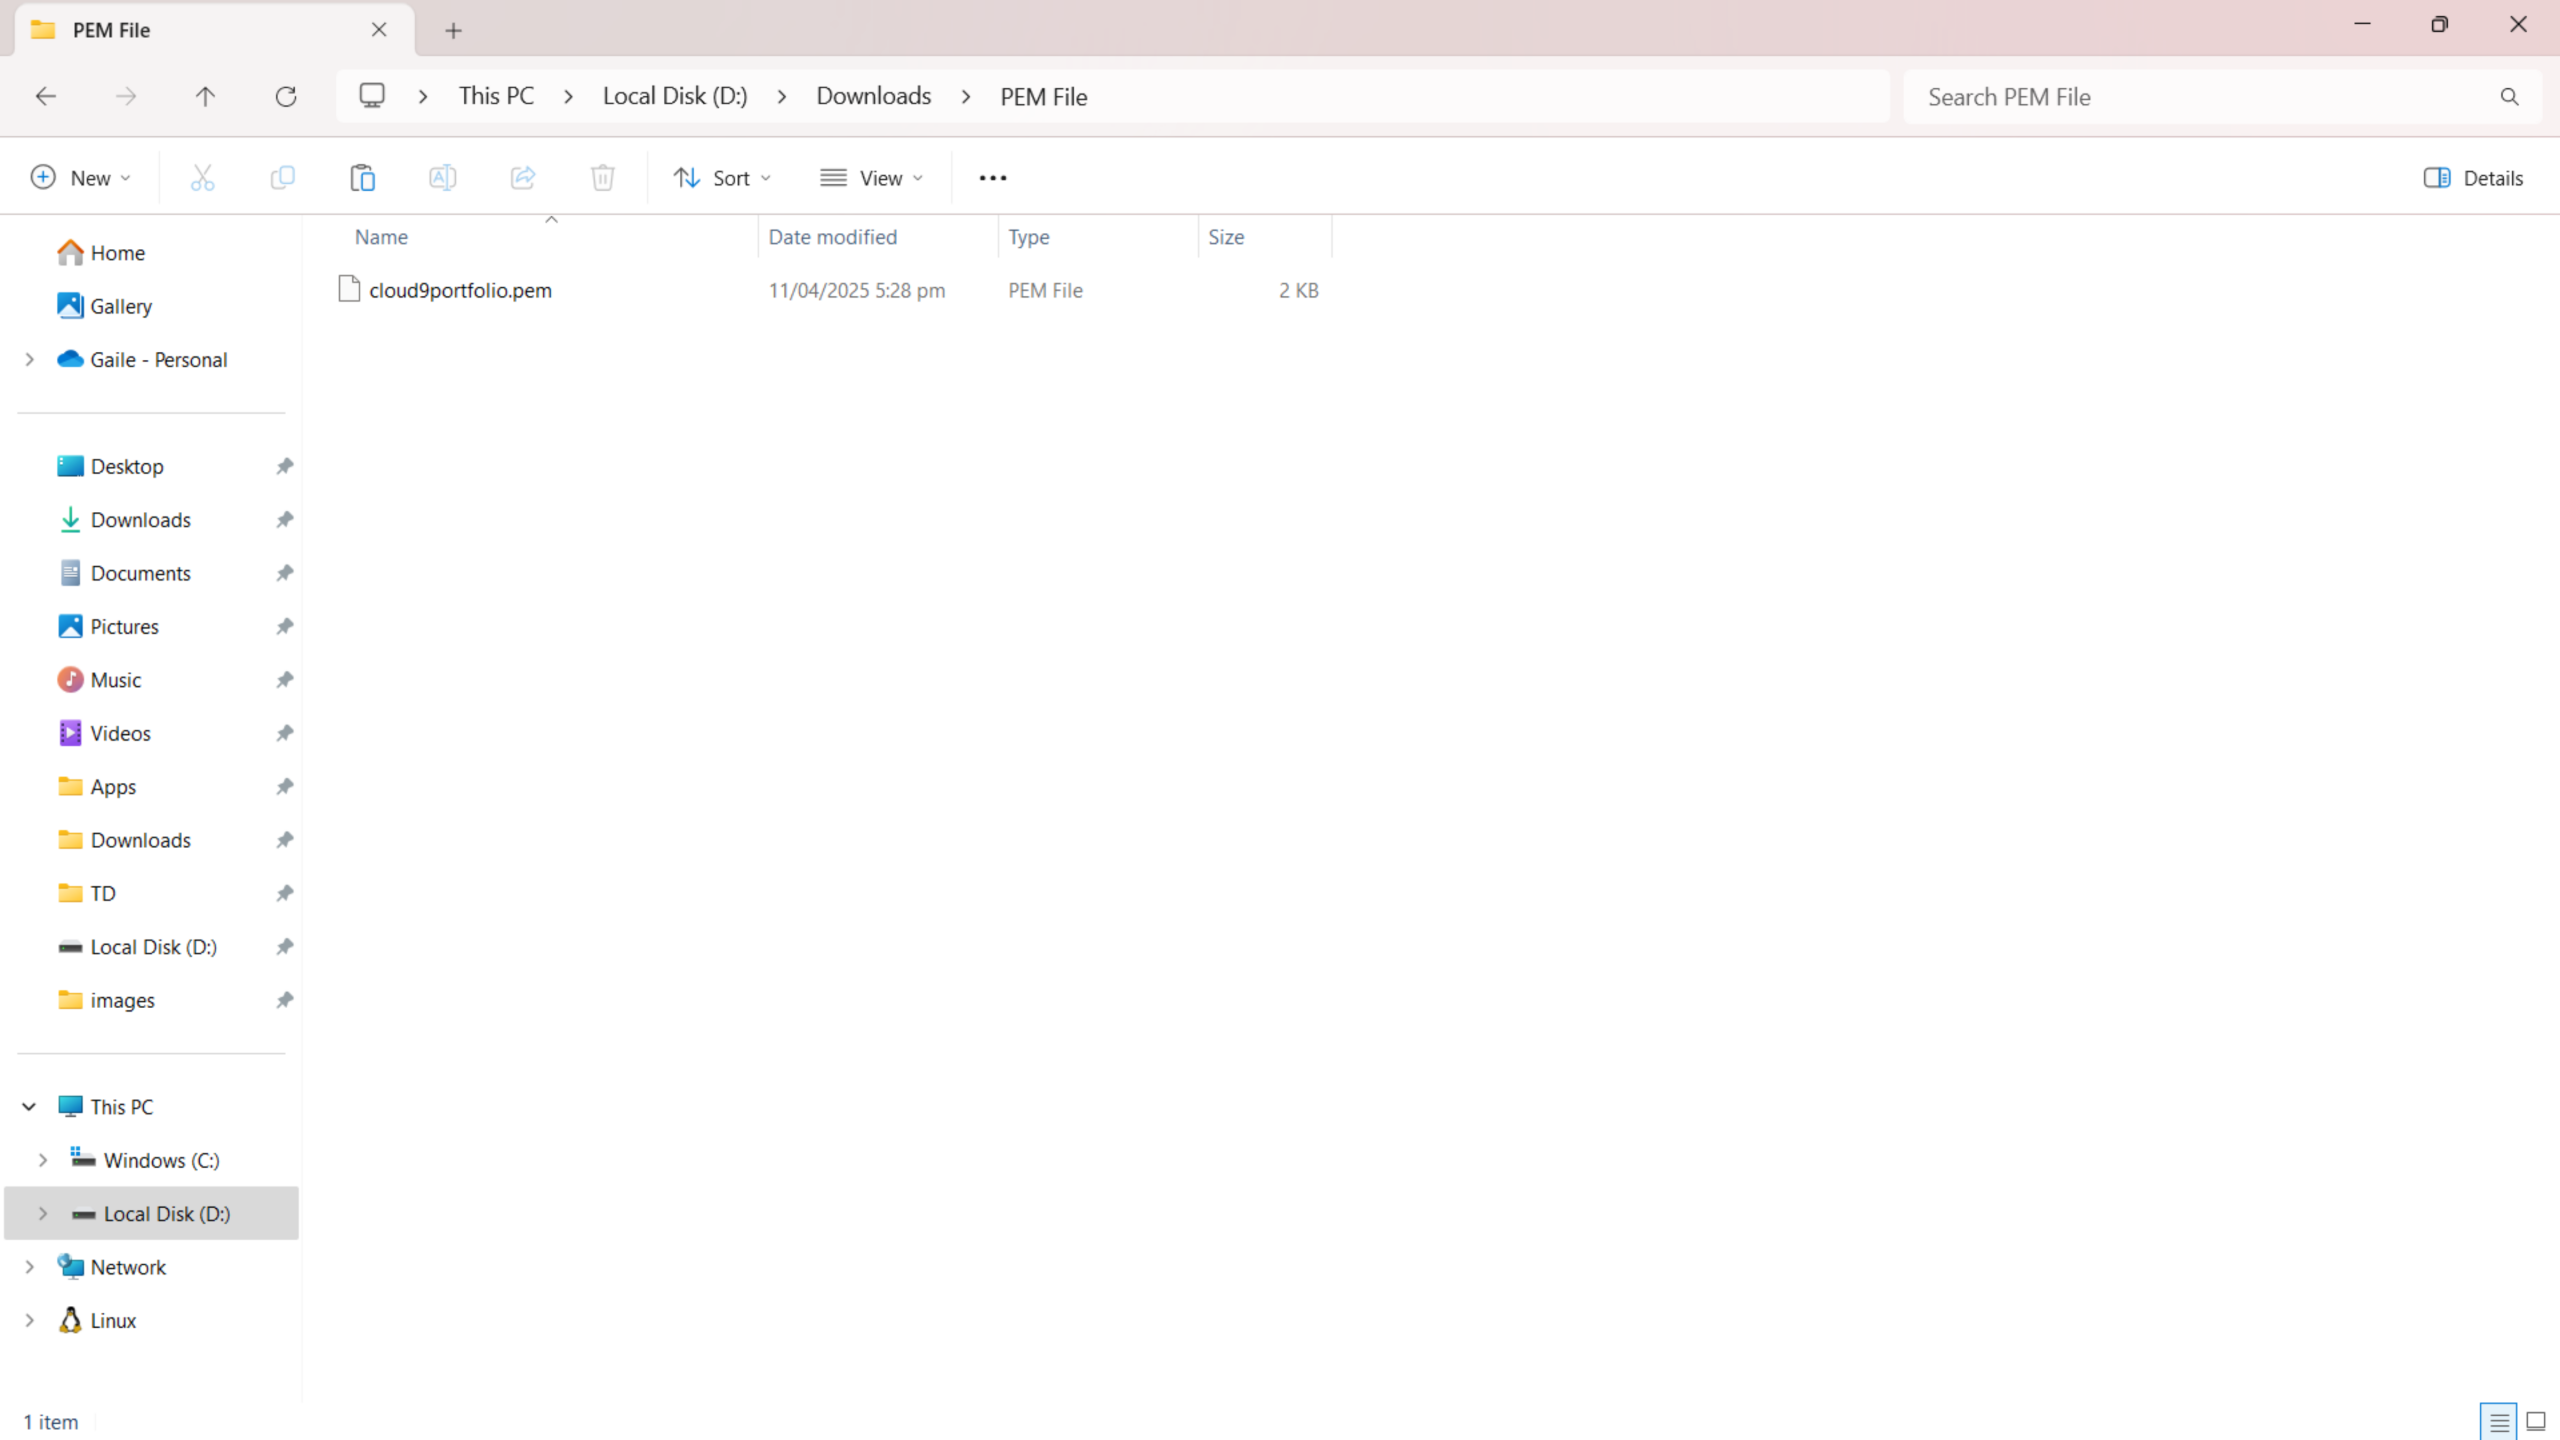
4. Locate Your .pem Key File – Make sure your .pem file is saved somewhere easy to find, like your Desktop or Downloads folder. We’ll use this file to securely prove to AWS that you have permission to log into the server.
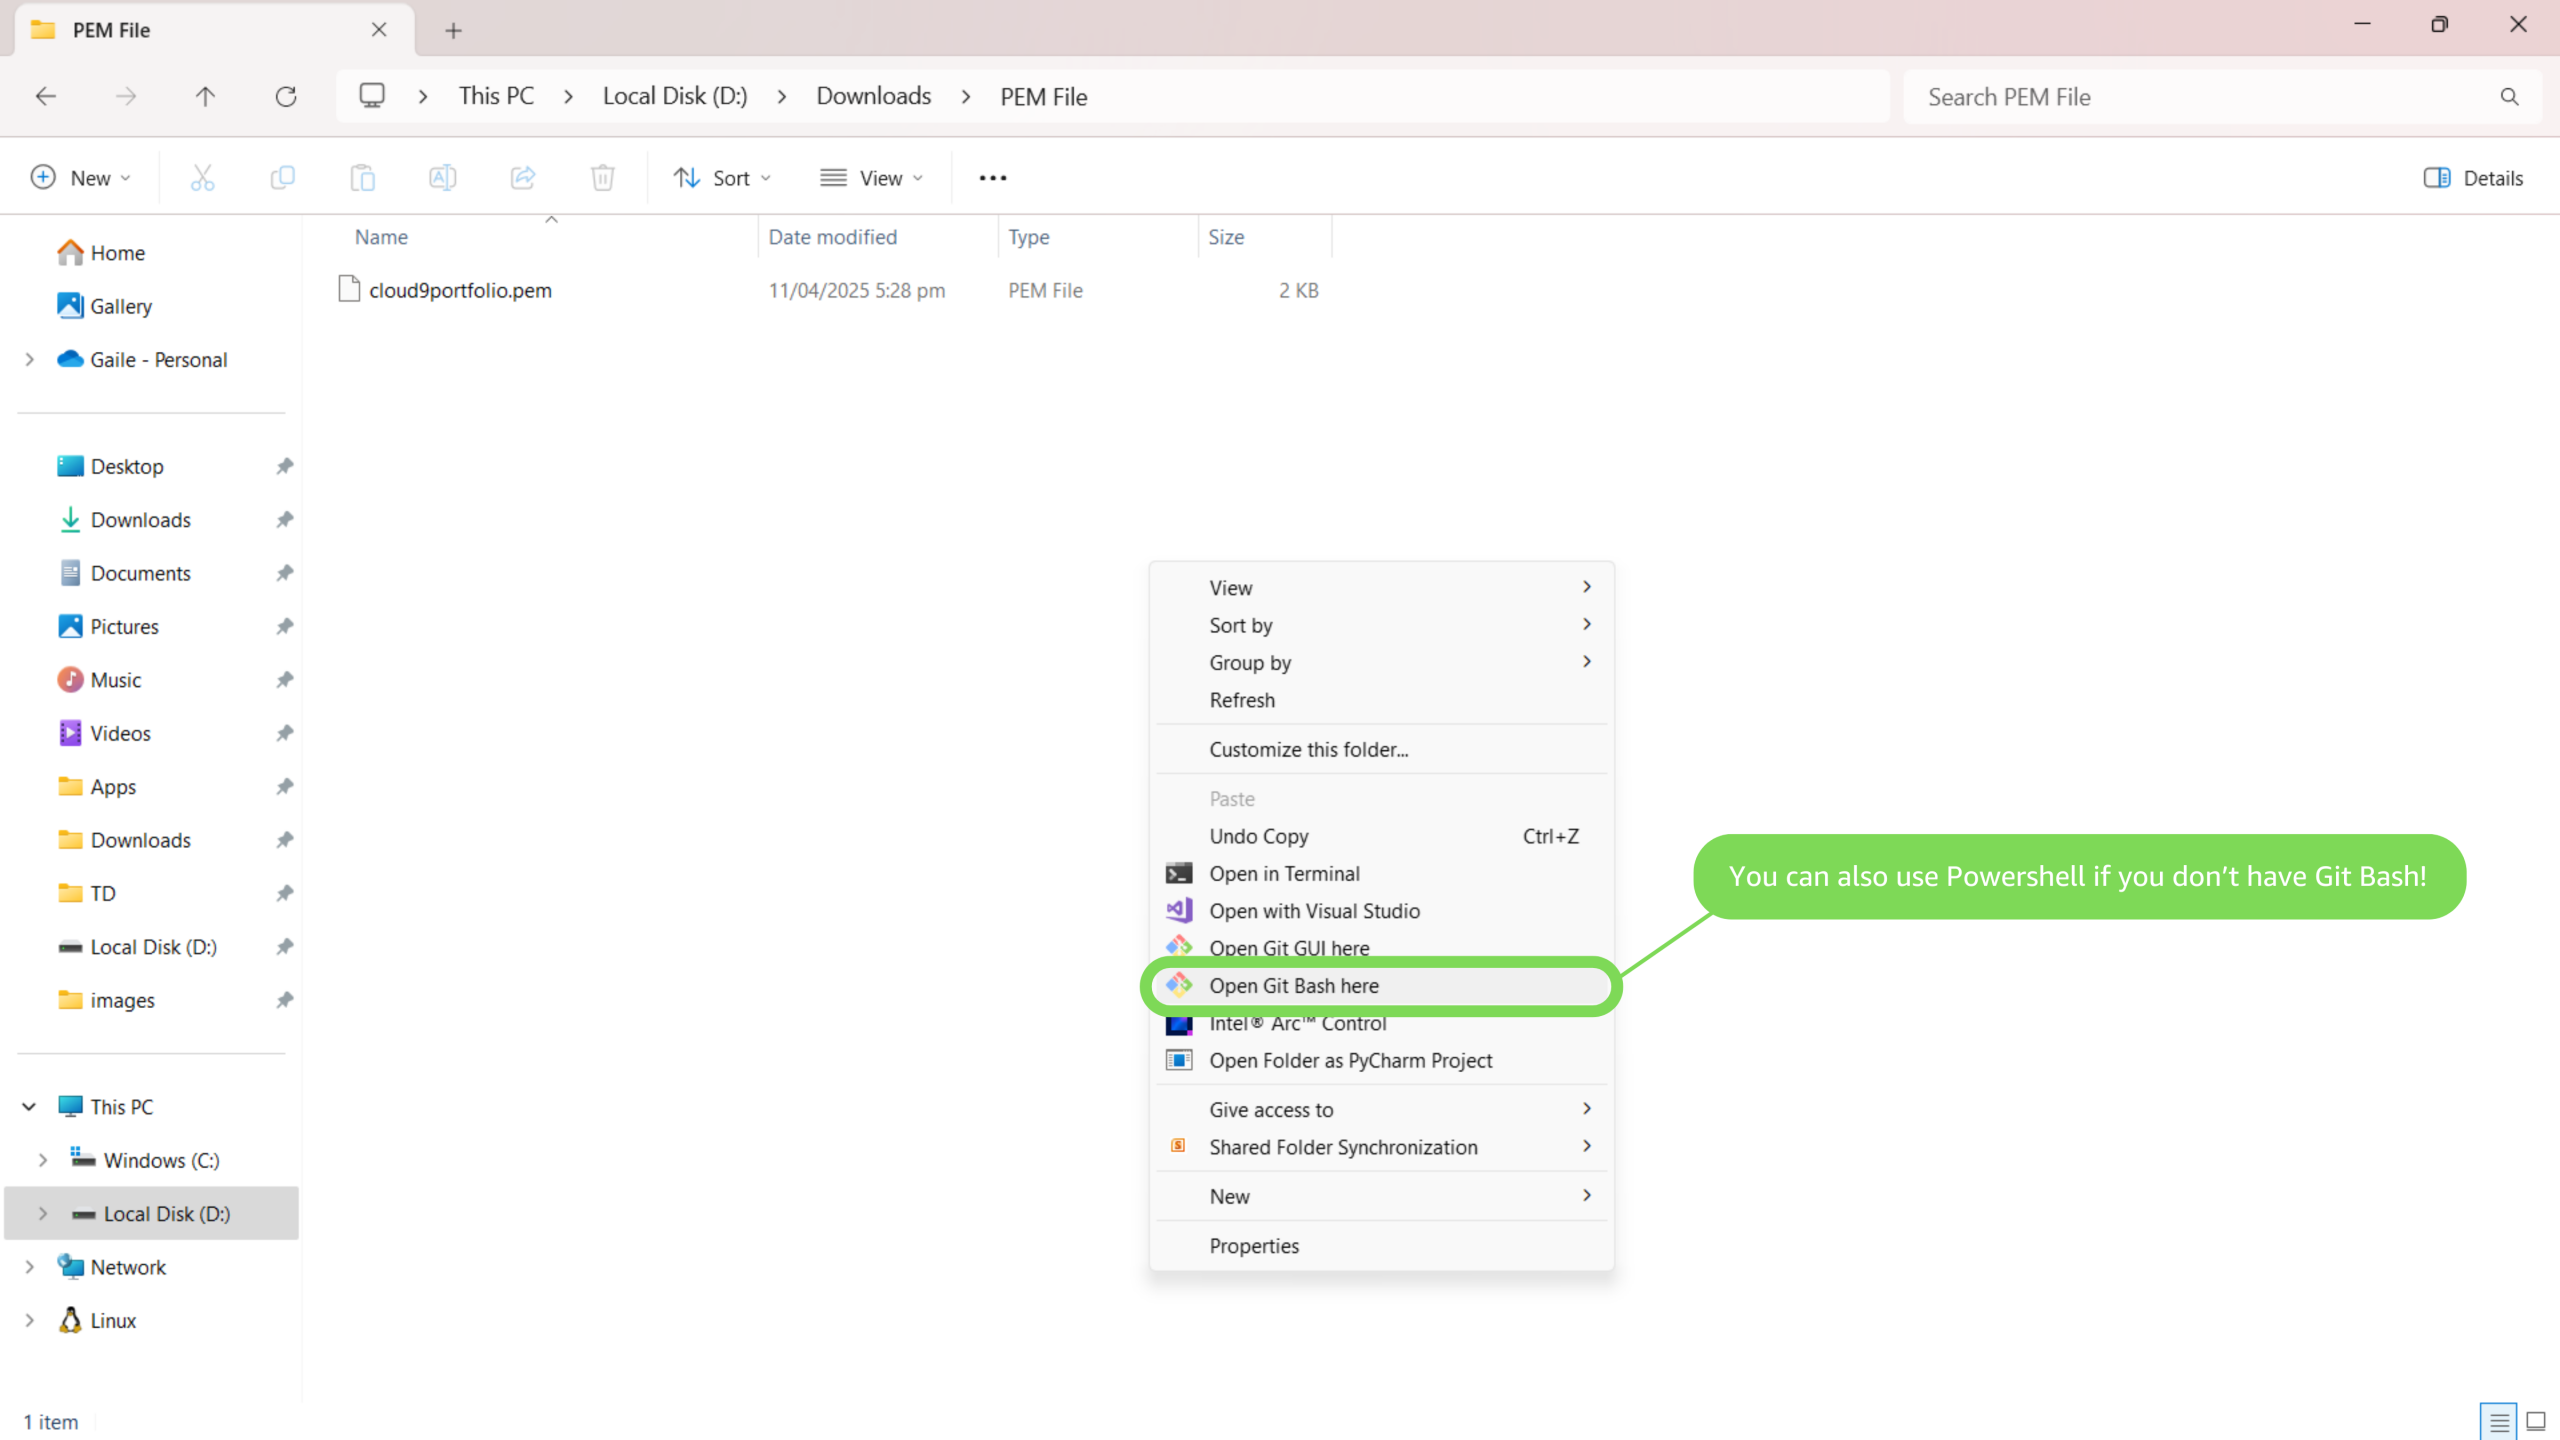
5. Open the Folder Using Git Bash – Right-click and Open the folder using Git Bash. Make sure it is run as an administrator on your computer. You can also use PowerShell if Git Bash is not installed.
To determine your current directory in Git Bash or the terminal, you can use the pwd command, which stands for “print working directory.” This command outputs the path of the directory you’re currently in.
For example, when you run the command pwd, it might display something like:
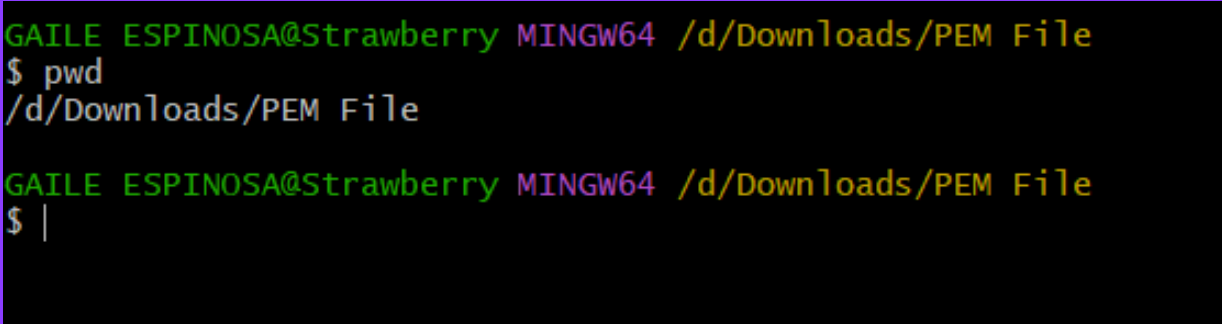
This tells you that you are currently in the PEM File folder located under Downloads on the D drive of your system. Using the pwd command is a simple and efficient way to confirm your current directory while working in the terminal.
To see the files in the folder, use the command:
ls -lart
What does ls -lart mean?
-
ls— list files -
-l— long format (shows details like file size and permissions) -
-a— show all files, including hidden ones -
-r— reverse order -
-t— sort by time (most recently modified files last)
This command helps you check if your .pem file is in the folder and what its permissions are.
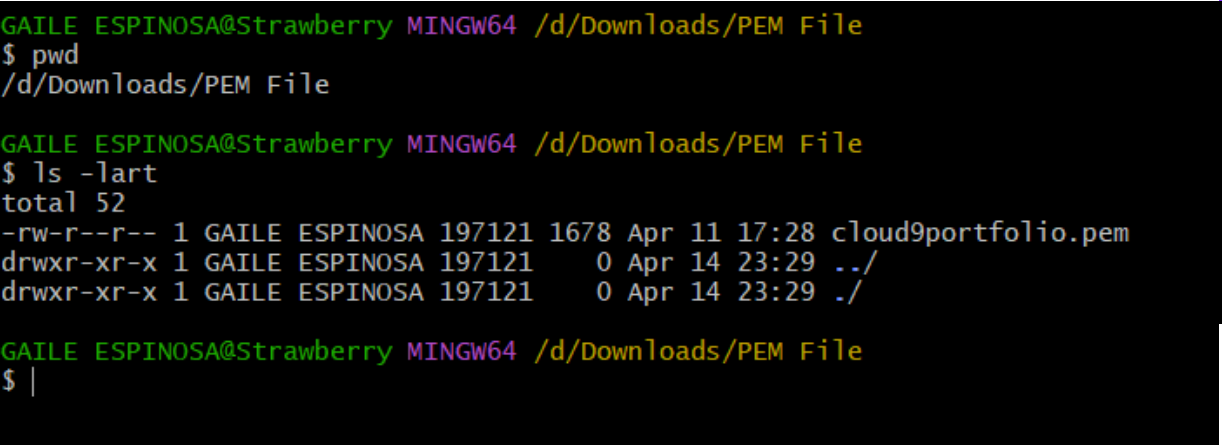
6. Secure Your .pem File – As shown in the output of your ls -l command, the key file (cloud9portfolio.pem) currently has permissions that are too open (likely rw-r--r--, meaning it’s readable by everyone), which AWS doesn’t allow for security reasons.
To fix this, run:
chmod 400 "yourfilename.pem"
This command sets the file permissions so only you can read the file.
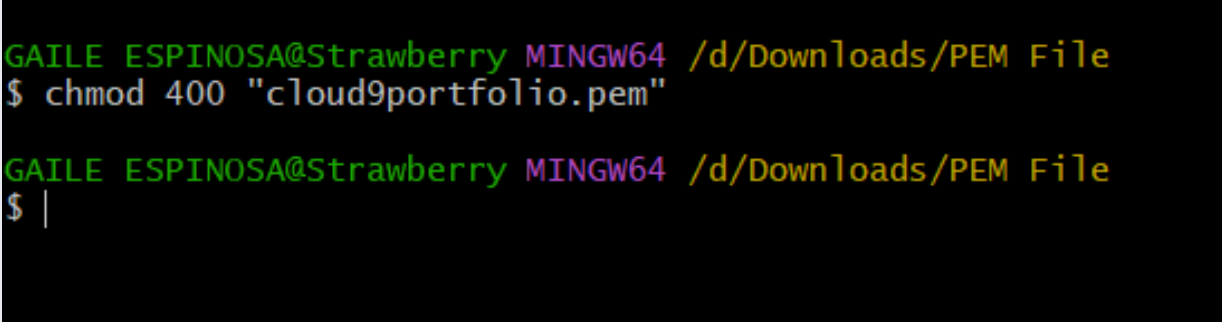
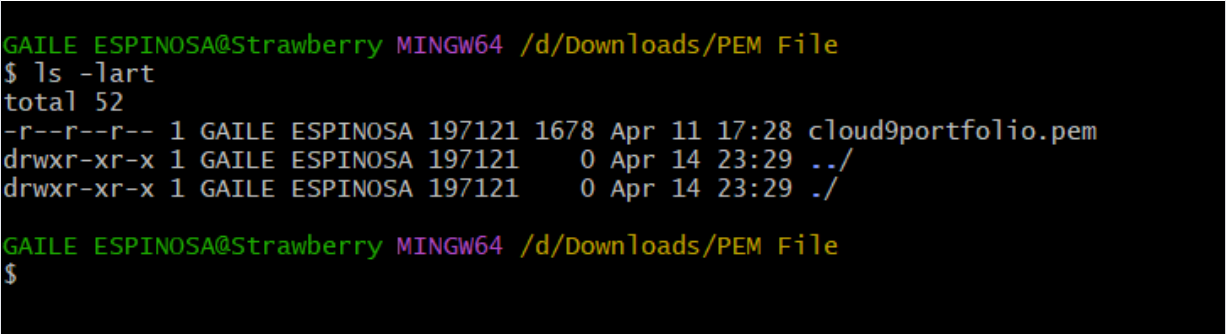
7. Press Enter – Now, if you run ls -lart again, you’ll see that the .pem file has more secure permissions. Like this:
8. Run the SSH Command – You can go back to the console and copy the SSH command provided there; it will have a format like this:
ssh -i "path_to_pem_file" username@hostname_or_ip
Replace:
-
"path_to_pem_file"with the actual path to your.pemfile -
username@hostname_or_ipubuntu) and hostname or public IP address of the EC2 instance you’re trying to connect to.

Common First-Time Prompts
“Are you sure you want to continue connecting?”
Type yes and press Enter.
9. If it works, you’ll see something like this:
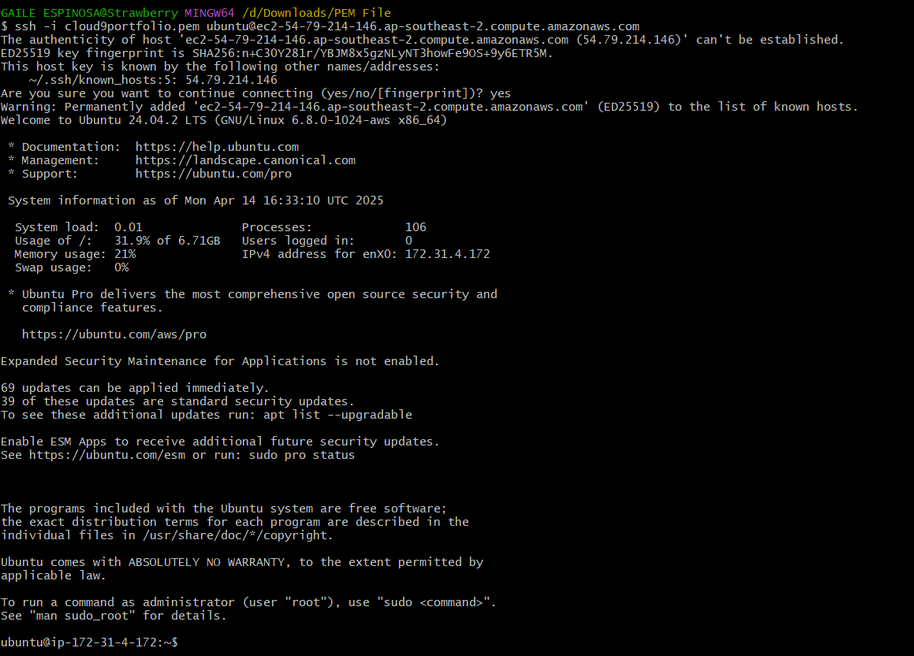
That means you’ve successfully connected to your EC2 server using SSH.
You can verify a few things, such as the IPv4 address, to ensure it matches the one on your console. Once everything is set, you’re now ready to install software, set up WordPress, or do anything else from the command line!
Frequently Asked Questions (FAQs)
- Is an Elastic IP free to use?
- Yes, as long as it’s associated with a running EC2 instance. If it’s not attached to anything, AWS may start charging for it.
- Can I use more than one Elastic IP?
- You can, but AWS only provides one Elastic IP per account for free. Extra ones may incur charges.
- What happens if I stop or terminate my EC2 instance?
- If you stop the instance, the Elastic IP remains attached and will still point to it when you start it again. If you terminate the instance, the Elastic IP becomes detached, and you’ll need to manually release it or attach it to a new instance.
- Can I change the Elastic IP anytime?
- Yes, you can disassociate it from one instance and associate it with another. This gives you flexibility in managing your infrastructure.
- What is a
.pemfile and why do I need it?- A
.pemfile is your private key. It proves to AWS that you’re allowed to access your EC2 instance. You download it when you create your key pair in AWS, and it’s required for secure SSH login.
- A
- What if I lost my
.pemfile?- You can’t download it again. You’ll need to create a new key pair and launch a new EC2 instance using that new key.
- What does the error “Permission denied (publickey)” mean?
- It usually means the
.pemfile is incorrect, missing, or too public. Double-check the key name and file path, and runchmod 400if needed.
- It usually means the
- How can I check if my “A” record is correct?
- Use tools like
digornslookupto verify that your domain points to the correct Elastic IP.
- Use tools like
- Can I point multiple subdomains to the same IP?
- Yes, you can create separate “A” records for each subdomain and point them to the same Elastic IP.
- How long does it take for changes to the “A” record to take effect?
- DNS changes can take anywhere from a few minutes to 48 hours to fully propagate across the internet.

Learn AWS with our PlayCloud Hands-On Labs

$2.99 AWS and Azure Exam Study Guide eBooks

New AWS Generative AI Developer Professional Course AIP-C01

Learn GCP By Doing! Try Our GCP PlayCloud

Learn Azure with our Azure PlayCloud

FREE AI and AWS Digital Courses

FREE AWS, Azure, GCP Practice Test Samplers


Subscribe to our YouTube Channel

Follow Us On Linkedin


