Last updated on February 23, 2026
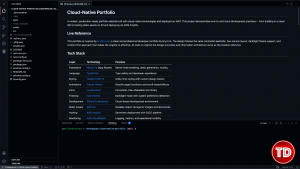
A few years ago, “setting up your dev environment” often meant losing half a day to installing Node versions, fixing PATH issues, fighting dependency conflicts, and hoping the project would run the same way on everyone’s machine. Today, cloud-native development is changing that workflow. Instead of treating your laptop as the only place you can build software, you can develop inside consistent, containerized environments that live in the cloud—accessible from any browser, anywhere. This is Part 1 of a 3-part series on Modern Cloud-Native Development for AWS Deployments, where we’ll build and ship a production-ready portfolio website using modern frontend tooling and AWS services: By the end of this series, you’ll have a polished portfolio website inspired by modern developer portfolios, and you’ll gain hands-on experience that maps directly to real-world cloud workflows: containerized development environments, asset hosting, and production deployment on AWS. Let’s start where cloud-native work begins: a consistent dev environment you can spin up in minutes. A developer portfolio website isn’t just “a nicer resume.” It’s a high-signal artifact that shows how you think, how you present work, and what you can build end-to-end. In a competitive industry, your portfolio becomes a shortcut for recruiters and hiring managers: instead of guessing your skills from a list of keywords, they can see your output. Your portfolio is your digital business card, the one link you can put everywhere: LinkedIn, GitHub bio, email signature, and applications. When someone looks you up, your portfolio is the page that should answer: Who are you? What do you build? What value do you bring? Personal branding and online presence also matter more than ever. Stack Overflow’s blog references Northeastern University’s point that building your presence “boosts your career,” and notes that hiring managers often consider personal brand as part of hiring decisions. GitHub repositories show your code. A portfolio shows the complete picture: A portfolio also helps non-technical stakeholders evaluate you. Not every decision-maker will dig through a repo, but almost anyone can scan a well-structured portfolio and understand impact. A resume is constrained. A portfolio lets you highlight what matters: This is especially useful if you’re early-career, shifting roles, or building credibility in a new stack. Building your own portfolio is one of the best “real projects” you can do because it forces you to practice production-oriented skills: This series is designed so that the output isn’t “just a tutorial app.” It’s something you can actually ship, iterate on, and use in your career. Now that we’re aligned on why portfolios matter, let’s look at the design reference we’ll use so we can build with a clear target in mind. To keep our portfolio professional and recruiter-friendly, we’ll take design inspiration from bryllim.com, a modern developer portfolio with a clean layout and strong readability. The site works well because it prioritizes clarity over clutter: the spacing feels intentional, typography is easy to scan, and the content is organized in a way that quickly communicates credibility. The layout also reflects what hiring managers typically expect to see in a portfolio: a clear introduction, proof of work through projects, credibility through experience and certifications, and a straightforward way to contact you. We’ll follow these same design principles while keeping our implementation fully original and customizable. Light mode view showing clean typography and structured layout. Dark mode view highlighting contrast and readability. Mobile responsive layout showing stacked sections and spacing. GitHub Codespaces is a cloud-hosted development environment that runs in a container and gives you a full VS Code experience in the browser. Instead of setting up Node, managing versions, and troubleshooting local machine quirks, you can open a project and start building immediately, on any device. This is especially useful for portfolio projects because the workflow is reproducible: the same repository can spin up the same environment every time. Codespaces also supports configuration-as-code through dev container settings, which mirrors how modern teams standardize development workflows in professional environments. Finally, Codespaces fits the cloud-native mindset: we develop in a containerized environment, then later deploy with AWS services (S3 and Amplify) without tying the project to a single laptop setup. By treating even a simple project like a real cloud deployment, we set ourselves up for a cleaner, more professional AWS architecture. Why these choices matter: 📁 GitHub Repository for Code Reference: https://github.com/pabilandokarenpv/cloud-native-portfolio Wait for initialization (usually 1–2 minutes) When you launch Codespaces: A VS Code-like interface in your browser: 💡 Tip: Stop your Codespace when you’re not using it to conserve your free quota. GitHub also documents how Codespaces usage is measured and billed. To make our development environment reproducible and consistent, we configure GitHub Codespaces using a dev container setup. Instead of manually installing tools or configuring extensions per machine, we define everything once and version-control it with the project. This approach reflects real-world cloud development practices: infrastructure and environment configuration should be treated as code. In this project, the dev container: You can find the complete configuration in the Gist below: 📁 Dev Environment Configuration Gist: After adding the configuration file, simply rebuild the Codespace so the environment provisions correctly This gives you a clean, repeatable development setup , exactly how modern teams standardize workflows. With the environment ready, we initialize the portfolio using Next.js with the App Router, TypeScript, Tailwind CSS, and ESLint enabled. Instead of pasting long terminal commands here, refer to: 📁 Project Initialization Steps Gist: This gist includes: Once initialized, running the development server will allow you to preview the default Next.js starter page inside Codespaces. At this stage, we have: Everything is production-ready from a structural standpoint. Clean structure matters more than most developers realize. A portfolio is small, but we design it like a scalable application. Instead of mixing everything into one folder, we separate responsibilities: You can find the complete folder map here: 📁 Project Structure Reference Gist: This structure keeps the project readable, maintainable, and professional. If someone else opens your repository, they immediately understand how it’s organized. Instead of hardcoding random colors and styles across components, we define a simple design system using Tailwind configuration. This includes: The goal is consistency. Every section should feel part of the same system. For the complete configuration and explanation of tokens, refer to: 📁 Tailwind Design System Gist: By centralizing design tokens, we ensure: This mirrors how real production apps handle design systems. Now the portfolio starts to take shape. Instead of dumping hundreds of lines of component code into this article, the full implementation is available in the repository and organized Gists. 📁 Component Architecture Overview Gist: The architecture includes: We also separate content into data files. That way, updating your projects or experience does not require editing layout logic. The two-column desktop layout collapses cleanly on mobile using responsive utilities. Dark mode is handled through next-themes, and interactive elements like carousels or galleries are isolated as client components. The focus here is structure, not complexity. The result is a clean, recruiter-ready portfolio built like a real application. Before committing anything, verify that everything behaves as expected. Open the development server and confirm: Light mode view result showing clean typography and structured layout inspired by bryllim.com portfolio website. Dark mode view result highlighting contrast and readability inspired by bryllim.com portfolio website. Mobile responsive layout result showing stacked sections and spacing inspired by bryllim.com portfolio website. Testing in browser DevTools (responsive mode) ensures the layout collapses correctly below tablet breakpoints. Even though this is “just a portfolio,” treating testing seriously reinforces good cloud development discipline. With everything working, commit your changes to GitHub. This locks in your environment configuration, project structure, and initial implementation. Pushing your code at this stage ensures: From here onward, your portfolio is no longer just local code, it’s a versioned, cloud-ready workload. Even though Part 1 doesn’t create any AWS resources, it already builds the habits behind good AWS architecture. We designed the portfolio as a portable, cloud-ready workload that can move cleanly into S3 and Amplify later. Now that the portfolio application is built and structured correctly, the next step is moving into AWS infrastructure. In Part 2, we will: This is where application design transitions into infrastructure design.
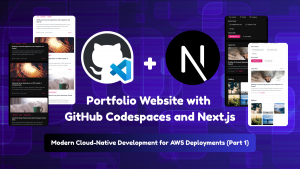
Modern Cloud-Native Development for AWS Deployments (Part 1)
Why Developers Need a Portfolio Website
Professional visibility
Showcase your work (beyond GitHub)
Personal branding (control the narrative)
A learning opportunity with real deployment value
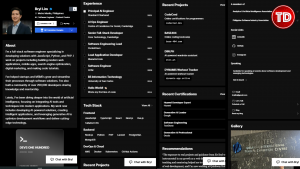
Design Reference: Inspiration from bryllim.com
bryllim.com – Light Mode
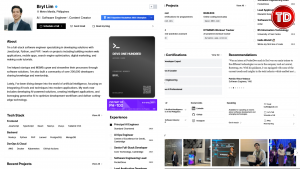
bryllim.com – Dark Mode


bryllim.com – Mobile View
Why GitHub Codespaces for Cloud Development?
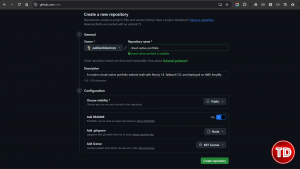
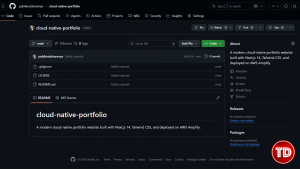
Creating the GitHub Repository
Setting Up GitHub Codespaces
Launch Codespaces
Step 1. Open your repository on GitHub
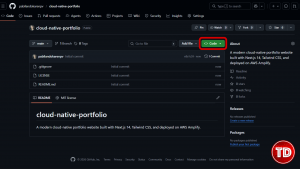
Step 2. Click the green Code button
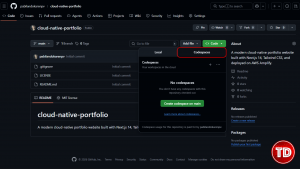
Step 3. Go to the Codespaces tab
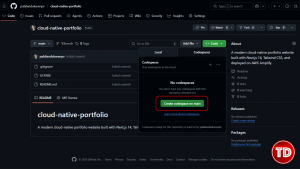
Step 4. Click Create codespace on main
What’s happening behind the scenes?
What you’ll see
Creating the Devcontainer Configuration
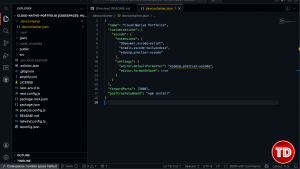
Initializing the Next.js Project
Setting Up the Project Structure
Configuring the Design System


Building the Portfolio Components
Testing Your Portfolio
Cloud-Native Portfolio – Light Mode
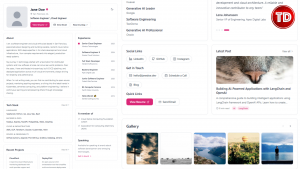
Cloud-Native Portfolio – Dark Mode
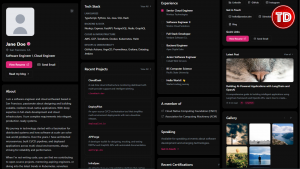
Cloud-Native Portfolio – Blog Page

Cloud-Native Portfolio – Mobile View

Committing Your Progress
What This Teaches About AWS — Even Without Using It Yet
What’s Next: Part 2 – Hosting Portfolio Static Assets with Amazon S3
Helpful Resources
https://docs.github.com/en/codespaces
https://docs.github.com/en/codespaces
https://developer.mozilla.org/en-US/docs/Learn/Getting_started_with_the_web/Files
https://aws.amazon.com/s3/
https://aws.amazon.com/what-is/cloud-computing/
https://aws.amazon.com/architecture/well-architected/🤖 $3.49 eBooks Start Here – Get Up to 30% OFF All AI & Machine Learning Reviewers

Turn Your Team Into Cloud-Ready Professionals Today

Learn AWS with our PlayCloud Hands-On Labs

$2.99 AWS and Azure Exam Study Guide eBooks

New Claude Certified Architect Foundations CCA-F

Learn GCP By Doing! Try Our GCP PlayCloud

Learn Azure with our Azure PlayCloud

FREE AI and AWS Digital Courses

FREE AWS, Azure, GCP Practice Test Samplers


Subscribe to our YouTube Channel

Follow Us On Linkedin


