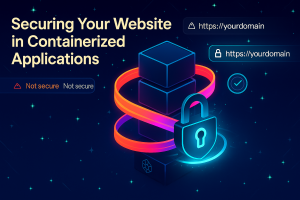
So, you have just deployed your first app to the cloud (maybe you have followed the tutorial that we have for deployment insert link here), it’s running great, you have your users now, but then you noticed that little “Not Secure” warning in the browser. Suddenly, your app looks… well, not so secure anymore
But what if I told you that getting that green padlock icon, the one that makes your site look legit and trustworthy—is not only possible but completely free? And you don’t need to be a security expert to pull it off?
This guide will walk you through transforming your HTTP site into a fully secured HTTPS powerhouse using Google Cloud’s Container-Optimized OS, HAProxy, and Let’s Encrypt. No expensive certificates, no complex DevOps, just steps to make it work.
Let’s turn that “Not Secure” warning into something you can be proud of.
What Are We Doing Here?
In case you’re wondering what all this HTTPS stuff actually means, here’s the deal. You know how when you send a letter, anyone could theoretically open it and read it? Well, HTTP is like sending that message to all, everything’s visible to anyone who wants to peek. HTTPS is like sending letters in sealed, encrypted envelopes that only the intended recipient can open.
When you visit a site with HTTPS, everything between your browser and the server gets scrambled into unreadable gibberish. Even if someone intercepts it, they just see random characters. It’s like having a secret language that only you and the website understand.
And that little padlock icon? That’s your browser’s way of saying “Hey, this site is legit and secure. You can trust it!”
Why This Specific Approach?
Now, before we dive in, let me be clear: there are many ways to enable HTTPS. You could use:
- Cloud load balancers with managed certificates (like Google Cloud Load Balancer)
- Traditional web servers like Apache or Nginx with direct certificate installation
- CDN services like Cloudflare that handle SSL at the edge
- Even simpler platforms like Netlify or Vercel that handle it automatically
So why are we doing it this way? Because we’re specifically working with Container-Optimized OS (COS) and containerized applications. This approach teaches you the fundamentals while working within COS’s unique details.
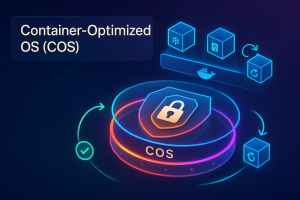
What Makes Container-Optimized OS Special?
Container-Optimized OS isn’t your typical Linux distribution. Google built it from the ground up with one purpose: running containers securely and efficiently. Here’s what makes it different:
Read-Only Root Filesystem: Unlike regular Linux where you can install packages anywhere, COS’s root filesystem is locked down and read-only. This means you can’t just run apt install nginx or yum install haproxy.
Everything has to run in containers.
Minimal Attack Surface: COS ships with only the bare essentials needed to run containers. No extra packages needed and no unnecessary services required.
Automatic Security Updates: Google also automatically updates COS with security patches. Your OS stays secure without you having to manage updates, reboots, or patch schedules.
Docker-Native: COS comes with Docker pre-installed and optimized. It’s designed to make containers first-class citizens, not just applications running on top of a traditional OS.
Stateless Design: COS is designed to be more scalable and reliable. If something goes wrong, you replace it rather than fix it.
This is why our approach uses Docker containers for everything—HAProxy, Certbot, even our challenge server. It’s not just a preference; it’s how you work effectively with a Container-Optimized OS.
And honestly? Once you get used to this containerized approach, you’ll find it’s cleaner and more maintainable than traditional methods.
Meet Your Security Buddies
The first time I set up HTTPS, I was convinced I’d break something on the application. But here’s what actually happened: it worked, it was free, and it felt great to see that padlock appear.
We’re going to use what I call the Security Buddies:
Container-Optimized OS: Google’s super-secure operating system that’s designed specifically for running containers. Think of it as Linux’s security-obsessed cousin.

HAProxy: This is our traffic director. It sits in front of your app and handles all the SSL/HTTPS heavy lifting. It’s the same technology used by massive sites like GitHub and Reddit.
Let’s Encrypt: The superhero of the certificate world. They give out SSL certificates for free because they believe the entire internet should be encrypted. And they’re backed by Mozilla, Google, and other internet giants.
Docker: We’ll run everything in containers because Container-Optimized OS is designed for it, and it makes everything cleaner and more secure.
Let’s Do This:
Before we dive into the exciting part, we need to handle some setup. Don’t worry, if you’ve already deployed something to Google Cloud, you’re ahead of the game!
Step 1: Check Your Current Setup
First, let’s make sure you’ve got a running app on Google Cloud. If you followed our deployment guide, you should have:
- A VM instance running your app
- A domain name pointing to your server
- Your app accessible via HTTP
If you don’t have these yet, go deploy something first! This guide assumes you’ve got a working HTTP site that you want to make HTTPS.
Step 2: Connect to Your Cloud Shell
Head over to console.cloud.google.com and click that little terminal icon (>_) in the top-right corner. You remember this—it’s our command center!
If you’re not already in your project, select it from the dropdown at the top.
Your Security Command Center: Setting Up the Basics
Here’s where things get fun. We’re going to set up some variables so we don’t have to type the same things over and over. Copy and paste this into your Cloud Shell, but customize the parts I’ve marked:
# This is where you customize everything for YOUR setup
APP_NAME="dockerlabs-tutorial"           # Your app's name
DOMAIN="dockerlabs.tutorialsdojo.com"    # Your actual domain
EMAIL="your-email@example.com"           # For Let's Encrypt notifications

# These are perfect defaults (don't change unless you know what you're doing)
ZONE="us-central1-a"                     # Where your VM lives
VM_NAME="$APP_NAME-vm"                   # Your VM instance name

Let me break down what we just set up:
- APP_NAME: Just a nickname for organizing everything
- DOMAIN: This is crucial, make sure to use your actual domain that’s already pointing to your server
- EMAIL: Let’s Encrypt will email you if certificates are about to expire (though we’ll set up auto-renewal)
The Benefits of Container-Optimized OS
If you haven’t used Container-Optimized OS yet, you’re in for a treat. It’s Google’s special version of Linux that’s designed to be super secure and perfect for running containers.
Here’s why it’s awesome:
- Read-only filesystem: Makes it nearly impossible for attackers to mess with your system
- Automatic updates: Google keeps it patched and secure for you
- Minimal attack surface: Only the essentials are installed
- Container-native: Docker just works perfectly
Let’s create a VM with Container-Optimized OS:
# Create your secure VM instance
gcloud compute instances create $VM_NAME \
  --zone=$ZONE \
  --machine-type=e2-medium \
  --image-family=cos-stable \
  --image-project=cos-cloud \
  --boot-disk-size=20GB \
  --tags=http-server,https-server

Opening the Right Doors (Firewall Rules)
We need to tell Google which ports people can use to reach your app:
# This is like installing the right doorways in your building
gcloud compute firewall-rules create $APP_NAME-allow-web \
  --allow tcp:80,tcp:443 \
  --source-ranges 0.0.0.0/0 \
  --target-tags http-server,https-server
What just happened? We told Google:
- tcp:80: The standard HTTP entrance (like the main lobby)
- tcp:443: The standard HTTPS entrance (like the secure VIP entrance)
- 0.0.0.0/0: Anyone on the internet can use these doors (which is what we want!)
Getting Your Hands Dirty: SSH Into Your Server
Time to connect to your shiny new server:
# This opens a door directly to your cloud computer
gcloud compute ssh $VM_NAME --zone=$ZONE

When you run this. You’re suddenly “inside” a computer sitting in a Google data center. If it asks “Do you want to continue?”—just type Y and hit Enter. It’s creating secure keys so only you can access your server.
Setting Up Your App (The Container Way)
Now we’re inside your Container-Optimized OS machine. Let’s set up a basic app structure that we can secure:
Your First Container: A Simple Web App
Let’s start with a basic web server to test everything:
# Start a simple web application container
docker run -d --name web-app \
  --network app-network \
  -v $(pwd)/html:/usr/share/nginx/html:ro \
  nginx:alpine

Enter HAProxy: Your SSL Buddy
HAProxy is going to be the star of our show. Think of it as a super-smart bouncer that sits in front of your app. It handles all the SSL/HTTPS complexity so your app doesn’t have to worry about it.
Creating HAProxy’s Brain (The Configuration)
# Create HAProxy configuration directory
mkdir -p haproxy

# Create the initial configuration
cat > haproxy/haproxy.cfg << 'EOF'
defaults
    mode http
    timeout connect 5000ms
    timeout client 50000ms
    timeout server 50000ms
    default-server init-addr none
    option http-server-close

resolvers docker_resolver
    nameserver dns 127.0.0.11:53

frontend http-in
    bind *:8080

    # For now, just route everything to our test app
    default_backend web-app

# This is where our test app lives
backend web-app
    server app1 web-app:80 check inter 10s resolvers docker_resolver resolve-prefer ipv4
EOF

Launching HAProxy
# Start HAProxy container
docker run -d --name haproxy \
  --network app-network \
  -p 80:8080 \
  -v $(pwd)/haproxy:/usr/local/etc/haproxy:ro \
  haproxy:2.4

Test time! Open a new browser tab and visit your domain (just HTTP for now). You should see your test page coming through HAProxy.
Let’s Encrypt: Here we go!
Here’s where the real magic happens. Let’s Encrypt is going to verify that you really own your domain, then give you a free SSL certificate. It’s like getting a digital passport for your website.
Setting Up the Challenge Test
Let’s Encrypt needs to verify you own your domain. It does this by asking you to serve a special file at a specific URL. We’ll set up a separate container just for this:
# Create directory for Let's Encrypt challenges
mkdir -p ~/certbot-webroot/.well-known/acme-challenge
chmod -R 755 ~/certbot-webroot/

# Start a challenge server (this serves the verification files)
docker run -d \
  --name letsencrypt-challenge \
  --network app-network \
  -v /home/chronos/certbot-webroot:/usr/share/nginx/html:ro \
  --restart unless-stopped \
  nginx:alpine

Teaching HAProxy About Challenges
We need to update HAProxy so it knows how to handle Let’s Encrypt verification requests:
cat > haproxy/haproxy.cfg << 'EOF'
defaults
    mode http
    timeout connect 5000ms
    timeout client 50000ms
    timeout server 50000ms
    default-server init-addr none
    option http-server-close

resolvers docker_resolver
    nameserver dns 127.0.0.11:53

frontend http-in
    bind *:8080

    # Special route for Let's Encrypt challenges
    acl is_letsencrypt path_beg /.well-known/acme-challenge/
    use_backend letsencrypt if is_letsencrypt

    # Everything else goes to your app
    default_backend web-app

# Your app
backend web-app
    server app1 web-app:80 check inter 10s resolvers docker_resolver resolve-prefer ipv4

# Let's Encrypt challenge handler
backend letsencrypt
    server letsencrypt letsencrypt-challenge:80 check inter 10s resolvers docker_resolver resolve-prefer ipv4
EOF

# Restart HAProxy with new config
docker restart haproxy

Testing the Challenge Setup
Let’s make sure everything works before we ask Let’s Encrypt for a certificate:
# Create a test challenge file
echo "Let's Encrypt test - this means it's working!" >
/certbot-webroot/.well-known/acme-challenge/test.txt

# Test if we can reach it through HAProxy
curl http://$DOMAIN/.well-known/acme-challenge/test.txt
If you see “Let’s Encrypt test – this means it’s working!” then you’re golden! If not, double-check that your domain is pointing to your server’s IP.
The Moment of Truth: Getting Your SSL Certificate
This is it—the moment we ask Let’s Encrypt for a real SSL certificate:
# Clean up our test file
rm /home/chronos/certbot-webroot/.well-known/acme-challenge/test.txt

docker run --rm \
  -v /etc/letsencrypt:/etc/letsencrypt:rw \
  -v /home/chronos/certbot-webroot:/var/www/certbot:rw \
  certbot/certbot certonly \
  --webroot \
  --webroot-path /var/www/certbot \
  --email $EMAIL \
  --agree-tos \
  --non-interactive \
  -d $DOMAIN

If everything worked, you should see something like:

Successfully received certificate.
Certificate is saved at: /etc/letsencrypt/live/your-domain.com/fullchain.pem
Key is saved at: /etc/letsencrypt/live/your-domain.com/privkey.pem
Congratulations! You now have a real SSL certificate issued by a trusted authority!
Putting It All Together: HTTPS Time!
Now comes the fun part—we’re going to configure HAProxy to actually use your shiny new SSL certificate.
Preparing the Certificate for HAProxy
HAProxy has a specific way it likes certificates. We need to combine the certificate and private key into one file:
# Create combined certificate file that HAProxy can understand
sudo cat /etc/letsencrypt/live/$DOMAIN/fullchain.pem \
     /etc/letsencrypt/live/$DOMAIN/privkey.pem \
     | sudo tee ~/ssl-tutorial/haproxy/$DOMAIN.pem > /dev/null

# Set secure permissions (very important!)
sudo chmod 600 ~/ssl-tutorial/haproxy/$DOMAIN.pem
sudo chown chronos:chronos ~/ssl-tutorial/haproxy/$DOMAIN.pem

The Final HAProxy Configuration
Time for the grand finale. This configuration will handle both HTTP and HTTPS, automatically redirect users to the secure version, and add security headers:
cat > haproxy/haproxy.cfg << EOF
defaults
    mode http
    timeout connect 5000ms
    timeout client 50000ms
    timeout server 50000ms
    default-server init-addr none
    option http-server-close

resolvers docker_resolver
    nameserver dns 127.0.0.11:53

frontend http-in
    bind *:8080
    bind *:8443 ssl crt /usr/local/etc/haproxy/$DOMAIN.pem

    # Automatically redirect HTTP to HTTPS (the magic happens here!)
    redirect scheme https if !{ ssl_fc }

    # Handle Let's Encrypt challenges (but only on HTTP)
    acl is_letsencrypt path_beg /.well-known/acme-challenge/
    use_backend letsencrypt if is_letsencrypt !{ ssl_fc }

    # Add security headers that make browsers happy
    http-response set-header Strict-Transport-Security "max-age=31536000; includeSubDomains; preload"
    http-response set-header X-Frame-Options "SAMEORIGIN"
    http-response set-header X-Content-Type-Options "nosniff"
    http-response set-header X-XSS-Protection "1; mode=block"

    # Route to your app
    default_backend web-app

# Your app backend
backend web-app
    server app1 web-app:80 check inter 10s resolvers docker_resolver resolve-prefer ipv4

# Let's Encrypt challenge backend
backend letsencrypt
    server letsencrypt letsencrypt-challenge:80 check inter 10s resolvers docker_resolver resolve-prefer ipv4
EOF

The Last Restart
Now we are going to restart our server in order to verify and check whether our setup had worked properly.
# Stop the current HAProxy
docker stop haproxy && docker rm haproxy

# Start the HTTPS-enabled version
docker run -d --name haproxy \
  --network app-network \
  -p 80:8080 \
  -p 443:8443 \
  -v $(pwd)/haproxy:/usr/local/etc/haproxy:ro \
  haproxy:2.4

The Moment of Truth: Testing Your Secure Site
Let’s see if it worked:
# Test HTTPS
curl -I https://$DOMAIN

# Test that HTTP redirects to HTTPS
curl -I http://$DOMAIN
Open your browser and visit your domain with HTTPS. You should see:
- That beautiful green padlock icon
- Your site loading over HTTPS
- HTTP automatically redirecting to HTTPS
You did it! You now have a properly secured website!
When Things Go Wrong (They Sometimes Do)
Even the best setups can have hiccups. Here are the most common issues and how to fix them:
“Certificate not found” Errors
# Check if your certificate files exist
sudo ls -la /etc/letsencrypt/live/$DOMAIN/

# Check if HAProxy can read the combined certificate
ls -la ~/ssl-tutorial/haproxy/$DOMAIN.pem

# If files are missing, regenerate the combined certificate
sudo cat /etc/letsencrypt/live/$DOMAIN/fullchain.pem \
     /etc/letsencrypt/live/$DOMAIN/privkey.pem \
     | sudo tee ~/ssl-tutorial/haproxy/$DOMAIN.pem > /dev/null
HAProxy Won’t Start
# Check HAProxy logs
docker logs haproxy

# Test HAProxy configuration
docker run --rm \
  -v $(pwd)/haproxy:/usr/local/etc/haproxy:ro \
  haproxy:2.4 haproxy -f /usr/local/etc/haproxy/haproxy.cfg -c
Let’s Encrypt Challenges Failing
# Make sure your domain points to your server
nslookup $DOMAIN

# Test if the challenge endpoint works
echo "test" > /home/chronos/certbot-webroot/.well-known/acme-challenge/test.txt
curl http://$DOMAIN/.well-known/acme-challenge/test.txt
You Did It! Welcome to the HTTPS Club
Take a moment to appreciate what you just accomplished. You took an unsecured website and turned it into a properly encrypted, professionally secured web application. That green badge represents real security that protects your users.
What This Means for You
- User Trust: People trust sites with HTTPS more. They’re more likely to enter personal information, make purchases, or just stick around longer.
- SEO Boost: Google gives preference to HTTPS sites in search results. You just gave yourself a ranking boost.
- Professional Credibility: That padlock says “this person knows what they’re doing.”
- Future-Proof: You now have the skills to secure any web application you build.
What’s Next on Your Security Journey?
Now that you’ve got the basics down, here are some things you might want to explore:
HTTP Security Headers: We added some basic ones, but there are more advanced headers like Content Security Policy that can provide even more protection.
Web Application Firewall: Services like Cloudflare can add an extra layer of protection in front of your site.
Advanced Monitoring: Set up alerting so you know immediately if something goes wrong with your certificates.
Multiple Domains: Once you’re comfortable with this setup, adding additional domains is straightforward.
The Final Stretch
Let me leave you with this: setting up HTTPS used to be expensive, complicated, and the domain of big companies with dedicated DevOps teams. The fact that you can now do it for free, with open-source tools is already outstanding.
You’re placing a block to make the entire internet more secure. Every site that moves from HTTP to HTTPS makes the web a little bit safer for everyone.
The green padlock isn’t just about your site, it’s about contributing to a more secure internet for all of us.
References:
https://cloud.google.com/container-optimized-os/docs/concepts/features-and-benefits
https://cloud.google.com/container-optimized-os/docs/concepts/security
🎭 GET 22% OFF our AWS Security Specialty and AZ-500 Azure Security Engineer Associate Practice Exams – Master Cloud Security Now!

Learn AWS with our PlayCloud Hands-On Labs

$2.99 AWS and Azure Exam Study Guide eBooks

New AWS Generative AI Developer Professional Course AIP-C01

Learn GCP By Doing! Try Our GCP PlayCloud

Learn Azure with our Azure PlayCloud

FREE AI and AWS Digital Courses

FREE AWS, Azure, GCP Practice Test Samplers


Subscribe to our YouTube Channel

Follow Us On Linkedin


