Last updated on June 12, 2025
Hey, this is Step 6 of our 9-step website portfolio building with AWS!
Got lost? Click here to go to the main article, and here for the fifth step!
WordPress is one of the most powerful and best-used platforms on the market for web construction and management. It’s a content management system (CMS) that gives users everything they need to build, modify, and manage websites without necessarily requiring technical know-how. As much as WordPress has an abundance of features, one of WordPress’s most prominent is the Dashboard—a user-friendly interface from which all of the functions of website management are managed from one place.
Whether you are new to publishing your website or a seasoned coder publishing a more complex project, the ability to work in the WordPress Dashboard is something that you will want to become familiar with. Over the course of this article, we will walk you through everything that you will need to know so that you can begin using the WordPress Dashboard, from its very simplest functions all the way up through how you might customize it so that it works for your needs.
What is the WordPress Dashboard?
WordPress Dashboard is the dashboard you use to manage everything on your website. It’s the very first thing that loads when you log into WordPress, presenting you with direct access to the things and choices you can play around with your website. It enables you:
-
Create and manage content (posts, pages, and media)
-
Install and manage themes and plugins
-
Manage the appearance of your site
-
View key statistics and news for your site
-
Configure global settings, such as user roles, reading preferences, and SEO
With all these options, the WordPress Dashboard is your starting point for anything related to managing your website.

Key Components of the WordPress Dashboard
Now, let’s go through the several areas and functionalities of the WordPress Dashboard step by step to familiarize ourselves with its appearance and performance.
1. Admin Toolbar
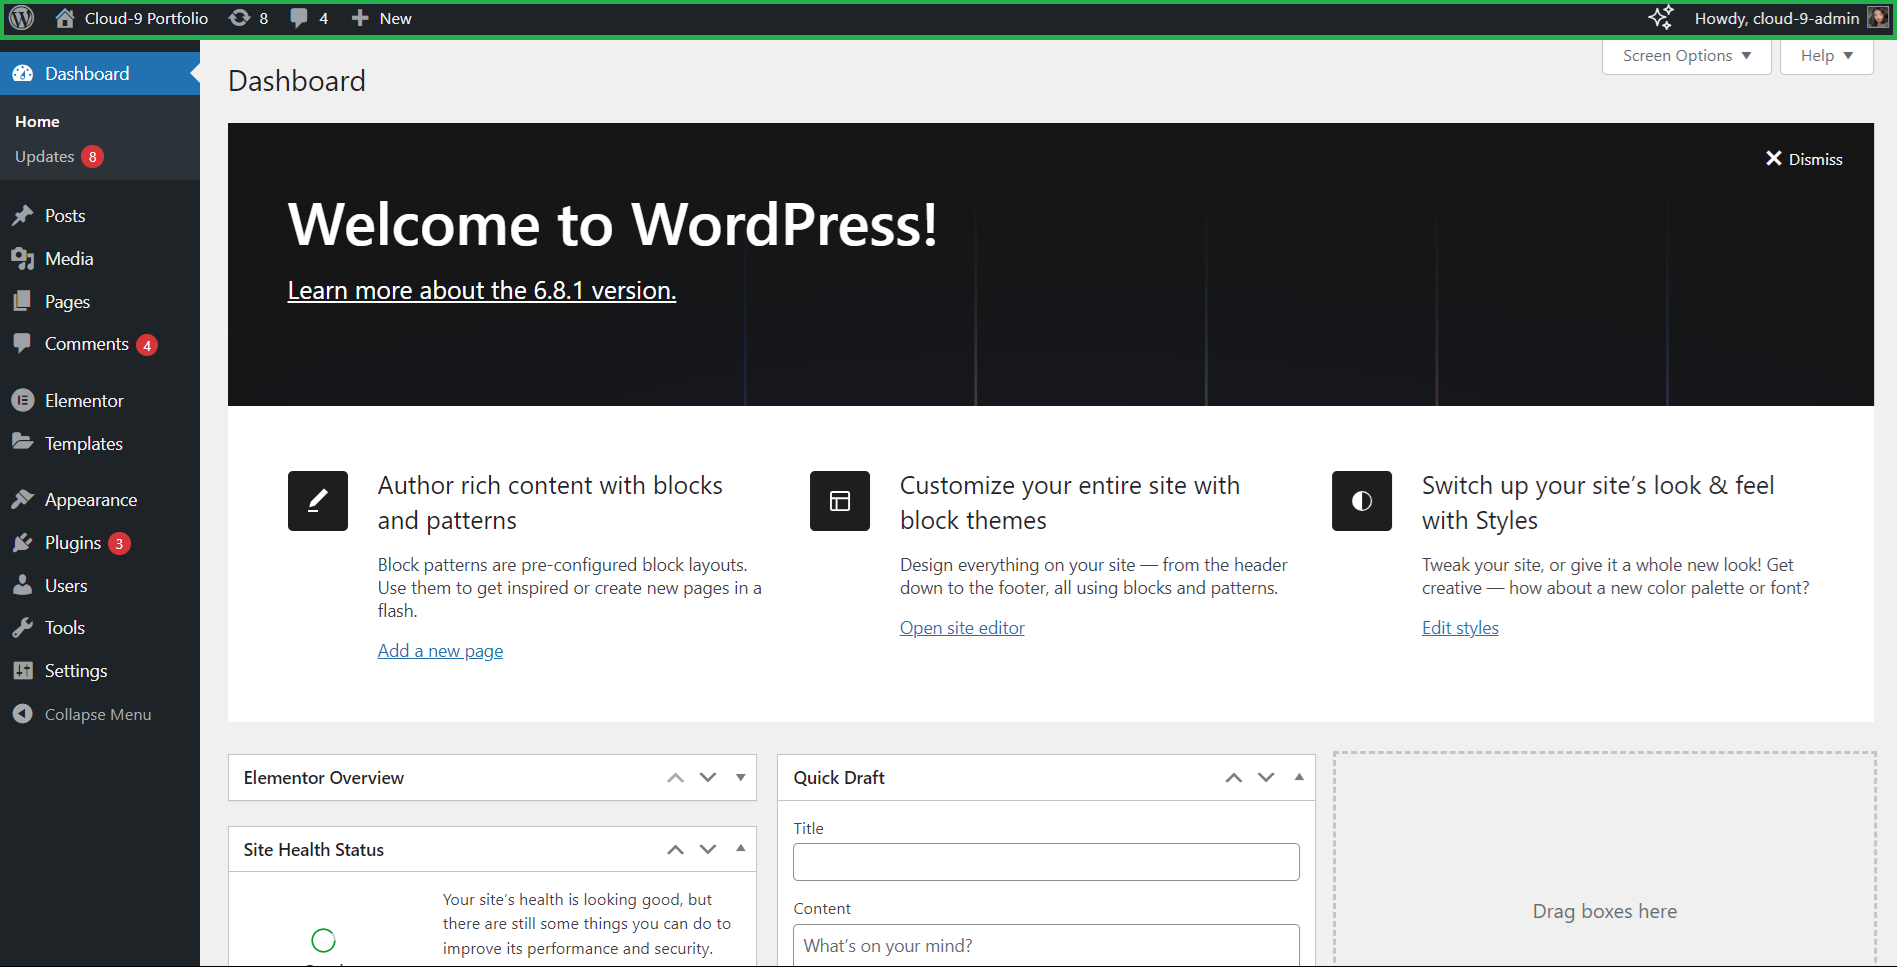
At the very top of the page, you’ll see the Admin Toolbar. This is a sticky toolbar that remains in one spot as you hover around your site’s front-end dashboard. The Admin Toolbar includes quick links to important actions, such as:
-
Visit Site: Switch right to your site’s front end and see your visitor’s perspective when visiting your website.
-
Edit Profile: Modify user profile information such as password, display name, etc.
-
Log Out: Log off the WordPress dashboard quickly when done.
Admin Toolbar also includes shortcuts for creating new content (like a new page or post) and accessing helpful resources.
2. Sidebar Menu

The Sidebar Menu is where most of the management options are located. It is a collapsible sidebar menu on the left side containing links to the WordPress main sections. Some of the important sections in the sidebar menu are:
-
Pages: Build static pages such as your home page, about page, and contact page.
-
Media: Upload, organize, and control all your media files (images, videos, documents, etc.).
-
Appearance: Install the theme and appearance of your site, including widgets, menus, and theme options.
-
Plugins: Plugins assist you in adding new functionality to your site.
-
Users: Control user permissions and roles. Add new users, assign roles such as administrator or editor, and permissions.
-
Settings: Set site settings, including your site title and tagline, time zone, and permalink.
These options will guide you in setting up and managing various aspects of your site.
3. Dashboard Widgets
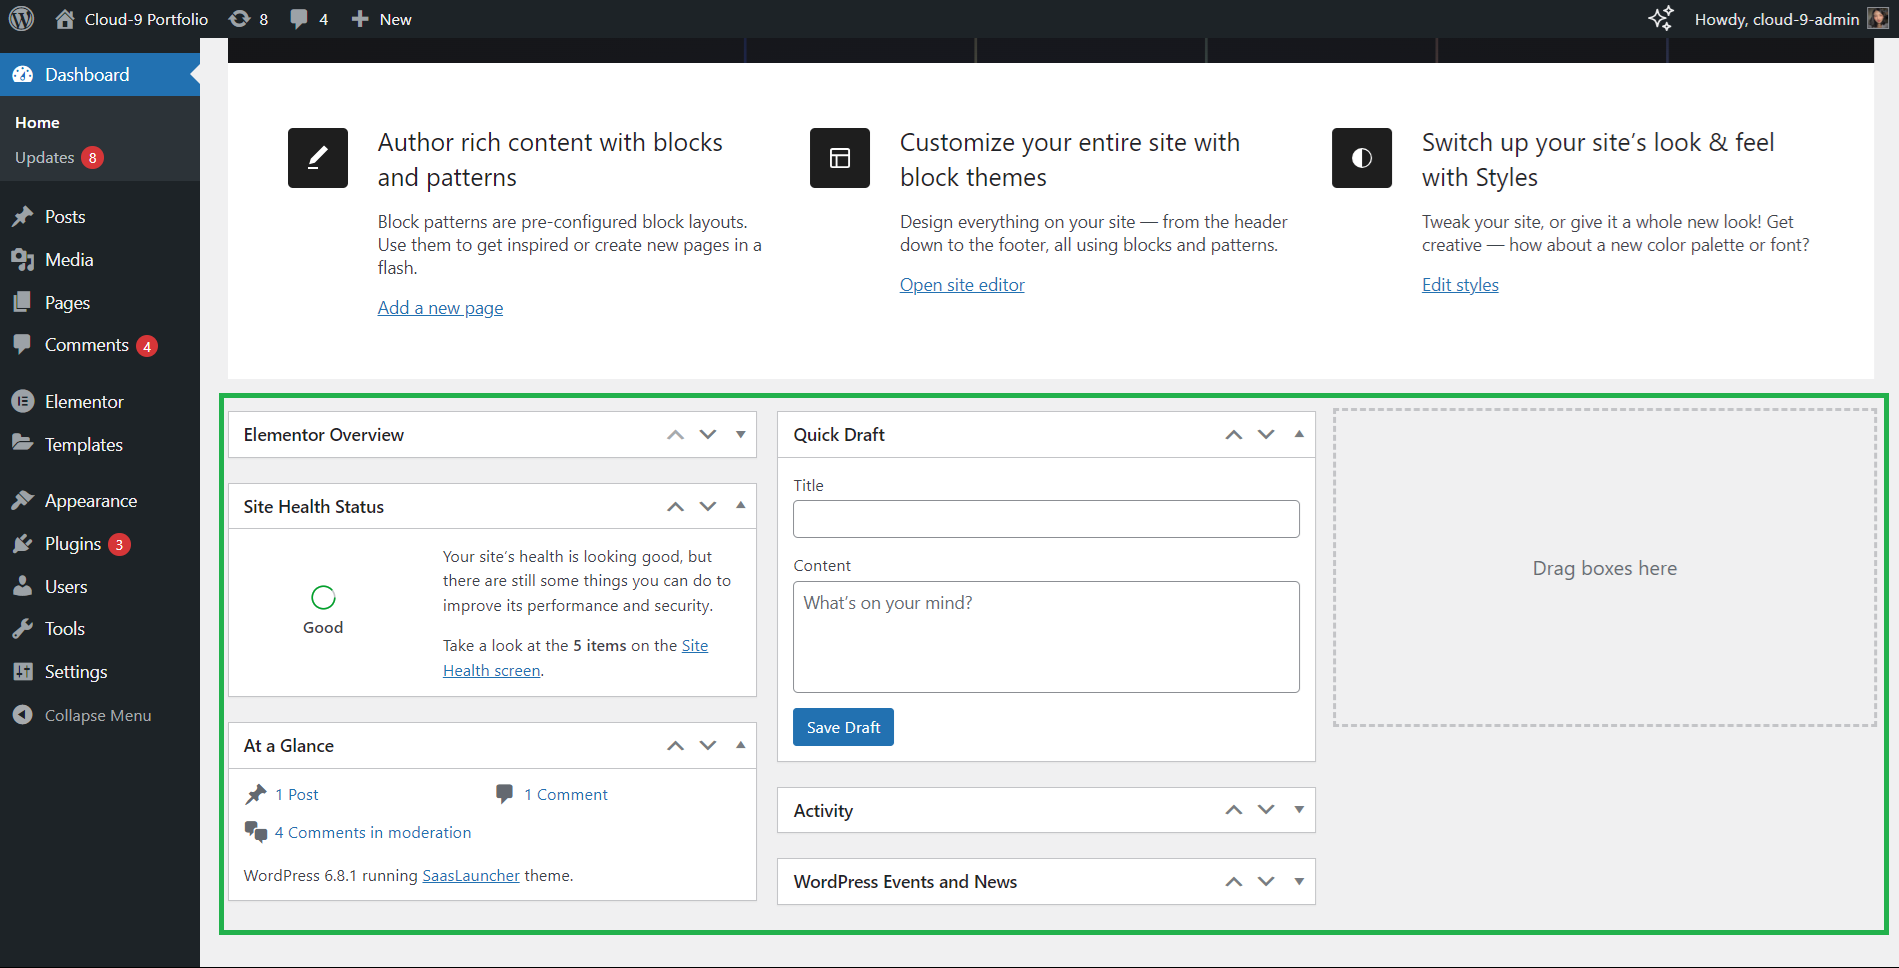
Dashboard widgets are panels that give a quick view of any key data. It displays important statistics and details about your website. Some useful widgets are:
-
At a Glance: Shows basic statistics such as number of posts, pages, and comments on your site.
-
Activity: Shows the latest activity, including published posts and comments.
-
Quick Draft: A simple text editor where you can compose a post or note without entirely creating or posting it to your website.
-
WordPress News: Displays the newest news of the WordPress community, e.g., updates, security news, and plugin releases.
You can also personalize the widgets to your workflow. For example, you may choose to remove unnecessary widgets or add new ones for site monitoring.
4. Welcome Panel
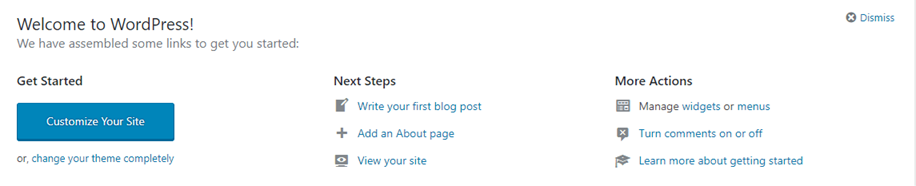
The Welcome Panel is displayed on the dashboard by default, particularly for new users. It provides helpful links for getting started and running your website. For instance, it can offer immediate links to:
-
Create your first post
-
Install a theme
-
Configure widgets and menus
-
Connect with support documentation or forums

The Welcome Panel is designed to help you get started quickly and guide you through some of the common first steps.
See You in My Next Article!
In my next article, we’ll explore website customization in WordPress, particularly the templates and plugins you use to get started and how you can customize them to your liking.
I’ll see you at Cloud-9.7: Your Guide to WordPress Plugins and Templates!
Frequently Asked Questions
- How do I customize the WordPress Dashboard to suit my needs?
- You can customize the Dashboard by rearranging, adding, or removing widgets. Use the “Screen Options” tab to adjust what appears. Plugins can also help with advanced customization.
- Can I manage multiple websites from a single WordPress Dashboard?
- Yes, WordPress Multisite allows you to manage multiple sites under one installation, with separate dashboards for each site but a central admin panel.
- How can I access my WordPress Dashboard if I forget my login credentials?
- Click the “Lost your password?” link on the login page to reset your password via email. If that doesn’t work, try resetting it through your hosting provider.
🤖 $3.49 eBooks Start Here – Get Up to 30% OFF All AI & Machine Learning Reviewers

Turn Your Team Into Cloud-Ready Professionals Today

Learn AWS with our PlayCloud Hands-On Labs

$2.99 AWS and Azure Exam Study Guide eBooks

New Claude Certified Architect Foundations CCA-F

Learn GCP By Doing! Try Our GCP PlayCloud

Learn Azure with our Azure PlayCloud

FREE AI and AWS Digital Courses

FREE AWS, Azure, GCP Practice Test Samplers


Subscribe to our YouTube Channel

Follow Us On Linkedin


