Last updated on September 21, 2025
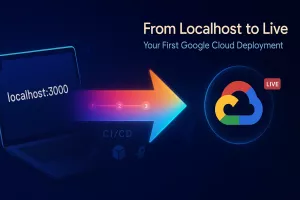
We’ve all been there. You’ve just built something new and unique, maybe it’s your portfolio website, a cool API, or that side project you’ve been working on for weeks. It works perfectly on your laptop, your friends are asking to see it, but there’s just one problem… it’s stuck on localhost:3000.
But, what if you wanted to deploy it on the web and let others see it as well. Well, you have come to the right place! This guide will walk you through deploying any application from GitHub to Google Cloud Platform.
No DevOps experience needed or complex configurations, this is made of straightforward steps that actually work. By the end, you’ll have a deployed website that you can share.
Let’s turn that local project into something the world can actually use.
What Are We Actually Doing Here?
In case you’re still wondering what “deploying to the cloud” actually means, here’s the gist of it. You know how your laptop runs your app locally? Well, Google has massive data centers full of computers that never turn off. We’re basically going to rent a tiny slice of one of those computers and run your app there instead.
The word “cloud” might sound intimidating, but it’s really just someone else’s computer that’s always connected to the internet. And today, that someone else is Google Cloud Platform, and they’re letting you use their computers for free (at least for the first three months).
Meet Your New Best Friend: Google Cloud Platform
The first time I deployed something to the cloud, I was terrified. What if I accidentally rack up thousands in charges or if it’s too complicated? But here’s what actually happened: it worked on the first try, cost me nothing (thanks to free credits), and felt like absolute magic.
Google Cloud Platform (GCP) is one of the “big three” cloud providers, alongside Amazon’s AWS and Microsoft’s Azure. What I love about GCP is that it’s powerful enough to run YouTube and Gmail, but simple enough for us to deploy our little side projects. Plus, they give you $300 in free credits when you sign up. That’s like getting free hosting for months!
Let’s Get This Deployment Started
Before we dive into the exciting part, we need to handle the set-up.
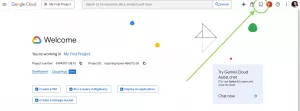
Step 1: Get Your Google Cloud Account
Head over to console.cloud.google.com. If you have a Gmail account, you’re already halfway there. Sign in and Google will greet you with a sweet offer: $300 in free credits. Accept it! That’s free resources to experiment with.
Now it may ask you for your billing details, but here’s the thing: they won’t charge you anything without your explicit permission. It’s like those free trials that actually mean it.
Step 2: Create Your First Project
Once you’re in, you’ll need to create a project. Think of a project as a folder where all your cloud stuff lives. Click “Select a project” at the top, then “New Project.” Give it a name that reflects what you would like to do or work on. The name doesn’t really matter; it’s just for your own organization.
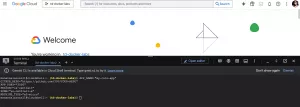
Step 3: Navigate Through Cloud Shell
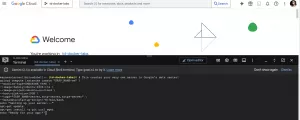
Here’s where things get cool. See that little terminal icon (>_) in the top-right corner? Click it. You now have a Linux computer running in your browser. This is Cloud Shell, and it’s going to be our command center for the next few minutes.
This blew my mind when I first discovered it. Google is literally giving you a free computer to use whenever you want. It has all the tools pre-installed, it saves your files, and you can access it from anywhere.
Where it all Begins: Setting Up Your Virtual Machine
A Virtual Machine (VM) is exactly what it sounds like—a virtual computer. It’s software pretending to be hardware. This is where we will deploy our website!

Copy and paste this into your Cloud Shell, but first—and this is important—change the parts I’ve marked:
 APP_NAME="my-cool-app"
GITHUB_REPO="https://github.com/YOU/YOUR-REPO"
APP_PORT="3000"
REGION="us-central1"
ZONE="us-central1-a"
MACHINE_TYPE="e2-micro"
Let me break down what we just set up:
- APP_NAME: This is just a nickname. Call it whatever you want—”my-blog,” “todo-app,” “world-domination-planner”—whatever floats your boat.
- GITHUB_REPO: This is where your code lives. If you haven’t pushed your code to GitHub yet, now’s the time!
- APP_PORT: Most web apps run on port 3000 or 8080. If you’re not sure, 3000 is a safe bet.
- MACHINE_TYPE: We’re using e2-micro because it’s FREE for the first month and only $6/month after. Perfect for learning!
Turning On the Right Services for Deployment
Google Cloud has tons of tools, but they’re not all open by default. Let’s open the ones we need:
# This is like turning on the features we need # (Similar to enabling features on your phone) gcloud services enable \ compute.googleapis.com \ cloudbuild.googleapis.com
# This is like turning on the features we need
# (Similar to enabling features on your phone)

gcloud services enable \
  compute.googleapis.com \
  cloudbuild.googleapis.com
echo "✨ Services activated! We're ready to create your server."
We turned on Compute Engine (which lets us create virtual machines) and Cloud Build (which helps with deploying code). Think of it as downloading the apps you need before you can use them.
Setting Up Security (Don’t Worry, It’s Not Scary)
Before we create your server, we need to tell Google who’s allowed to visit your app. This part sounds technical, but it’s actually super simple.
# This tells Google "let people visit my app through these doors"
gcloud compute firewall-rules create "$APP_NAME-allow-web" \
--allow tcp:80,tcp:443,tcp:$APP_PORT \
--source-ranges 0.0.0.0/0 \
--target-tags "$APP_NAME-server"
Okay, what just happened? We basically told Google:
- tcp:80, tcp:443: These are the standard web ports (like the main entrance to a building)
- tcp:$APP_PORT: This is your app’s special entrance
- 0.0.0.0/0: This means “anyone on the internet” (which is what we want—we’re not building a secret app!)

Creating Your Server for Deployment
# This creates your very own server in Google's data center!
gcloud compute instances create "$APP_NAME-vm" \
--machine-type=$MACHINE_TYPE \
--image-family=ubuntu-2204-lts \
--image-project=ubuntu-os-cloud \
--boot-disk-size=10GB \
--tags="$APP_NAME-server,http-server,https-server" \
--metadata=startup-script='#!/bin/bash
echo "Setting up your server..."
apt-get update
apt-get install -y git curl wget
echo "Ready for your app!"'
Here the gist of what we have done:
- A small computer (e2-micro – perfect for learning)
- Running Ubuntu (a friendly version of Linux)
- With 10GB of storage (plenty for most apps)
- Basic tools pre-installed (git, curl, wget – the essentials)
Finding Your App’s New Home Address
# Let's find out where your app will live on the internet
EXTERNAL_IP=$(gcloud compute instances describe "$APP_NAME-vm" \
--format='value(networkInterfaces[0].accessConfigs[0].natIP)')

Your app's new address: http://$EXTERNAL_IP:$APP_PORT"
That IP address is like your app’s street address on the internet. Anyone in the world can use it to visit your app!
Moving Your Code to Its New Home
Now comes the fun part—we’re going to connect to your brand new server and install your app.
# This is like opening a door to your cloud computer
gcloud compute ssh "$APP_NAME-vm"
When you run this, something magical happens. You’re suddenly “inside” a computer that’s sitting in a Google data center somewhere. The prompt changes, and you’re now controlling a machine
If it asks “Do you want to continue?”—just type Y and hit Enter. It’s creating secure keys so only you can access your server.
Getting Your Code from GitHub
# First, let's see where we are
pwd # This shows your current location (probably /home/your-username)

# Now let's get your code from GitHub
git clone YOUR_GITHUB_REPO_URL_HERE # Replace with your actual URL!

# Move into your project folder
cd your-repo-name # Replace with your actual repo name

# Let's see what we've got
ls -la # This lists all your files
You should see all your familiar files—your README, your source code, everything from your GitHub repository.
Making Your App Run
This part depends on what kind of app you built. Don’t worry—I’ll cover all the common ones. Just find your language and follow along.
If You Built a Node.js App (JavaScript)
Node.js apps are super common these days. If you’ve got a package.json file, this is for you:
# First, let's install Node.js (JavaScript for servers)
curl -fsSL https://deb.nodesource.com/setup_18.x | sudo -E bash -
sudo apt-get install -y nodejs

# Let's verify it worked
node --version # Should show v18.something
npm --version # Should show 9.something

# Install your app's dependencies (this reads your package.json)
npm install

# The moment of truth... start your app!
npm start
If You Built a Python App
Python apps are equally awesome. Here’s how to get yours running:
# Python usually comes pre-installed, but let's make sure
sudo apt-get update
sudo apt-get install -y python3 python3-pip

# Check the version
python3 --version # Should show Python 3.something

# Install your requirements
pip3 install -r requirements.txt

# Run your app!
python3 app.py # Or whatever your main file is called

# For Flask apps specifically:
# flask run --host=0.0.0.0 --port=$APP_PORT
If You Have a Static Website (Just HTML/CSS/JS)
Got a simple website? This is the easiest one:
# Install a web server (Nginx is perfect for this)
sudo apt-get update
sudo apt-get install -y nginx

# Copy your files to the web folder
sudo cp -r * /var/www/html/

# Start the server
sudo systemctl start nginx

# That's it! Your site is live!
The “Keep It Running” Problem (And How to Fix It)
Here’s something nobody tells you: when you close your terminal, your app might stop running. It’s like your app needs you to watch it work. Let’s fix that so your app runs even when you’re sleeping.
For Node.js Apps: Meet PM2
PM2 is like a babysitter for your Node.js app. It keeps it running no matter what:
# Install PM2 globally
sudo npm install -g pm2

# Start your app with PM2 instead of npm start
pm2 start app.js --name "$APP_NAME" # or whatever your main file is

# Tell PM2 to restart your app if the server restarts
pm2 startup
pm2 save

# Check if your app is running
pm2 status # You should see your app with status "online"
For Python Apps:
# Run your Python app in the background
nohup python3 app.py > app.log 2>&1 &

# The 'nohup' means "no hangup" - keep running even if I leave
# The '&' at the end means "run in background"

# Check if it's running
ps aux | grep python  # You should see your app in the list
Testing Your Live App Deployment

Let’s see if your app is actually accessible from the internet!
Step 1: Exit Your Server
# Type 'exit' to leave your cloud server
exit

# You're back in Cloud Shell now

Step 2: Visit Your App

# Let's test if your app responds
curl http://$EXTERNAL_IP:$APP_PORT

# But even better, just open your browser and visit:
echo "🌍 Click this link: http://$EXTERNAL_IP:$APP_PORT"
Open that link in a new tab. If you see your app… CONGRATULATIONS! You just deployed to the cloud!
Your First 3 Months: Basically Free
Remember those $300 credits Google gave you? Here’s how far they’ll go:
- e2-micro instance: About $6/month
- 10GB storage: About $0.40/month
- Network traffic: Unless you go viral, basically free
This will take you a long time, but you can always just turn it off when you don’t need it anymore, just don’t forget it!
Stopping the VM Instance
Maybe you’re done with your project, or you just want to pause to avoid charges. No problem! You have options:
The Pause Button (You Can Resume Later)
# This stops your VM but keeps everything saved
gcloud compute instances stop "$APP_NAME-vm"

# Your app goes offline, but you stop paying for compute
# Your disk and IP are saved

# When you're ready to resume:
gcloud compute instances start "$APP_NAME-vm"
The Nuclear Option (Delete Everything)
# This deletes everything - no more charges, but no more app
gcloud compute instances delete "$APP_NAME-vm" --quiet

# Also clean up the firewall rules
gcloud compute firewall-rules delete "$APP_NAME-allow-web" --quiet
What’s Next?
Now that you’ve got the basics down, here are some things you might want to explore in deployment:
Get a Real Domain Name: Instead of sharing an IP address, get a domain like myawesomeapp.com. It’s like $12/year and makes you look super professional.
Add HTTPS: That little padlock in the browser that makes your site secure? You can add it for free with Let’s Encrypt. Users trust sites with HTTPS more.
Set Up Continuous Deployment: Imagine if your app automatically updated every time you pushed to GitHub. That’s possible with GitHub Actions!
Learn About Docker: Containers are the next level of deployment. They make your app portable and consistent across any environment.
But honestly? For now, just enjoy the fact that your app is live. Share it with friends and you can also put it on your resume
The Real Talk
Let me leave you with this: the deployment your first app is a rite of passage. It’s the moment you go from playing with code to building real things that real people can use. It might feel overwhelming at first, but remember every developer you went through this exact same process.
Welcome to the cloud. Welcome to the world of deployed applications. Most importantly, welcome to the community of developers who ship real things.
Now go forth and deploy!
References:
🎭 GET 22% OFF our AWS Security Specialty and AZ-500 Azure Security Engineer Associate Practice Exams – Master Cloud Security Now!

Learn AWS with our PlayCloud Hands-On Labs

$2.99 AWS and Azure Exam Study Guide eBooks

New AWS Generative AI Developer Professional Course AIP-C01

Learn GCP By Doing! Try Our GCP PlayCloud

Learn Azure with our Azure PlayCloud

FREE AI and AWS Digital Courses

FREE AWS, Azure, GCP Practice Test Samplers


Subscribe to our YouTube Channel

Follow Us On Linkedin


