Last updated on December 28, 2023
With the rapid advancement of technology today, it is undeniable that this has resulted in a higher number of cyber-attacks, calling every website owner to strengthen their preemptive measure to protect and have robust security for their website and its users. One essential way of boosting website security is by obtaining an SSL (Secure Sockets Layer) certificate. This article will explore the reasons and benefits of adding an SSL certificate to your WordPress website. We will also provide step-by-step instructions on obtaining and installing an SSL certificate using Certbot for Nginx on a Ubuntu 20.04 server. So, let’s start and make your website a secure and trustworthy place for users to visit!
Reasons and benefits why you need to use an SSL Certificate
You may have noticed that some websites have “HTTPS” in their URLs, while others only have “HTTP” when you’re browsing the internet. Websites without ‘s’ in their Hypertext Transfer Protocol (HTTP) do not have an additional security layer, which means that any information sent between the website and the user’s browser is vulnerable to interception and reading by third parties, posing a risk to the user’s privacy and security. On the other hand, websites with “HTTPS” in their URL use an additional security layer called SSL/TLS encryption.
Secure Sockets Layer (SSL) is a secure protocol that encrypts the communication between a web server and a web browser. When a website employs SSL, the data transmitted between the server and browser is encrypted and cannot be intercepted or read by anyone attempting to eavesdrop on the connection.
Having an SSL installed on your website does more than just security, but also includes benefits such as:
- Improved search engine ranking: Google and other search engines prioritize websites with SSL-enabled websites. Thus, using SSL on your website will rank higher in search results, resulting in more website traffic.
- Increased confidence: When a website uses SSL, a green padlock icon in the browser bar can make the end user feel more secure and trustworthy of your website.
Prerequisite
To successfully obtain your SSL Certificate, you will need the following:
- Let’s Encrypt is a global Certificate Authority (CA) offering free SSL Certificates that allow you to obtain, renew and manage your SSL/TLS certificates. You may read more about Let’s encrypt here.
- CertBot is a console-based certificate generation tool that allows you to create Let’s Encrypt SSLs on your Ubuntu server easily. With CertBot, you can automatically renew your site’s certificate whenever needed.
- An Nginx installed website. Nginx is another popular tool for web serving, reverse proxying, caching, loading, etc. Nginx is known for its high performance, stability, rich feature set, simple configuration, and low resource consumption.
- A registered domain name. If you’re looking for low-cost but high-stability domain registration, Amazon LightSail offers these things for you. You can host your WordPress website and install Nginx through Amazon LightSail. You can read more about NGINX on Amazon LightSail from here.
With these prerequisites in place, you can successfully add SSL to your WordPress website and improve its security.
Disclaimer: The following steps about adding SSL Certificate can be applied to various hosting platforms and is not specific to Amazon LightSail as long as it is served on a Ubuntu 20.04 server. Setting up SSL for your website can differ depending on your hosting platform.
Steps for Adding an SSL Certificate
The first step is to install the Let’s Encrypt client and Certbot into your server.
Run the following command into your terminal:
sudo apt install certbot python3-certbot-nginx
After installing the Certbot, run this command to specify the domain name you want to be SSL certified.
sudo certbot --nginx -d domain_name
After running the command, a message will prompt you to provide information and agree to its service terms.
First, please enter your email address, which we will use for renewal and security notices. Press “Enter” to proceed. Next, the Terms and Conditions link will show; press “A” to agree. Once you have agreed to the Terms and Conditions, you will be asked whether you would like to share your email address with the Electronic Frontier Foundation so they can send you their other works, news, campaigns, etc. If you would like to receive these, enter “Yes.” If not, enter “No.”
You are now ready to configure your HTTPS setting; select “2” to Redirect all the requests to secure HTTPS access.
After giving all the needed information, Certbot will generate the requested SSL Certificate.
Now, go to your Amazon LightSail instance, then select Networking, in here, you will configure the IPv4 Firewall by adding a rule that permits HTTPS traffic from any IPv4 address.
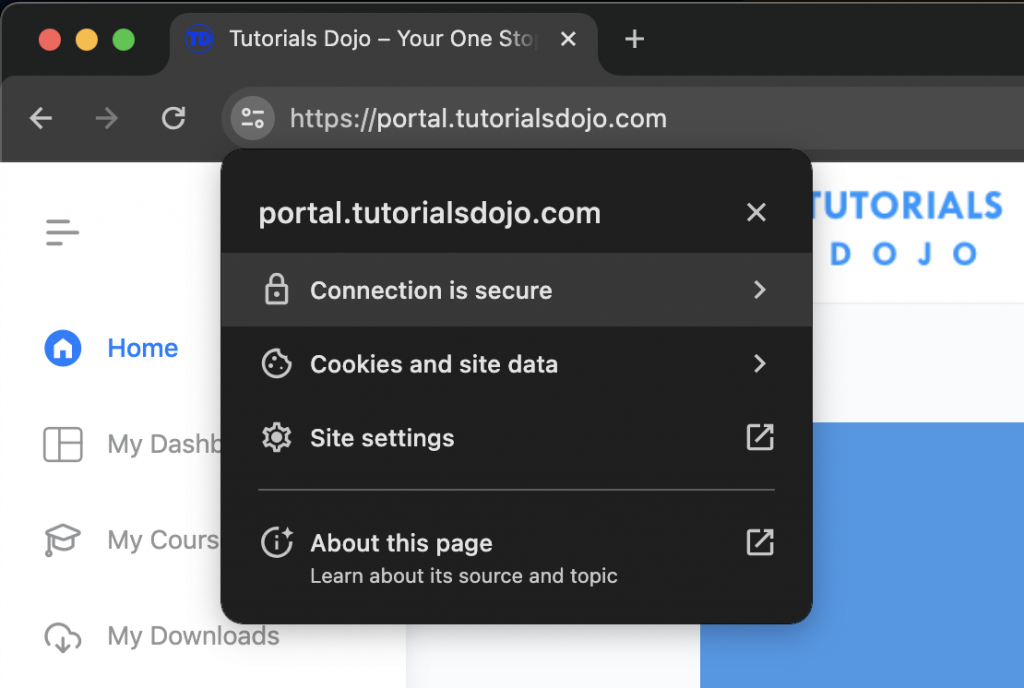
To verify your SSL Certificate, open a browser and visit your website. Hit the padlock icon in the address bar, click Connection is secure, then select Certificate is valid.
Lastly, another window will appear that shows detailed information about your SSL Certificate, indicating that your site is finally secure.
Final Remarks
In conclusion, Let’s Encrypt is a widely used option for obtaining SSL certificates due to its free-of-cost service. One of the main benefits of using Let’s Encrypt is that it provides SSL/TLS encryption for free, making it an excellent option for website owners that is on a budget. However, the drawback of using Let’s Encrypt is that its certificates must be renewed every three months, which can be a hassle for some owners, but this can be automated through a cron job. Apart from the free SSL certificate provider, there are also paid SSL certification options, such as DigiCert, Symantec, Comodo, etc., also available in the market, which offer additional features and support at a higher cost. Overall, the choice of SSL certificate provider will depend on the specific needs and budget of the website owner.


