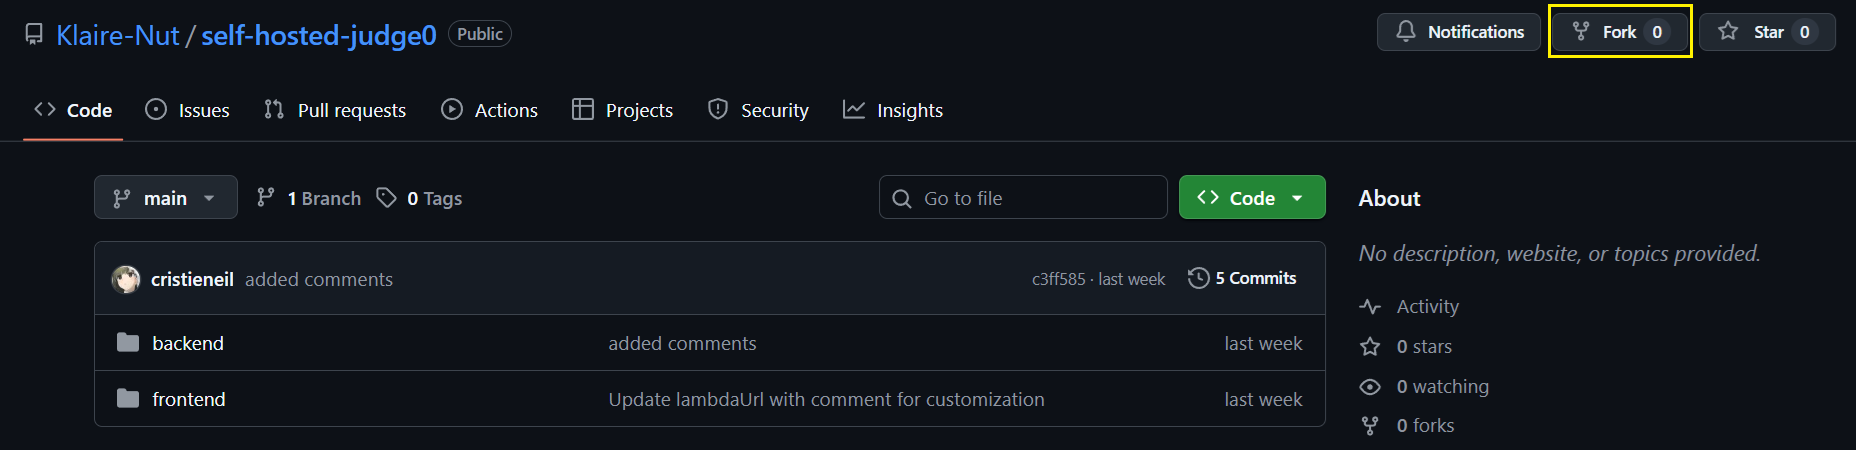
Judge0 is a powerful, open-source code execution system widely used by online coding platforms to run programs in secure environments. However, while it is often accessed as a third-party service, self-hosting Judge0 on AWS significantly grants you complete control over configuration and security. In fact, this level of ownership is essential for handling sensitive data or customizing language support. Moreover, self-hosting enables greater scalability, thereby allowing you to adapt the system as your requirements evolve. Consequently, if you are looking for a robust solution to enhance your coding platform, this guide is the ideal choice. This step-by-step guide will walk you through deploying your own Judge0 backend on an AWS EC2 instance and connecting it to a live frontend application. Perfect for beginners and cloud enthusiasts, this tutorial moves beyond theory to offer hands-on experience with real-world infrastructure. By the end, you will have a fully functional, self-hosted code execution engine running entirely on your own terms. This section of the tutorial walks you through setting up your own instance of the Judge0 API using an Amazon EC2 instance. We will cover everything from launching the server to fixing common To make this tutorial easier to follow, we have prepared a specific repository for you. 1. Fork the Repository 2. Clone Your Fork 3. Verify Configurations 4. Modify Port Configuration Click Launch Instance. To ensure your API endpoint doesn’t change if the server restarts, assign a static IP. Now, connect to your server to install Docker and Docker Compose. Modern Linux systems (like Amazon Linux 2023) use cgroup v2 by default. Judge0 relies on cgroup v1. If you skip this, you will see errors like 1. Transfer Files (SCP) 2. Start the Services 3. Verify Deployment Success! Your self-hosted Judge0 API is now running at In this section, we will run the frontend user interface locally. Since we are building a secure architecture where the frontend talks to AWS Lambda (which we will build in Part 3) instead of directly to the EC2 instance, we will set up the configuration variables now but leave them empty for the next step. Because this is a vanilla HTML/JS project, you can open it directly in your browser. Your interface should load immediately. At this stage, do not worry if clicking “Run Code” does nothing or shows an error in the console. Frontend setup is complete! Let’s move on to the AWS Lambda configuration. Now that our Judge0 API is running on EC2, we need to connect it to our frontend. We will use AWS Lambda as a bridge. This ensures our frontend (hosted securely on HTTPS) can communicate with our EC2 instance (running on HTTP) without browser security errors. We need to tell Lambda where your EC2 instance lives. Go to Configuration > Environment variables. Click Edit > Add environment variable. Add the following key-value pairs: Key: Key: Click Save. Go to Configuration > General configuration > Edit. Timeout: Increase to 30 seconds. Reason: Standard API calls are fast, but this provides a buffer. Click Save. Go to Configuration > Function URL. Click Create function URL. Auth type: NONE (Public). Click Configure cross-origin resource sharing (CORS) and set: Allow origin: Allow headers & Expose headers: Allow methods: Click Save. Finally, we deploy the frontend files so the world can access your Code Runner. Go to Amazon S3 > Create bucket. Bucket name: Block Public Access: Uncheck “Block all public access” and acknowledge the warning. Click Create bucket. Open the newly created bucket. Upload Go to the Properties tab. Scroll down to Static website hosting. Click Edit > Enable. Index document: Click Save changes. Go to CloudFront > Create distribution. Origin domain: Click the field and select your S3 bucket’s Website Endpoint. Tip: Use the endpoint format Copy the Distribution Domain Name (e.g., Run a code snippet. Congratulations on successfully building your own production-ready self-hosted Judge0 from scratch! You have journeyed through the core of cloud computing: from configuring a raw Linux server on EC2 and debugging low-level
Pre-requisites
Part 1: Self-Hosted Judge0 API Using EC2 Instance
cgroup issues on modern Linux distributions.Prerequisites
Step 1: Fork and Prepare the Configuration
<YOUR_USERNAME> with your actual GitHub username):
cd self-hosted-judge0/backend
backend folder, which contains the configured Judge0 files. In the screenshots below, you might see a folder named judge0—this is simply the renamed backend folder. It was renamed here for clearer file organization, so don’t be confused!
judge0.conf file for you since the default authentication settings are often empty.
tutorialsdojoSpaghetti2025AuthToken
docker-compose.yml maps port 80 to the internal port.
ports: - "80:2358"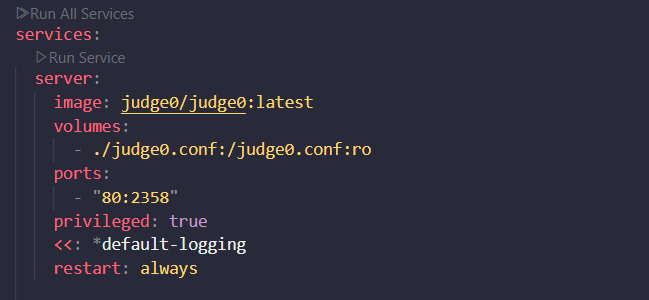
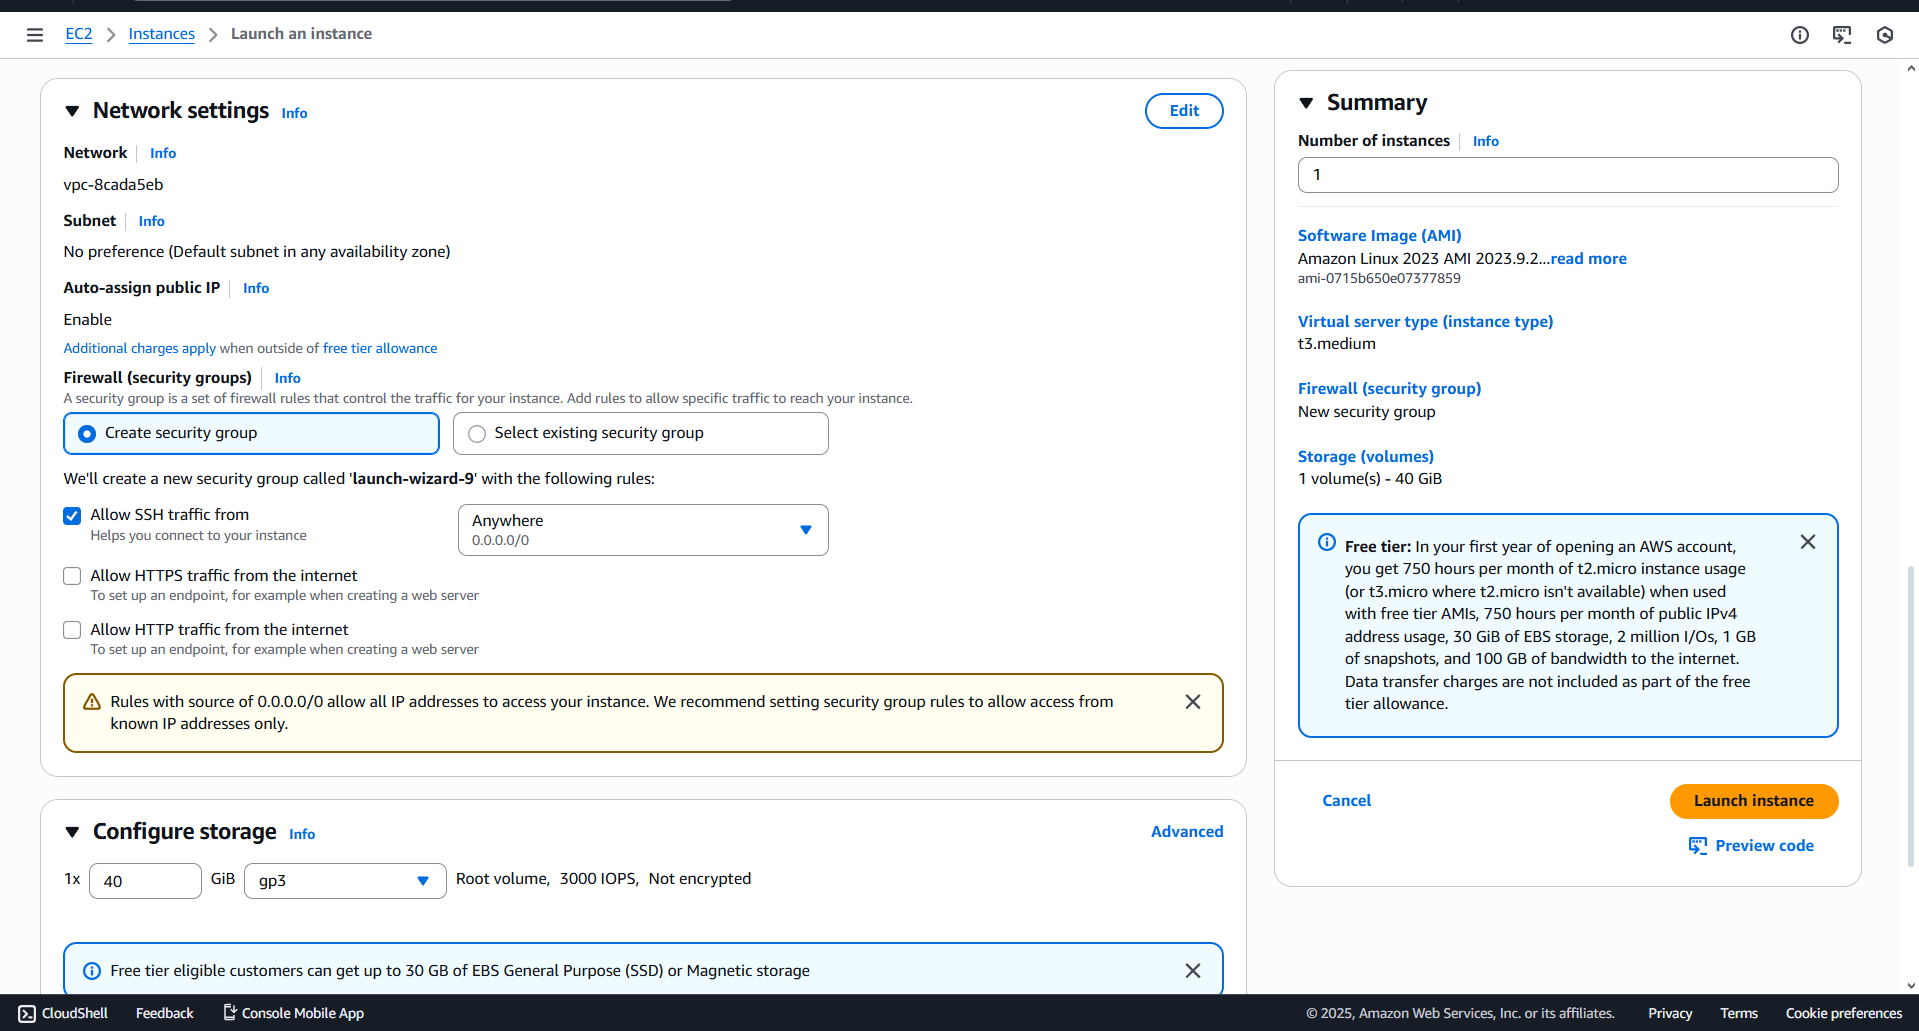
Step 2: Launch an EC2 Instance
self-hosted-judge (you can rename this whatever you want)

t3.medium
.pem file and keep it safe
.pem file, note exactly where it is saved (usually your Downloads folder).
0.0.0.0/0) so the API is accessible. SSH (Port 22) should also be open.

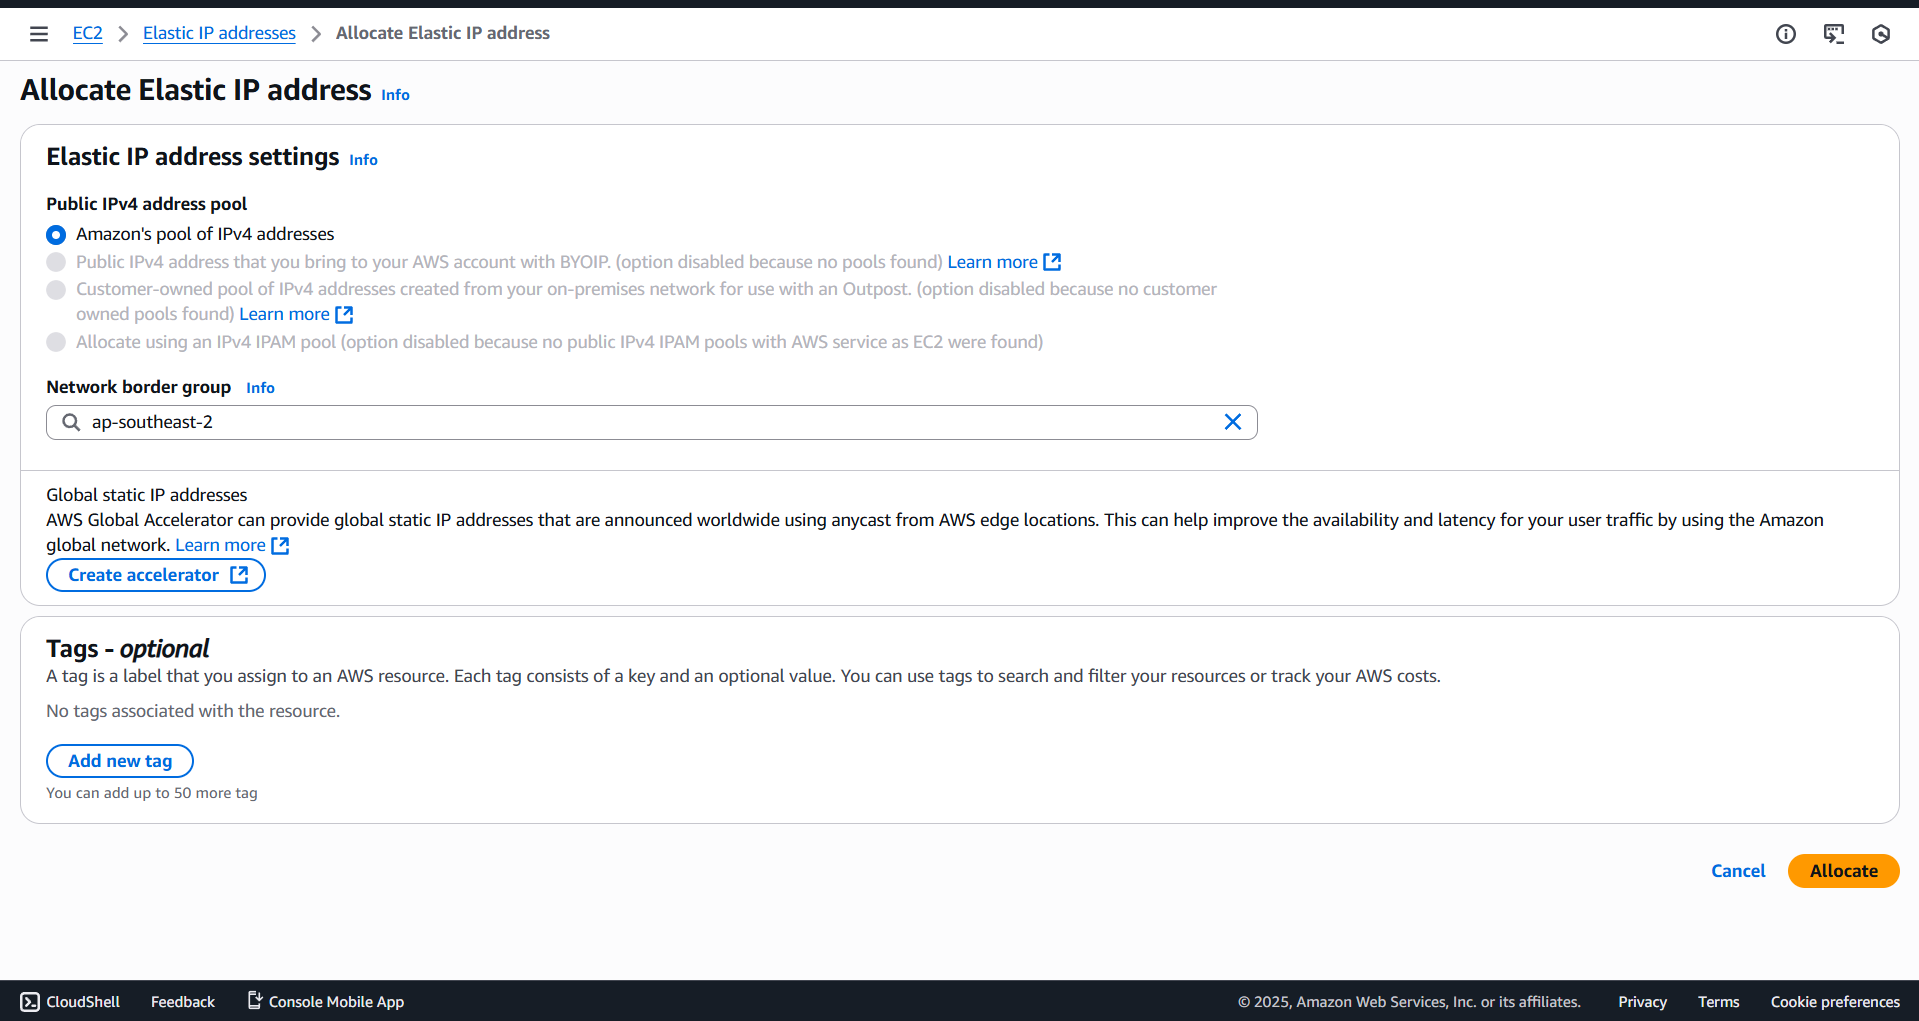
Step 3: Configure Elastic IP
Step 4: Connect and Install Dependencies
chmod 400 JUDGE0-KEY.pem
ssh -i “JUDGED-KEY.pem” ec2-user@<YOUR_ELASTIC_IP>
sudo yum install docker -y
sudo systemctl start docker
sudo systemctl enable docker
sudo):
exit) and log back in for this to take effect.
sudo chmod +x /usr/local/bin/docker-compose
Step 5: Fix Cgroup Error (Critical Step)
No such file or directory @ rb_sysopen or status 13 (Internal Error).
GRUB_CMDLINE_LINUX_DEFAULT. Append the following parameters inside the quotes: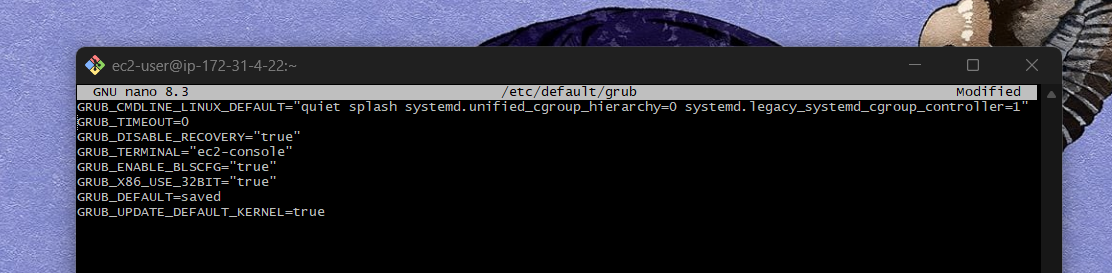
Step 6: Deploy Judge0
backend folder, but naming it judge0 on the server to match standard conventions.
scp -i “/Users/username/Downloads/JUDGED-KEY.pem” -r /path/to/your/documents/self-hosted-judge0/backend ec2-user@:/home/ec2-user/judge0
docker-compose up -d
judge0/judge, postgres, and redis with status Up.http://<YOUR_ELASTIC_IP>/Part 2: Setting Up the Frontend Application
Step 1: Navigate to the Frontend Folder
frontend folder in your forked repository. It contains these three core files:
index.htmlstyle.cssscript.jsStep 2: Configure the API URL in script.js
script.js in your code editor.
Step 3: Run the Frontend
open index.html
index.html in your file explorer.xdg-open index.htmlindex.html and press Go Live.Step 4: Verify the Interface
Step 5: A Note on the “Run Code” Button
LAMBDA_URL is empty.Part 3: Linking the Frontend to Your Self-Hosted API
Step 1: Create the Lambda Function
self-hosted-judge0 (rename this to whatever you like)

requests library for this code to work, as standard Python Lambda does not include it. (You can see the request file zip file in the repository provided)import os
import requests
import json
import base64
def lambda_handler(event, context):
print("DEBUG: Lambda invoked with event:", event)
# Self-hosted Judge0 configuration
JUDGE0_API_URL = os.environ.get("JUDGE0_API_URL", "http://localhost:2358")
JUDGE0_AUTH_TOKEN = os.environ.get("JUDGE0_AUTH_TOKEN")
if not JUDGE0_AUTH_TOKEN:
raise Exception("Missing JUDGE0_AUTH_TOKEN in environment variables")
headers = {
"Content-Type": "application/json",
"td-auth-token": JUDGE0_AUTH_TOKEN,
}
# Parse event body
body = event.get("body")
if body and isinstance(body, str):
try:
body = json.loads(body)
except json.JSONDecodeError:
body = {}
else:
body = {}
# Get code submission details from event
# 'source_code' is not base64 encoded when sent, so it's already "decoded".
source_code = body.get("source_code", "print('Hello, World!')")
language_id = body.get("language_id", 71)
stdin = body.get("stdin", "")
print("STD INPUT", stdin)
print("SOURCE CODE", source_code)
# Check if stdin is empty and handle accordingly
# Store the original stdin to print it later
original_stdin = stdin
if stdin == "":
stdin = None
submission_data = {
"language_id": language_id,
"source_code": source_code,
"stdin": stdin
}
print("DEBUG: Submitting code to Judge0:", submission_data)
# Submit code to Judge0 API with wait=true (Judge0 handles polling internally)
submit_response = requests.post(
f"{JUDGE0_API_URL}/submissions?wait=true",
headers=headers,
json=submission_data,
timeout=30,
)
print("DEBUG: Submission response:", submit_response.status_code, submit_response.text)
if submit_response.status_code != 201:
return {
"statusCode": submit_response.status_code,
"body": json.dumps({"error": submit_response.text})
}
result = submit_response.json()
print("DEBUG: Execution finished with result:", result)
# Decode the base64-encoded output for the final print statement
stdout = result.get("stdout", "")
decoded_stdout = ""
if stdout:
try:
decoded_stdout = base64.b64decode(stdout).decode('utf-8')
except Exception as e:
print(f"Warning: Could not decode stdout: {e}")
decoded_stdout = f"!!! Base64 Decoding Failed: {stdout} !!!"
stderr = result.get("stderr", "")
compile_output = result.get("compile_output", "")
if stderr:
decoded_stderr = base64.b64decode(stderr).decode('utf-8')
print("DEBUG: stderr decoded:", decoded_stderr)
if compile_output:
decoded_compile_output = base64.b64decode(compile_output).decode('utf-8')
print("DEBUG: compile_output decoded:", decoded_compile_output)
# --- THE REQUESTED SINGLE PRINT STATEMENT ---
print(f"\n--- Execution Summary ---\n"
f"Source Code:\n{'-'*20}\n{source_code}\n"
f"Standard Input:\n{'-'*20}\n{original_stdin}\n"
f"Standard Output (Decoded):\n{'-'*20}\n{decoded_stdout}\n"
f"-------------------------")
# -------------------------------------------
return {
"statusCode": 200,
"body": json.dumps(result)
}Step 2: Add Environment Variables
JUDGE0_API_URL Value: http://<YOUR_EC2_ELASTIC_IP> (e.g., http://54.123.45.67)AUTH_TOKEN Value: tutorialsdojoSpaghetti2025AuthToken (The token configured in Part 1).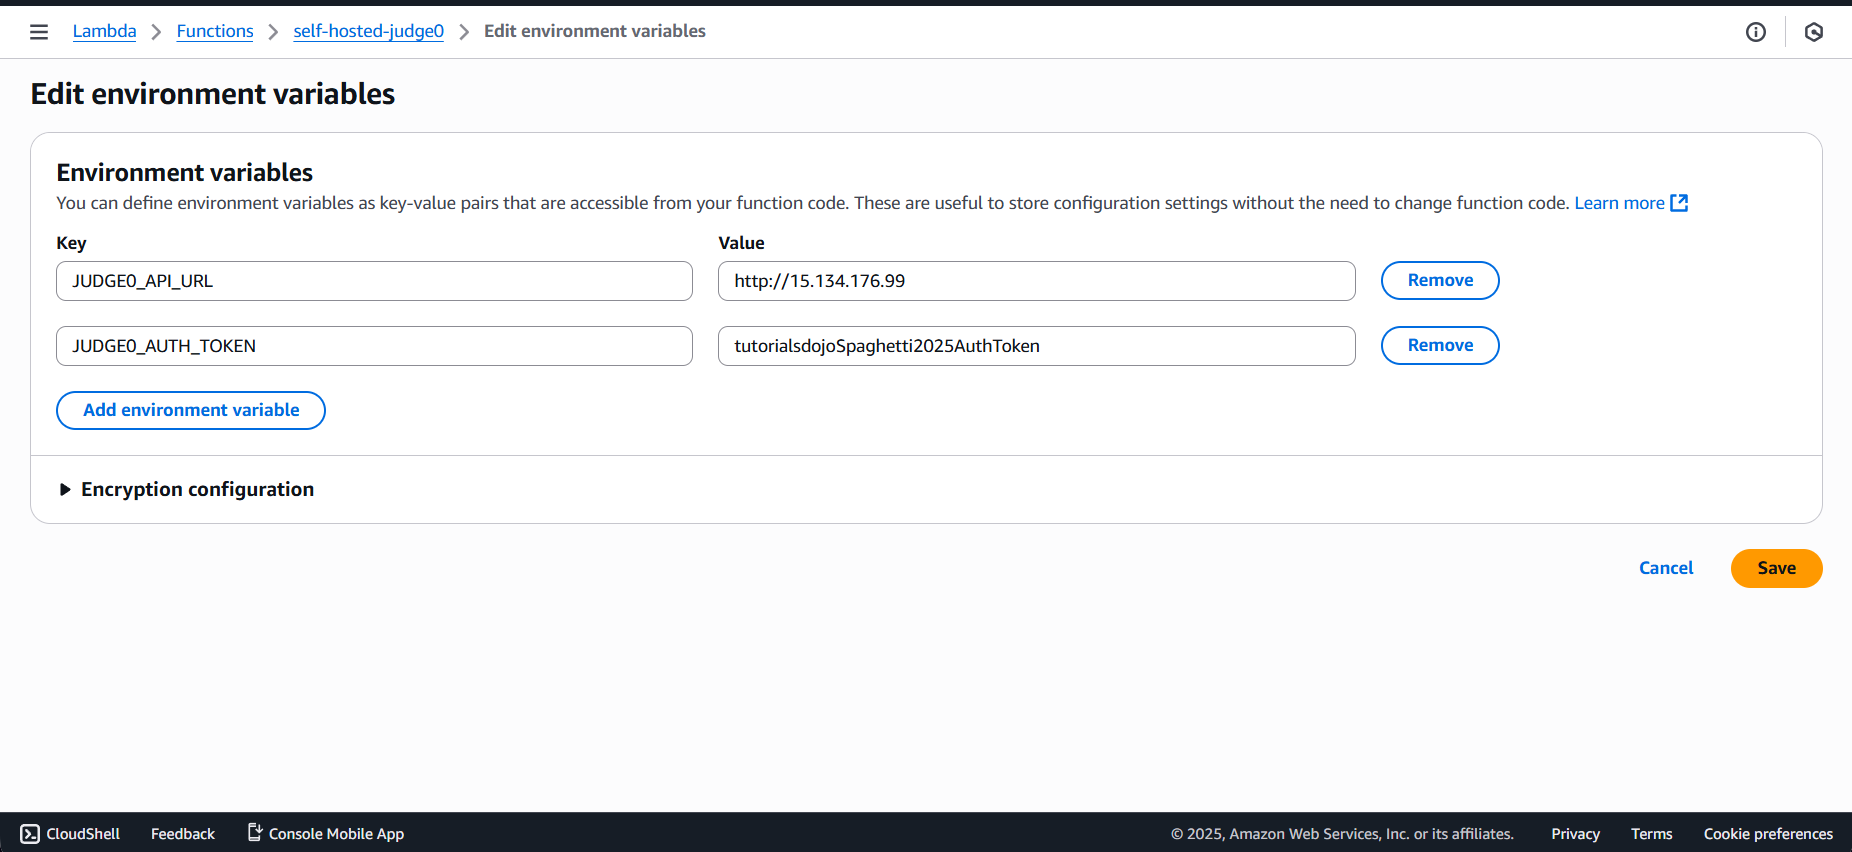
Step 3: Adjust General Configuration

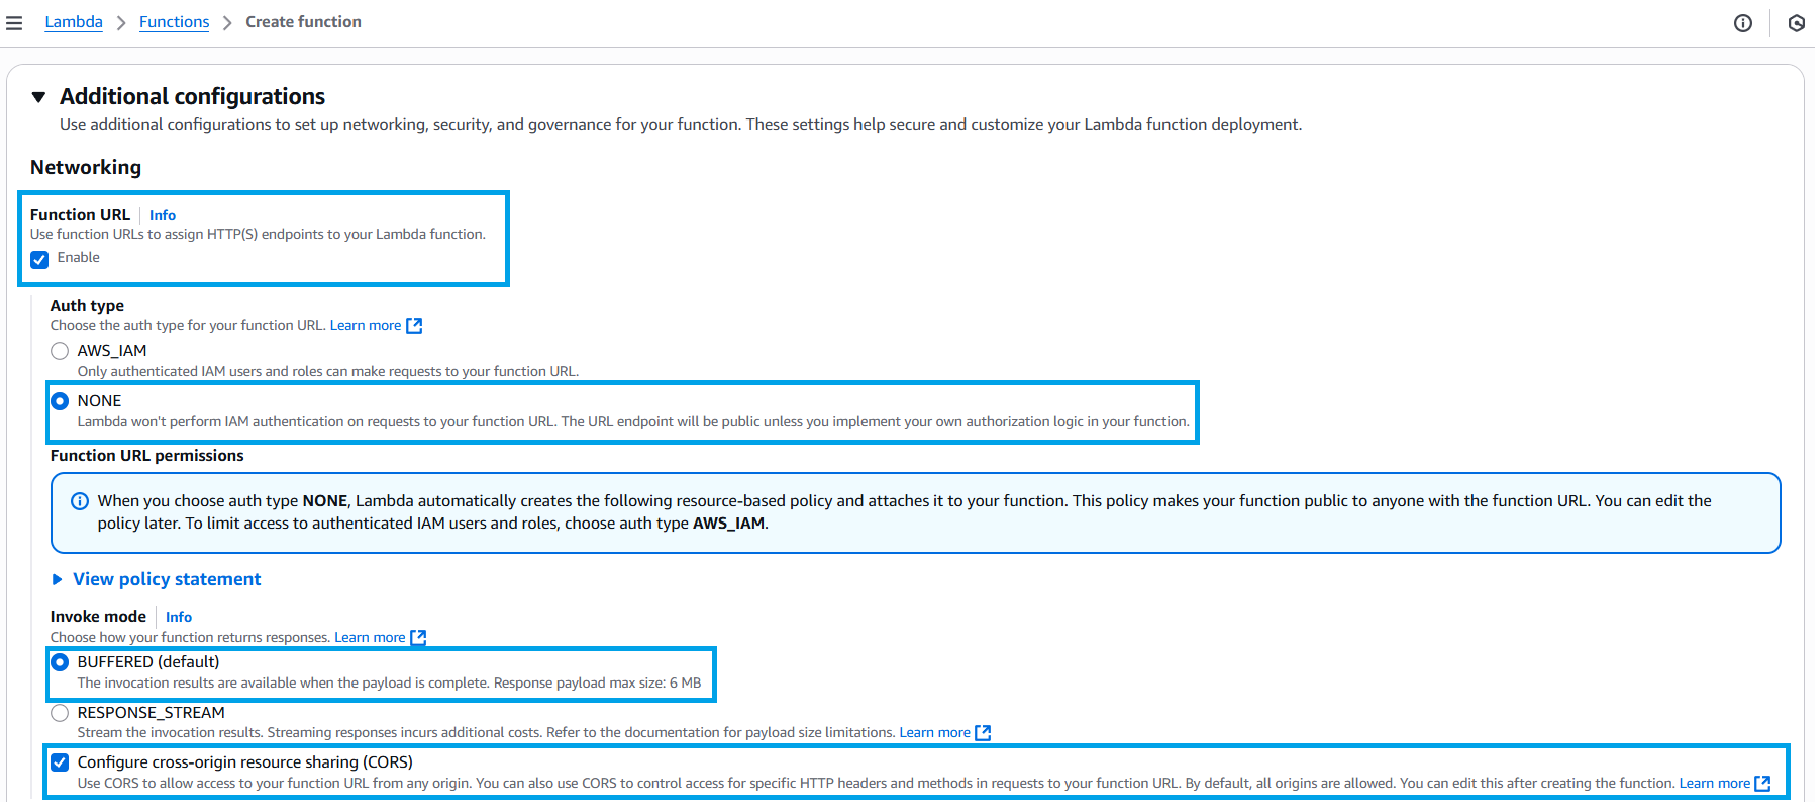
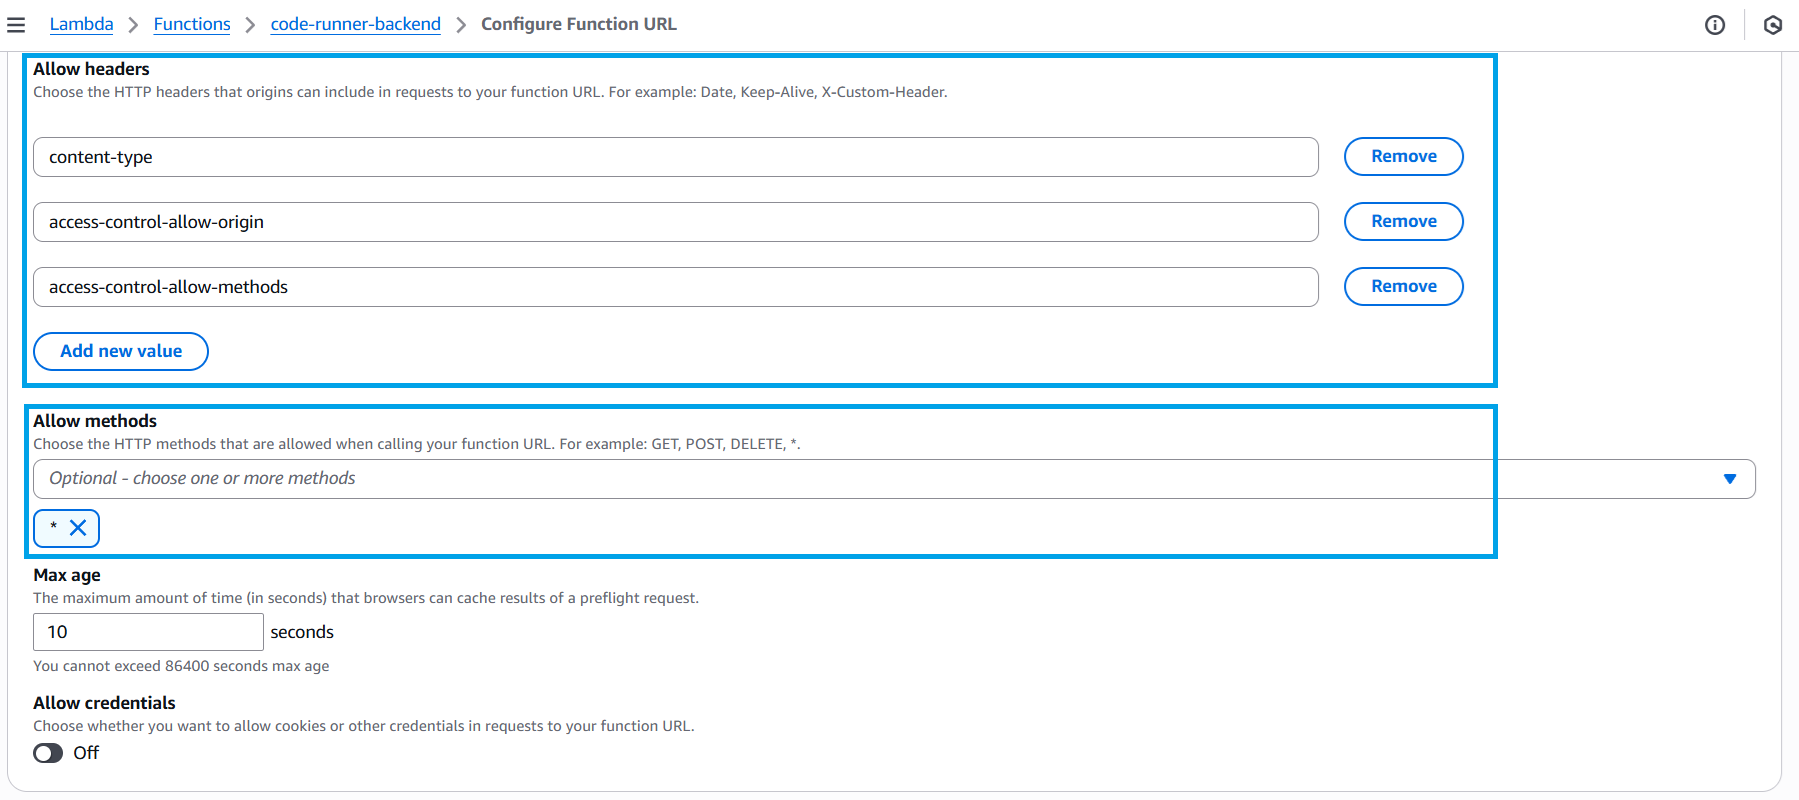
Step 4: Enable Function URL & CORS
* content-type, access-control-allow-origin, access-control-allow-methods* 
Part 4: Hosting the Static Website (S3 & CloudFront)
1. Prepare Frontend Code
script.js file.LAMBDA_URL or API_URL).
const API_URL = "https://<your-id>.lambda-url.us-east-1.on.aws/";2. Create S3 Bucket
judge0-frontend-demo-<your-name> (namemust be unique).3. Upload Files
index.html, style.css, and your updated script.js.
4. Enable Static Hosting
index.html.5. Configure CloudFront
bucket-name.s3-website-us-east-1.amazonaws.com, NOT the S3 bucket ARN.
6. Final Test
d123.cloudfront.net) and open it in your browser.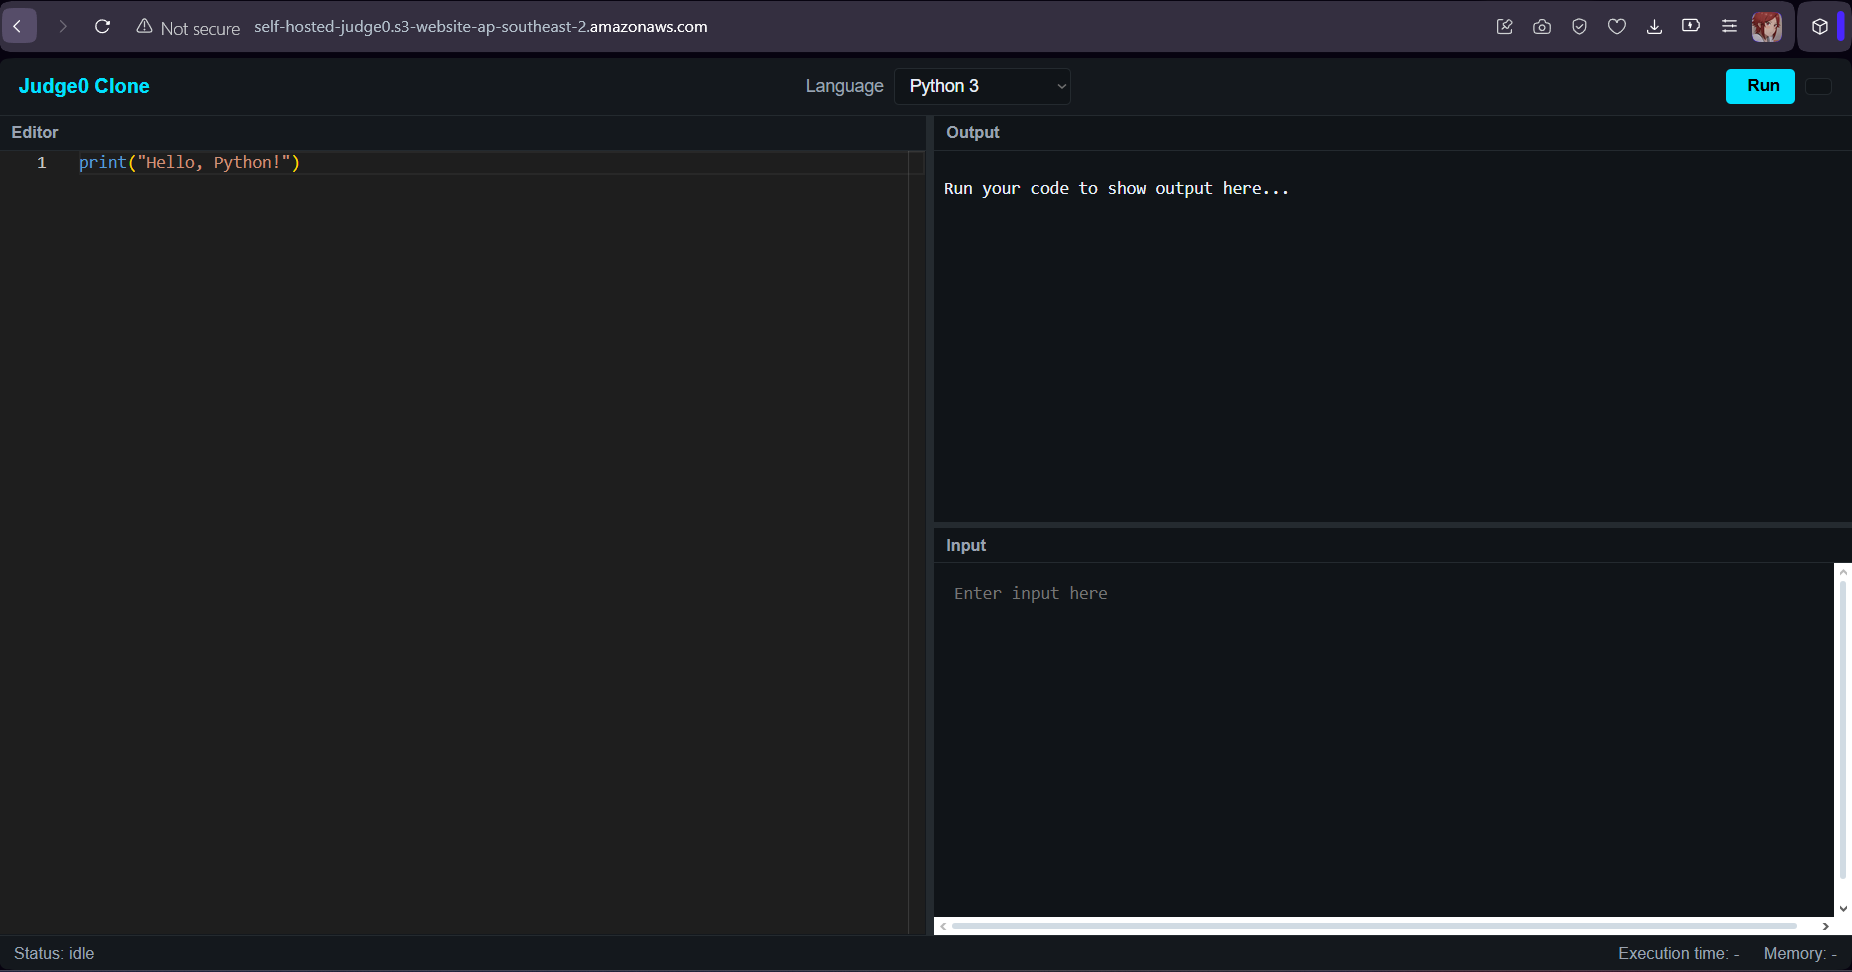
cgroups to bridging secure connections with AWS Lambda, and finally deploying a global frontend using S3 and CloudFront. This article wasn’t just a tutorial on self-hosting; it was a hands-on masterclass in connecting the dots between infrastructure, security, and application logic. We hope this project gives you the confidence to dive deeper into the AWS ecosystem and continue building excellent, scalable solutions. Well done, and happy coding!🔥20% OFF All GitHub Reviewers & Video Course!

Turn Your Team Into Cloud-Ready Professionals Today

Learn AWS with our PlayCloud Hands-On Labs

$2.99 AWS and Azure Exam Study Guide eBooks

New Claude Certified Architect Foundations CCA-F

Learn GCP By Doing! Try Our GCP PlayCloud

Learn Azure with our Azure PlayCloud

FREE AI and AWS Digital Courses

FREE AWS, Azure, GCP Practice Test Samplers


Subscribe to our YouTube Channel

Follow Us On Linkedin


git clone https://github.com/<YOUR_USERNAME>/self-hosted-judge0
# Syntax: chmod 400 /path/to/your/downloaded/key.pem
# Syntax: ssh -i “path/to/key” user@ip-address
sudo yum update -y
sudo usermod -a -G docker ec2-user
sudo curl -L “https://github.com/docker/compose/releases/latest/download/docker-compose-$(uname -s)-$(uname -m)” -o /usr/local/bin/docker-compose
sudo nano /etc/default/grub
systemd.unified_cgroup_hierarchy=0 systemd.legacy_systemd_cgroup_controller=1
sudo grub2-mkconfig -o /boot/grub2/grub.cfg
sudo reboot
# Syntax: scp -i “path/to/key” -r “path/to/local/backend_folder” user@ip:destination
cd judge0
docker ps
cd /path/to/frontend
Klaire is a BS Computer Science student from the University of the Philippines Mindanao who thrives at the intersection of technology and creativity. She plays an active role in campus organizations, taking part in initiatives that highlight design, collaboration, and digital innovation. With a strong interest in creative production and tech-driven storytelling, she enjoys bringing ideas to life through visual and interactive projects. Klaire aims to keep growing as both a developer and creative, using her skills to inspire and connect people through meaningful work.


