Last updated on February 13, 2026
GitHub Desktop Cheat Sheet
GitHub Desktop is an application that enables you to interact with GitHub using a visual interface instead of the command line. It extends and simplifies your Git workflow using a transparent and accessible graphical user interface.
Key Concepts
- Repository: A project folder that is tracked by Git, containing all files and their version history.
- Clone: The act of creating a complete local copy of a repository that exists on GitHub.com.
- Commit: A snapshot of the changes you have staged, saved permanently to your local repository’s history.
- Branch: An independent line of development within a repository.
- Pull Request (PR): A request to merge the changes from one branch into another, facilitating code review and discussion on GitHub.com.
- Remote: The common version of your repository hosted on GitHub.com (typically named
origin)
Core Workflows
Getting a Repository
- Clone an existing repository
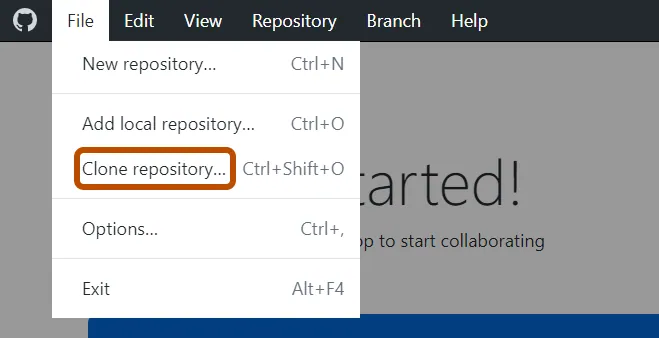
- Use File > Clone Repository.

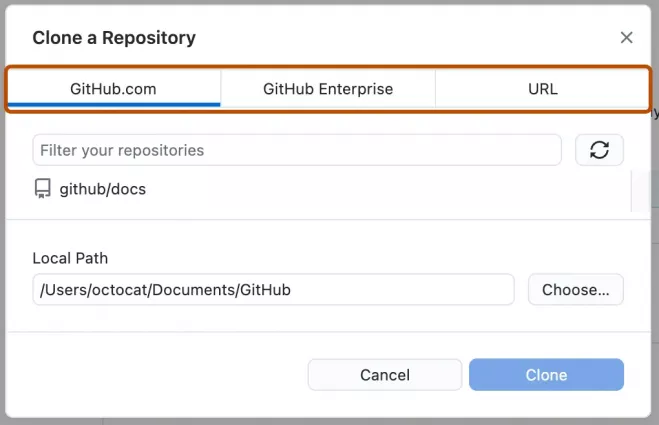
- Select a repository from your GitHub.com list or enter its URL directly.

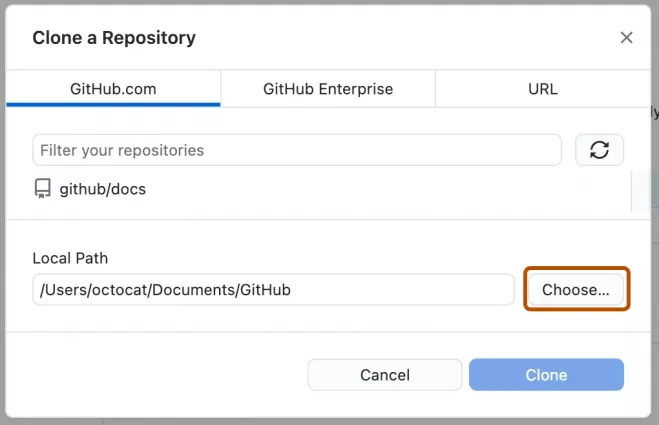
- Choose a local path and click Clone.
- Use File > Clone Repository.
- Create a new repository
- Use File > New Repository.
- Enter a name, optional description, and choose a local path.
- You can choose to initialize the repository with a README file.
- Add an existing local repository
- Use File > Add Local Repository.
- Navigate to the folder on your computer that already contains a
.gitsubdirectory.
Making and Saving Changes

-
Make Changes: Edit files in your configured external editor.
-
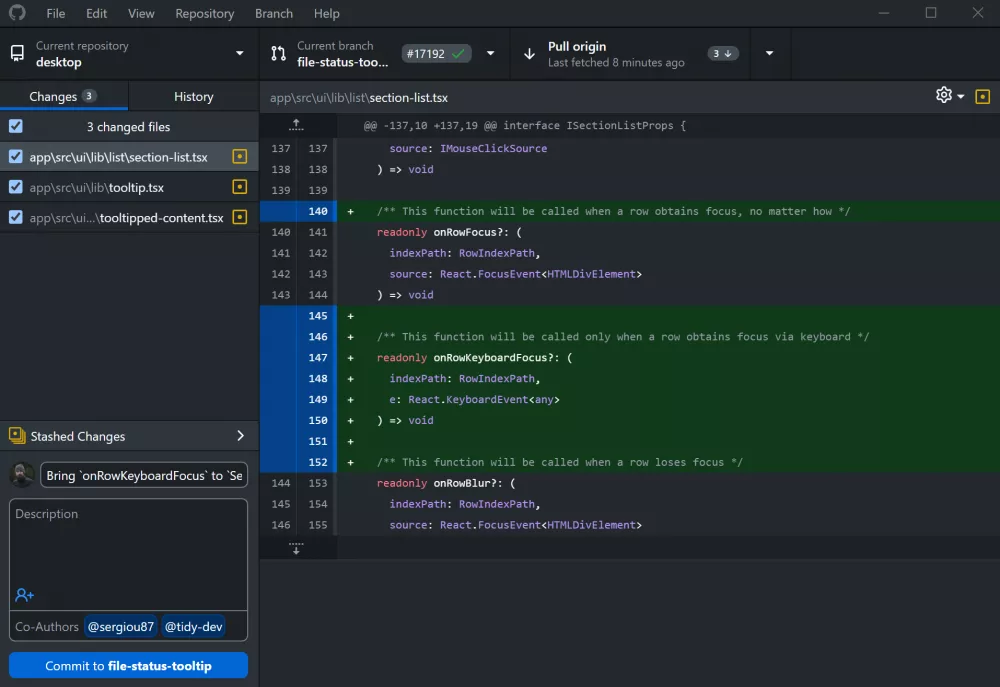
View Changes: All modified files are listed in the Changes tab in the left sidebar. Click a file to see a line-by-line diff.
-
Stage Changes: Select the checkbox next to individual files you wish to commit.
-
Create a Commit:
-
-
Write a mandatory summary and an optional extended description.
-
Click Commit to
[branch-name]to save the snapshot to your current branch.
-
Branching
- Create a new branch: Click Current Branch in the toolbar, then click New Branch. Name the branch and select which existing branch to base it on.
- Switch branches: Click Current Branch in the toolbar and select any available local branch.
- Merge a branch:
- Switch to the branch you want to merge into (e.g.,
main). - Click Current Branch, then Choose a branch to merge into
main. - Select the branch containing the changes you want to integrate (e.g.,
feature-branch).
- Switch to the branch you want to merge into (e.g.,
Synchronizing with GitHub
- Push: To upload your local commits to the remote repository on GitHub, click Push origin.
- Pull: To download and integrate changes from the remote repository into your current local branch, click Pull origin.
- Fetch: To check for new changes on the remote without merging them, use Repository > Fetch.
Working with Pull Requests
- Publish a branch: After committing to a new branch, click Publish branch to push it to GitHub. A button to create a pull request will appear.
- Create a Pull Request: Click Create Pull Request to open GitHub.com in your browser and finalize the pull request.
- View open pull requests: Check the Pull Requests list tab to see open requests and checkout their associated branches locally.
Troubleshooting
| Problem | Likely Cause | Solution |
| Authentication failed | Expired or missing credentials. | Re-authenticate your account in File > Options > Accounts. |
| Can’t push or pull | Your local history diverges from the remote, often causing a merge conflict. | You must first pull the remote changes. GitHub Desktop will guide you to resolve any conflicts. |
| Repository not found | Incorrect URL or lack of permissions. | Verify the repository URL and your access permissions on GitHub.com. |
| Changes not appearing in the list | Files are not tracked by Git, possibly due to a .gitignore rule. |
Ensure the files are not listed in your .gitignore file. |
| Merge conflict | Git cannot automatically merge changes from different branches. | The application will list conflicted files. You must open them, resolve the conflicts manually, mark them as resolved, and then commit. |
Best Practices
- Make focused, atomic commits with clear messages.
- Always create a new branch for any feature or bug fix.
- Regularly pull changes from the upstream
mainbranch into your feature branches. - Review the diff of your changes in the Changes tab before every commit.
- Use the History tab to examine past commits and revert changes if necessary.
References
🤖 $3.49 eBooks Start Here – Get Up to 30% OFF All AI & Machine Learning Reviewers

Turn Your Team Into Cloud-Ready Professionals Today

Learn AWS with our PlayCloud Hands-On Labs

$2.99 AWS and Azure Exam Study Guide eBooks

New Claude Certified Architect Foundations CCA-F

Learn GCP By Doing! Try Our GCP PlayCloud

Learn Azure with our Azure PlayCloud

FREE AI and AWS Digital Courses

FREE AWS, Azure, GCP Practice Test Samplers


Subscribe to our YouTube Channel

Follow Us On Linkedin


Written by: Joshua Emmanuel Santiago
Joshua, a college student at Mapúa University pursuing BS IT course, serves as an intern at Tutorials Dojo.


