
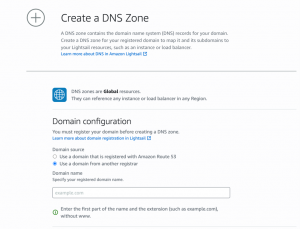
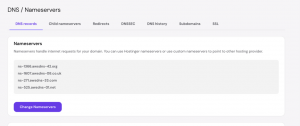
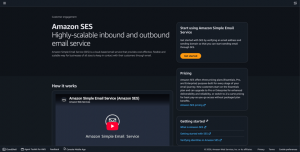
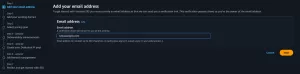
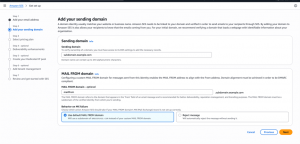
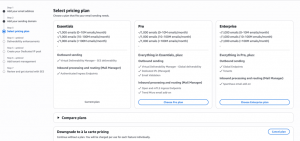
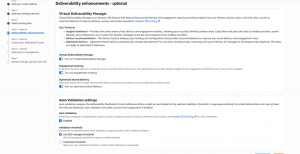
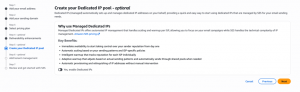
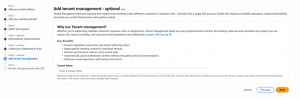
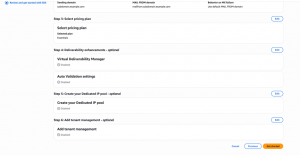
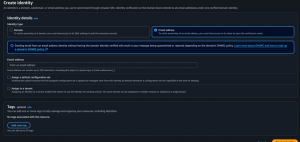
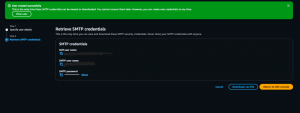
On this article, you will learn how you can send emails from AWS Simple Email Service (Amazon SES) on applications hosted in AWS Lightsail, a virtual private server. You will learn how to verify a sending domain, connect your application, and prepare to send password resets, notifications, and newsletters. This article assumes that you already have a working application within the Lightsail instance, that is capable of handling and sending emails and ready to support Simple Mail Transfer Protocol (SMTP), the standard used here to submit messages to SES. The Tutorials Dojo Amazon Lightsail cheat sheet explains the hosting service and its main features. To start make sure you have an AWS account, a registered domain (you own or rented), and access to the domain’s DNS settings. The Domain Name System (DNS) stores records that direct services to the correct destinations and help prove domain ownership. You also need access to an inbox where you can receive a verification link during setup. This guide uses example.com as the sending domain and hello@example.com as the sender address. Replace these examples with a domain you control. Keep the same domain throughout the setup so that the identity, DNS records, and application settings agree. Choose one AWS Region for sending, such as Asia Pacific (Singapore). A Region is a geographic area where AWS runs services; SES identities and SMTP credentials have regional requirements. Keep the console Region consistent as you work through the steps. SES needs the required records at the provider that serves your domain’s DNS. If you intend to keep your current provider, skip the migration instructions and add the authentication records there later. To move DNS, open Lightsail > Domains & DNS > Create DNS zone. A DNS zone holds the records for a domain, seelect Use a domain from another registrar, enter your registered domain without www, and create the zone. Create a Lightsail DNS zone for a domain registered elsewhere. Copy your existing website and email records into the new zone before changing nameservers. Nameservers identify the service that answers DNS queries for your domain. Missing email records, for example, can stop new messages from reaching your existing inbox. If Hostinger is your registrar, (the company where you registered the domain), open its domain dashboard, select the domain, and choose DNS/Nameservers > Change Nameservers. Enter all four nameservers from that domain’s Lightsail zone and save. Hostinger’s nameserver instructions describe this change and the time needed for it to take effect. Transferring DNS/Nameserver from Hostinger to AWS Lightsail Domain registration and renewal remain with your registrar. Keep the old DNS zone available while the change spreads, and make later record updates in Lightsail once it is serving the domain. Open the SES console in your chosen Region and select Get started if the setup wizard is available. Enter an email address you can access, then follow the verification link sent to that inbox. The address must include an @ sign, such as hello@example.com. Start SES setup from the Get started screen in your chosen AWS Region. Add the domain you own as your sending domain. An SES identity is a domain or email address that you verify for sending. For basic sending, a verified domain generally covers its email addresses, so you do not need to verify each address separately. Continue through the plan and optional feature screens Amazon Simple Email Service (SES) onboarding wizard, where users enter an email address to send a verification link and confirm ownership. Fill up your desired sending subdomain and mailfrom that your users will see from the email. Fill up your desired sending subdomain and mailfrom that your users will see from the email. Select a pricing model based on your usage volume, feature requirements, and business needs. Choose from Essential, Professional, or Enterprise plans, or opt for à la carte, pay-as-you-go pricing for flexible, usage-based billing with no unnecessary commitments. Deliverability Manager allows you to enable or disable additional features based on your operational requirements. These features are enabled by default and may incur additional charges on top of standard Amazon SES pricing. As with the previous step, you may choose to use Dedicated IPs based on your sending requirements. Dedicated IPs provide several benefits for organizations with specific deliverability and reputation management needs, with additional costs beyond standard Amazon SES pricing. Tenant Management is essential for organizations supporting multiple tenants, accounts, or business units at scale. Enable this option when your use case requires tenant-level management and separation; otherwise, you may leave it blank. Finally Review the configuration details and click Get started Navigate to Configuration > Identities to review the identities that were created. If the required domain is not listed, select Create identity > Domain and add it. Do not recreate an identity that already exists. Finally, configure a Tenant. A tenant functions similarly to an email user identity, allowing you to control, organize, and manage email activity within your environment. Go to SMTP Settings and select Create IAM credentials and Create user to generate the credentials required for SMTP access. Copy the generated SMTP credentials into your application’s environment variables and ensure they are securely stored. Assuming your backend is already deployed and running on Amazon Lightsail, your application will be able to send emails through Amazon SES for common use cases such as notifications, password resets, transactional emails, and newsletters. Select Easy DKIM, which allows AWS to manage your DomainKeys Identified Mail (DKIM) signing keys. DKIM adds a digital signature that receiving mail systems use to authenticate your domain and verify that signed content has not been modified. For this walkthrough, keep the default 2048-bit key length. Open the domain’s Authentication settings and copy the three generated CNAME records. Publish all three records through your active DNS provider so AWS can verify the domain and enable DKIM signing. In Lightsail, go to Domains & DNS, select your DNS zone, and open DNS records. Add each SES entry as a CNAME, using the record name and target provided by SES, then save the changes. Wait until SES shows the domain as Verified and DKIM as Successful before testing email delivery. If verification remains pending, review the CNAME names and values carefully for typing errors or a duplicated domain suffix. With your domain verified, DKIM configured, and SMTP credentials securely connected to your Lightsail application, you have the foundation for sending email through Amazon SES. You are now ready to test your backend functionality by sending emails to confirm that messages reach the intended inbox and work as expected. Before sending to unverified recipients, request production access if your SES account is still in the sandbox. As your application grows, monitor delivery failures, complaints, and costs, and enable additional features when your sending needs justify them. This is essential on limiting your SES bill.
Prepare your domain and application

Choose where to manage your DNS records

Set up Simple Email Service
Verify sending identity

Configure Easy DKIM
Conclusion
Resources
🔥 $1.99 eBooks and $4.99 Video Claude Reviewers

Turn Your Team Into Cloud-Ready Professionals Today

Learn AWS with our PlayCloud Hands-On Labs
$2.99 AWS and Azure Exam Study Guide eBooks

Learn GCP By Doing! Try Our GCP PlayCloud
Learn Azure with our Azure PlayCloud
FREE AI and AWS Digital Courses

FREE AWS, Azure, GCP Practice Test Samplers

Subscribe to our YouTube Channel

Follow Us On Linkedin


Written by: Vince Austria