Last updated on July 16, 2025
Hello Dojos! We’re back again for another Infrastructure as Code article, focusing on AWS Native Infrastructure as Code Service, CloudFormation
In my previous article, we explored the benefits of using Infrastructure as Code to ramp up your production by showing how easy it is to launch an EC2 Instance using Terraform. For this article, we will explore AWS CloudFormation and try to deploy our very own Virtual Private Cloud. Using Terraform and CloudFormation offers their benefits and advantages, which we won’t tackle right now. Nevertheless, they offer the same purpose: to make provisioning much faster and reduce the risk of committing human errors.
Before we begin, there is a difference in how Terraform and CloudFormation work. First is their file format; Terraform has a file format called a .tf file. Meanwhile, CloudFormation operates on either .yaml or .json files. For this article, we’re going to write code in a .yaml. I prefer YAML because it appears to be much simpler to write and read, but I guess it’s just a matter of preference. To each is their own. Next, is how we execute our line of code. We use the Command Line for Terraform, and in CloudFormation, we will use the AWS Cloud Console.
Without further ado, let’s say good bye to “ClickOps” and start with the demo!
Implementation Steps for CloudFormation
1. Set Up Your IDE
In Visual Studio Code, create a folder to store your CloudFormation code. Create a .yaml file for the CloudFormation code. Remember that CloudFormation can read two types of file .json and .yaml files. However, we will use .yaml file for this article as a personal preference.
2. Write Code for CloudFormation
- Template Version and Description
Write this line of code to your .yaml file:

We will start the structure of our CloudFormation Template with the lines of code above. The “AWSTemplateFormatVersion” defines the format version of the template. It is an optional field, but must be the first in the code when omitted. The latest version is 2010-09-09, so we will use this.
Next is the description, another recommended optional field. It is a good practice to describe and document the purpose of this CloudFormation Template.

- Resources

Next, write the Resources in the YAML file. This section of our CloudFormation Template defines the resources we want the template to create. We will create a VPC, Private and Public Subnets, and an Internet Gateway for this demo.
Now, let’s get to the fun part. Let’s set up our Virtual Private Cloud on the next step:
- VPC
Write these lines of code, right below resources:
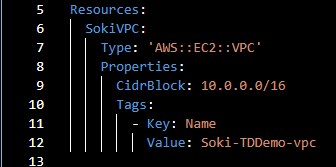
If you’re unfamiliar with working with YAML files, indentation is important as it defines the structure of your code. SokiVPC will be the name of our VPC. Each resource must have a unique name within the CloudFormation Template. This name is only used within the template to reference the resources. This name will not be the name of your VPC when it is deployed in the Management Console. That is why we use tags to set the name of our VPC once deployed in the AWS Management Console.
Type defines the type of resources you want to create. For this step, we will create a Virtual Private Cloud, which is why we set the type to AWS::EC2::VPC. Another element of a resource is the Properties. Properties provide further setup information that is either required or optional. For VPC, there are no required properties, but properties are required for resources like AWS::EC2::Instance, ImageId, and InstanceType. For our VPC, we will set the property CidrBlock to 10.0.0.0/16.
To know more about different resource types and their properties, refer to this link: https://docs.aws.amazon.com/AWSCloudFormation/latest/TemplateReference/aws-template-resource-type-ref.html
- Subnets
Write these lines of code:
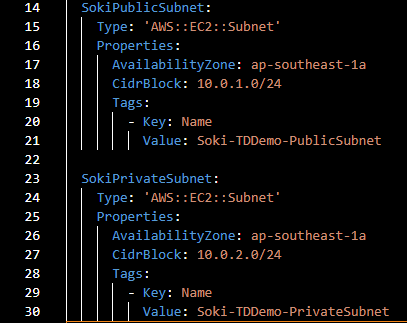
For this step, we define our Private and Public Subnets. The properties that we set are the AvailabilityZone and CidrBlock. How do we tell CloudFormation that we want these subnets to be assigned or associated with the VPC we defined earlier? Well, the answer is simple: we reference it. Let’s move forward to the next step, and I will show you how.
- Referencing
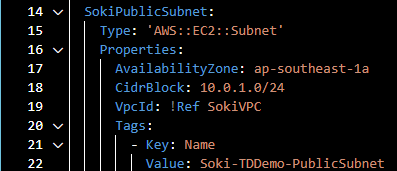
Under the CidrBlock, we added VpcId property to connect our Subnets to the VPC. When referencing, we used “!Ref” to indicate that we will reference a resource defined in our CloudFormation Template. !Ref is followed by the Resource Name that we defined earlier.
- Internet Gateway

For the next step, we will create an internet gateway and attached it to our VPC. Internet Gateway has no required properties besides Tags. VPC Gateway Attachment has two required priorities: VPC ID and Internet Gateway ID. As we learned how to reference earlier, we applied the same referencing here in the VPC Gateway Attachment.
3. Execution of CloudFormation
For the execution of the template that we created, we’re going to head first on the AWS Management Console and search for the CloudFormation
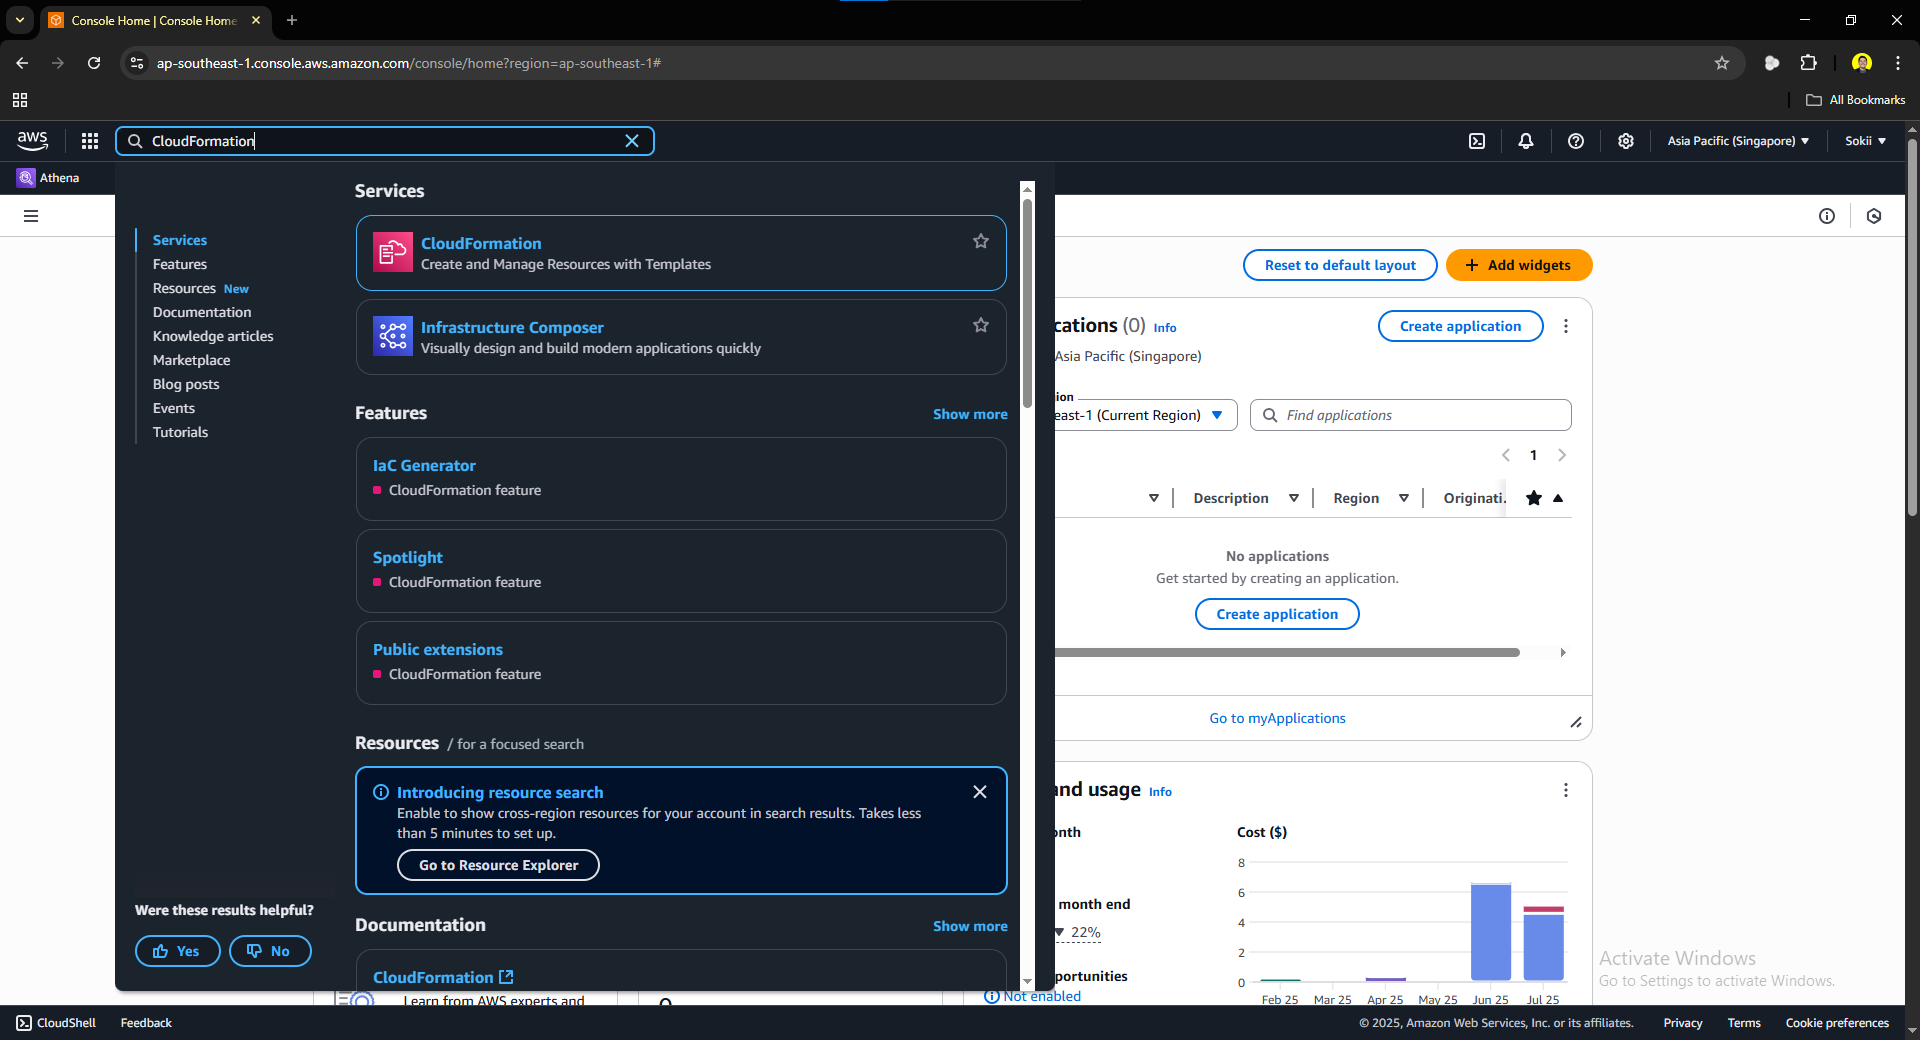
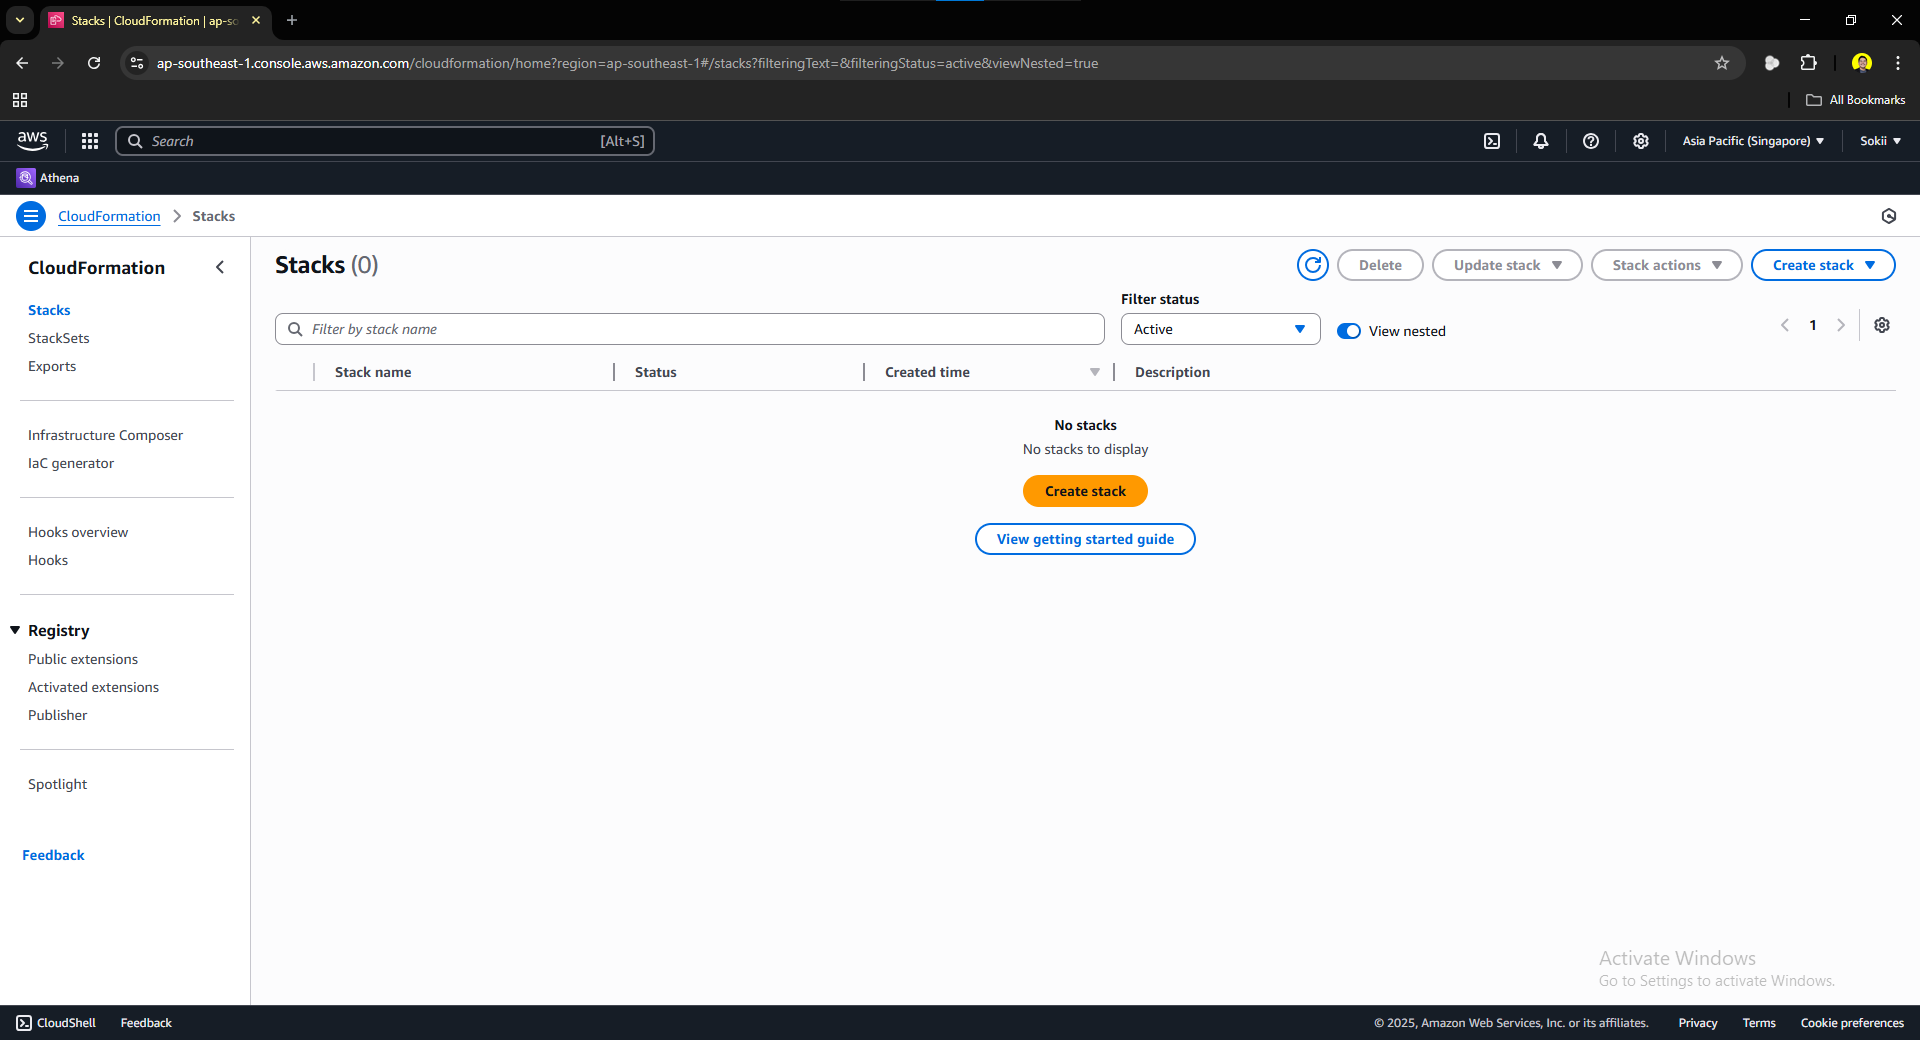
You will be prompted to this page:
Click the Create stack button, you should be prompted to this page:

Select the Choose an existing template in the Prerequisite – Prepare template. On the Specify Template section, select the Upload a template file and upload the YAML file that we created earlier.

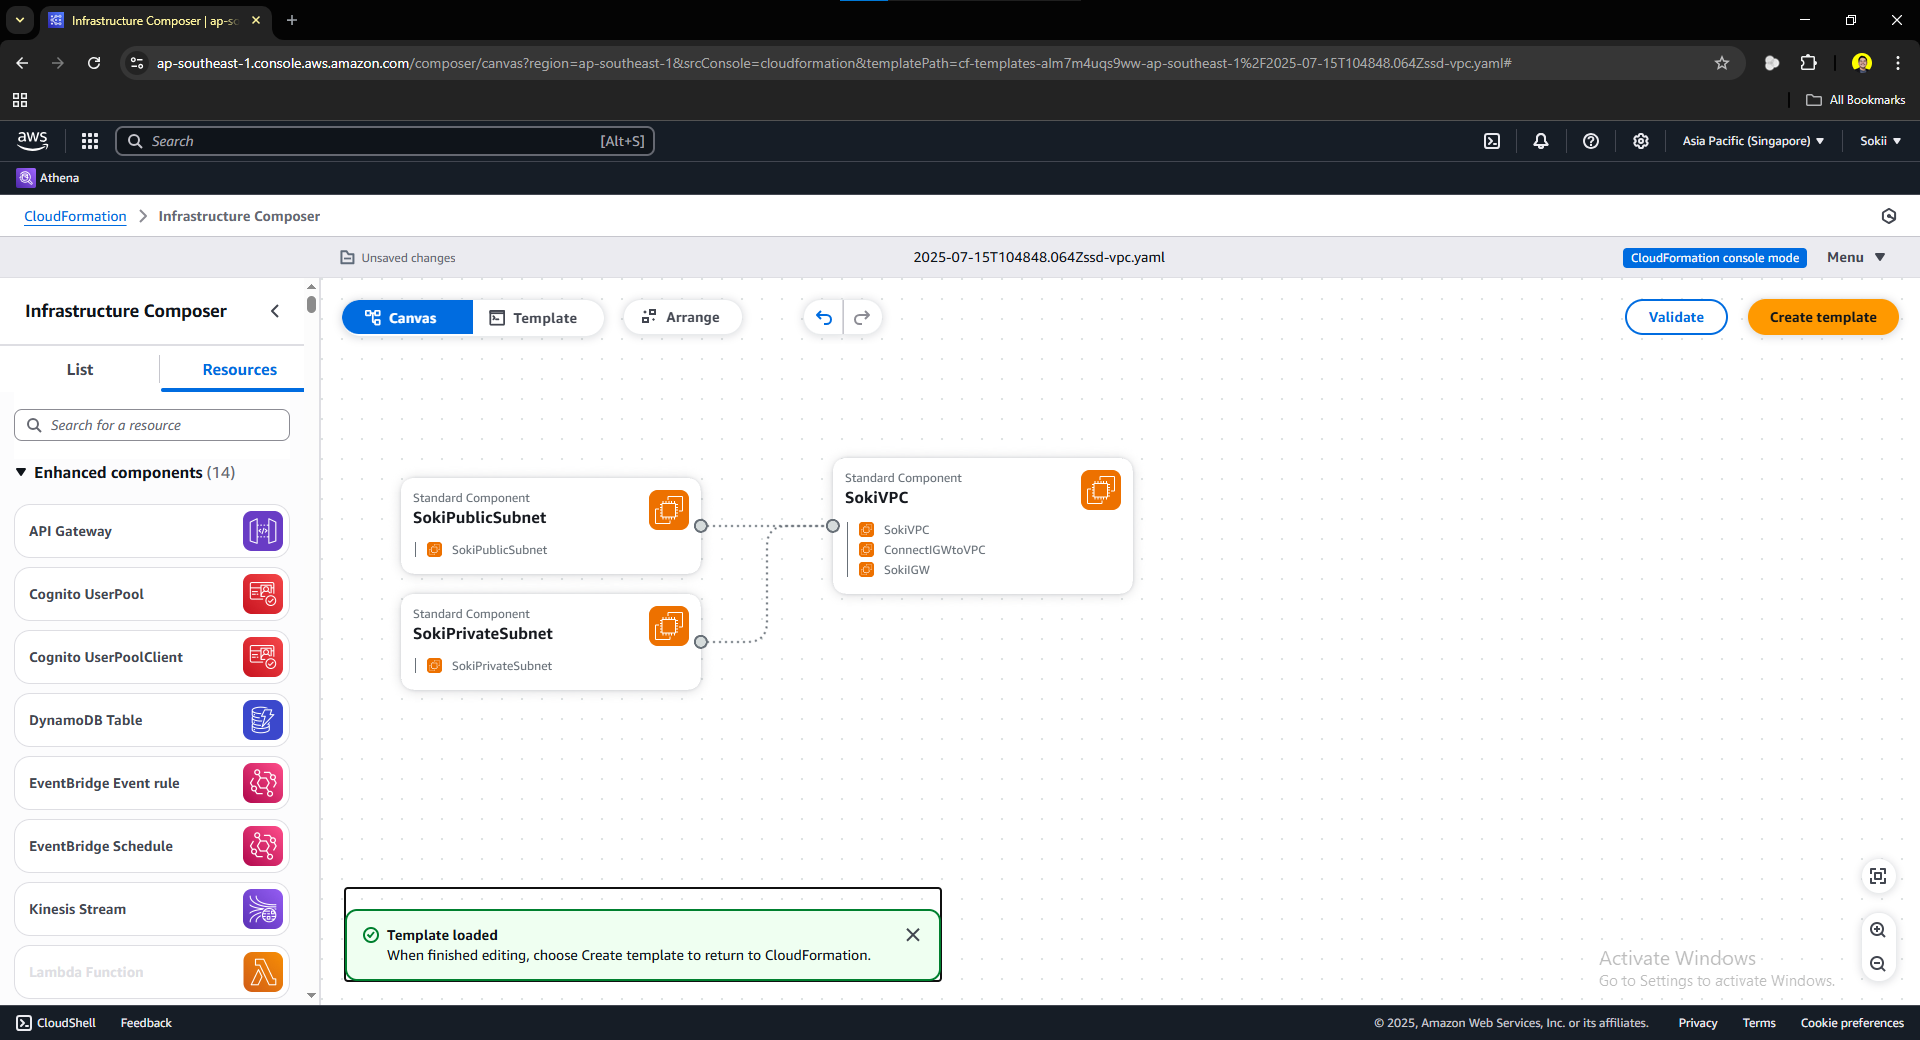
Once the file is uploaded, click the View in Infrastructure Composer. This is to verify and visualize the relationships and connections of the resources that we made. Once pressed, you should be prompted to this canvas:
Once everything looks good, you can now proceed in creating a template. Press the Create Template button at the upper right corner. Just proceed to the next steps and you should be prompted to this page:
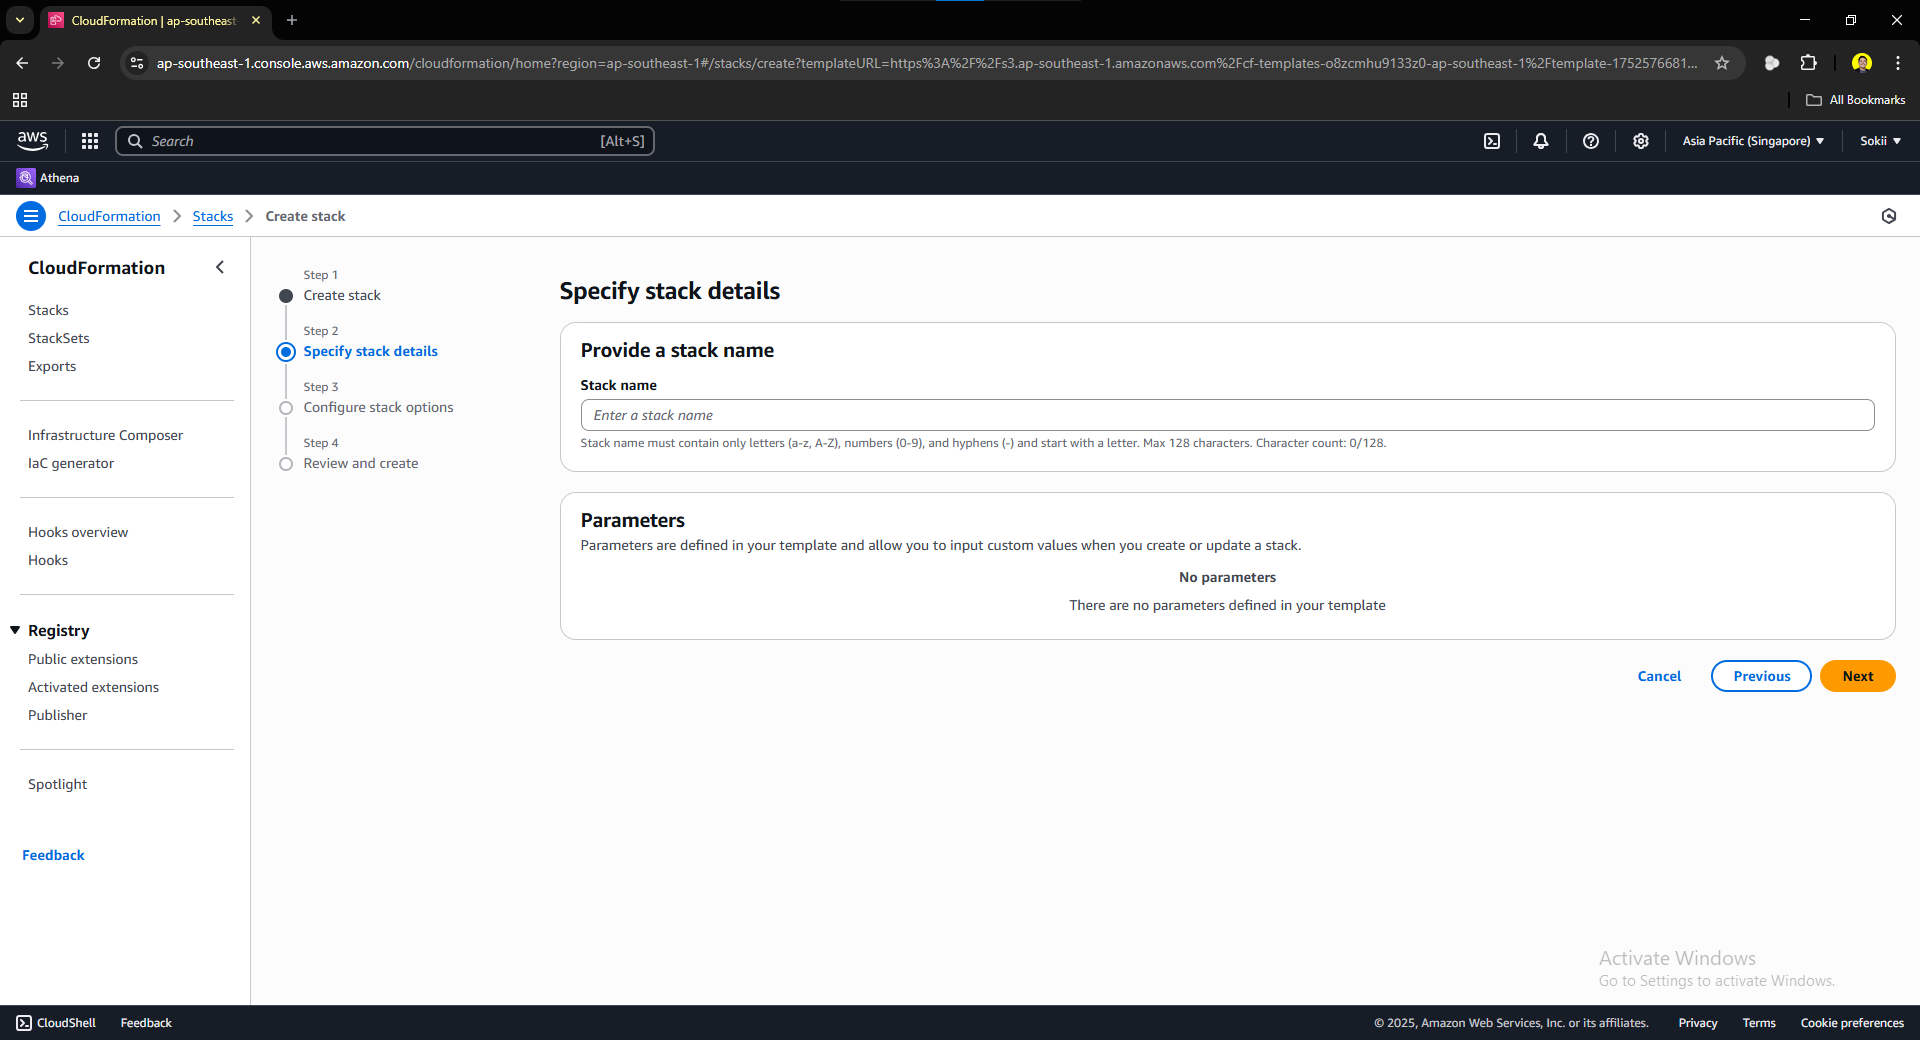
Give your stack a name. For this CloudFormation Template, we have not set any parameters so we will just leave it as is. Click next and you should be prompted to this page:
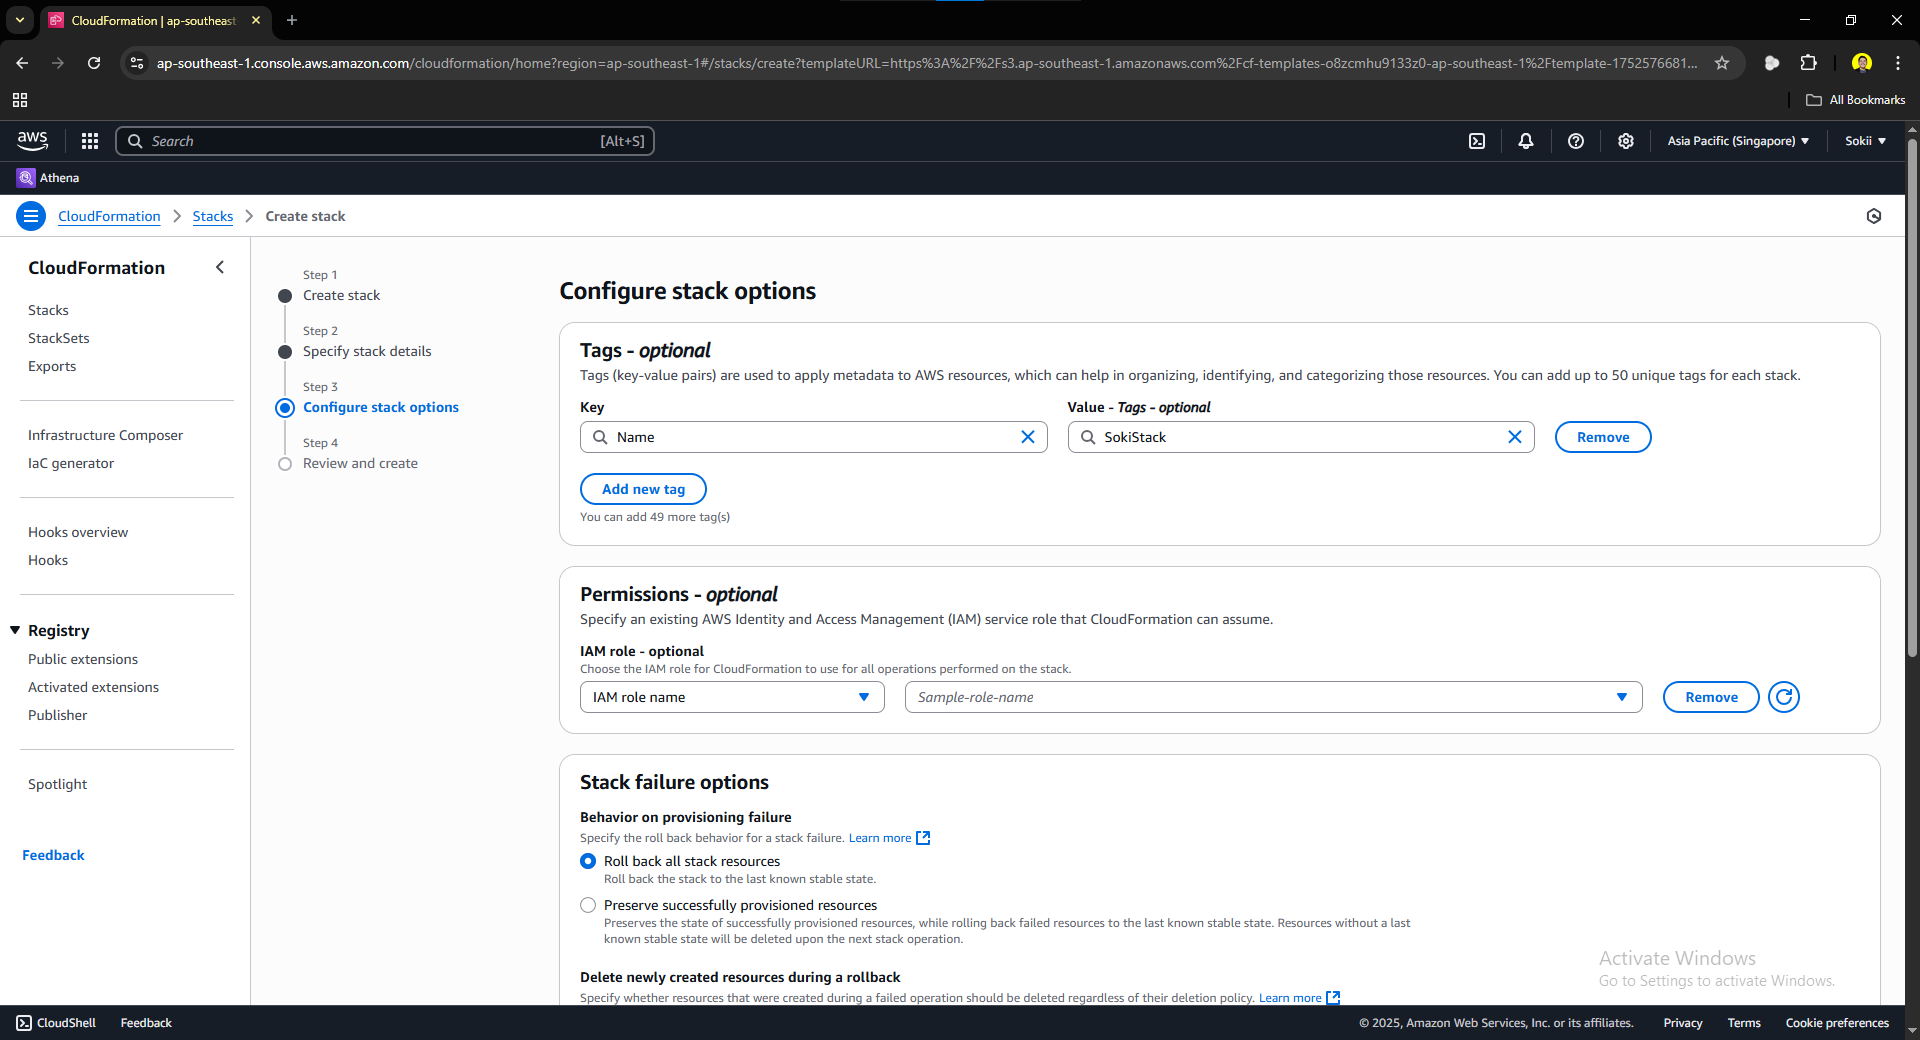

Adding tags is optional, but a great practice. You are not required to add tags, but I added a Name tag valued SokiStack for this stack. Leave other options as default, scroll to the bottom, and click next. You should be prompted to this page:
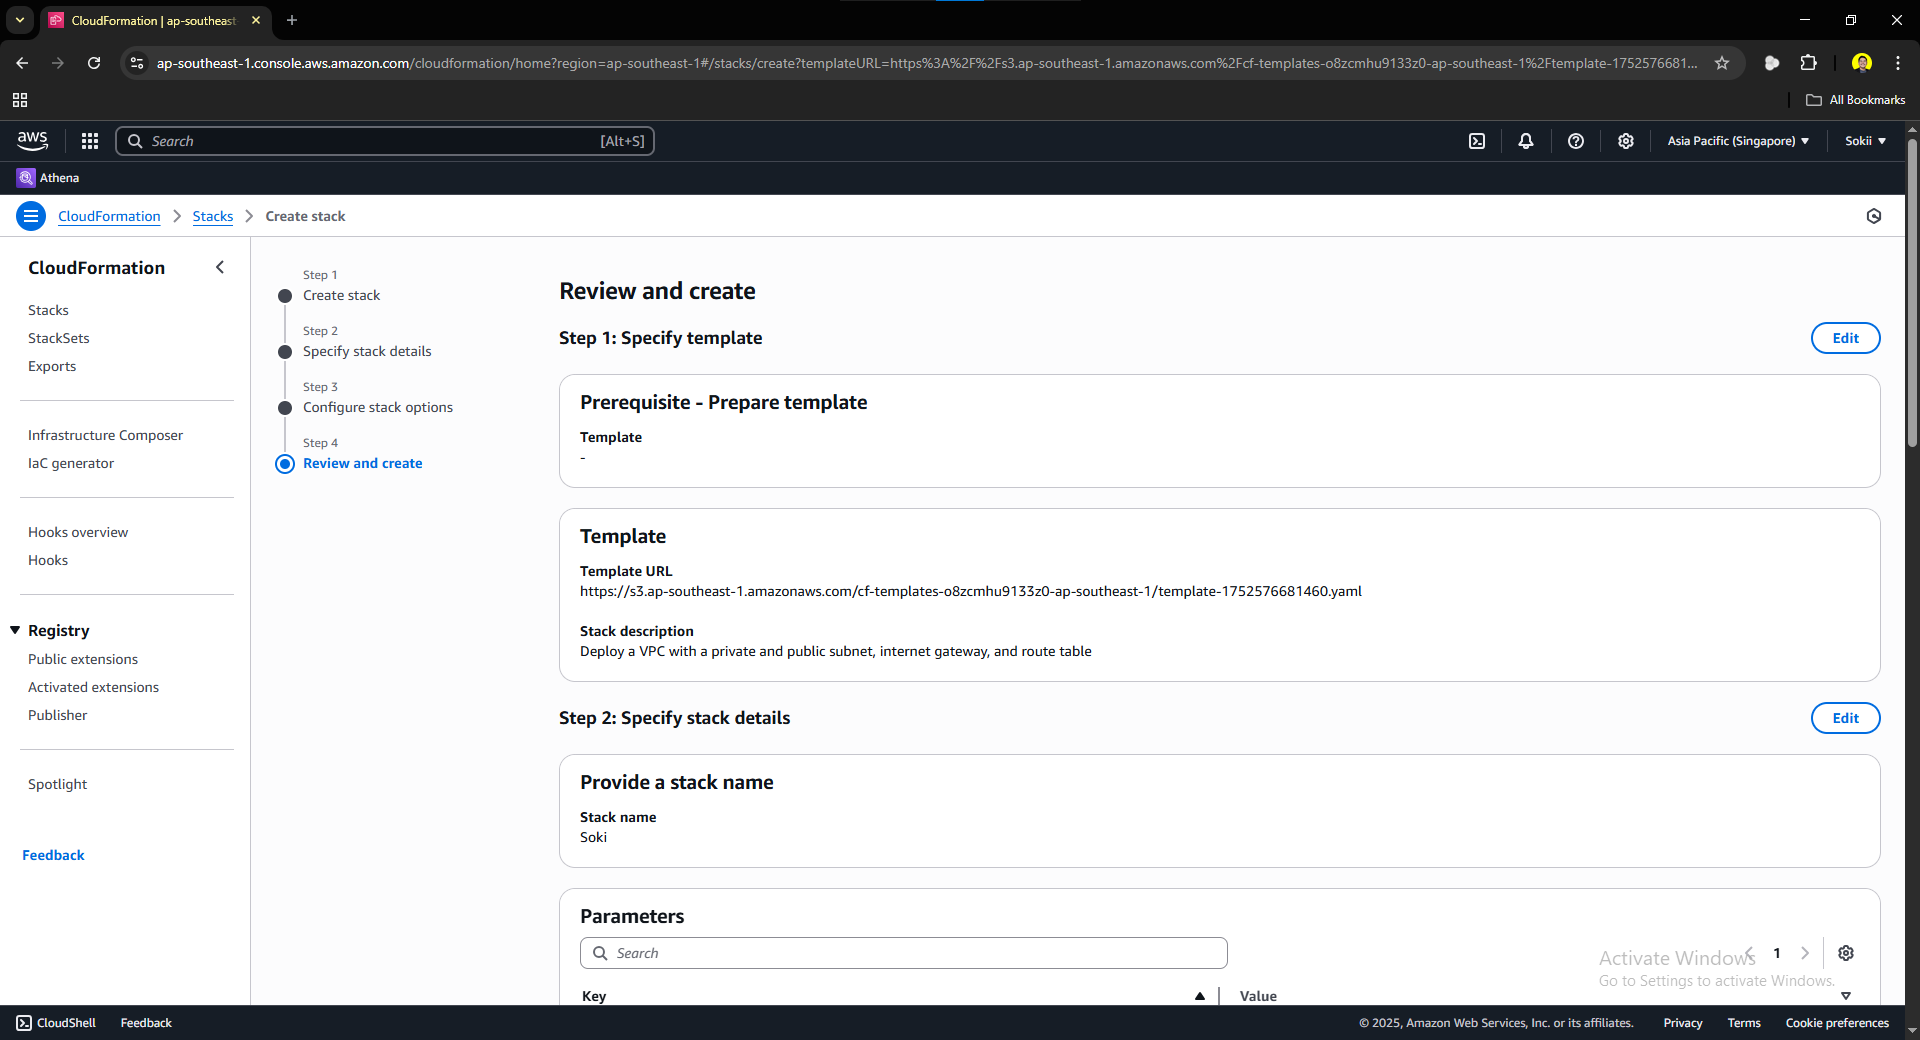
In this page, CloudFormation will ask you to review the details of the stack that you created. Check for every details and once everything looks right, click submit. You will be prompted to this page:
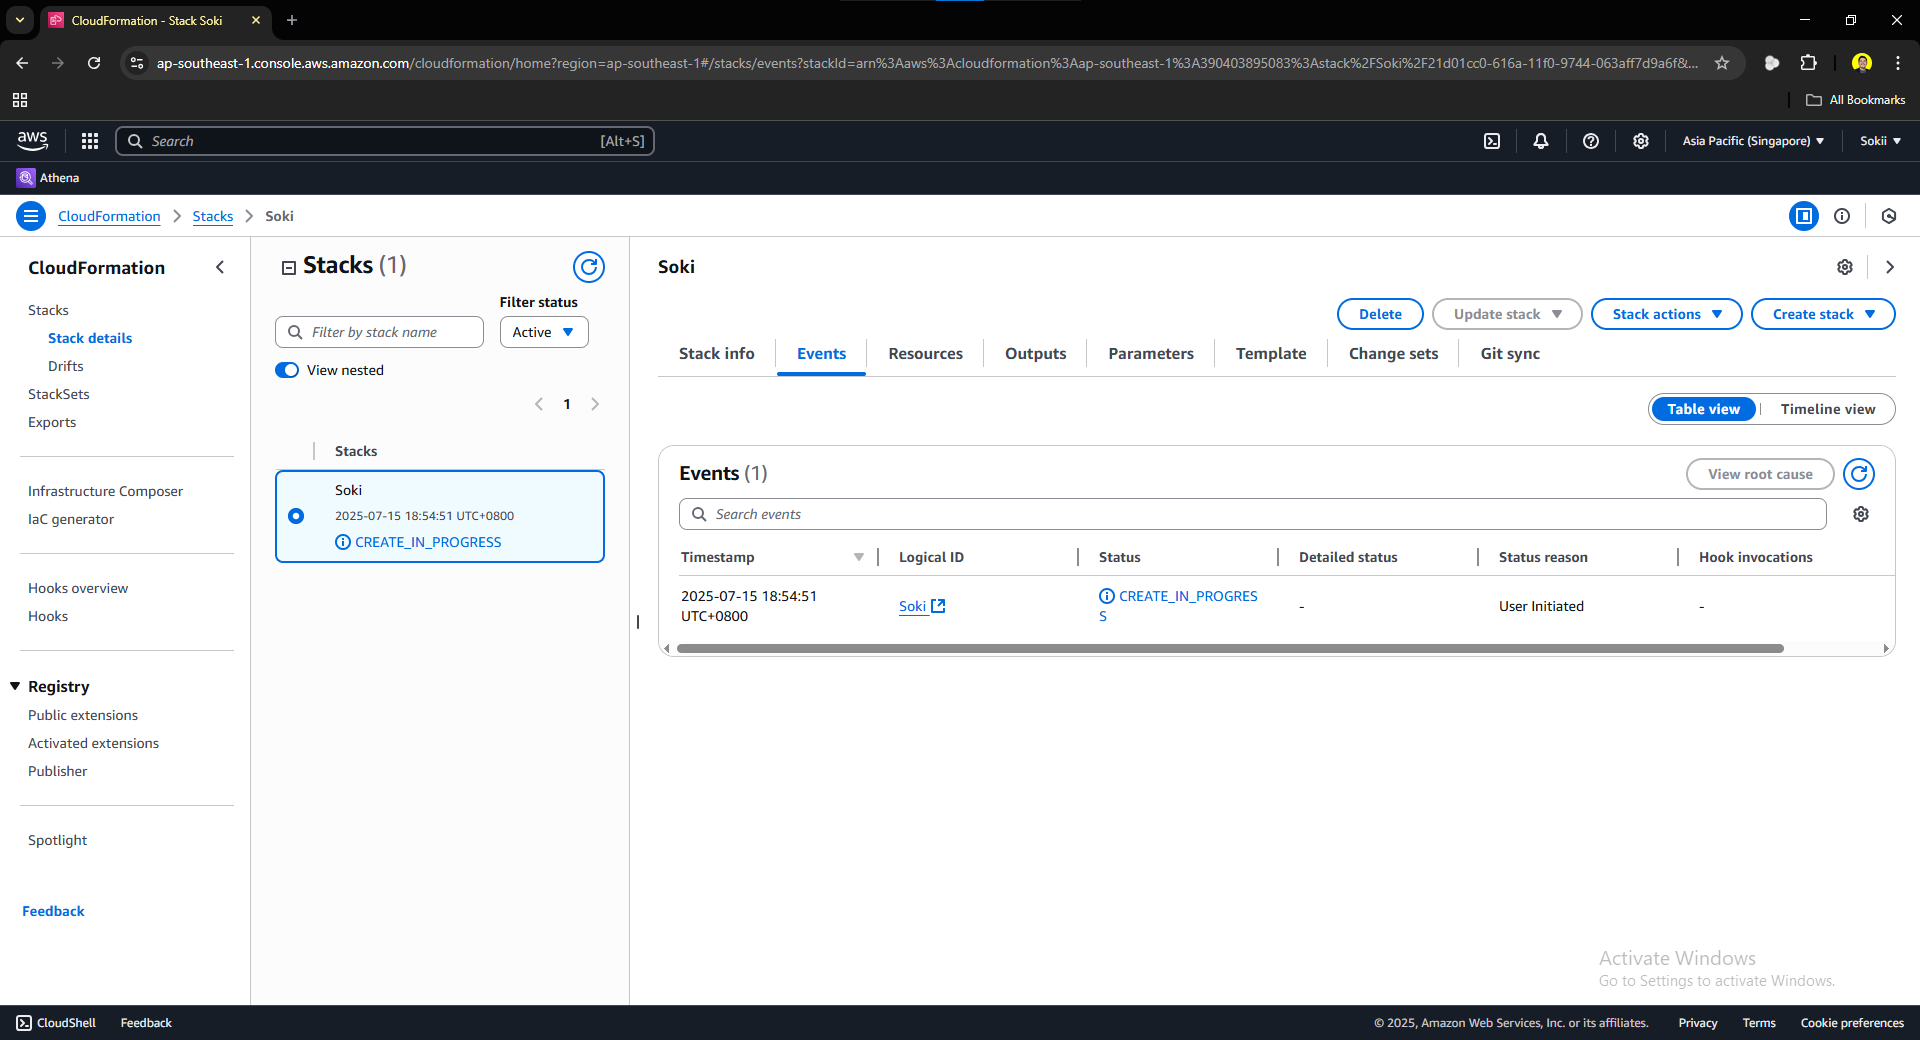
As you can see, we have successfully submitted our CloudFormation to AWS. They are creating the resources we see in our template and reviewing if the syntax is correct. Wait a few minutes, try to click the refresh button, and once that status turns green, your resources have been created. Click on the Resources tab to view the resources that you have deployed using CloudFormation.
4. Verify CloudFormation Configurations
Once you clicked the resources tab, you will be prompted to this tab:
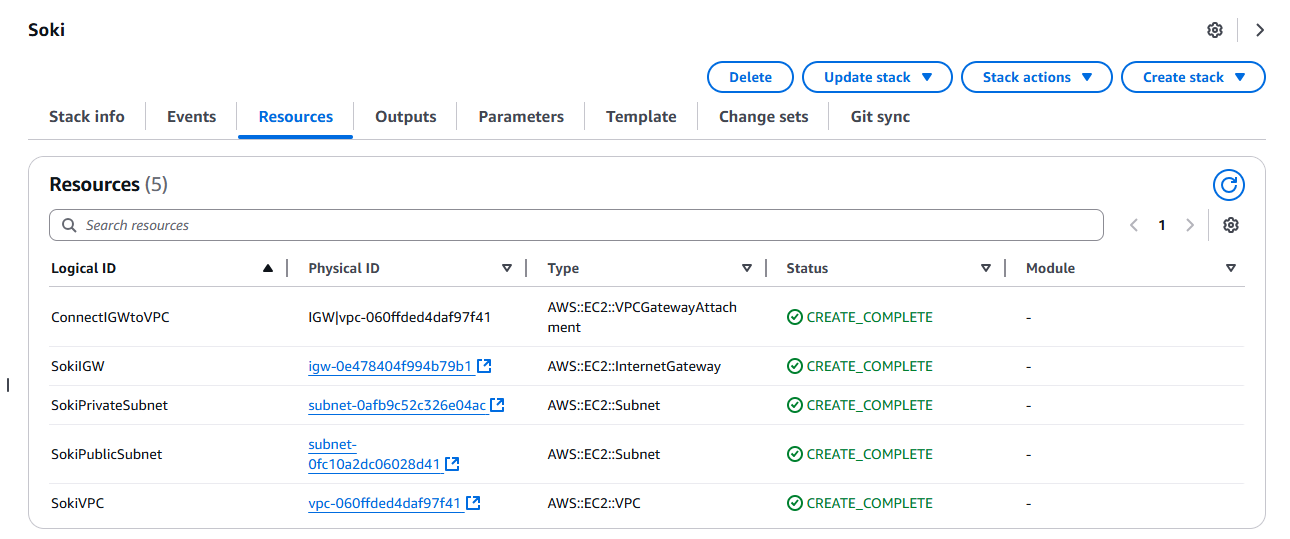
This tab shows all of the resources you have created using CloudFormation. You can press on the ID of each resource to be prompted to their console. We will click the VPC’s Physical ID to verify that our configurations have been made.
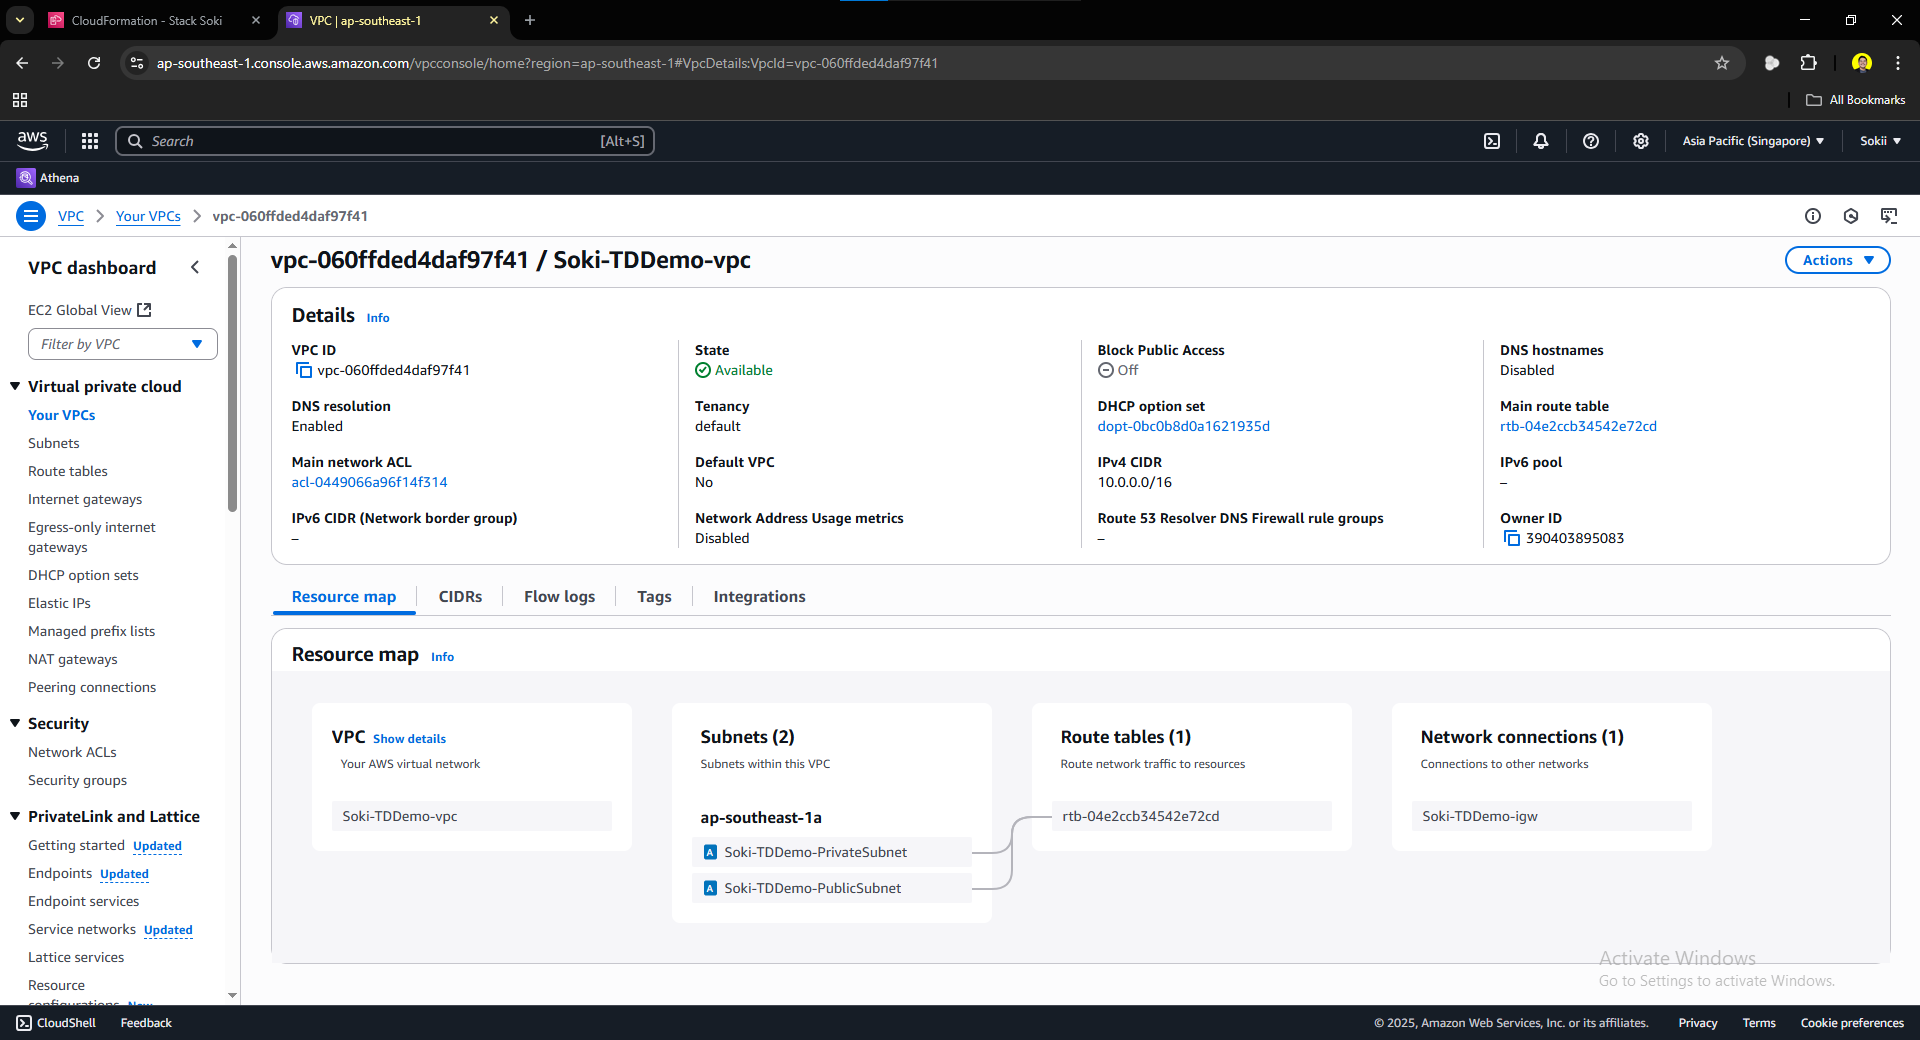
As you can see, we successfully created our own Virtual Private Cloud using CloudFormation. Visible on the figure are the subnets that we also launched using CloudFormation.
CloudFormation is FREE and does not cost anything to create a stack. However, the resources you created using CloudFormation that are not free tier eligible will still bill you depending on the specification of the resources you created. So if you’re like me, just testing out new stuff and exploring AWS, it is important to delete your resources immediately to avoid unwanted payment bills. To do so, head to your stack and click the Delete button. You will be asked to confirm your decision:
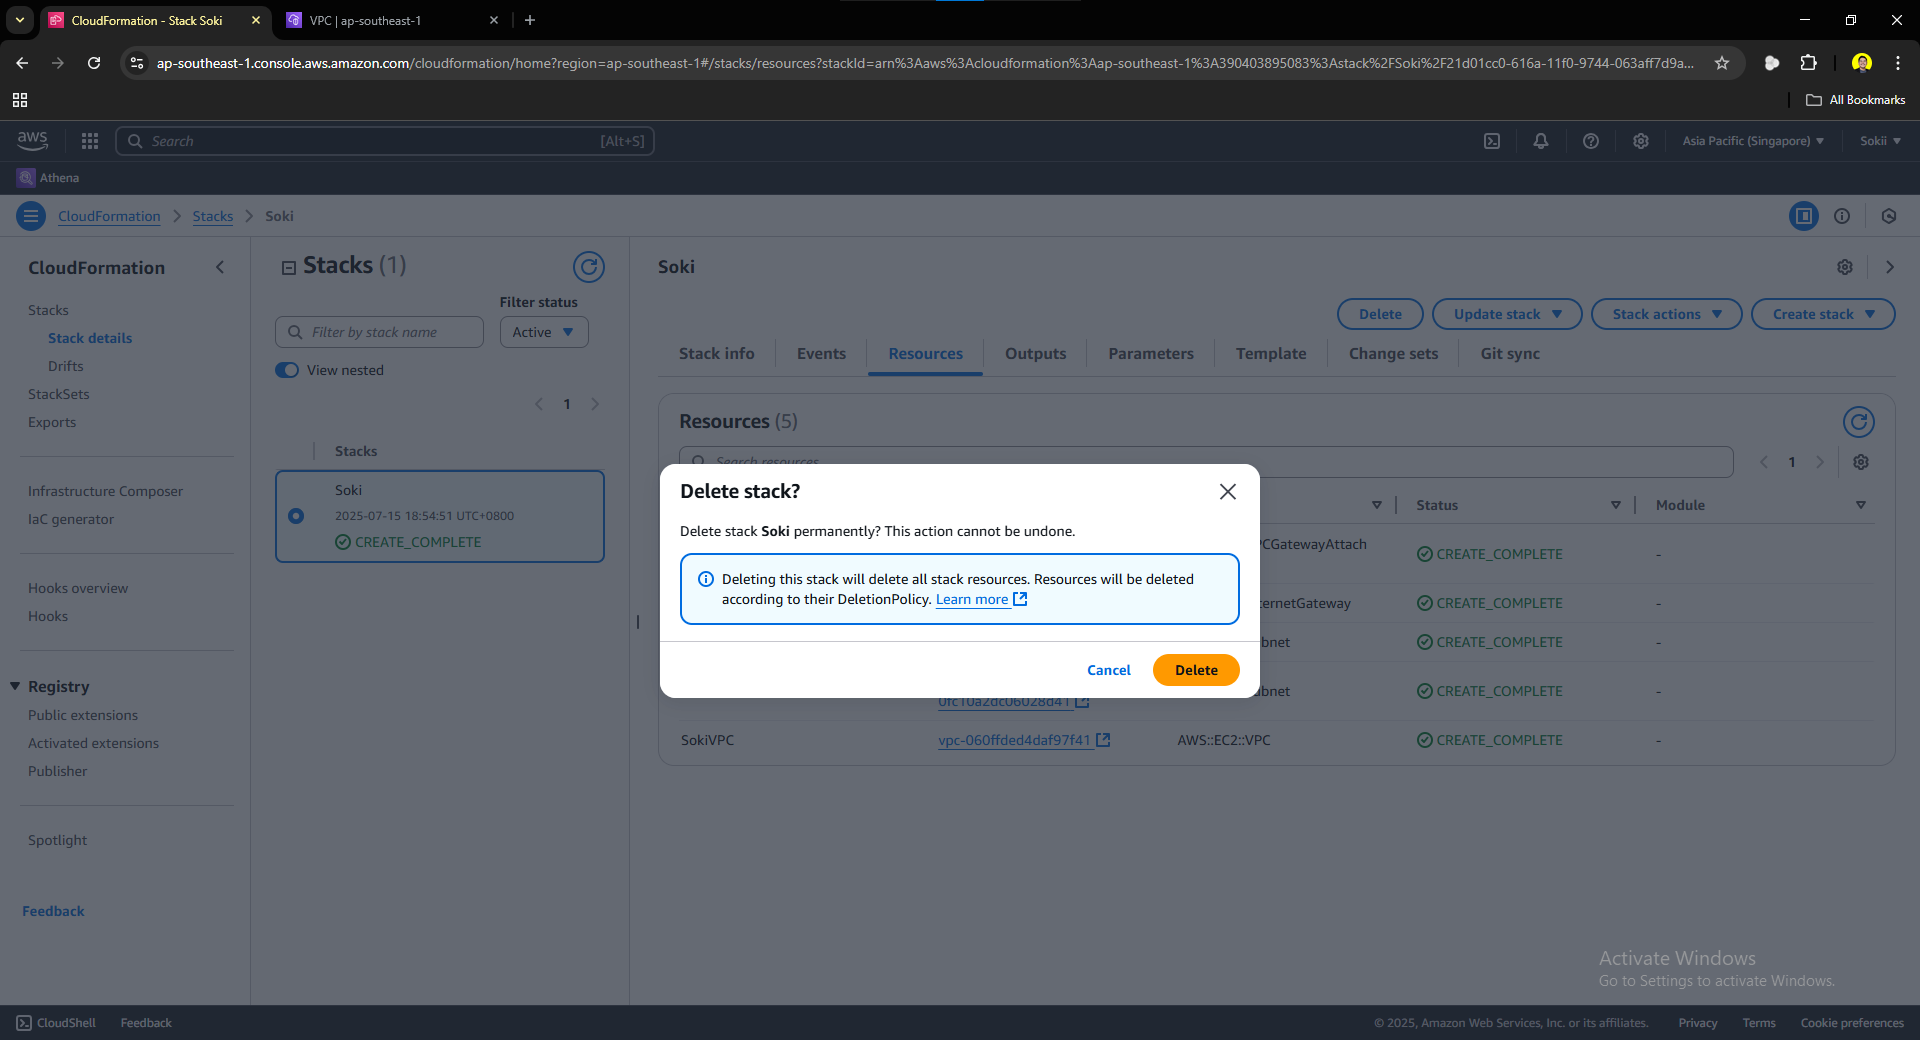
Click delete. Once you clicked delete, the delete process is now initialized, wait for a few minutes, refresh the page and once the delete process is done, your stack will be now empty.
Below is the final code for our CloudFormation:
AWSTemplateFormatVersion: 2010-09-09
Description: >-
Deploy a VPC with a private and public subnet, internet gateway, and route table

Resources:
SokiVPC:
Type: 'AWS::EC2::VPC'
Properties:
CidrBlock: 10.0.0.0/16
Tags:
- Key: Name
Value: Soki-TDDemo-vpc

SokiPublicSubnet:
Type: 'AWS::EC2::Subnet'
Properties:
AvailabilityZone: ap-southeast-1a
CidrBlock: 10.0.1.0/24
VpcId: !Ref SokiVPC
Tags:
- Key: Name
Value: Soki-TDDemo-PublicSubnet

SokiPrivateSubnet:
Type: 'AWS::EC2::Subnet'
Properties:
AvailabilityZone: ap-southeast-1a
CidrBlock: 10.0.2.0/24
VpcId: !Ref SokiVPC
Tags:
- Key: Name
Value: Soki-TDDemo-PrivateSubnet

SokiIGW:
Type: 'AWS::EC2::InternetGateway'
Properties:
Tags:
- Key: Name
Value: Soki-TDDemo-igw

ConnectIGWtoVPC:
Type: 'AWS::EC2::VPCGatewayAttachment'
Properties:
VpcId: !Ref SokiVPC
InternetGatewayId: !Ref SokiIGW
Conclusion
Once again, we finished a demonstration on how Infrastructure as Code is revolutionizing the way we provision and manage our cloud resources. In this article, we explored how to deploy a complete Virtual Private Cloud setup using AWS Native IaC tool, AWS CloudFormation. We dove deep into a CloudFormation Template, Anatomy, and File Composition structure. We also demonstrated how to deploy a VPC using CloudFormation from IDE Setup, Code Writing, Execution, and Verification. The following article will dive deep into the difference between Terraform and CloudFormation.
Reference/s:
🐰 25% OFF Easter Sale! Use code TDPLAYCLOUD-04022026 for 10% OFF ALL PlayClouds Subscription & 5% OFF gift cards!

Learn AWS with our PlayCloud Hands-On Labs

$2.99 AWS and Azure Exam Study Guide eBooks

New AWS Generative AI Developer Professional Course AIP-C01

Learn GCP By Doing! Try Our GCP PlayCloud

Learn Azure with our Azure PlayCloud

FREE AI and AWS Digital Courses

FREE AWS, Azure, GCP Practice Test Samplers


Subscribe to our YouTube Channel

Follow Us On Linkedin


