Last updated on July 17, 2025
What’s up, Dojos! This is your first step on automating your cloud infrastructure by launching an EC2 Instance using Terraform!
Efforts from various cloud providers such as AWS made managing your configurations manageable and easy by the use of their Management Consoles. With AWS, launching an EC2 instance, setting up IAM configurations, and VPC provisioning have never been easier within their console. But what if you have to configure large amounts of resources? Provisioning your projects are like a walk in the park, but if you’re managing an application or a business that caters to thousands to millions of customers or clients, provisioning your resources will takes lots of time. Most especially when you’re trying to build a highly available and durable system which you will need to set up on multiple AWS Regions, in multiple Availability Zones.
This is where Infrastructure as Code come in to place. Infrastructure as Code is a way to manage and provision your cloud infrastructure and resources using lines of code instead of manual configuration through the console. Infrastructure as Code makes provisioning much faster. Compared to traditional ways of manual infrastructure management, it lessens the risk of committing human errors, especially when you have to deploy the same configurations of your infrastructure to multiple regions or availability zones. It also opens your application to version control and team collaborations. AWS CloudFormation is the native IaC service provided by AWS. However, for this article, we are using Terraform as Terraform is recognized by multiple cloud providers such as GCP, Azure, and AWS.
Without further ado, let’s start the demo! For this article, we will keep it simple. We are using Terraform to Launch an EC2 Instance in AWS. Here are the following steps:
IMPLEMENTATION
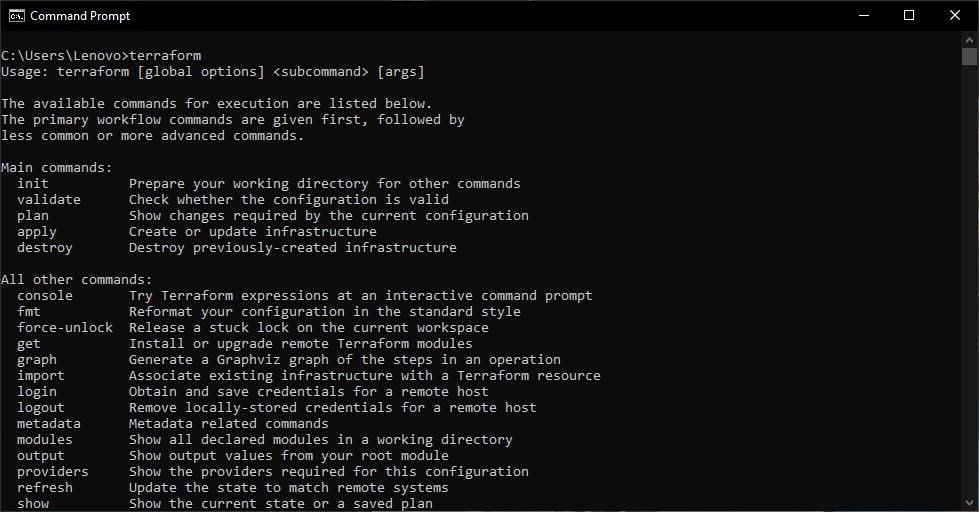
1. Installation and Verification
Install Terraform to your Local Device and verify installation. Reference here: https://developer.hashicorp.com/terraform/tutorials/aws-get-started/install-cli, Once done, verify installation by running the command ‘terraform’ on your command line. The output should be something like this:
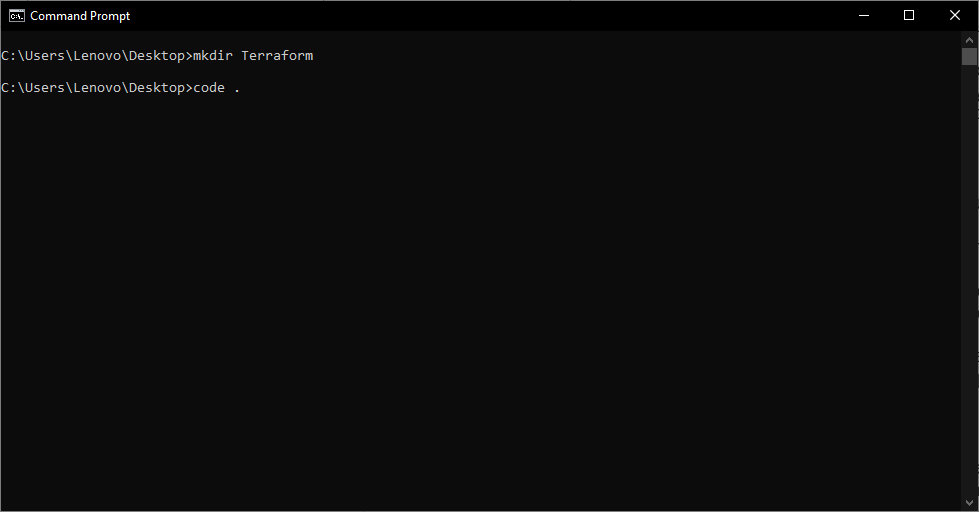
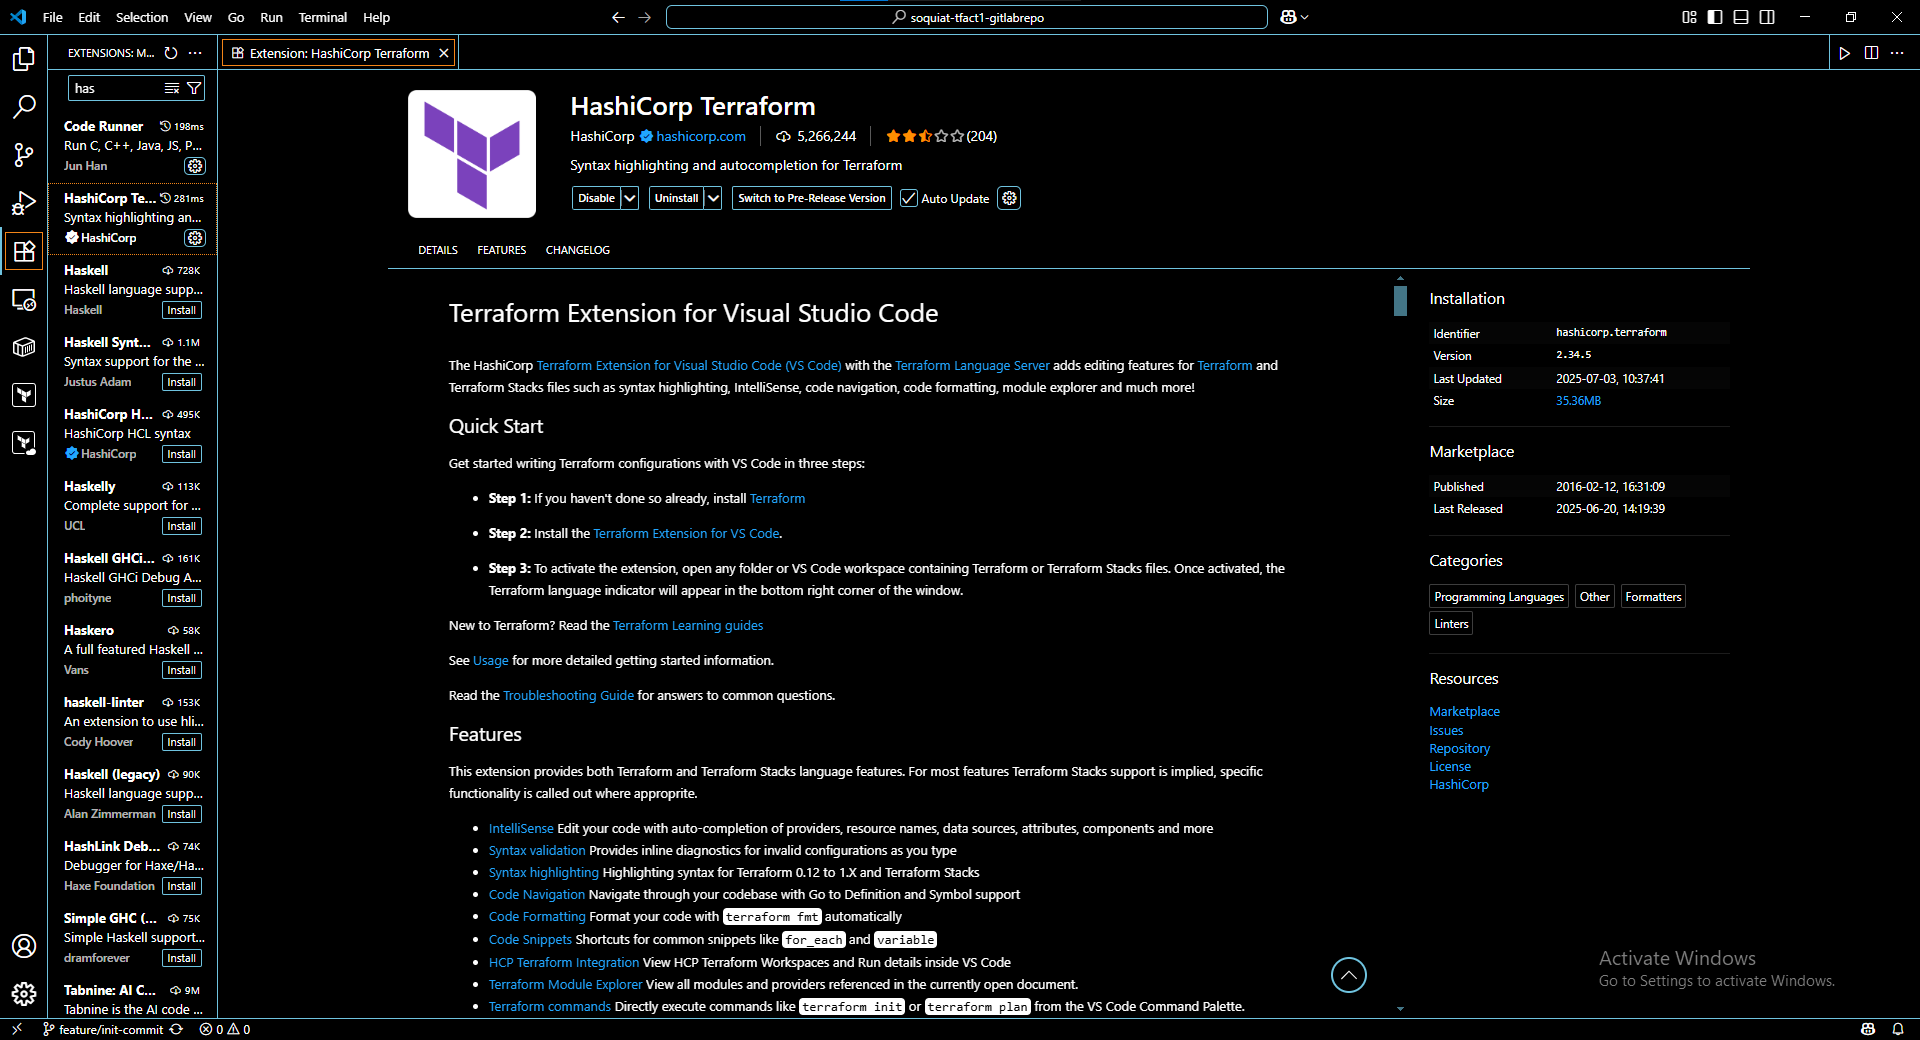
2. IDE Setup
Once Terraform has been set up, create a folder where we will store all of our Terraform files. Open with your desired IDE. In my case, Visual Studio Code. Install all the necessary extensions. Search for “Hashicorp Terraform”
3. Authentication and Authorization
Leave the opened Folder for now, head over to your AWS Console. Navigate to IAM Users, and create a User

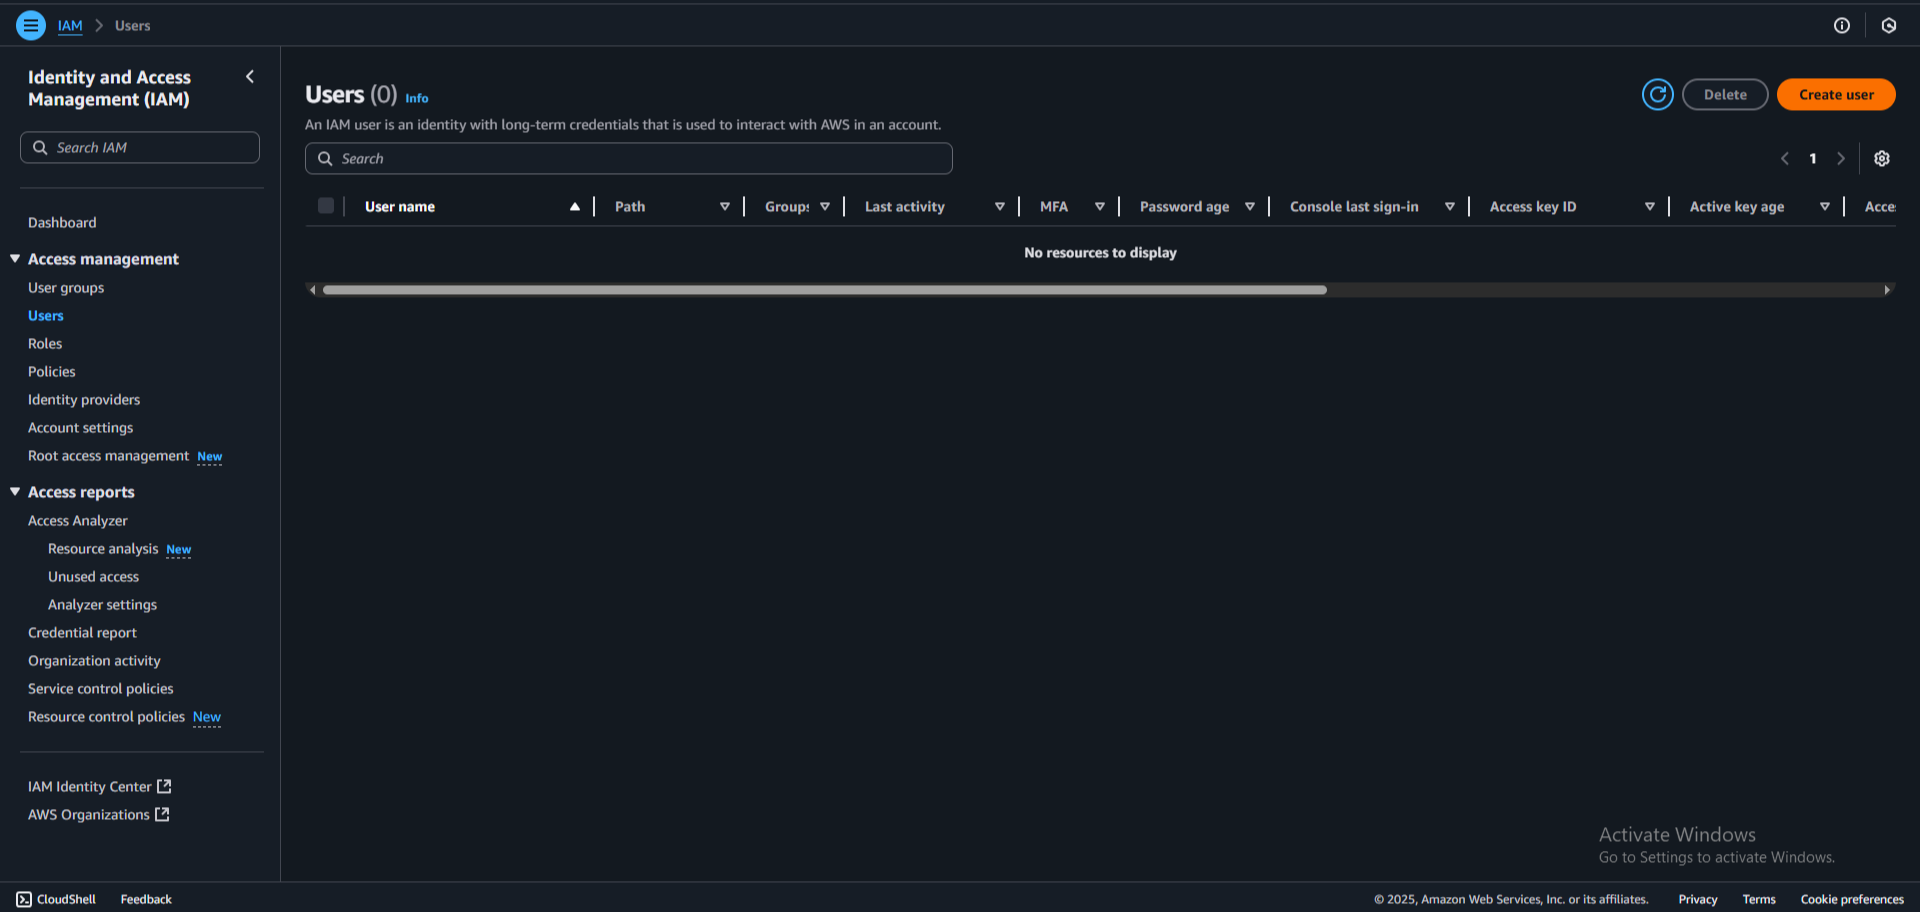
As Terraform interacts with various cloud providers such as AWS, it is important to verify your identity with Terraform. That is what we’re going to do. We are going to set up Authentication and Authorization using AWS IAM.
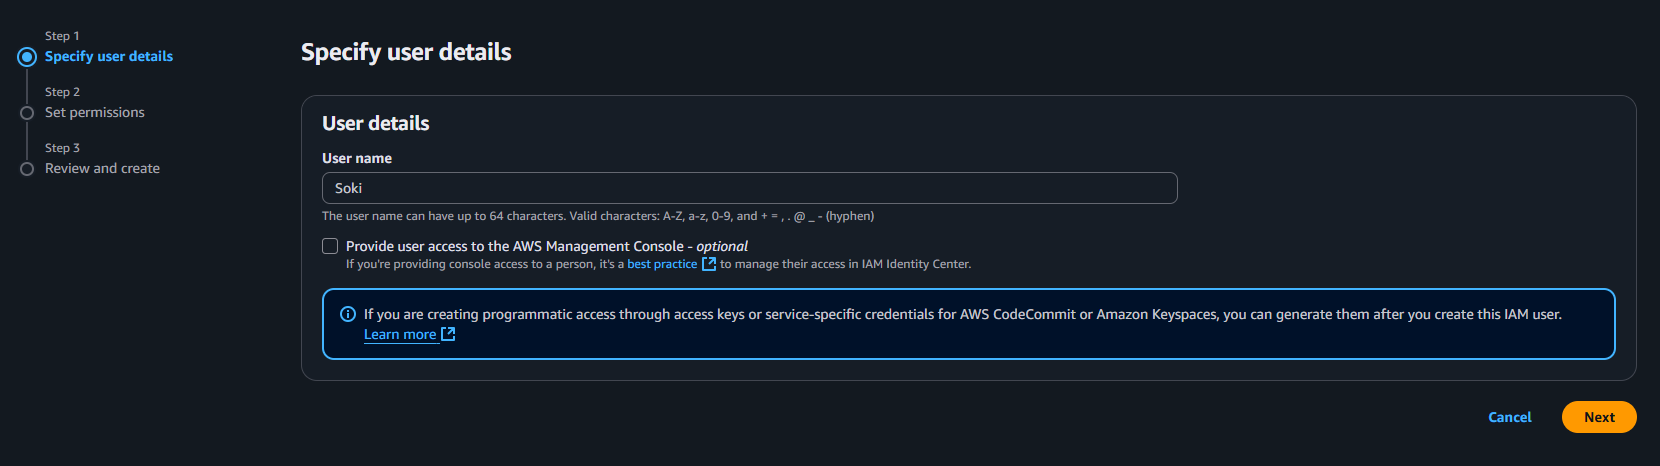
First, name your user. I used my nickname here “Soki”
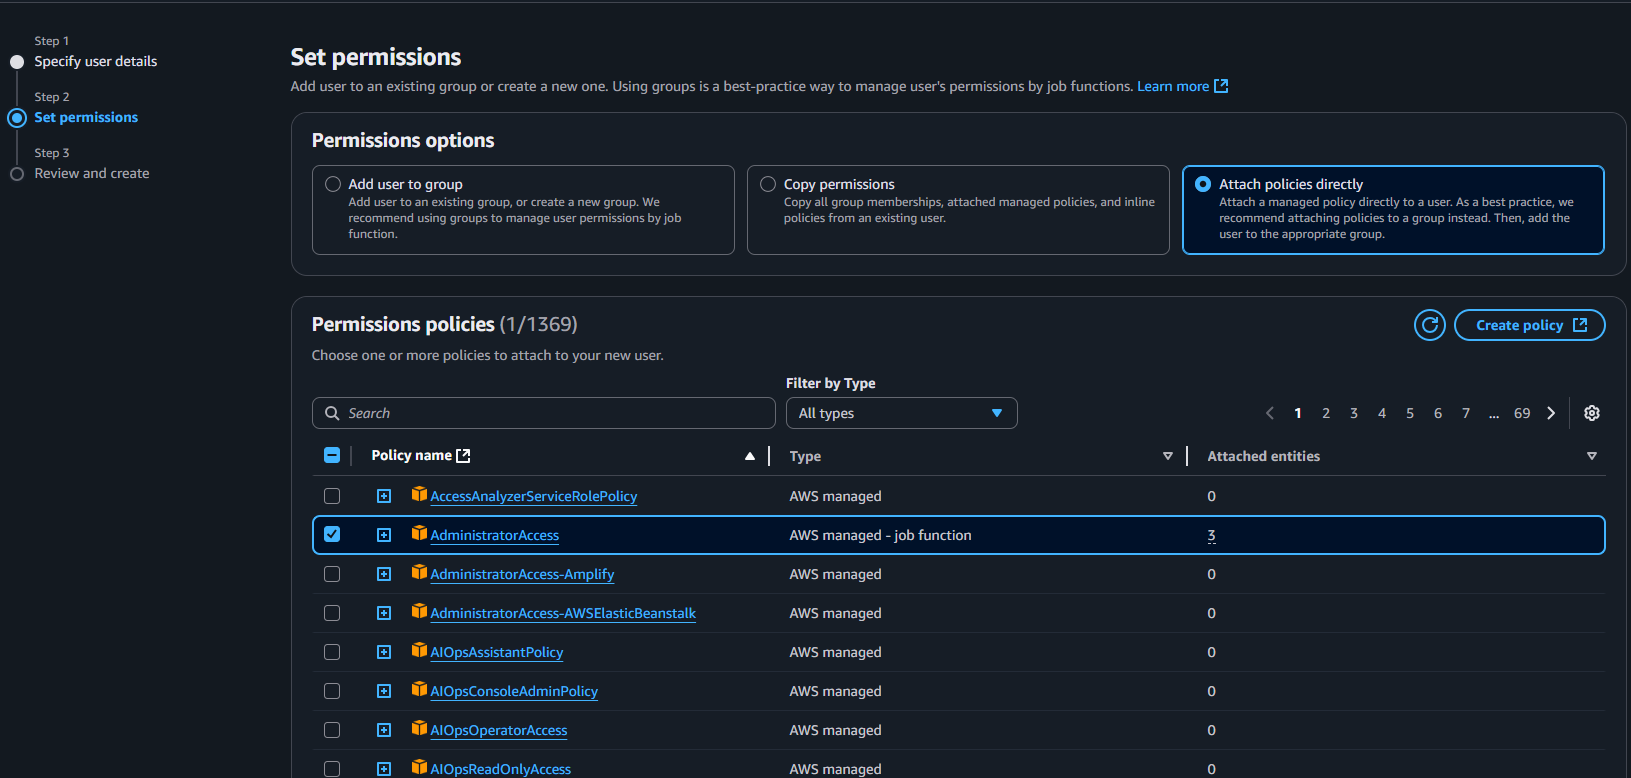
Next, we are going to set permissions. We will give this user the AdministratorAccess for now, as this is my personal account and we want the flexibility to provision any AWS resources for this demo. However, if you want to limit the access and authorization of the user you’re creating, please apply the minimum access as possible.
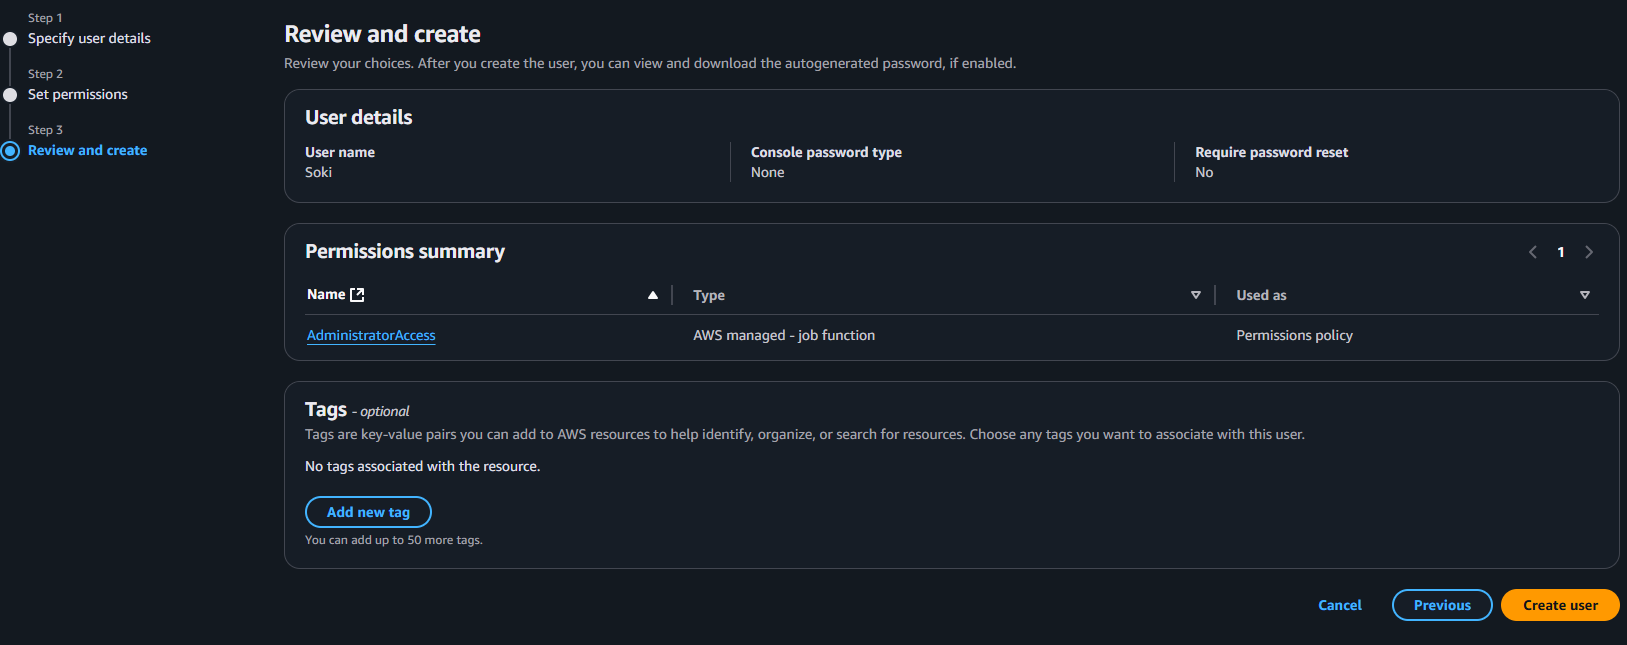
Review the permissions that you have given, once everything is okay, press create user to create the user.
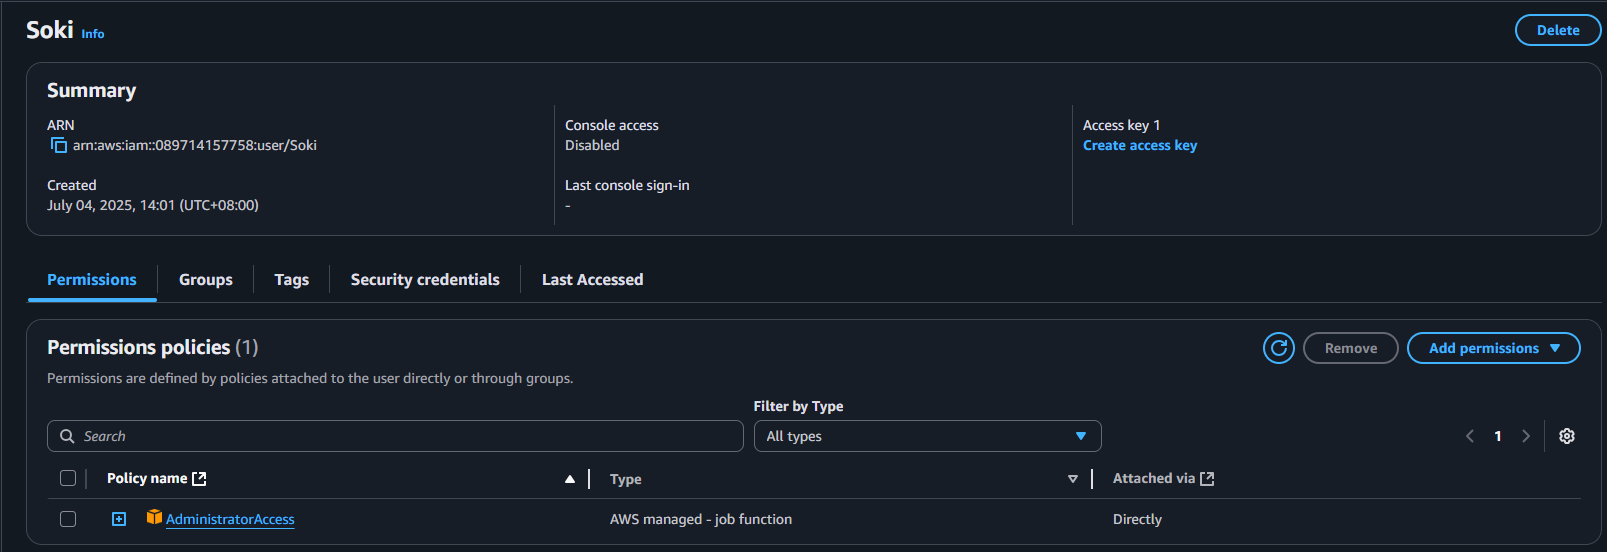
Navigate to your user and press Create Access Key
Select Command Line Interface, and tick the confirmation checkbox at the bottom and click next.
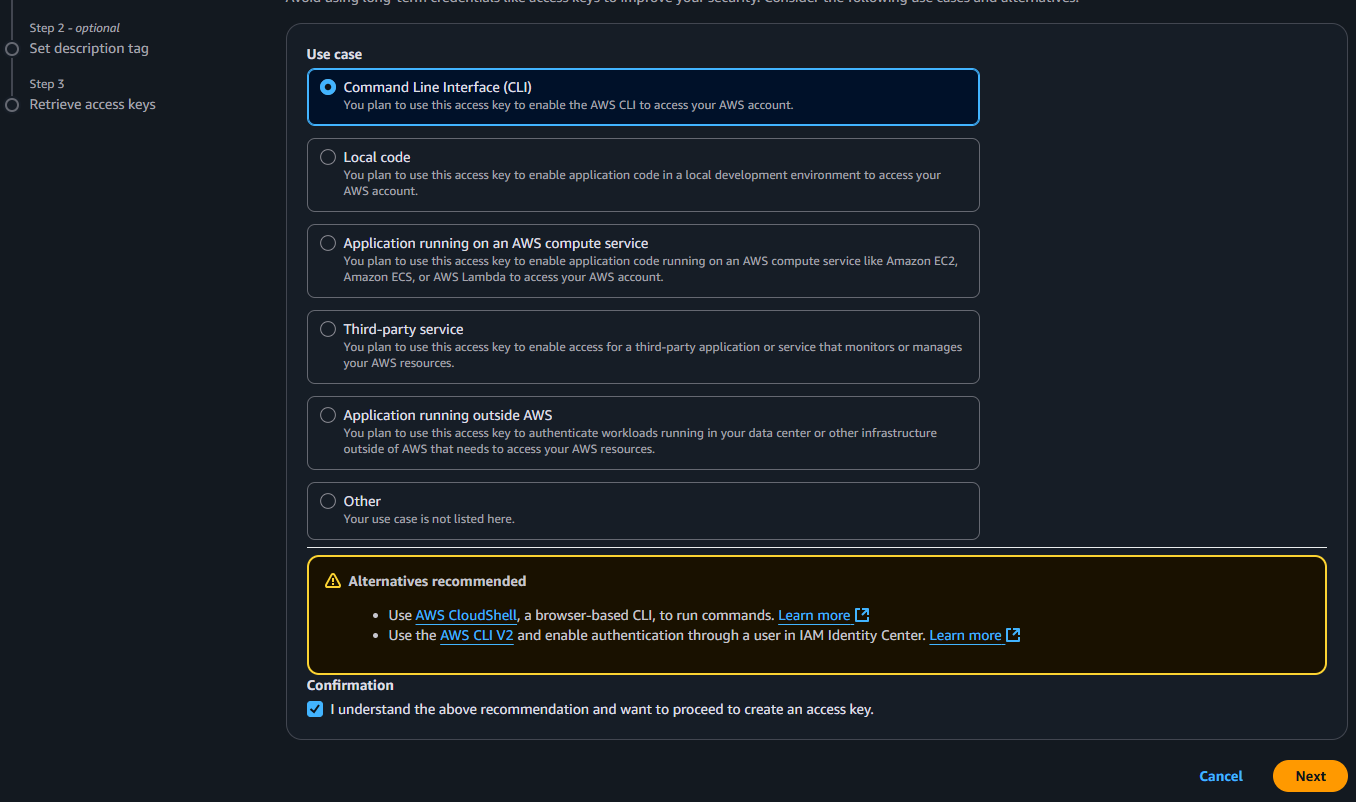
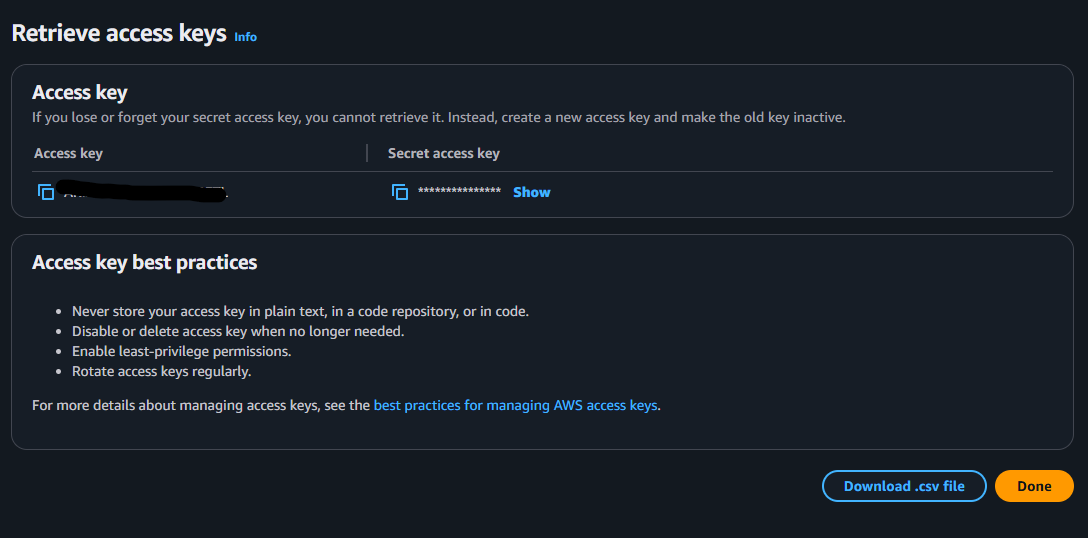
Click create access key and you should be prompted to the retrieve your access keys. Save your access key and secret access key to your Local Device or Password Managers.
Once that is done, we will head back to the folder we created earlier
4. Provider Code
Create a Terraform file with the name ec2.tf to easily recognize the type of resources we want to configure. In that file write this code:
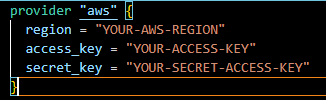
These lines of code will serve as the authentication and authorization combo that will give Terraform the permission to provision your AWS resources. Make sure to replace the region, access_key, and secret_key with the proper AWS Region you’re provisioning your infrastructure and the Access key and Secret Access key you created earlier.
5. Retrieve AMI ID
Go back to your AWS Management Console and Navigate to EC2, Launch an instance to get the AMI that we need.
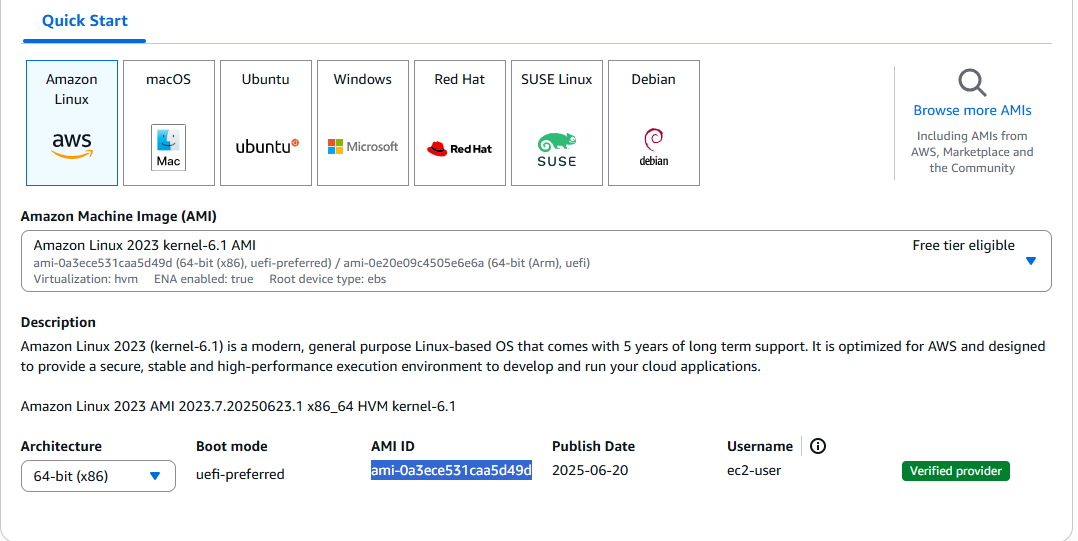
Once you retrieve the AMI ID, go back to your ec2.tf file.
6. Terraform Code
Write this line of code:
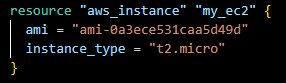
These lines of code will be the configuration that will launch your EC2 instance. Included in this code is the AMI and the Instance type that we want, for this case, t2.micro, since t2.micro is free tier eligible. Once done, go back to your Command Prompt.
7. Terraform Execution
To execute your terraform file, run these commands:
terraform init:
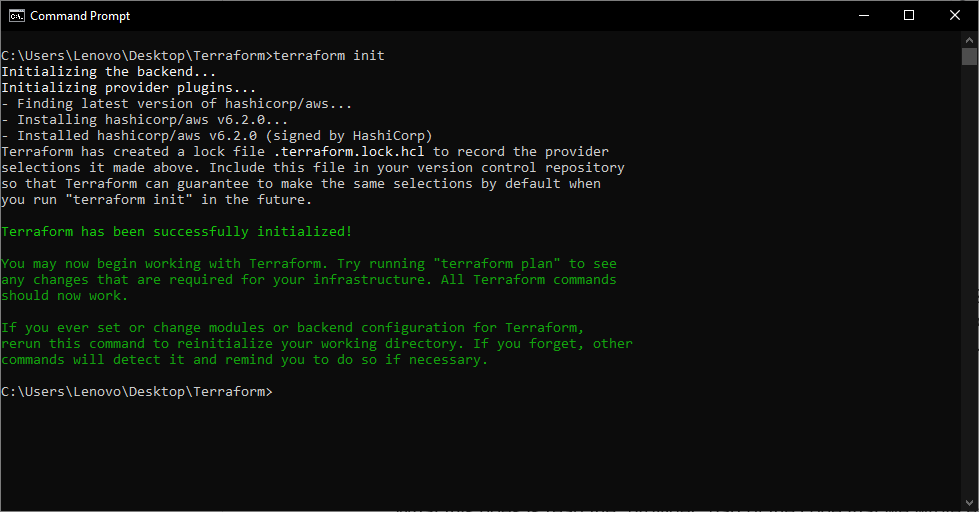
What this does is read the “provider” part of the code that we wrote earlier. Once terraform identifies the cloud provider that you will use, terraform will install the necessary files needed for that specific provider.
terraform plan:
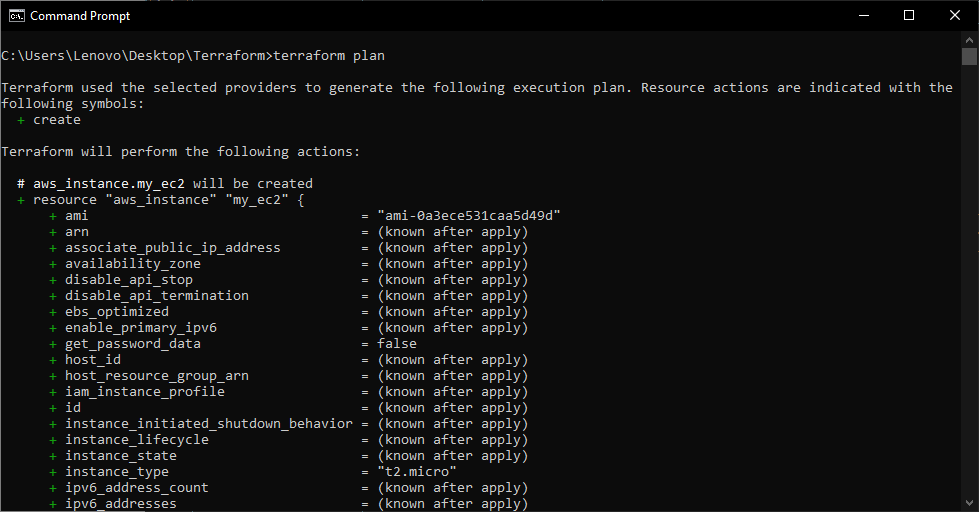
What this command does is display the actions that terraform will do to your AWS resources, it will include all of the configurations and provisioning that you intended for your infrastructure. In the figure above, you can see the ami and instance type that we specified earlier in the code that we wrote.

terraform apply:

Once you run terraform apply, it will ask you to confirm the actions listed above, input yes. Wait for a minute, depending on the amount of your configurations, then it is done. Proceed to the last step:
8. Verify Configurations
Go to your AWS Management Console and navigate to Amazon EC2 to verify if your configurations have been made.

EC2 Instance Launched using Terraform
As you can see, we have successfully launched our Amazon EC2 Instance with the use of Terraform!
Below is the final code for our Terraform file:
provider "aws" {
region = "YOUR AWS REGION"
access_key = "YOUR ACCESS KEY"
secret_key = "YOUR SECRET ACCESS KEY"
}
resource "aws_instance" "my_ec2" {
ami = "ami-0a3ece531caa5d49d"
instance_type = "t2.micro"
}
Conclusion
In this article, we explored how Infrastructure as Code (IaC) simplifies the provisioning of cloud infrastructures using Terraform. In AWS, managing infrastructure manually is easy with the use of AWS Management Console. However, as our businesses scale, this approach becomes inefficient and prone to human error. Terraform gives us the ability to manage our AWS infrastructure programmatically, reducing human error, improve speed, enabling automation, and creating a collaborative environment with our team. By launching an EC2 instance using Terraform, you have successfully taken the first step to automating your infrastructure setup. See you soon for more provisioning using Terraform!
Reference/s:
- https://tutorialsdojo.com/cloud-9-2-launching-your-amazon-ec2-instance/
- https://registry.terraform.io/providers/hashicorp/aws/latest/docs
🤖 $3.49 eBooks Start Here – Get Up to 30% OFF All AI & Machine Learning Reviewers

Turn Your Team Into Cloud-Ready Professionals Today

Learn AWS with our PlayCloud Hands-On Labs

$2.99 AWS and Azure Exam Study Guide eBooks

New Claude Certified Architect Foundations CCA-F

Learn GCP By Doing! Try Our GCP PlayCloud

Learn Azure with our Azure PlayCloud

FREE AI and AWS Digital Courses

FREE AWS, Azure, GCP Practice Test Samplers


Subscribe to our YouTube Channel

Follow Us On Linkedin


