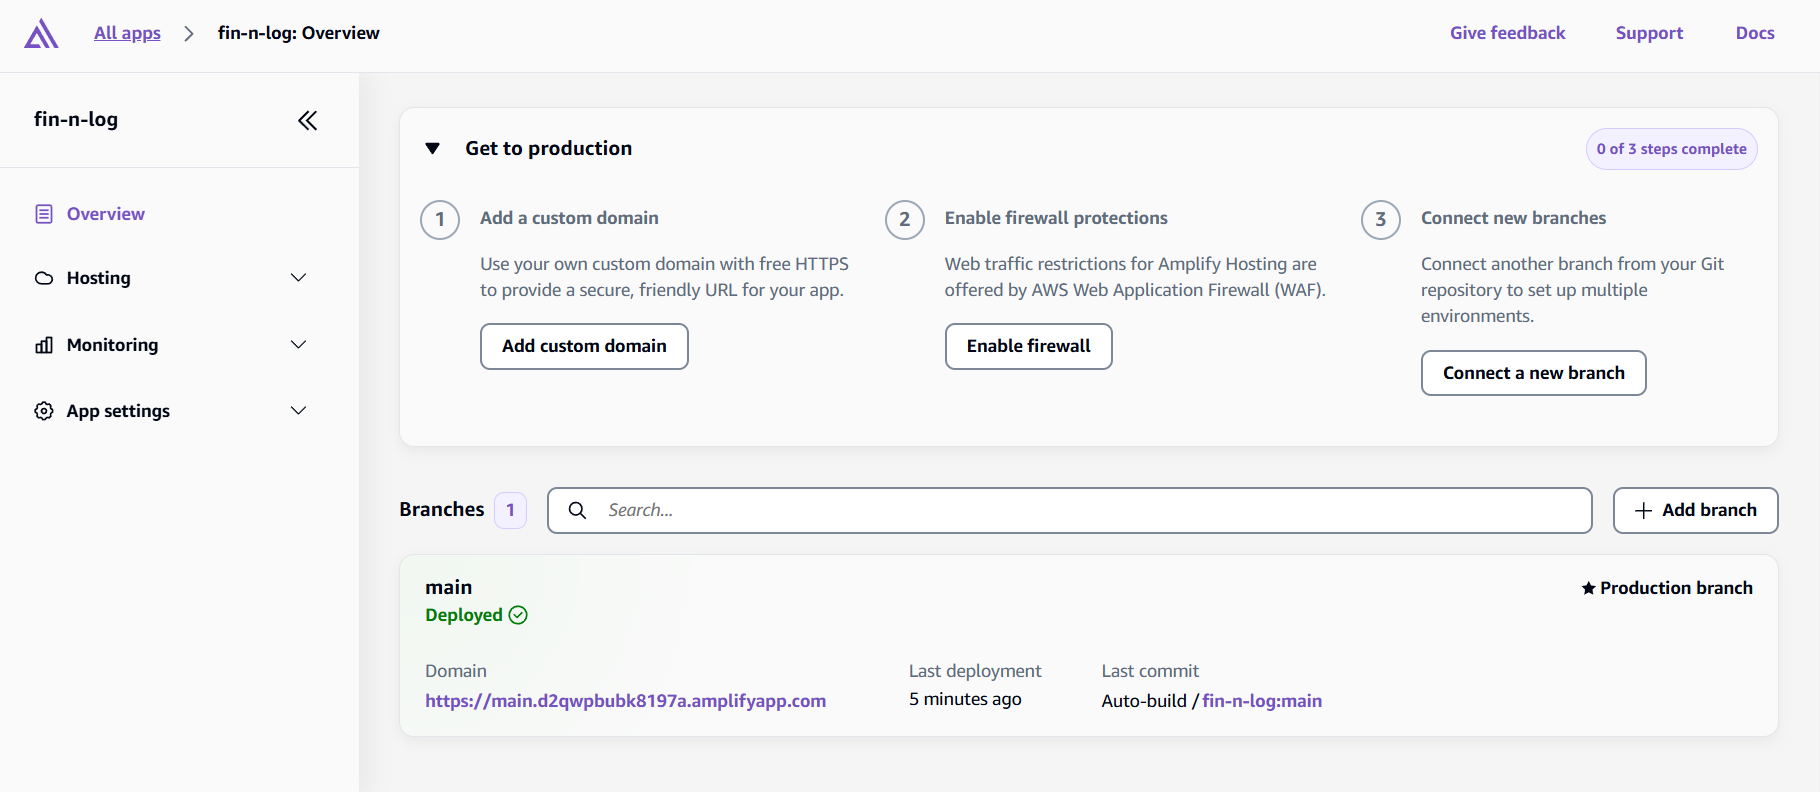
To solve this, I decided to build a solution. That’s how Fin-N-Log (short for Finance and Logistics) was born—a personal dashboard to track logistics expenses and to-do lists. My goal was simple: reduce stress and eliminate manual checking for student volunteers like me. In this guide, I’ll show you exactly how I built and deployed this tracker using AWS Amplify Gen 2. The best part? You don’t need to be a cloud expert to do it. In fact, if you can build a basic React app, you’re already halfway there. Managing user accounts is hard. You usually have to implement a database schema, encrypt passwords, and manually handle email verification. With AWS Amplify and Amazon Cognito, all of that is handled for you. Users can easily create accounts, log in, and even reset their passwords without you writing a single line of complex backend security code. It just works! Here is the straightforward workflow I used to build the tracker. First, we started with a clean slate using an empty Vite template. This method gave us a fast, modern React environment. When asked to initialize Amplify, I simply selected “Yes” to the defaults. This created an For the frontend, I didn’t spend days pixel-pushing. I used AI to help generate the React components (vibe-coding) and then debugged and customized them to fit my needs. (Note: The full UI code is quite long, but it essentially uses standard React Note: You may be asked to log in to AWS here. I used my IAM Secret Keys to authorize my computer. export default function App() { Since this is a personal project, I configured two types of access directly in the Cognito Console: This setup gives me total control without writing complex role-based logic in the code. Step A: I selected GitHub as my source provider. Step B: I authorized Amplify to access my repository and selected the Step D: I clicked Save and Deploy. Within minutes, my app was live! Note: Every new account starts as a basic “User.” To make myself an Admin, I simply went back to the AWS Cognito Console and updated my user manually. Refresh the app, and I have full power! I encourage you to try it out. Start small, use AI to help with the code, and let Amplify handle the rest. Check out the demo here: Fin-N-Log Demo Happy building! 💻✨ Amplify: The Good, The Bad, and The Ugly Self-Hosting Judge0: A Step-by-Step Guide Using Amazon EC2, Lambda, and S3 Kubernetes Development Workflow with GitHub Codespaces
Why AWS Amplify?
Getting Started: Deploy Your Project
1. Setting Up the Foundation
amplify/ folder in my project where my backend logic lives.2. App UI
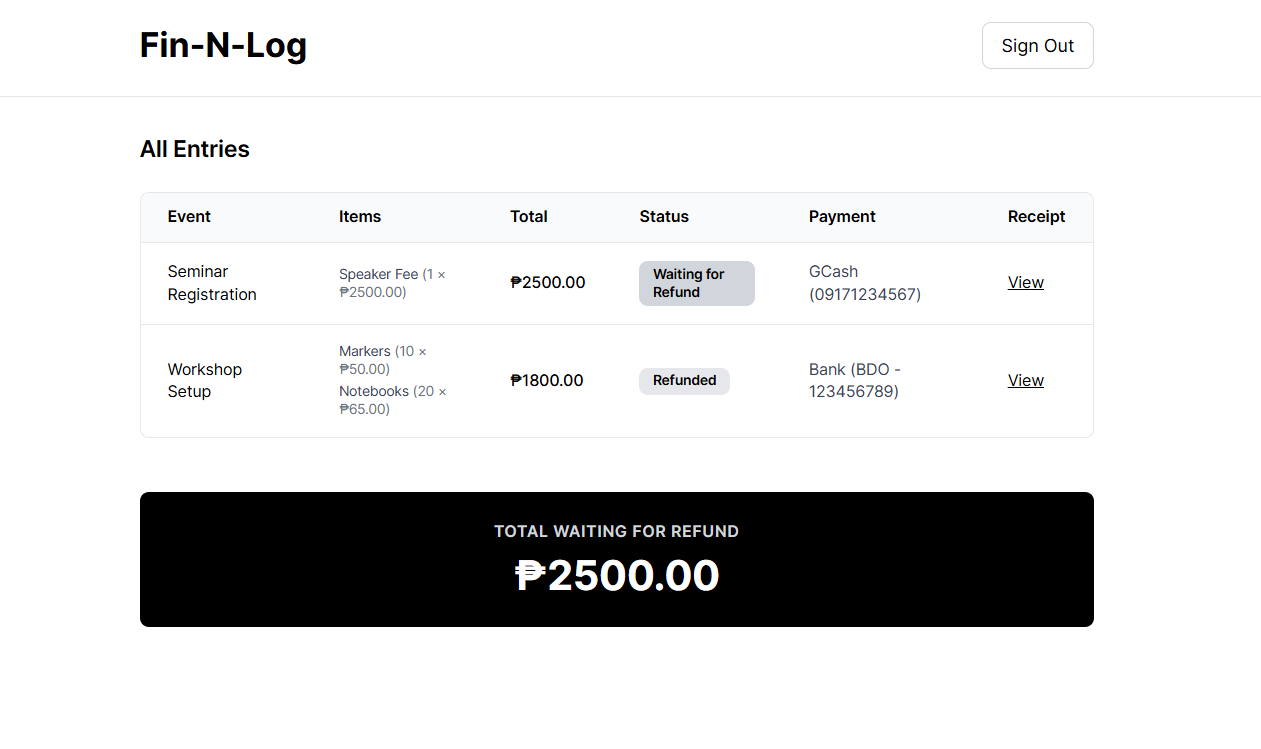
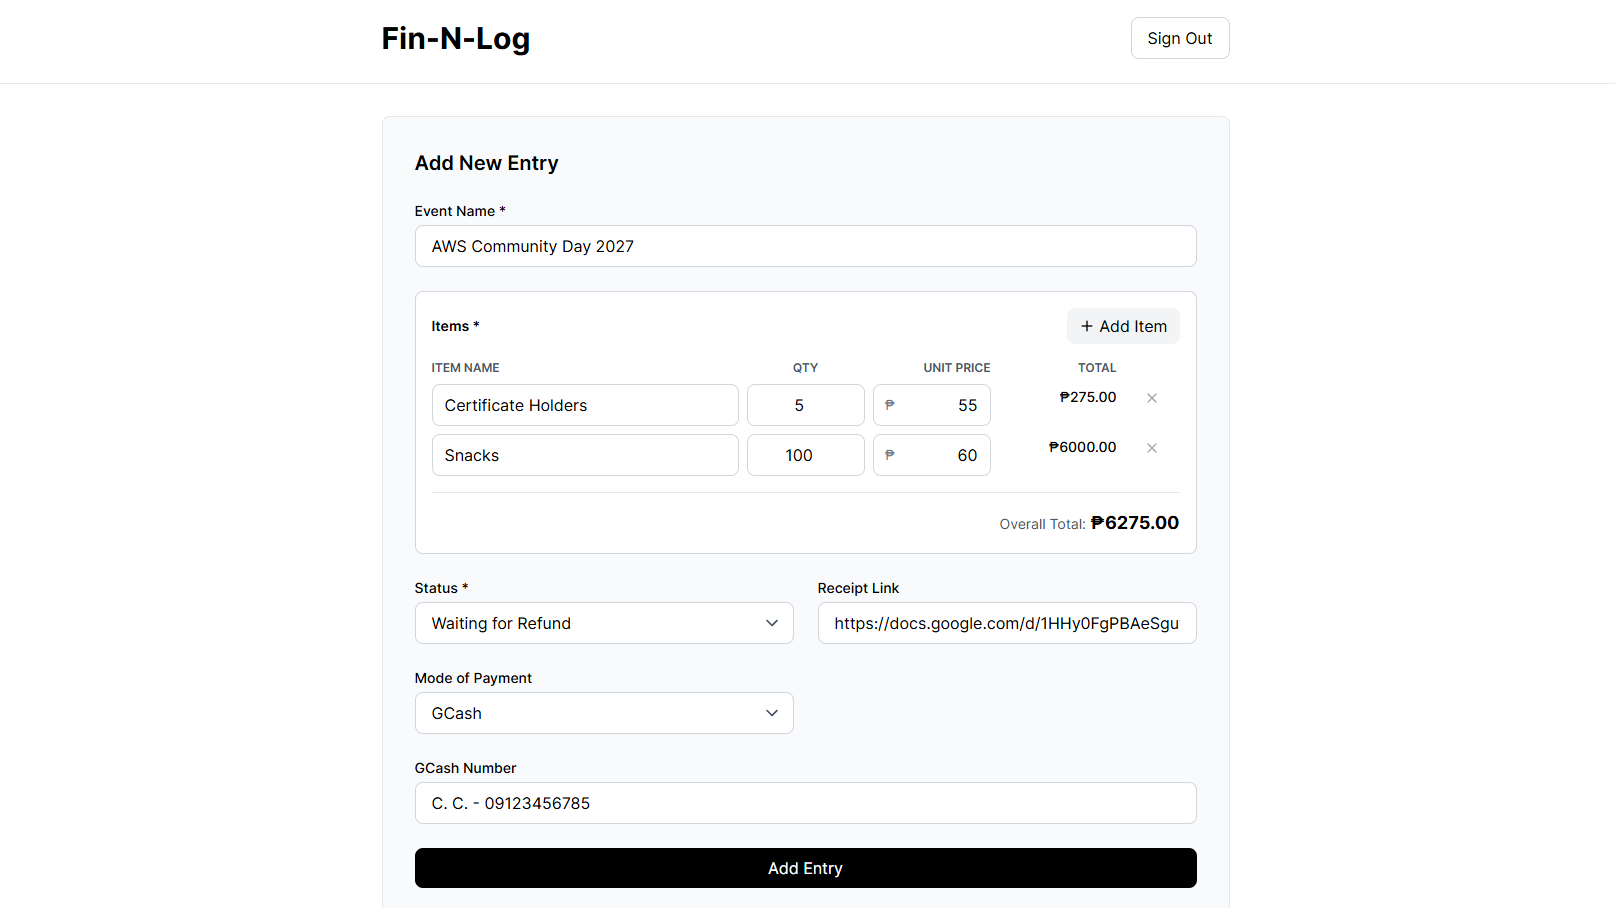
npm install lucide-reactsrc/App.jsx to log events, items purchased, and payment methods.useState to handle the form inputs like this):
const [formData, setFormData] = useState({
eventName: ”,
itemDescription: ”,
price: ”,
status: ‘Waiting for Refund’,
paymentMode: ‘GCash’,
});
3. Connecting to the Cloud
amplify/auth/resource.ts and ensured it was set to allow email logins: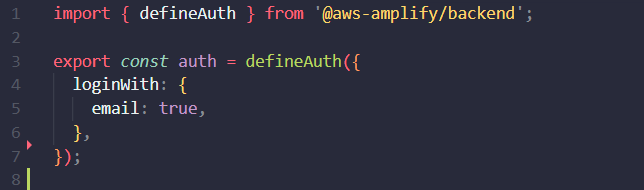
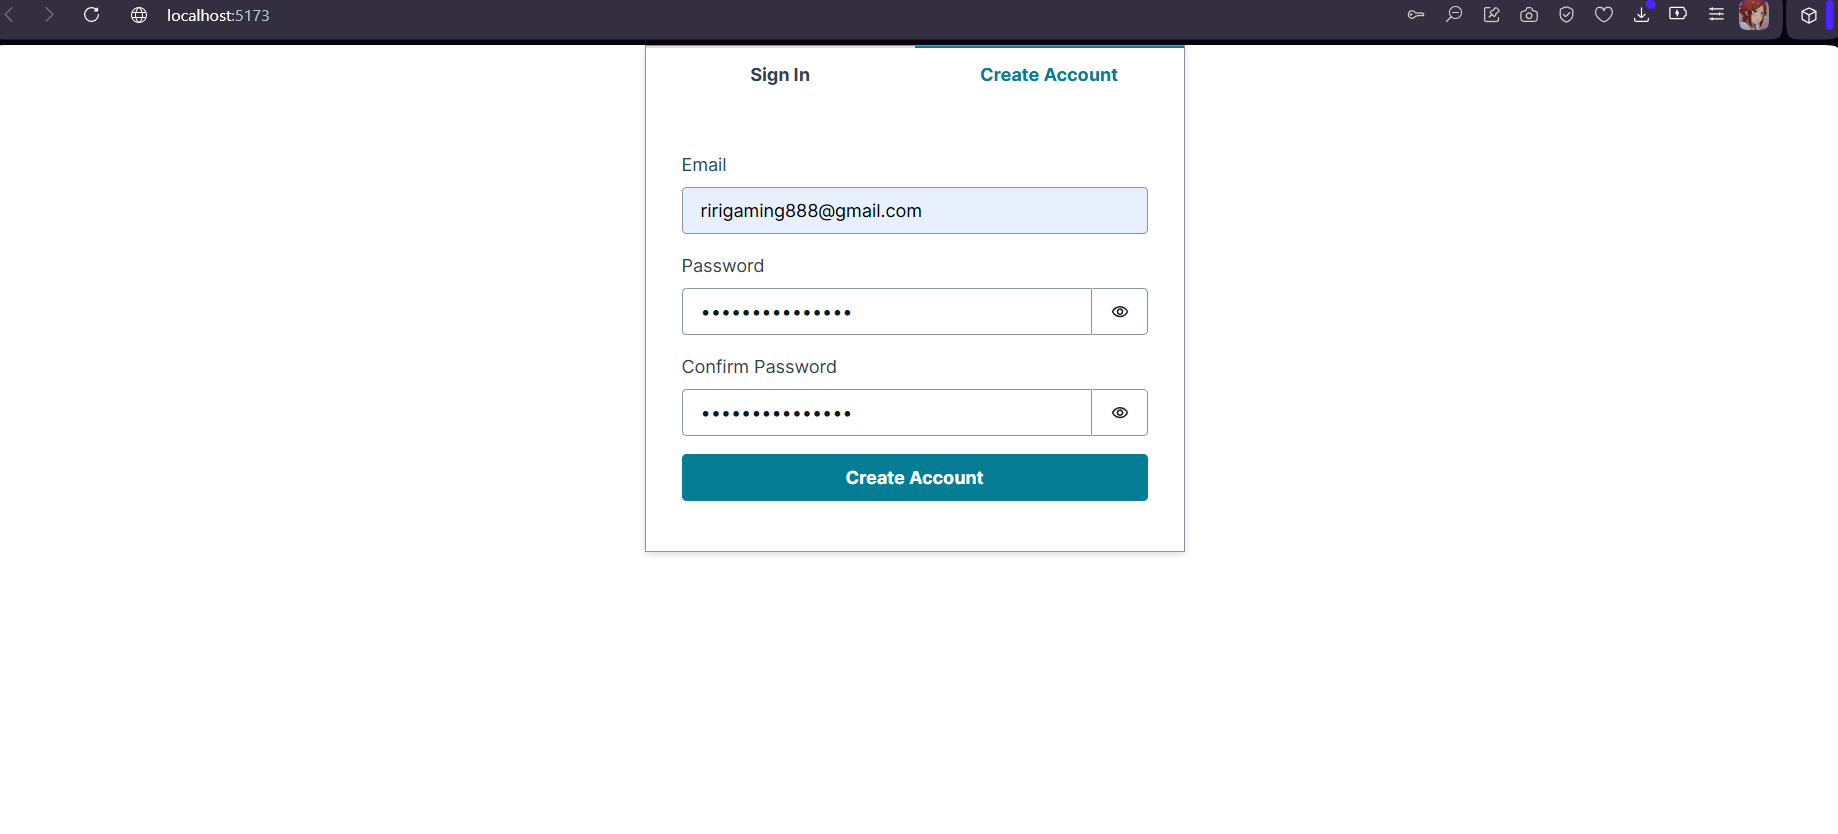
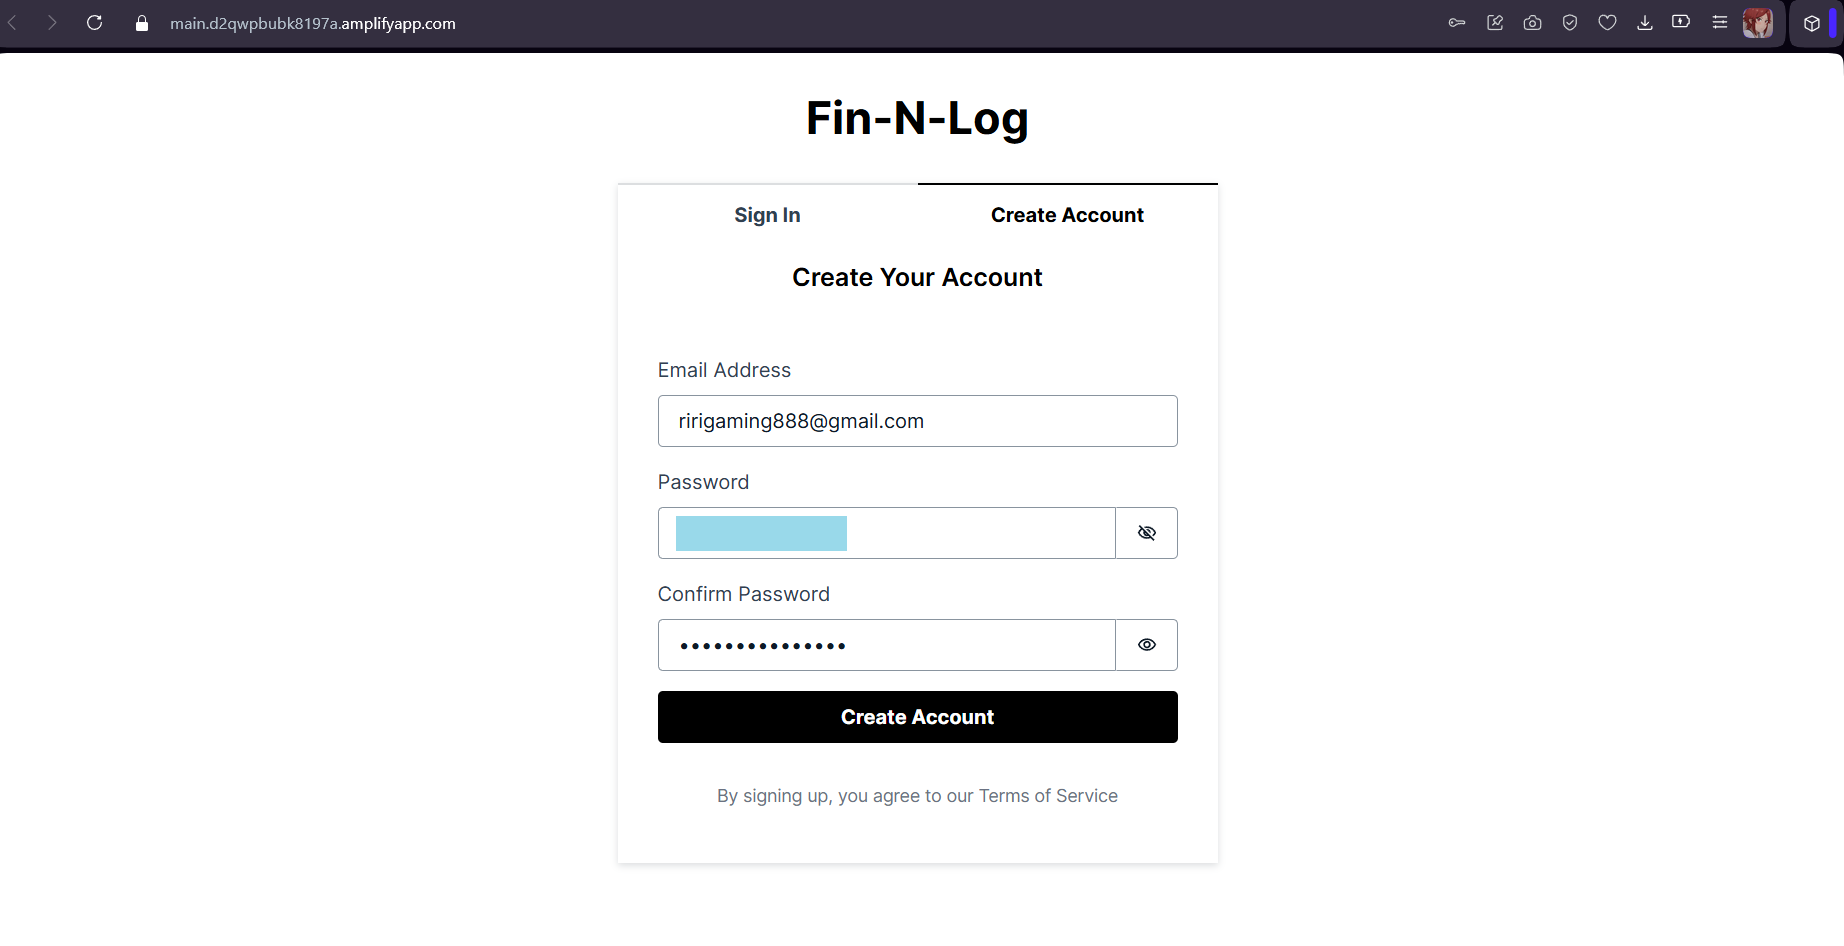
4. Adding Authentication

src/main.jsx:
import outputs from ‘../amplify_outputs.json’; // This file is generated by the sandbox
Amplify.configure(outputs);
<Authenticator> in src/App.jsx. This one wrapper protects the whole app!
import ‘@aws-amplify/ui-react/styles.css’;
return (
<Authenticator>
{({ signOut, user }) => (
<main>
{/* My Dashboard Code goes here */}
<h1>Welcome, {user?.signInDetails?.loginId}</h1>
<button onClick={signOut}>Sign Out</button>
</main>
)}
</Authenticator>
);
}
5. Deployment via AWS Amplify
git init
git add .
git commit -m "Ready for deployment"
git branch -M main
git remote add origin https://github.com/YOUR_USERNAME/app-name.git
git push -u origin main
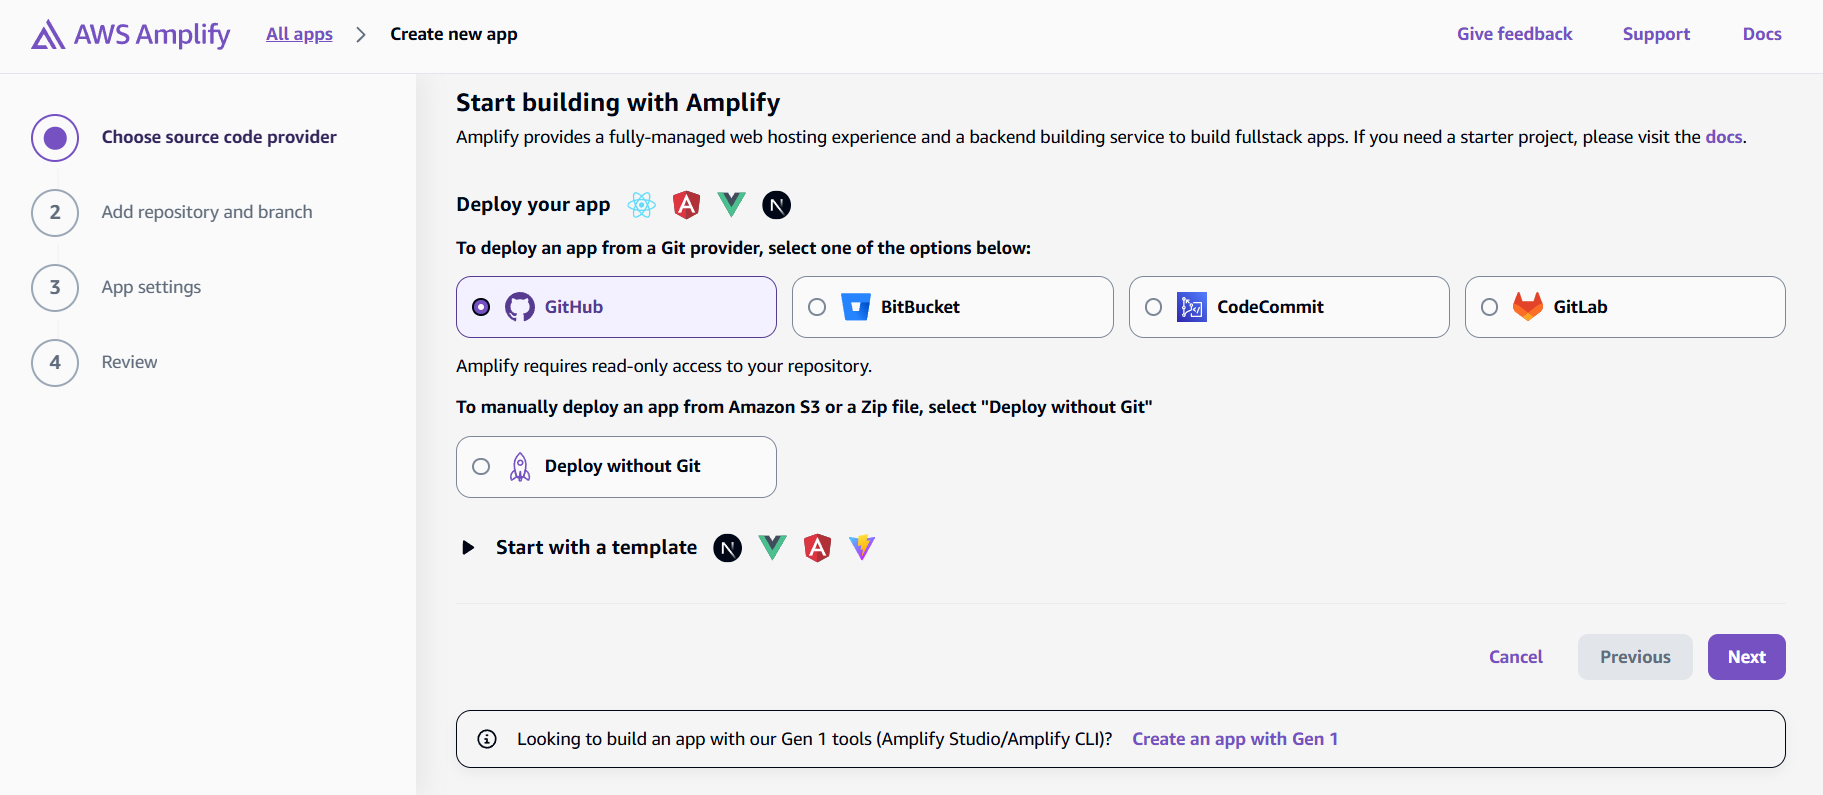
main branch. 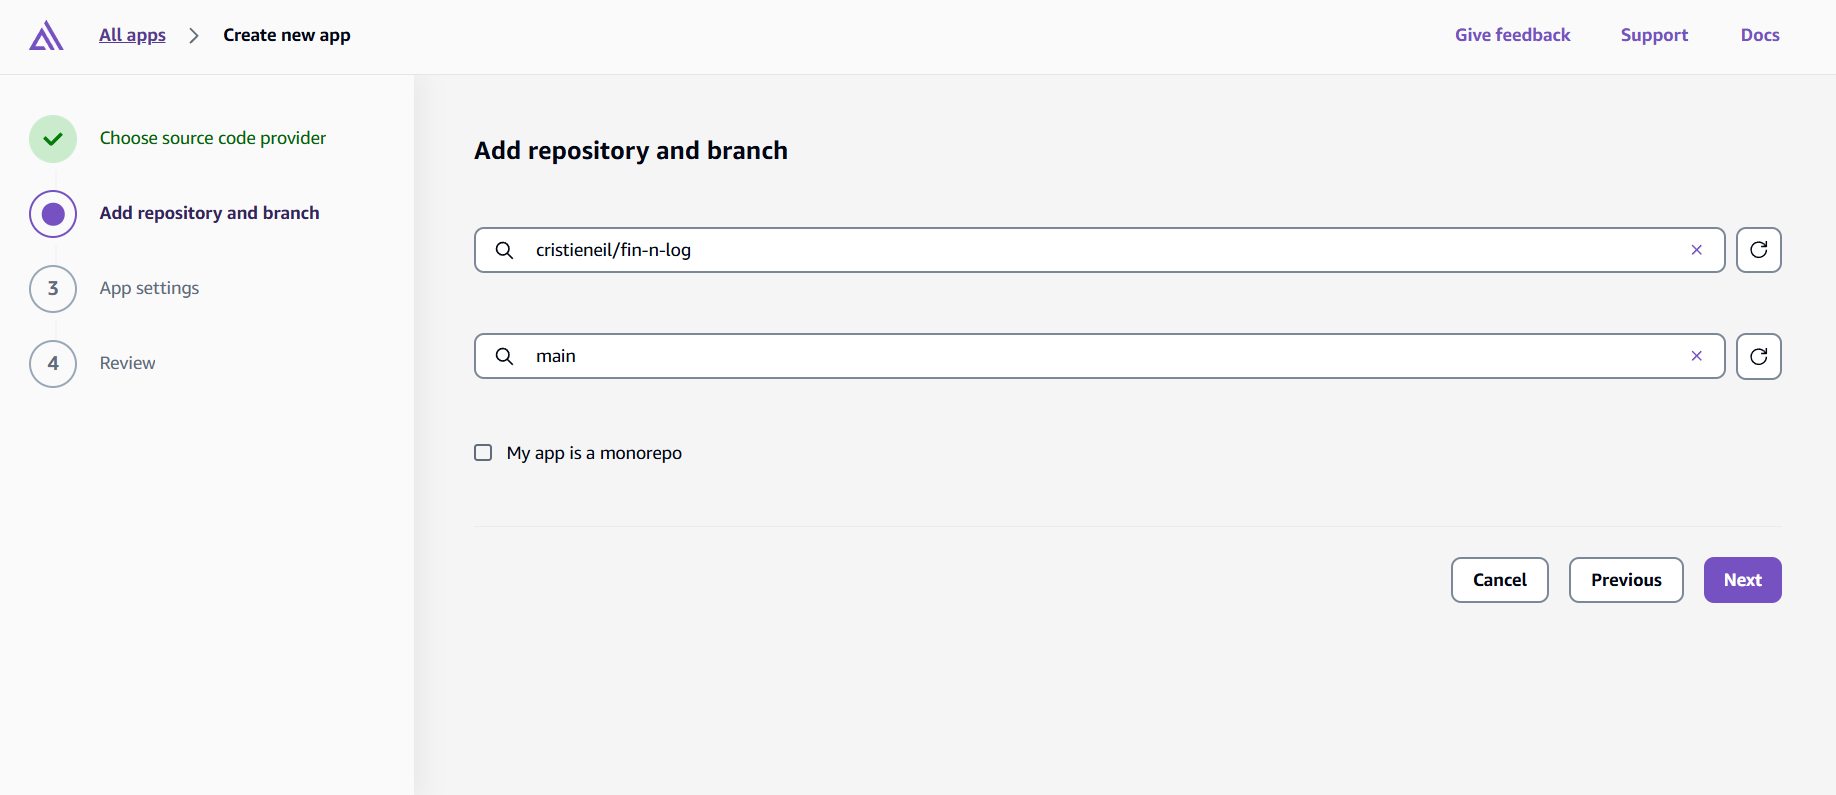
Vite/React structure). I just clicked Next.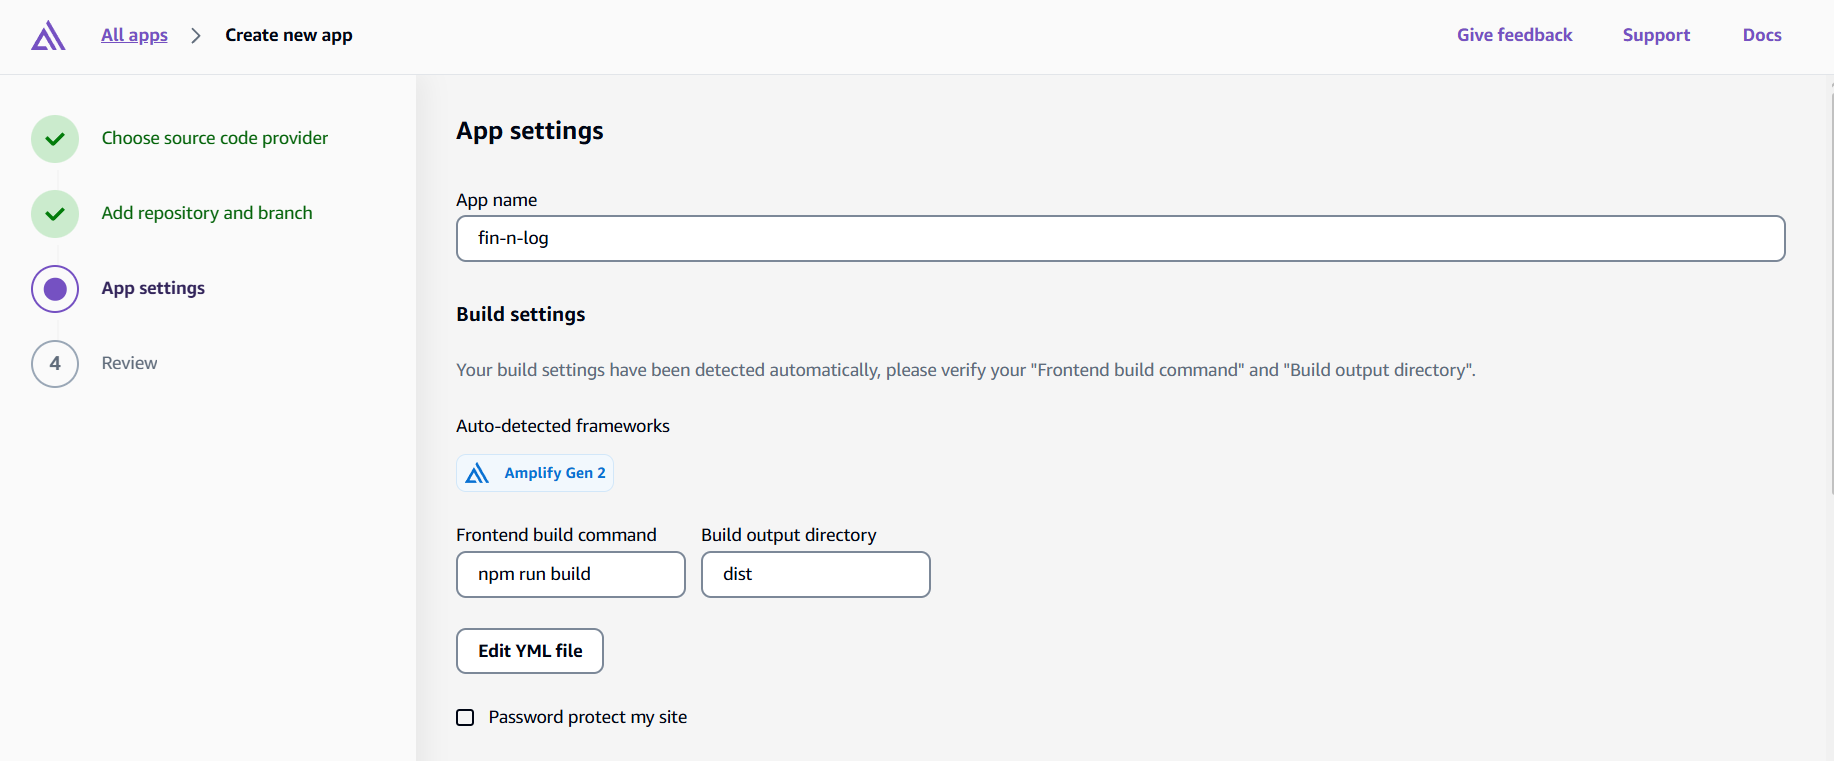
6. Final Test
The Pros and Cons of Using AWS Amplify
The Pros: Why AWS Amplify Rocks
1. Speed
2. Authentication
<Authenticator> component, and boom—you have a production-ready login system. No security nightmares, no storing passwords in plain text (we’ve all heard those horror stories).3. Pay Only for What You Use
4. Built-in CI/CD

5. Global Performance
The Cons: Where Amplify Falls Short
1. The Learning Curve
2. Customization
3. Not Ideal for Large, Complex Projects
4. Vendor Lock-In
Important Things to Note
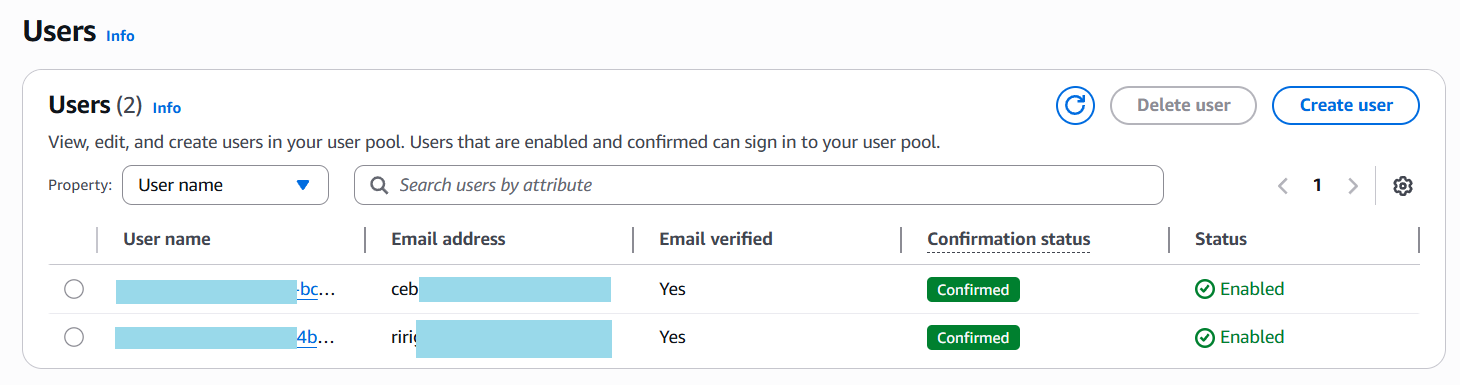
ap-southeast-1 Singapore) you chose. Your User Pool and your Amplify App must reside in the same region to communicate with each other.Building with AWS Amplify
References:
Read More Articles Like This!
🌸 25% OFF All Reviewers on our International Women’s Month Sale! Save 10% OFF All Subscriptions Plans & 5% OFF Store Credits/Gift Cards!

Learn AWS with our PlayCloud Hands-On Labs

$2.99 AWS and Azure Exam Study Guide eBooks

New AWS Generative AI Developer Professional Course AIP-C01

Learn GCP By Doing! Try Our GCP PlayCloud

Learn Azure with our Azure PlayCloud

FREE AI and AWS Digital Courses

FREE AWS, Azure, GCP Practice Test Samplers


Subscribe to our YouTube Channel

Follow Us On Linkedin


As an active student volunteer in various organizations, specifically as a Logistics Member, I know firsthand how overwhelming the work can get. When tasks come pouring in, booking venues, buying supplies, and tracking receipts, it is easy to lose track of the details.
Disclaimer: This project was created with the help of AI and is intended for tutorial and demonstration purposes only. This article presents one of many ways to build and deploy an application using AWS Amplify.
# Create the React project npm create vite@latest fin-n-log — –template react # Enter the folder cd fin-n-log npm install # Initialize the AWS Amplify Backend npm create amplify@latest
// Example snippet of the Form State
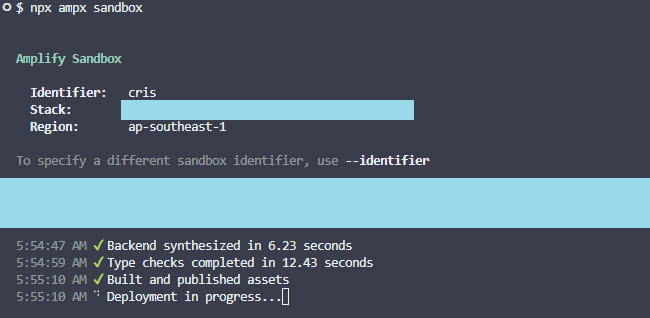
npx ampx sandbox
npm install @aws-amplify/ui-react aws-amplify
import { Amplify } from ‘aws-amplify’;
import { Authenticator } from ‘@aws-amplify/ui-react’;
Before you jump into AWS Amplify for your next project, let’s be real about what you’re getting into. Like any tool, it has its strengths and weaknesses. Here’s what I’ve learned from building Fin-N-Log and researching other developers’ experiences.
If you plan to build this yourself, keep these important tips in mind:
Building a secure, full-stack application used to be intimidating. However, with AWS Amplify Gen 2, I was able to turn a simple idea—a logistics tracker to help student volunteers—into a live, secure web app in no time.
Of course, Amplify has its limitations. The learning curve can be steep, and you might feel locked into the AWS ecosystem. Nevertheless, for student developers, indie builders, and anyone who needs to ship an MVP quickly, the tradeoffs are absolutely worth it. As a result, you get to focus on solving real problems instead of wrestling with server configurations and security implementations.
Cristieneil Ceballos, “Cris” for short, is a Computer Science student at the University of the Philippines Mindanao and an IT Intern at Tutorials Dojo. Passionate about continuous learning, she volunteers and engages with various tech communities—viewing each experience as both a chance to contribute and an opportunity to explore areas she’s interested in.


