I’ve tried no-code builders like Bolt.new, Lovable, and v0. They’re all good, and they all share the same problem: spend enough time with them, and you start recognizing the output. Same card layouts, same hero sections, same vibe that says “an AI made this.” Claude Code is the first tool that actually broke that pattern for me, partly because of how it’s built and partly because of where it lives. It doesn’t pull you into its own environment. It just shows up in your IDE and works with what you already have.
That alone made me want to document how I’ve been using it, because the setup matters a lot more than people talk about. Get it right, and the results are genuinely hard to place. Get it wrong, and you’re back to the same template everyone else is shipping. Here’s what actually made the difference.
What Is Claude Code?
Claude Code is Anthropic’s coding tool that works as a VS Code extension and a command-line interface. Unlike regular AI chat tools that only suggest code, Claude Code interacts directly with your project. It can read and write files, run terminal commands, install packages, take screenshots, and manage Git. You set a goal, and it handles the steps to reach it.
What makes Claude Code especially helpful for web design is its agentic loop. You can ask it to build a page, start a local server, take a screenshot, compare it to a reference, fix any issues, and take another screenshot. This whole process runs automatically, saving you a lot of time.
To begin, install the extension from the VS Code marketplace and sign in with an Anthropic Pro or Max subscription. Then, open an empty project folder, and you’re set to go.
However, the tool alone isn’t enough. How you set it up really matters, and that’s what I’ll explain in the rest of this post.
Setting Up the Environment
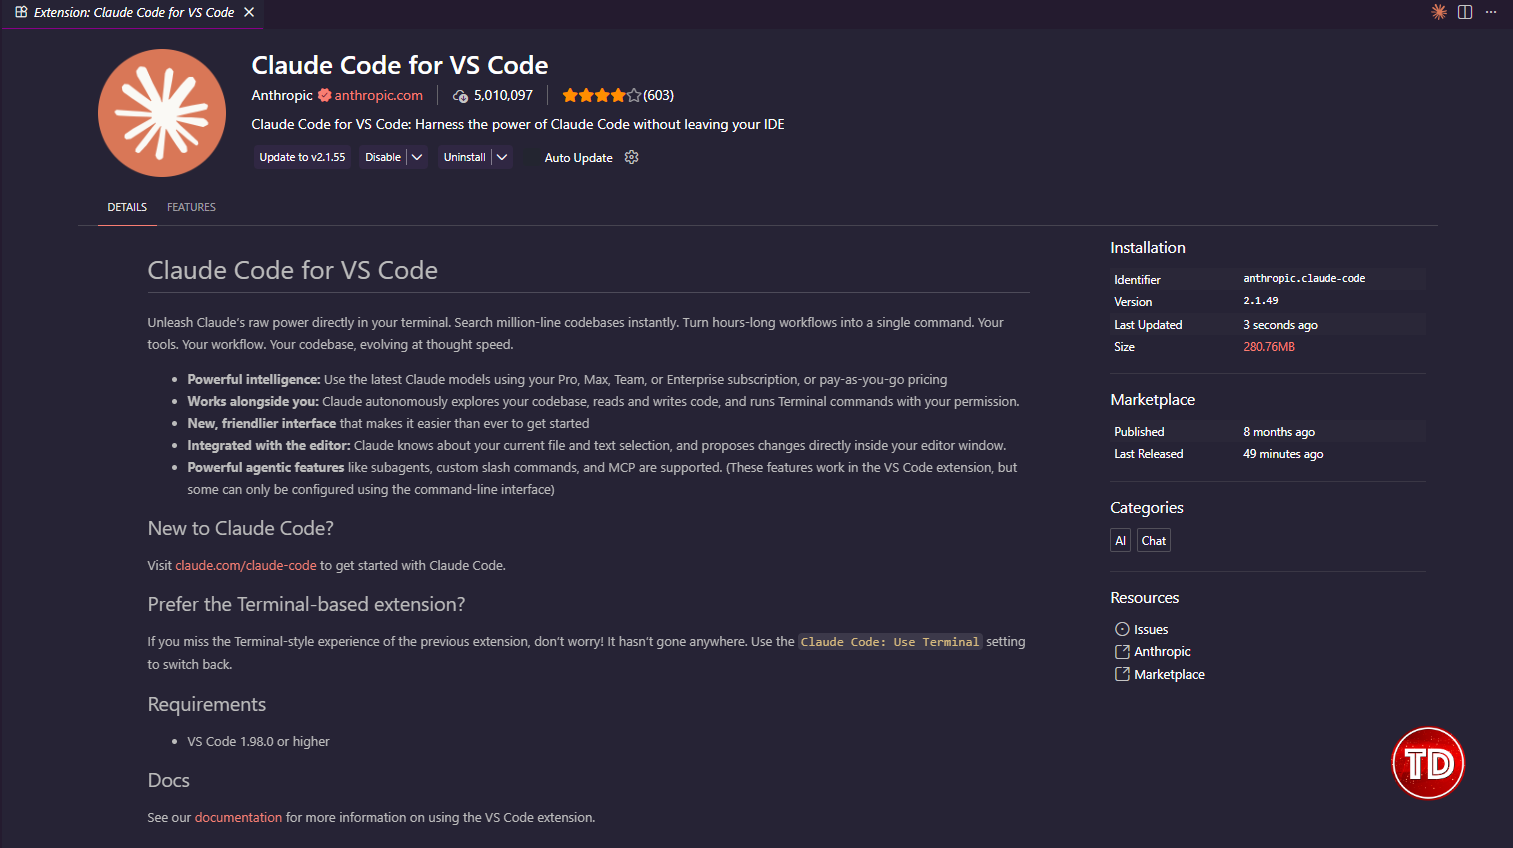
If you already have VS Code, go to the Extensions panel, search for Claude Code, and install it. Sign in with your Anthropic Pro or Max subscription to activate the agent.
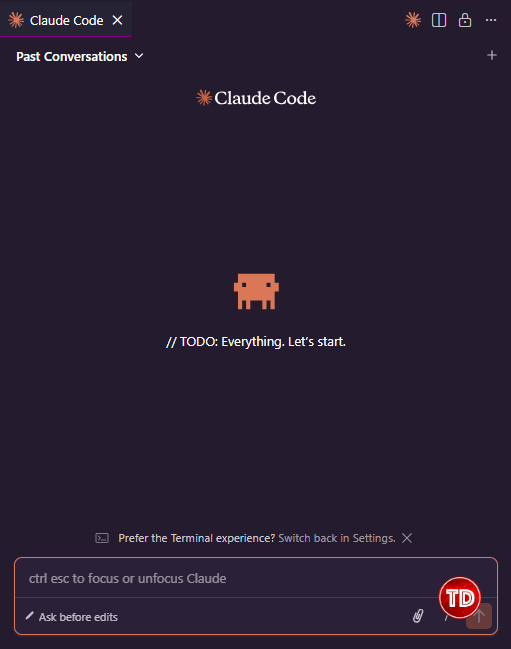
Setting up your project is simple: create an empty folder, open it in VS Code using File → Open Folder, and click the Claude Code icon in the top-right corner. This opens the agent chat panel.

Before you start prompting, spend a few minutes setting up your configuration file. It’s worth the effort.
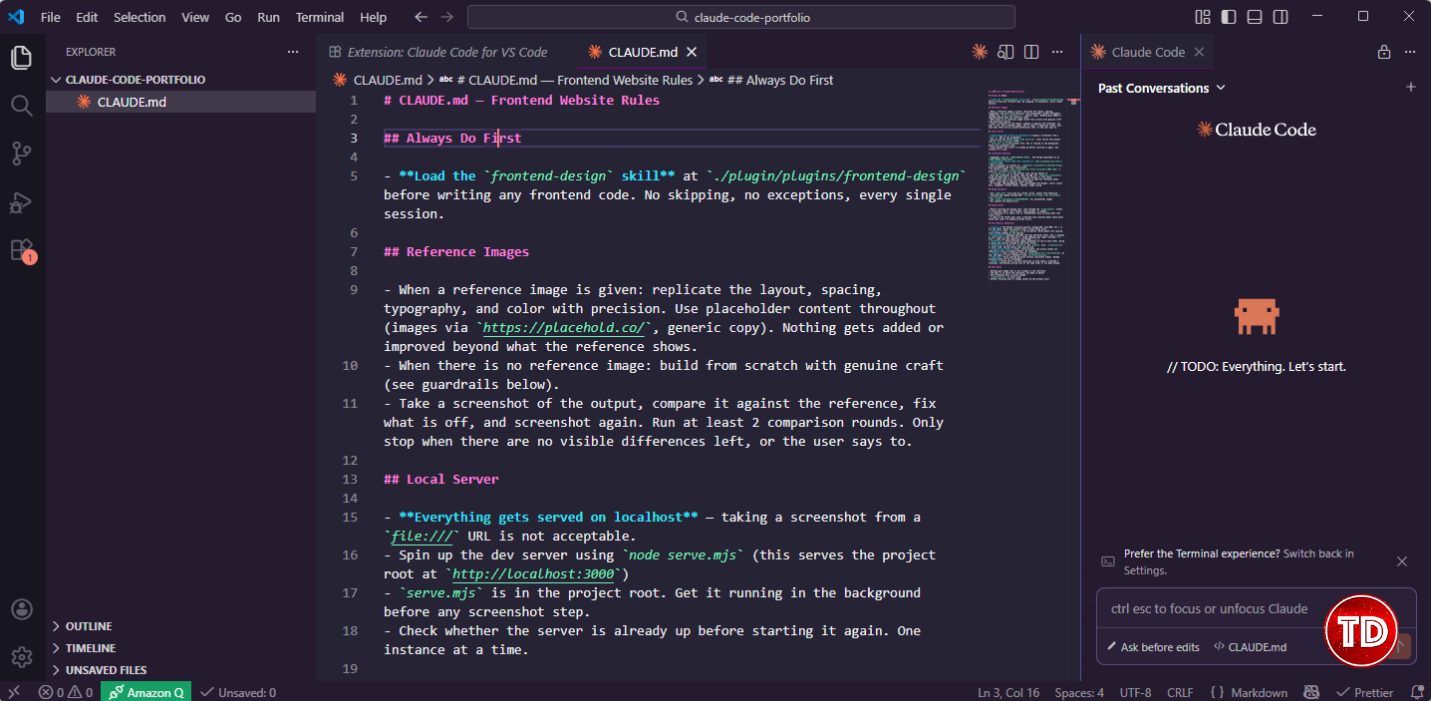
The CLAUDE.md File: Your Persistent Rules Layer
Make a file named CLAUDE.md in your project’s root folder. The agent checks this file before every action, so any rules you set here will apply throughout your session without needing to repeat them.
Without it, you end up re-explaining preferences every few prompts. With it, things like “always use a single index.html file,” “never use default Tailwind colors,” or “screenshot from localhost rather than a file path” are just understood from the start.
Here’s the structure I landed on after a few iterations:
# CLAUDE.md — Frontend Website Rules
## Always Do First
– **Load the `frontend-design` skill** at `./plugin/plugins/frontend-design` before writing any frontend code. No skipping, no exceptions, every single session.
## Reference Images
– When a reference image is given: replicate the layout, spacing, typography, and color with precision. Use placeholder content throughout (images via `https://placehold.co/`, generic copy). Nothing gets added or improved beyond what the reference shows.
– When there is no reference image: build from scratch with genuine craft (see guardrails below).
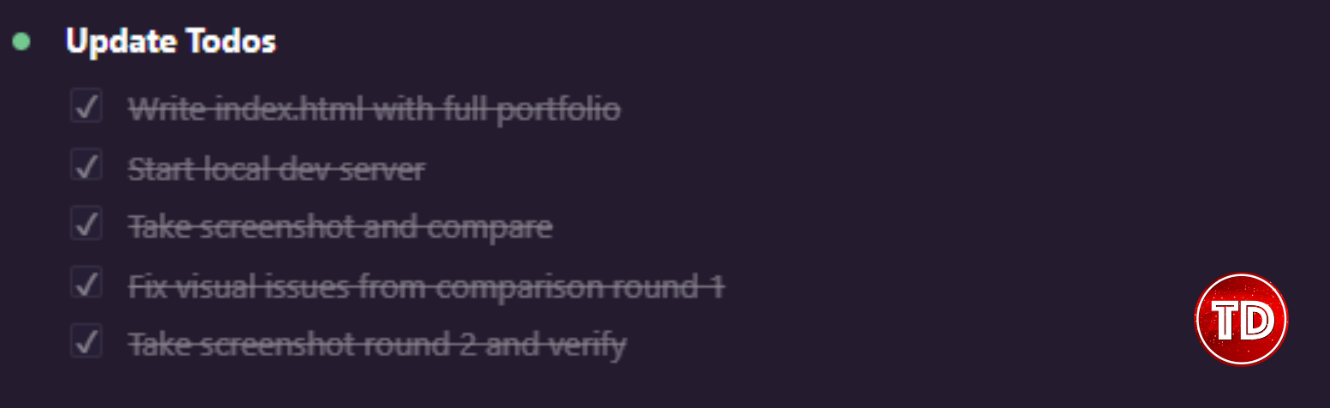
– Take a screenshot of the output, compare it against the reference, fix what is off, and screenshot again. Run at least 2 comparison rounds. Only stop when there are no visible differences left, or the user says to.
## Local Server
– **Everything gets served on localhost** — taking a screenshot from a `file:///` URL is not acceptable.
– Spin up the dev server using `node serve.mjs` (this serves the project root at `http://localhost:3000`)
– `serve.mjs` is in the project root. Get it running in the background before any screenshot step.
– Check whether the server is already up before starting it again. One instance at a time.
## Screenshot Workflow
– Puppeteer lives at `[YOUR_PROJECT_PATH]`. The Chrome executable is at `[YOUR_CHROME_CACHE_PATH]`.
– **Screenshots always come from localhost:** `node screenshot.mjs http://localhost:3000`
– Each screenshot is written to `./temporary screenshots/screenshot-N.png`, auto-incremented and never overwritten.
– To attach a label: `node screenshot.mjs http://localhost:3000 label` → saves as `screenshot-N-label.png`
– `screenshot.mjs` is in the project root. Do not modify it.
– Once the screenshot is saved, read the PNG from `temporary screenshots/` using the Read tool — Claude can view and analyze it from there.
– Comparisons need to be precise: “heading is 32px but reference shows ~24px”, “card gap is 16px but should be 24px”
– Go through: spacing/padding, font size/weight/line-height, colors (exact hex), alignment, border-radius, shadows, image sizing
## Output Defaults
– One `index.html` file with all styles inline, unless told otherwise
– Tailwind CSS loaded through CDN: `<script src=”https://cdn.tailwindcss.com”></script>`
– Use `https://placehold.co/WIDTHxHEIGHT` for placeholder images
– All layouts are mobile-first
## Brand Assets
– Before starting any design work, look through the `brand_assets/` folder. It could have logos, color guides, style guides, or images.
– If something is in there, use it. Placeholders have no place when real assets exist.
– A logo in the folder gets used. A defined color palette means those exact values get used — no making up brand colors.
## Anti-Generic Guardrails
– **Colors:** The default Tailwind palette (indigo-500, blue-600, etc.) is off the table. Build the palette from a custom brand color.
– **Shadows:** Flat `shadow-md` is not an option. Build depth with layered, color-tinted shadows at low opacity.
– **Typography:** Headings and body text get different fonts. Pair a display or serif with a clean sans-serif. Large headings get tight tracking (`-0.03em`), body text gets generous line-height (`1.7`).
– **Gradients:** Stack multiple radial gradients on top of each other. Bring in grain and texture through an SVG noise filter.
– **Animations:** Stick to `transform` and `opacity` only. `transition-all` is never used. Easing should feel spring-like.
– **Interactive states:** hover, focus-visible, and active states are required on every clickable element. No skipping.
– **Images:** Layer a gradient overlay (`bg-gradient-to-t from-black/60`) on top, and apply a color treatment using `mix-blend-multiply`.
– **Spacing:** Every spacing decision follows consistent tokens. Random Tailwind steps are not acceptable.
– **Depth:** Build with a surface hierarchy in mind (base → elevated → floating). Everything sitting flat at the same level is not good enough.
## Hard Rules
– Nothing gets added that is not already in the reference
– The goal is to match the reference, not make it better
– One screenshot pass is never enough
– `transition-all` is never used
– Default Tailwind blue or indigo cannot be the primary color
Installing the Frontend Design Skill
To get started, type /plugin in the Claude Code chat and select the Marketplace tab that appears. From there, paste in this URL:
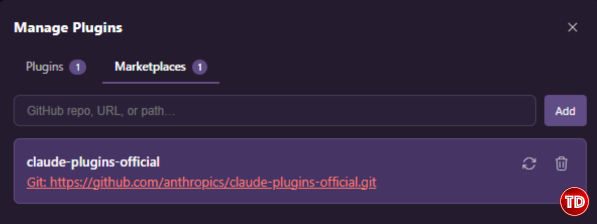
That pulls in the full plugins repository. Next, switch to the Plugins tab and paste this URL to install the frontend design skill specifically:
https://github.com/anthropics/claude-plugins-official/tree/main/plugins/frontend-design
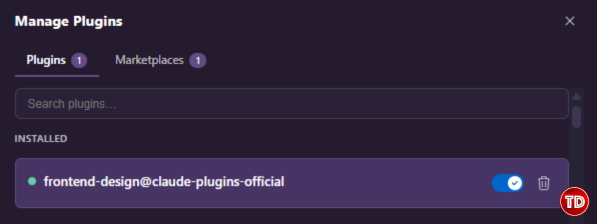
This is the skill that moves the output away from generic AI defaults and toward something with considered typography, layered depth, and proper spacing. The difference in output quality is noticeable, and it’s what makes the setup worth the extra two minutes.
The Screenshot Loop: Visual Self-Correction
This part of the setup is what makes the speed feel real. The idea is to give Claude a way to see its own output and check it against a reference, then fix what’s off without you stepping in.
It runs on Puppeteer, a headless browser tool. To get it set up, first install it by running npm i puppeteer in your project directory. Then update the two placeholder paths in your CLAUDE.md under the Screenshot Workflow section: one for your project directory and one for the Chrome executable that Puppeteer uses. Once those are set, the loop runs on its own: Claude spins up the local server, takes a screenshot, reads the image directly, compares it against your reference, fixes what’s off, and screenshots again. It handles the whole cycle without you stepping in.
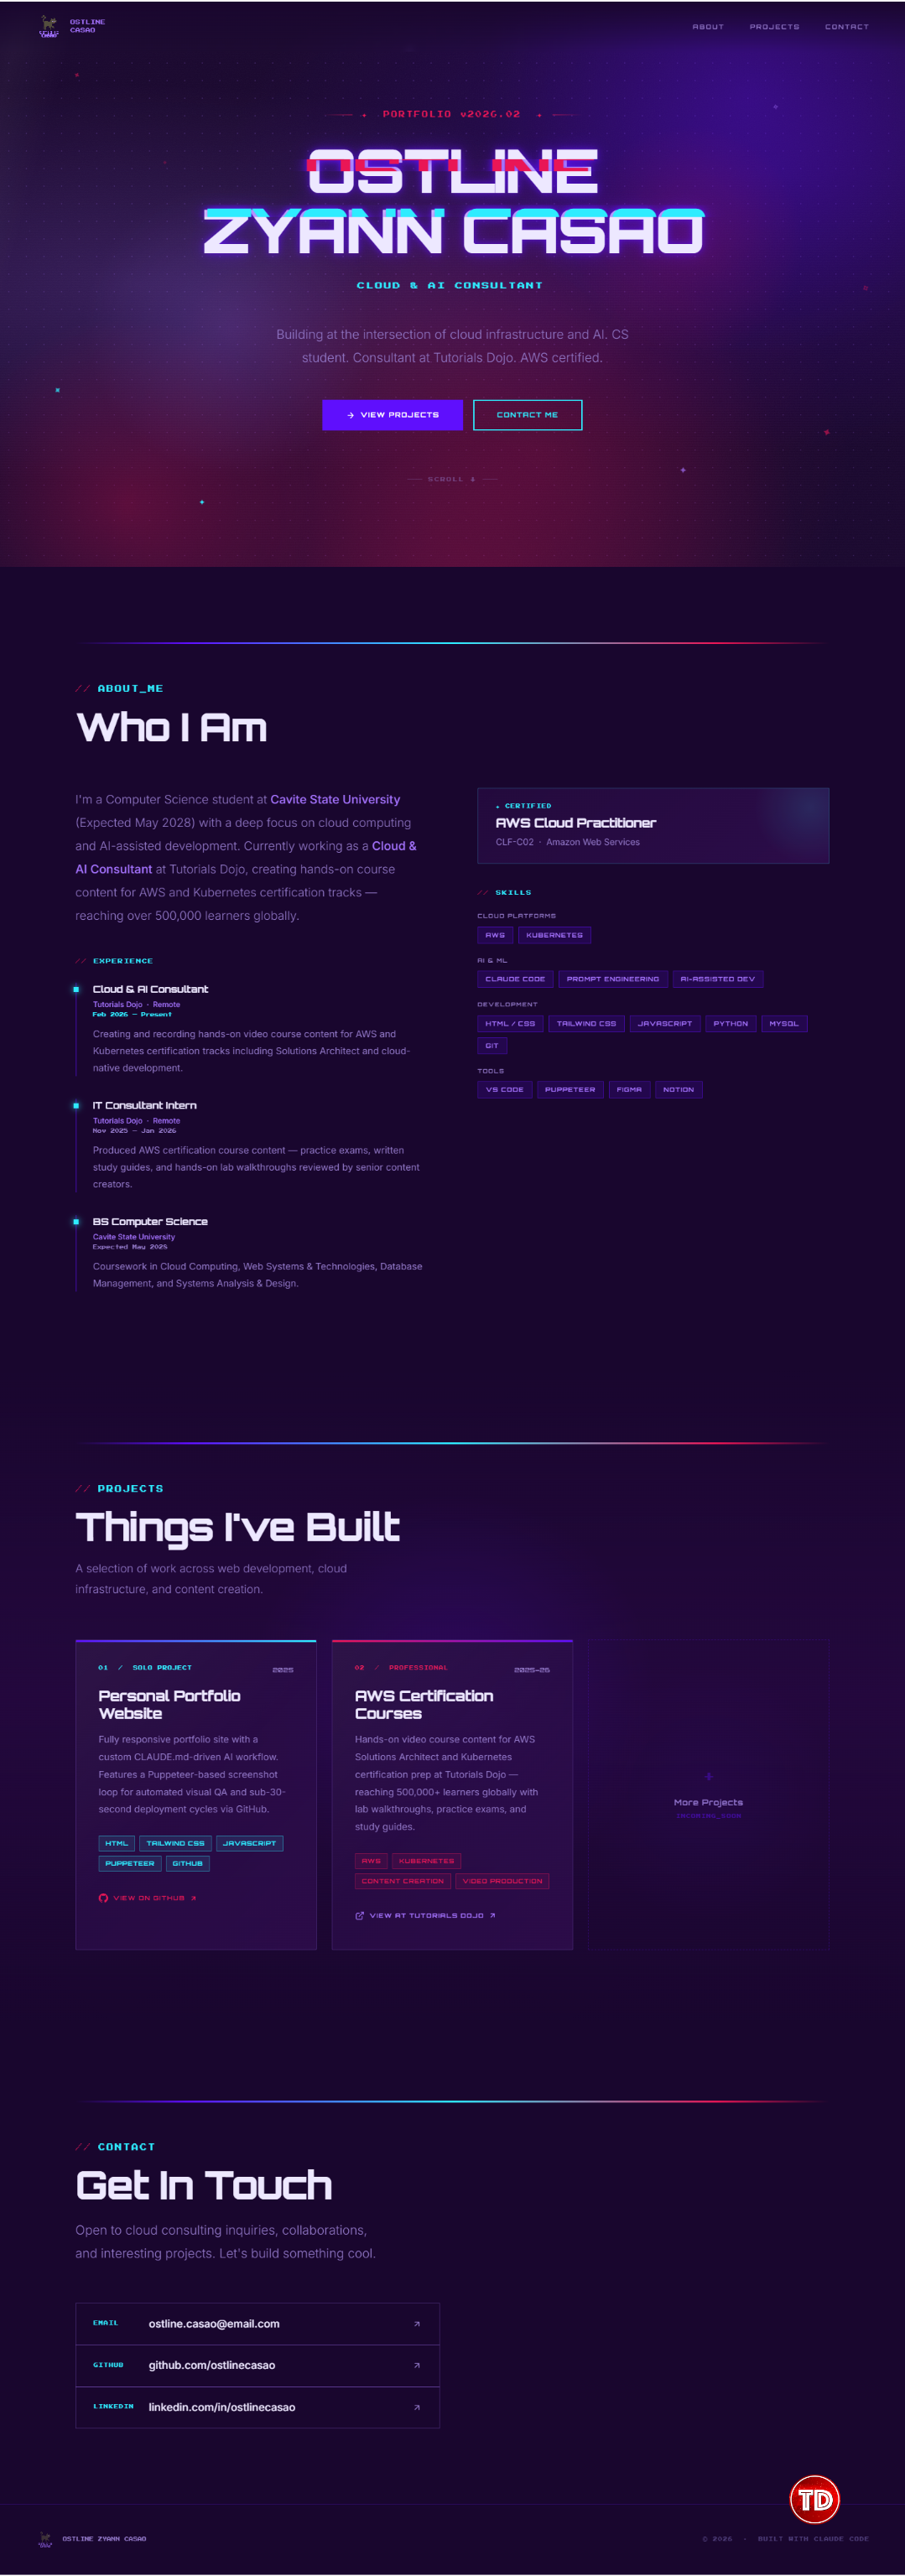
The Output Speaks for Itself (And Brand Assets Are Why)
Before writing a single prompt about layout or content, drop your actual brand files into a brand_assets folder in the project root. For my portfolio site, that meant three things: my logo, a made-up resume, and a brand guidelines document. Nothing fancy, just the files Claude would need to make decisions I didn’t want to keep explaining.

Then my first real prompt looked something like this:
Build my futuristic personal portfolio website using the following files as reference:
@brand_assets/logo.png — use this as the site logo
@brand_assets/resume.pdf — use this to pull my name, role,
experience, and projects
@brand_assets/brand-guidelines.pdf — follow these for colors,
typography, and tone
Start with the homepage. Include a hero section, a short about section,
a projects section, and a contact section.
The image below shows what came out of that first prompt. I ran two more rounds of tweaks to get the hero section exactly where I wanted it, mostly adjusting text sizes and the background, but the foundation was solid from the start.
Using a Reference Site as a Starting Point
If you don’t have a design direction yet, this technique is a good way to get moving. Find a site on Dribbble or Godly with the kind of aesthetic you’re going for. Open the browser console (F12), capture a full-page screenshot by pressing Ctrl+Shift+P in the Console tab and searching for “Capture full size screenshot,” and copy the raw CSS from the Styles panel in the Elements tab.
Give Claude both, along with a prompt like this:
Attached is a screenshot of a reference site I like.
Here are the raw styles from its elements panel:
Clone the layout and visual structure. Swap in placeholder content.
Apply our brand styles from @brand_assets/brand-guidelines.pdf
The output won’t match the original exactly, and that’s fine. What you get is a page with similar compositional structure, built around your own content and colors. It tends to be a much faster starting point than prompting from scratch.
A Few Things Worth Knowing Before You Start
The workflow works well, but there are a few things I wish I’d known before starting.
- The screenshot loop adds time. Each pass takes 15 to 30 seconds. For a quick prototype that’s fine to skip, but for anything you’re showing to a client or putting in a portfolio, running it makes a visible difference.
- Your CLAUDE.md will need editing as you go. I updated mine a few times during the project: once when Claude kept adding sections I hadn’t asked for, once to tighten the animation rules, and once to be clearer about font pairing. Treat it as a living document rather than a one-time setup.
- The reference cloning works better on sections than full pages. Trying to clone an entire homepage at once tends to produce something loosely inspired rather than closely matched. Breaking it into header, body, and footer and handling each separately gives you a lot more control.

If you’ve been curious about Claude Code but weren’t sure where to start, this workflow gives you something concrete to build on. It’s structured enough to produce consistent results and flexible enough to adapt as the project grows.
🌸 25% OFF All Reviewers on our International Women’s Month Sale! Save 10% OFF All Subscriptions Plans & 5% OFF Store Credits/Gift Cards!

Learn AWS with our PlayCloud Hands-On Labs

$2.99 AWS and Azure Exam Study Guide eBooks

New AWS Generative AI Developer Professional Course AIP-C01

Learn GCP By Doing! Try Our GCP PlayCloud

Learn Azure with our Azure PlayCloud

FREE AI and AWS Digital Courses

FREE AWS, Azure, GCP Practice Test Samplers


Subscribe to our YouTube Channel

Follow Us On Linkedin


