Last updated on February 11, 2026
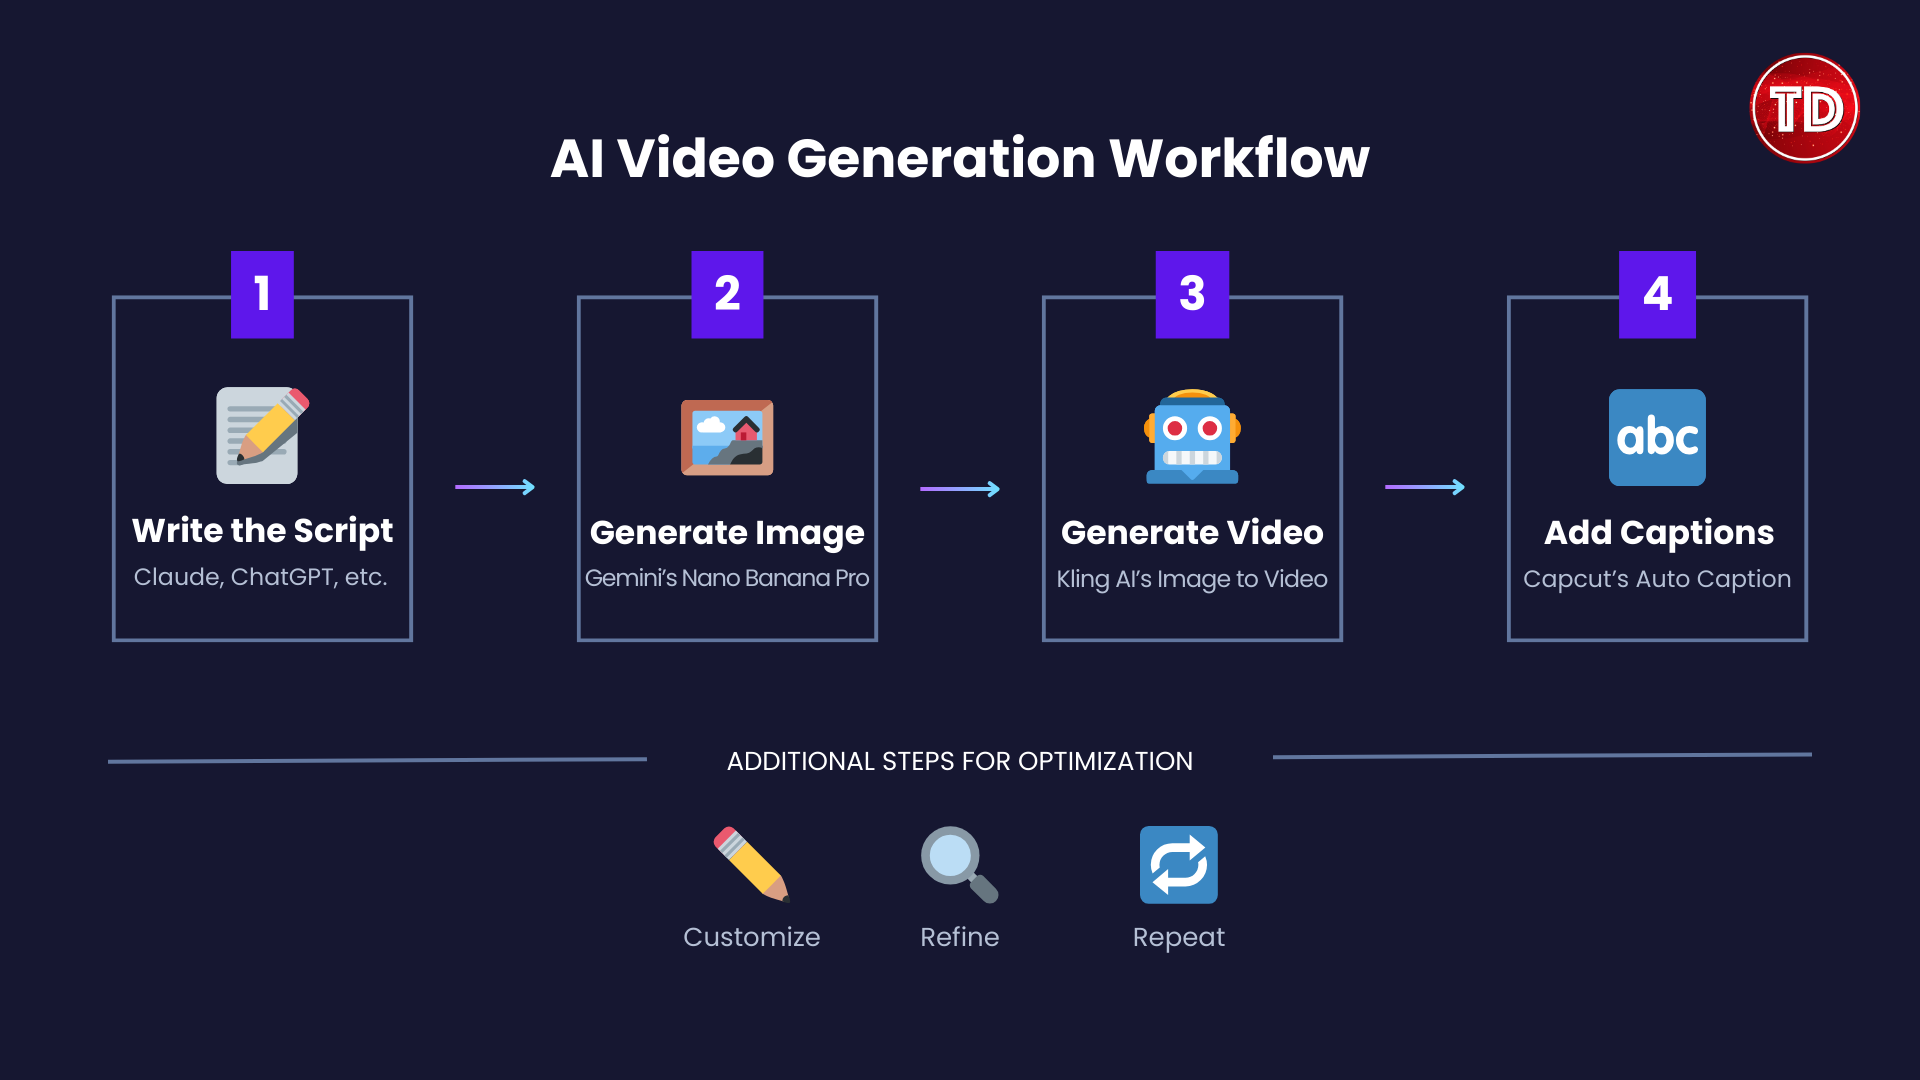
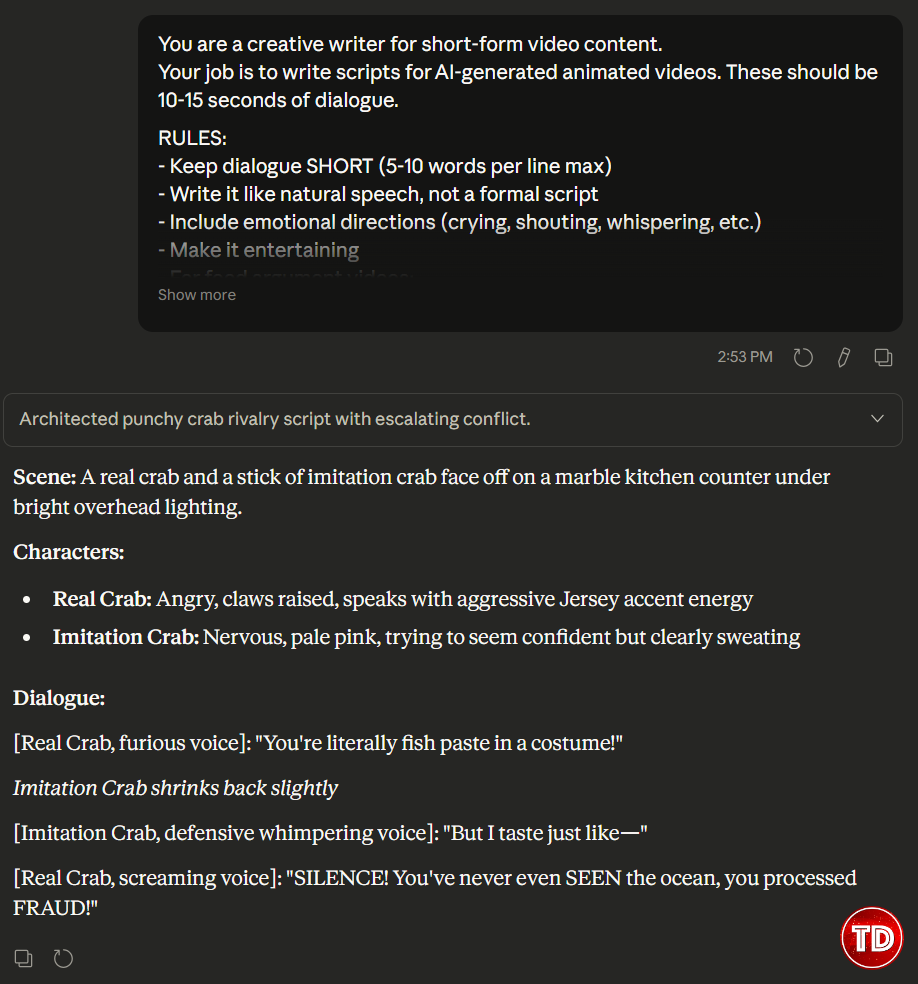
You’ve seen them. Those weird AI videos where someone is cutting colorful glass cubes and the pieces fall in the most satisfying way possible. Or dark chocolate is telling white chocolate that he’s not even real cocoa. Next thing you know, you’ve watched it five times and your friend is asking why you sent them a video of crying chocolate at 2am. These videos are everywhere right now, and they’re surprisingly easy to make. The workflow is simple: use Claude to write your script, then use Kling AI to turn it into an animated video. That’s basically it! This guide walks you through the whole process so you can start making your own. Kling AI is a video generation tool made by Kuaishou (the company behind Kwai, which is basically TikTok’s competitor in China). It launched in mid-2024 and has gotten a lot better since then. The current version is 2.6, released in December 2025. Here’s why it works well for this kind of content: Kling uses a credit system. New users get 166 credits right when you sign up, and then 66 free credits per day after that (though those daily credits expire if you don’t use them). A 5-second video costs around 15 credits in 720p, or up to 50 credits if you want 1080p Professional quality. Paid plans start at $6.99/month if you need more. For this video, I’ll only be using Kling’s free version, so everything you see here is achievable without spending anything. The process has three steps: write the script, generate an image, then generate the video. This is where Claude (or ChatGPT, Gemini, whatever you prefer) comes in. You need a script before you can make anything. Give the AI a system prompt that tells it exactly what format you need. Here’s one that works well: You are a creative writer for short-form video content. Your job is to write scripts for AI-generated animated videos. These should be 5 seconds of dialogue. RULES: – Keep dialogue SHORT – Write it like natural speech, not a formal script – Include emotional directions (crying, shouting, whispering, etc.) – Make it entertaining OUTPUT FORMAT: Generate the script immediately when given a concept. No explanations needed. Then just tell it what you want. “A crab and imitation crab arguing about who’s the real crab” Or “Sparkling water and soda arguing about who’s ruining your teeth.” Or “A prison guard offering you an overflowing plate of ribs you have to finish to free your girlfriend.” Customizing the Prompt You can also add your own rules if you have a specific format in mind. For example, I noticed a lot of viral videos follow this pattern: the “real” or healthier food attacks first, the fake/unhealthy food defends itself weakly with something short like “But I’m creamy…”, then gets cut off with “SILENCE!” and a brutal roast. So I added this rule: – For food argument videos:
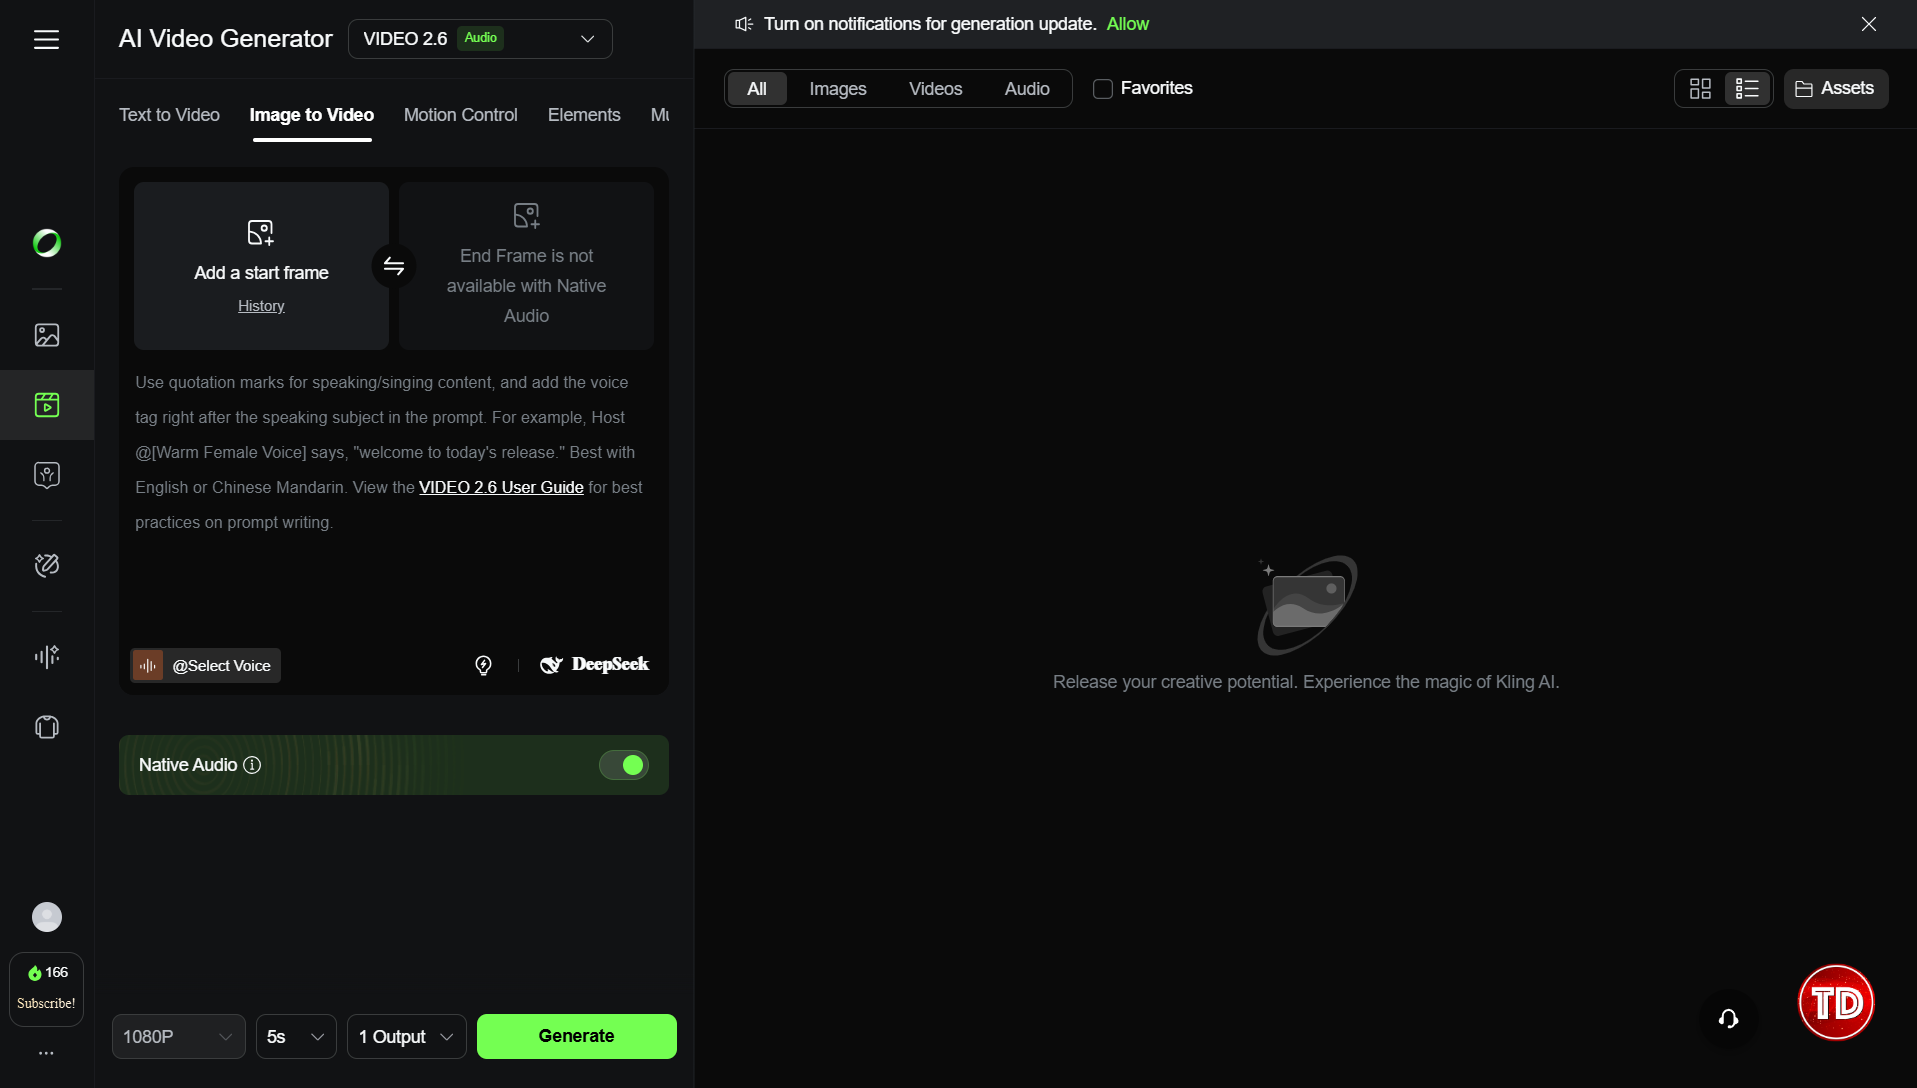
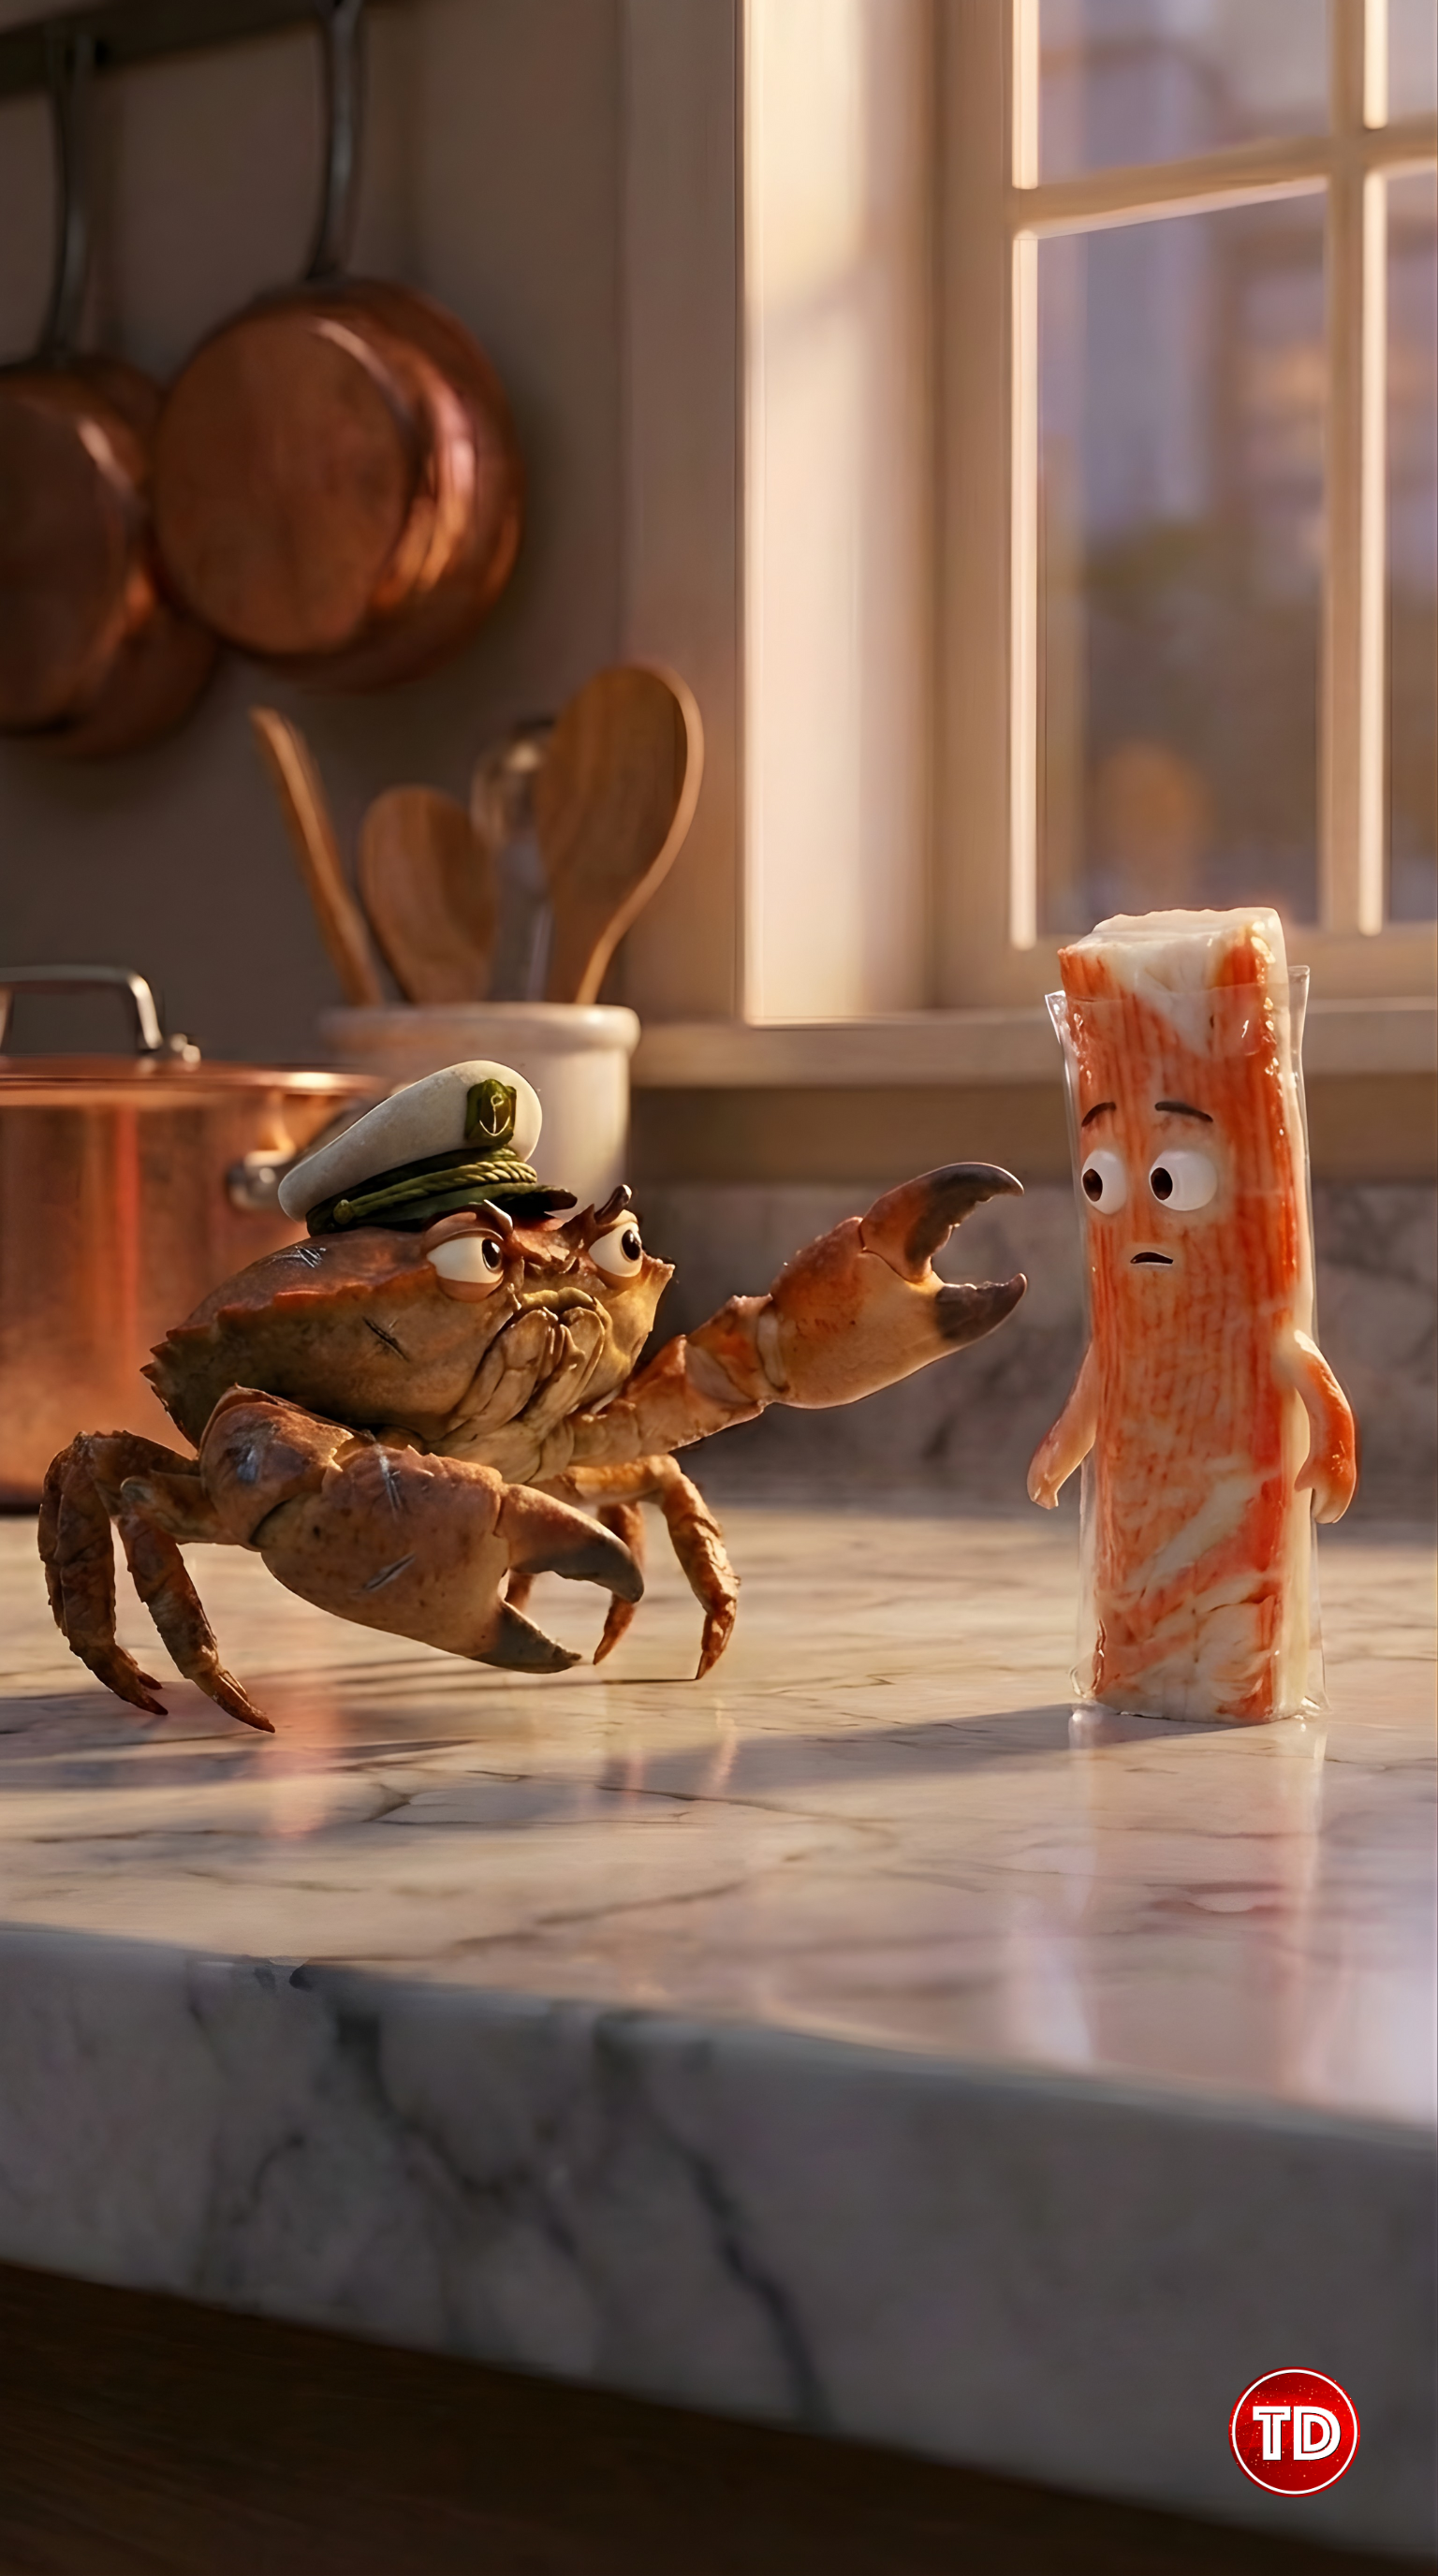
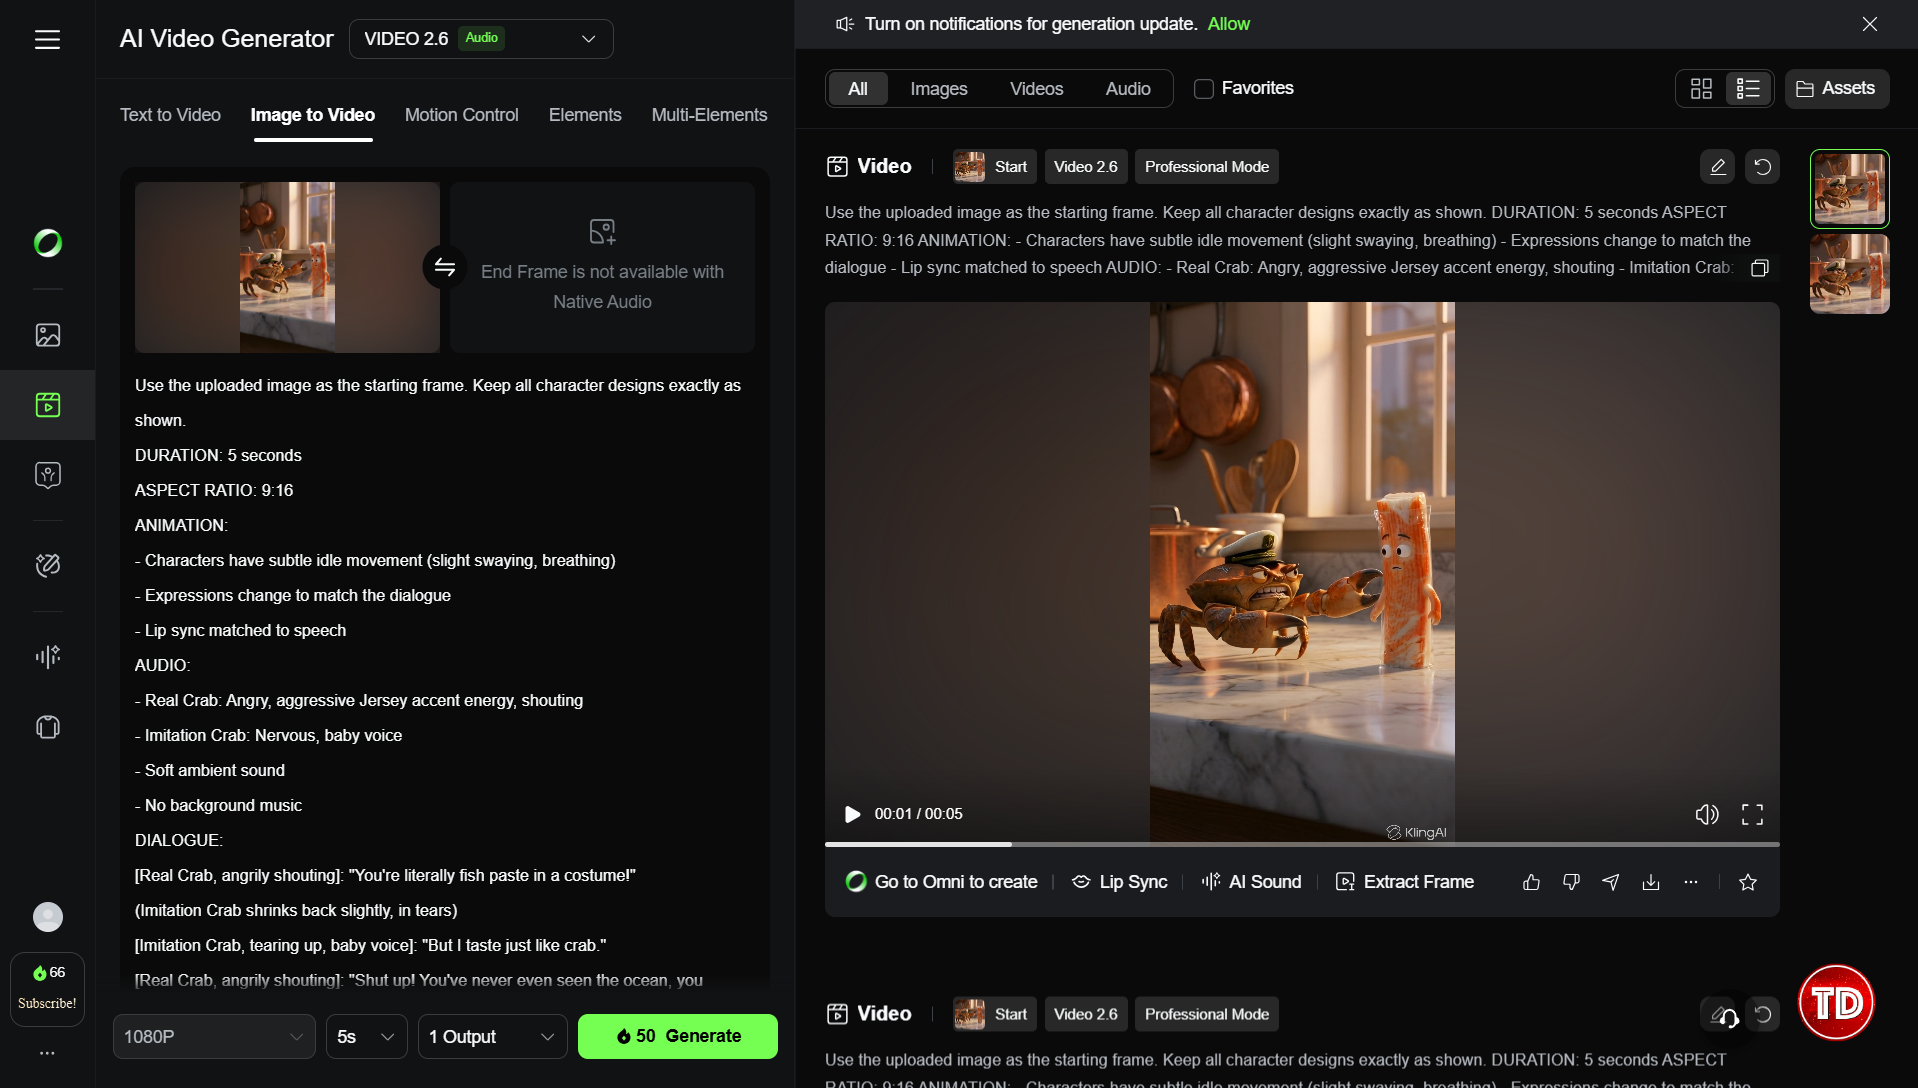
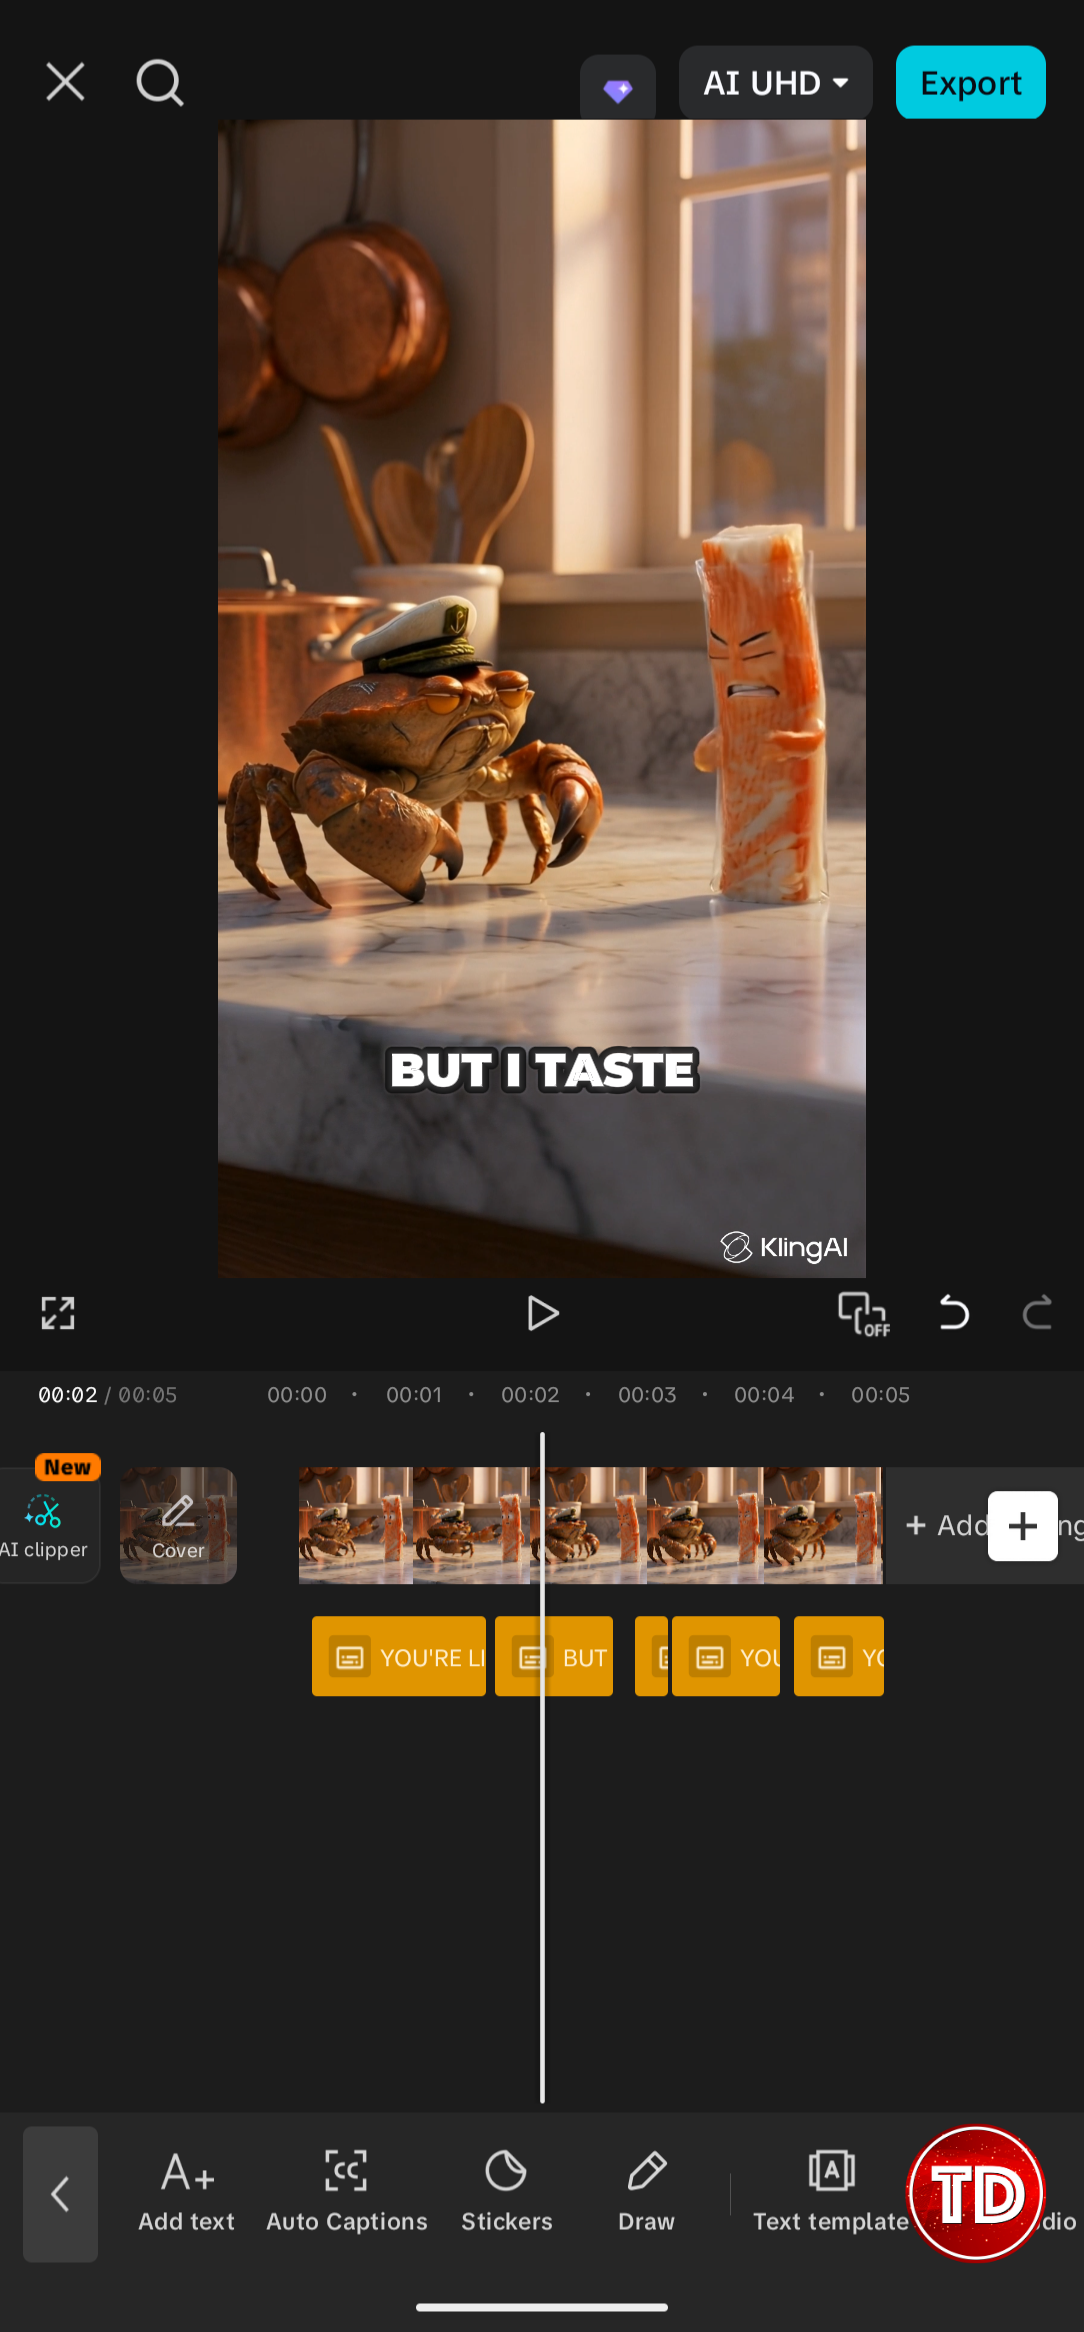
Now every script follows that exact rhythm. If you’ve seen a video format you want to replicate, just break down the pattern and add it as a rule. The AI will follow it every time. Script Output Now you need a still image of your characters. You can do this directly in Kling, or use another image generator like Gemini’s Nano Banana Pro and then upload it. Here’s a prompt structure that works: Pixar-style 3D render, cinematic lighting. [Paste the scene from your generated script] [Paste the characters from your generated script] [Note the positioning: who’s on the left, who’s on the right] Aspect ratio: 9:16 A few things to keep in mind: Generated Image Output I generated this image using Gemini’s Nano Banana Pro. I chose it because, after testing multiple image generators, Nano Banana Pro produced the most realistic results. The texture, lighting, and proportions looked natural rather than that familiar “AI-generated” smoothness. If you want to see how it compared to other tools like Claude, I wrote a full breakdown here: Can Gemini 3 Replace My AI Toolkit? After generating, I brought it into Canva to clean things up a bit. I used the Image Upscaler to boost the resolution and the Magic Eraser to remove the watermark. Upload your image to Kling AI and use the image-to-video feature. Then give it a prompt that includes your script and some animation directions. Here’s a template: Use the uploaded image as the starting frame. Keep all character designs exactly as shown. DURATION: 5 seconds ASPECT RATIO: 9:16 ANIMATION: – Characters have subtle idle movement (slight swaying, breathing) – Expressions change to match the dialogue – Lip sync matched to speech AUDIO: – [Character A]: [describe their voice] – [Character B]: [describe their voice] – Soft ambient sound – No background music DIALOGUE: [Paste your script here] CAMERA: – Stable shot or very slow push-in – Keep both characters in frame Note: You’ll likely need to tweak your prompt a few times. Sometimes the dialogue gets spoken by the wrong character, or the tone doesn’t match what you wanted. This is normal. Try adjusting your speaker labels, simplifying emotion descriptors, or rewording lines until you get the result you’re looking for. You can also check out Kling AI’s official audio guide for more tips on getting the best results. Step 4 (Optional): Add Captions I added captions to mine using mobile CapCut’s auto-caption feature. It only takes a few seconds and makes the video way more engaging, especially since most people scroll with sound off.
That’s the whole process. Your preferred AI writes your script, Kling turns it into an animated video. You add captions and post it. The barrier to making this kind of content is pretty low now. The hard part isn’t the technical workflow. It’s coming up with ideas that are actually worth watching. Start simple. Make a few videos. See what works.

What is Kling AI?

Pricing
The Workflow
Step 1: Write the Script
Step 2: Generate the Image
Step 3: Generate the Video

Final Result
Wrapping Up
🎉 PlayCloud Sale Extension – Get 10% OFF and Save Big on All PlayCloud Subscription Plans!

Learn AWS with our PlayCloud Hands-On Labs

$2.99 AWS and Azure Exam Study Guide eBooks

New AWS Generative AI Developer Professional Course AIP-C01

Learn GCP By Doing! Try Our GCP PlayCloud

Learn Azure with our Azure PlayCloud

FREE AI and AWS Digital Courses

FREE AWS, Azure, GCP Practice Test Samplers


Subscribe to our YouTube Channel

Follow Us On Linkedin


