
Last updated on July 13, 2026
If you have ever stared at a blank Figma canvas with a deadline looming, whether that is a thesis defense, a hackathon demo, or a personal app you finally want to ship. You already know that speed matters as much as polish. A traditional UI/UX workflow covers research, wireframing, high-fidelity mockups, and developer handoff, which can take weeks in a normal product cycle. Most people building on a deadline simply do not have weeks to spare. Students finishing a thesis MVP, hackathon participants racing the clock, and hobbyists building for fun on a weekend all share the same goal: getting something real on screen, fast.
AI tools that generate, translate, and scaffold interfaces can compress that multi-week pipeline into a few focused hours. That frees up time for the part that actually matters: making the idea work end-to-end, whatever the occasion.
Speed Is Only Half the Story
Building fast is only half the equation. A beautifully prototyped interface that only runs on your laptop is not a finished project. It is a demo. The other half is knowing enough fundamentals to put that prototype somewhere a panel, a judge, a recruiter, or just a curious friend can actually reach it.
Tutorials Dojo’s article on human-plus-AI workflows captures this well: AI produces, and the person stays responsible for direction, quality, and the final call on what gets shipped. AI provides the speed while human judgment provides the direction. Together, they form the backbone of the workflow below. It applies whether you are prototyping for a thesis panel, a hackathon, or simply something you want to build for fun.
Phase 1: Inspiration and Baseline
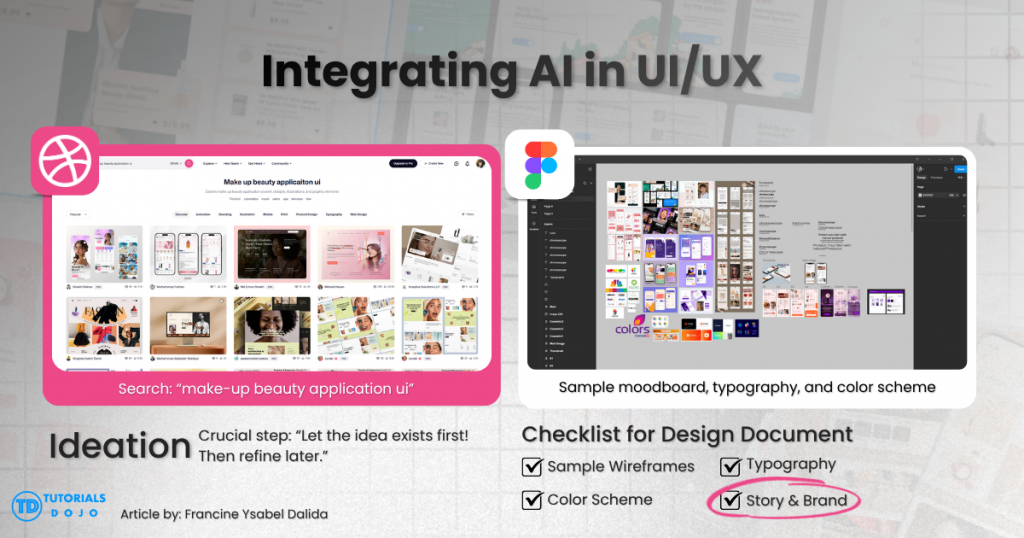
Every good interface starts with looking at other good interfaces. Before opening any AI tool, the goal at this stage is not to copy a design. It is to build a visual vocabulary. A strong reference point makes it easier to brief an AI tool later, because vague prompts like “make it look modern” produce vague results.
Step-by-Step: Building Your Moodboard
- Open Dribbble and browse with a specific theme in mind. Search for terms close to your actual project: “fintech dashboard,” “habit tracker app,” or “campus event app.” Avoid searching generic terms like “UI design.” Specific searches surface more relevant layout and color patterns.
- Screenshot or save anything that catches your eye. This includes full layouts, individual components, color combinations, or even just a typography pairing that feels right for the project.
- Open a fresh Figma file and paste those images in. Drop everything onto a single canvas without worrying about organization yet. This rough collection is your moodboard.
- Cluster the images by mood or tone. Group the screenshots by what they communicate: “playful,” “minimal,” “corporate,” or “dark mode.” Delete anything that no longer fits once you see it next to the others. This step defines the personality and essence of the application, not just its visual style.
- Pull a color palette from the moodboard. Use Figma’s color picker to extract 4–6 hex values that consistently appear across your favorites, then save them as color styles in the file.
- Set a basic type scale. Pick one or two typefaces and define 3–4 sizes: heading, subheading, body, and caption. This ensures every screen you build afterward pulls from the same scale.
- Lay out the skeleton of your core screens. Using the palette and type scale, block out the rough structure of your most important 2–3 screens. Keep it to boxes, labels, and spacing, not a polished mockup. This is enough structure for an AI tool to work from in the next phase.
What You Should Have by the End of Phase 1
A fully polished mockup is not necessary at this stage. A moodboard, a palette, a type scale, and a rough skeleton are enough. Together, they form the design system an AI model will use as its brief.
Phase 2: Injecting AI into the Canvas
This is where the workflow stops looking like traditional design and starts looking like a collaboration with a model. Stitch, Google’s AI design tool, is built specifically for this transition. Rather than generating a flat image, it focuses on what the product looks like and how screens connect, producing real HTML and CSS you can actually build on.
Step-by-Step: Generating Screens in Stitch
- Open Stitch and start a new project.
- Feed it your Figma moodboard. Upload the moodboard, palette, and skeleton screens from Phase 1 as reference images. If image input is limited in your current mode, describe them in detail instead.
- Write a specific prompt. Instead of “make this pretty,” describe what the screen does and how it should feel. For example: “A habit-tracker home screen with a streak counter at the top, a card list of today’s habits below it, using the warm minimal palette and rounded-card style from the attached moodboard.”

The Prompt Refinement Technique
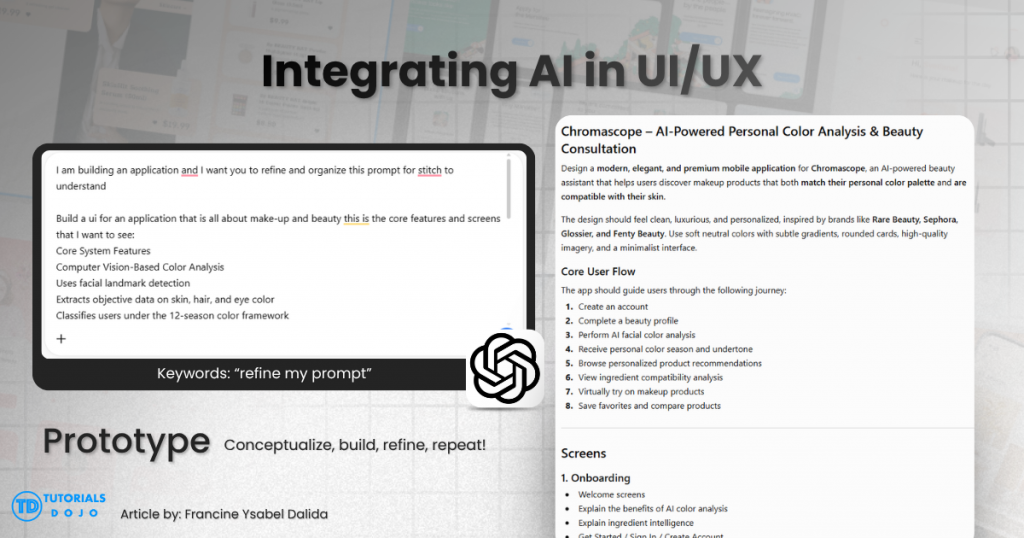
Before submitting any prompt to an AI design tool, there is a two-step habit worth building. First, draft the prompt yourself in plain language. Specify exactly what you want to happen and do not worry about polish. Second, take that draft to ChatGPT and ask it to refine the prompt for the tool you are about to use, since each model interprets instructions differently.
For example, try: “Refine this prompt so that Stitch can understand and implement it” or “Refine this prompt so that Claude can understand and implement it.” Adding “be mindful of the user’s token usage” keeps the refined version concise rather than bloated. This approach consistently produces better first-pass results than typing directly into the tool from scratch.
- Review the generated screens and iterate. Ask Stitch to adjust spacing, swap a component, or regenerate a screen that did not land. This is a back-and-forth conversation, not a one-shot generation.
Choosing Your Export Path
Once the screens look right, Stitch gives you two directions. Which one fits depends on what the project needs next:
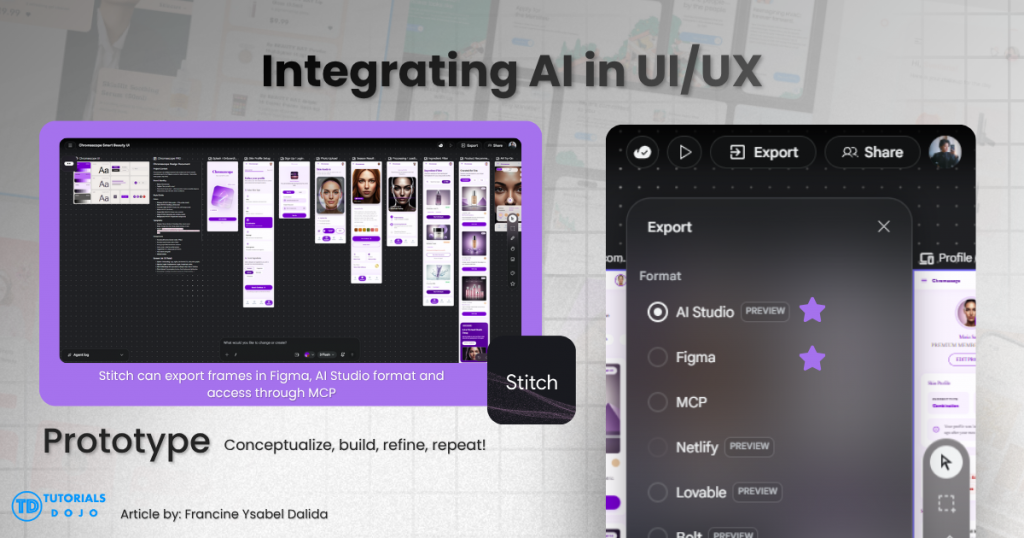
- Option 1: Export to Figma. Choose this if the design still needs manual refinement: tightening spacing, fixing component hierarchy, or aligning to a stricter design system. Stitch’s Figma export preserves layers and components, so you land in a familiar, editable file.
- Option 2: Export to Google AI Studio. Choose this if the design is solid enough to build on. This path takes the exported HTML and CSS straight into AI Studio, where scaffolding the actual application logic begins.
Setting Up Figma MCP
The Model Context Protocol (MCP) is what makes this whole pipeline possible under the hood. Introduced by Anthropic, MCP is an open standard that gives AI models a consistent way to read external context such as your Figma file, and call external tools without relying on custom integrations for every app. Many developers describe it as a “USB-C port for AI.”
Figma MCP uses this standard to hand your design context directly to a model later in the build. For a beginner-friendly breakdown of how it works, Tutorials Dojo’s cheat sheet on Model Context Protocol (MCP) is a good starting point. Set up Figma MCP now if it is not yet configured. Phase 3 depends on it.
Phase 3: Building the Logic
A static UI, no matter how clean, rarely tells the whole story of an idea. A thesis panel, hackathon judges, or even just a personal benchmark usually require something that behaves intelligently. This is where the build moves from Google AI Studio into a real IDE.
Finishing the Scaffold in Google AI Studio
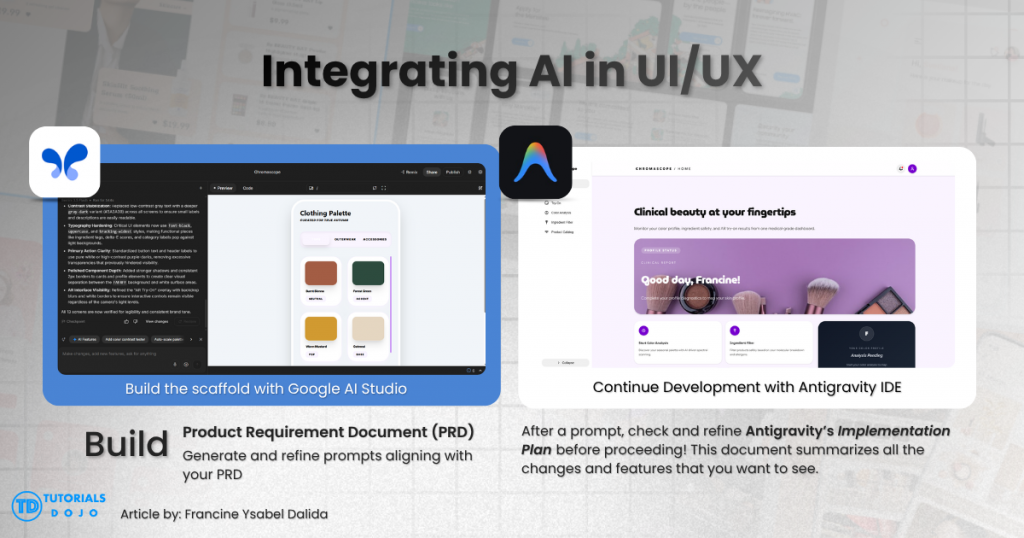
- Continue scaffolding in Google AI Studio. Wire up the generative AI features your prototype needs: a chatbot panel, a recommendation engine, a summarizer, or any Gemini-powered feature responding to user input. Keep iterating until you have a working scaffold document with the application structure and logic stubbed in.
- Push the project to GitHub. Export your project files, run
git init, commit the code, and push it to a new GitHub repository. Version control gives you a clean copy to bring into a real IDE, and also a safety net if anything breaks in the next step.
Moving the Build into Antigravity
- Download and install Antigravity. Antigravity is Google’s AI-powered IDE, available at antigravity.google. Sign in with your Google account. No separate license is required for the free tier.
- Open your project. In Antigravity, click + Open Workspace and select the option to open from a local directory. Point it at the unzipped GitHub folder, or clone the repo directly via Git. Name the workspace clearly so the agent scaffolds files into the correct root folder.
- Install Figma MCP inside Antigravity. Open the Agent Manager (Cmd+E on Mac / Ctrl+E on Windows), go to MCP Servers, and search for the Figma MCP server in the MCP store. Install it and authenticate your Figma account when prompted. Once active, Antigravity’s agent can read your Figma file’s layers, colors, and components directly.
- Verify the connection. In the Antigravity chat, ask something simple: “List my Figma files” or “Fetch the design tokens from [project name].” A real response confirms the MCP bridge is working.
- Continue the build with prompts. The workflow is now fully conversational. Prompt the agent to implement a specific screen, review the result in the built-in browser preview, and refine through follow-up prompts. Repeat screen by screen until the core application flow works end-to-end.
For readers whose interest extends beyond a single prototype, Tutorials Dojo’s Google Cloud Certified Generative AI Leader study guide covers the strategic side of leading and implementing generative AI initiatives at an organizational level. It is a natural next step after building something hands-on.
Phase 4: From Prototype to Production
This is the phase many builders skip, and it is the one that most often separates a polished-looking demo from a project people can actually test on their own devices. Whether the goal is a working thesis deliverable, a live hackathon submission, or just a side project you are proud of. A prototype is not finished until it is reachable through a live URL.
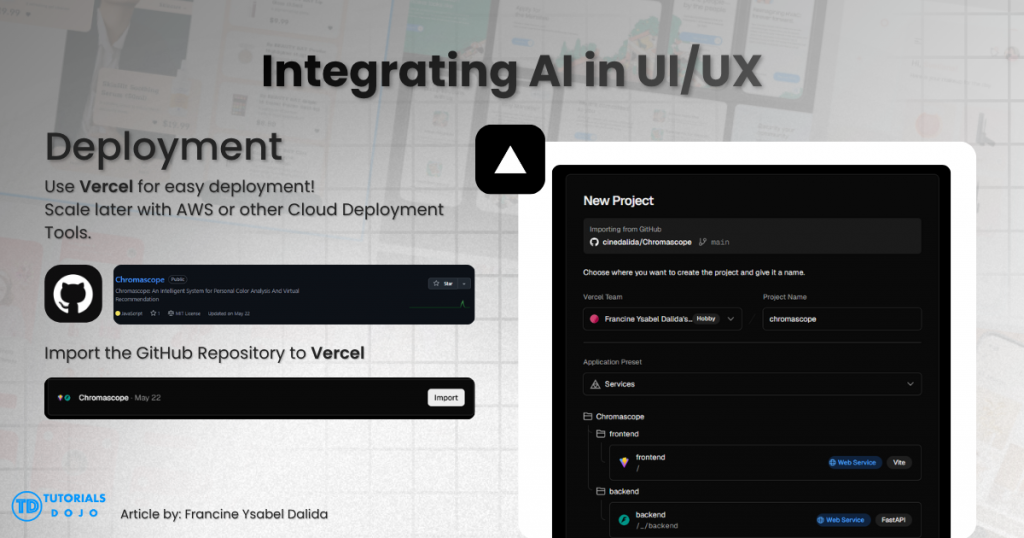
For quick deployment, Vercel is the go-to choice. Built by the team behind Next.js, it works seamlessly with whatever a frontend AI builder generates. There are two ways to get an app live, and which one you use usually comes down to how much terminal time you want to spend.
Option 1: Push to GitHub and Import (No Terminal Required)
- Create a GitHub repository and push your project code to it.
- Go to vercel.com and sign in with your GitHub account.
- Click “Import Project” and select your repository.
- Let Vercel detect the framework automatically. It recognizes Next.js, Vite, plain HTML, and most scaffolds generated by Stitch or Antigravity, then pre-fills the build settings.
- Click Deploy. A live URL is ready in roughly one minute.
- Keep building normally. Every push to the main branch triggers a new deployment automatically. Every pull request also gets its own preview link, useful for sharing progress with a teammate or thesis adviser before going live.
Option 2: The Vercel CLI (Fastest Option from the Terminal)
This approach skips the GitHub import step entirely and works best when you are already in the terminal.
- Install the CLI:
npm install -g vercel - Log in to your Vercel account:
vercel login - Deploy a preview from your project’s root folder:
vercelThe CLI asks a few quick questions about scope and directory, then returns a shareable preview URL in seconds.
- Push to production when ready:
vercel --prodThat single command promotes the current build to your production domain.

A prototype built in an afternoon through Figma MCP, Stitch, and Antigravity can be sitting on a live Vercel URL before that same afternoon is over, ready for a thesis defense, a hackathon pitch, or a link you send to friends.
Before You Even Start: Local Environment Setup
Before any build session, it is worth getting your local environment in order first. Tutorials Dojo’s comparison piece, “The Best Local Development Setups for Web and Mobile Apps,” benchmarks practical stacks including Next.js with Expo, Flutter with Android Studio, and Next.js with Capacitor. Each is scored on ease of setup, developer experience, resource efficiency, and mobile performance. It is useful reading regardless of what kind of project is coming up next.
Bridging Design and Deployment
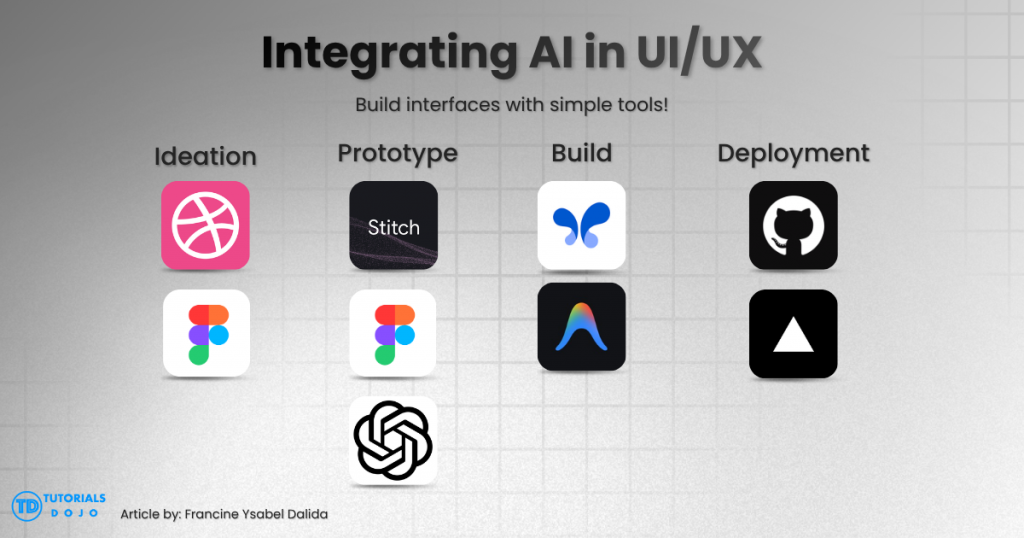
This workflow covers the full journey from idea to live product: gather inspiration on Dribbble, structure it in Figma, use Figma MCP and Stitch to turn that structure into real frontend code, layer in intelligence through Google AI Studio and Antigravity, then ship to the world through Vercel. Each tool removes a bottleneck that used to cost builders days.
The core lesson still holds: AI gets you there fast, but you remain the one deciding what is correct, what is polished enough, and what actually gets deployed. That judgment is not something any tool replaces. It is what makes the difference between a demo and a finished product.
Spin up a throwaway project this weekend and push it through the full pipeline. Run both the vercel and vercel --prod commands at least once before you actually need them. By the time something real is on the line, deployment should already feel like the easy part.
References
On AI Workflows & Mindset
- Tutorials Dojo. The Rise of Human + AI Workflows.
On Model Context Protocol (MCP)
- Tutorials Dojo. What is Model Context Protocol (MCP)?
On Stitch, Antigravity & Google AI Tools
- Google Codelabs. Design-to-Code with Antigravity and Stitch MCP.
- Google Cloud. Generative AI Leader certification.
- Tutorials Dojo. Google Cloud Certified Generative AI Leader Exam Study Guide.
On Deployment & Local Setup
- Vercel. Deploying Projects from Vercel CLI.
- Tutorials Dojo. The Best Local Development Setups for Web and Mobile Apps.
🔔 20% OFF All Reviewers + 10% OFF PlayCloud’s First Billing Use Code: TDPLAYCLOUD-101326

Turn Your Team Into Cloud-Ready Professionals Today

Learn AWS with our PlayCloud Hands-On Labs

$2.99 AWS and Azure Exam Study Guide eBooks

Learn GCP By Doing! Try Our GCP PlayCloud

Learn Azure with our Azure PlayCloud

FREE AI and AWS Digital Courses

FREE AWS, Azure, GCP Practice Test Samplers


Subscribe to our YouTube Channel

Follow Us On Linkedin


Written by: Francine Ysabel B. Dalida