Last updated on June 12, 2025
Hey, this is Step 9 of our 9-step website portfolio building with AWS!
Got lost? Click here to go to the main article, and here for the eighth step!
In this final step of the series, we’ll guide you through integrating Amazon CloudFront, a global Content Delivery Network (CDN), with your WordPress website hosted on Amazon EC2. Amazon CloudFront will help accelerate content delivery, reduce latency, and enhance the overall performance and security of your site, making it even more robust.
Let’s dive in!
What Is a Content Delivery Network (CDN) and Why Is It Important?
A Content Delivery Network (CDN) is a system of distributed servers that deliver web content to users based on their geographic location. By caching copies of static content such as images, CSS files, JavaScript, and even media files at edge locations (data centers across the globe), Amazon CloudFront reduces the load on your Amazon EC2 instance and improves your site’s performance.
When a user requests content from your site, Amazon CloudFront serves the content from the nearest edge location, decreasing the time it takes to load the page. This is particularly important for global websites or sites with heavy media files, as Amazon CloudFront ensures faster delivery and better user experiences.
Why Use Amazon CloudFront with Your WordPress Site?
When you run a WordPress site on Amazon EC2, your content is served directly from your Amazon EC2 instance. As traffic grows, serving all the content from a single instance can lead to slow page loads and higher latency. Integrating Amazon CloudFront can help address these issues by:
-
Speeding up content delivery: Amazon CloudFront caches static content at edge locations, ensuring it’s delivered faster to users, regardless of their location.
-
Reducing load on your Amazon EC2 instance: With Amazon CloudFront caching static files, your Amazon EC2 instance handles fewer requests, improving server performance and reducing resource usage.
-
Improving scalability: Amazon CloudFront automatically scales to handle increases in traffic without compromising performance.
-
Enhancing security: Amazon CloudFront integrates with AWS security services like AWS Shield and AWS Web Application Firewall (WAF), offering enhanced protection from DDoS attacks and other security threats.
How to Integrate Amazon CloudFront with Your WordPress Site on Amazon EC2
Note: If you’re a beginner, feel free to follow the steps as is — no worries! But if you’re comfortable tweaking things a bit, you can:
-
Replace Amazon EC2 origin with an Amazon S3 bucket for hosting static assets
-
Customize the cache behavior settings to better match your site
-
Add custom error pages, redirect rules, or even Lambda@Edge functions for more advanced control
-
Use Amazon Route 53 or your own DNS provider to point your domain to Amazon CloudFront

Now, let’s get started!
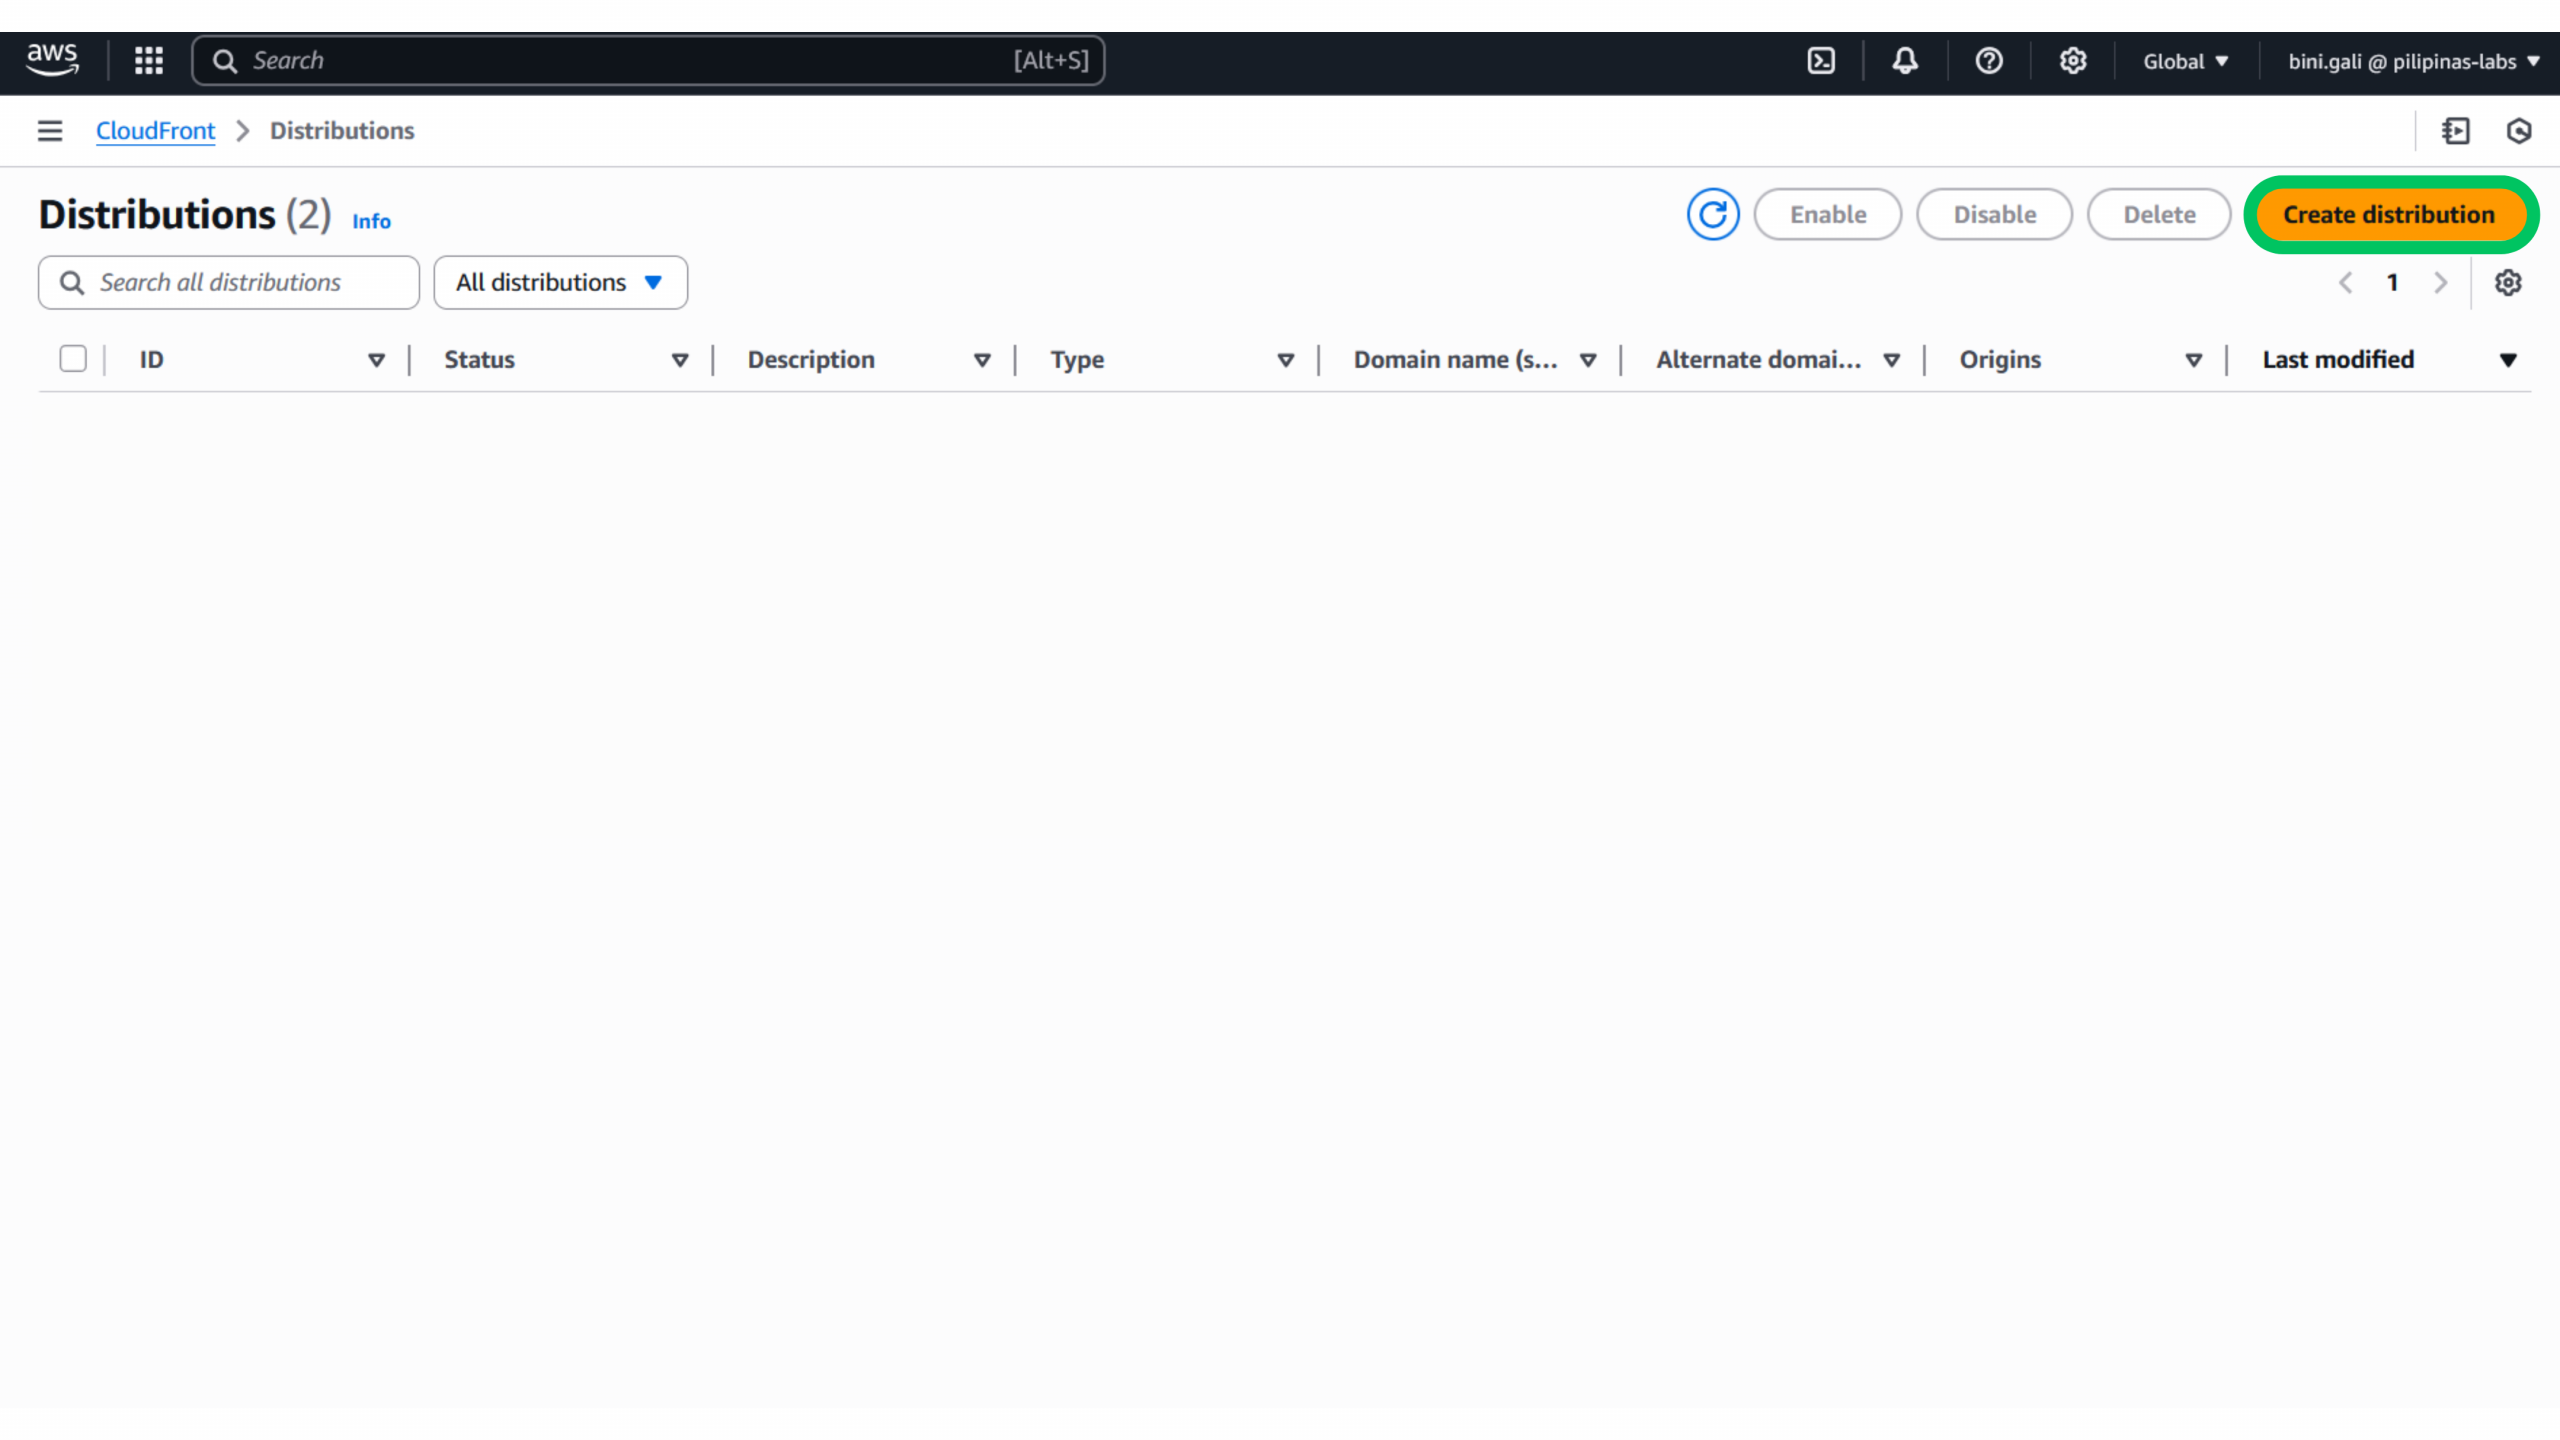
1. Create an Amazon CloudFront Distribution
-
Go to the Amazon CloudFront section in the AWS Console.
-
Click Create Distribution.
-
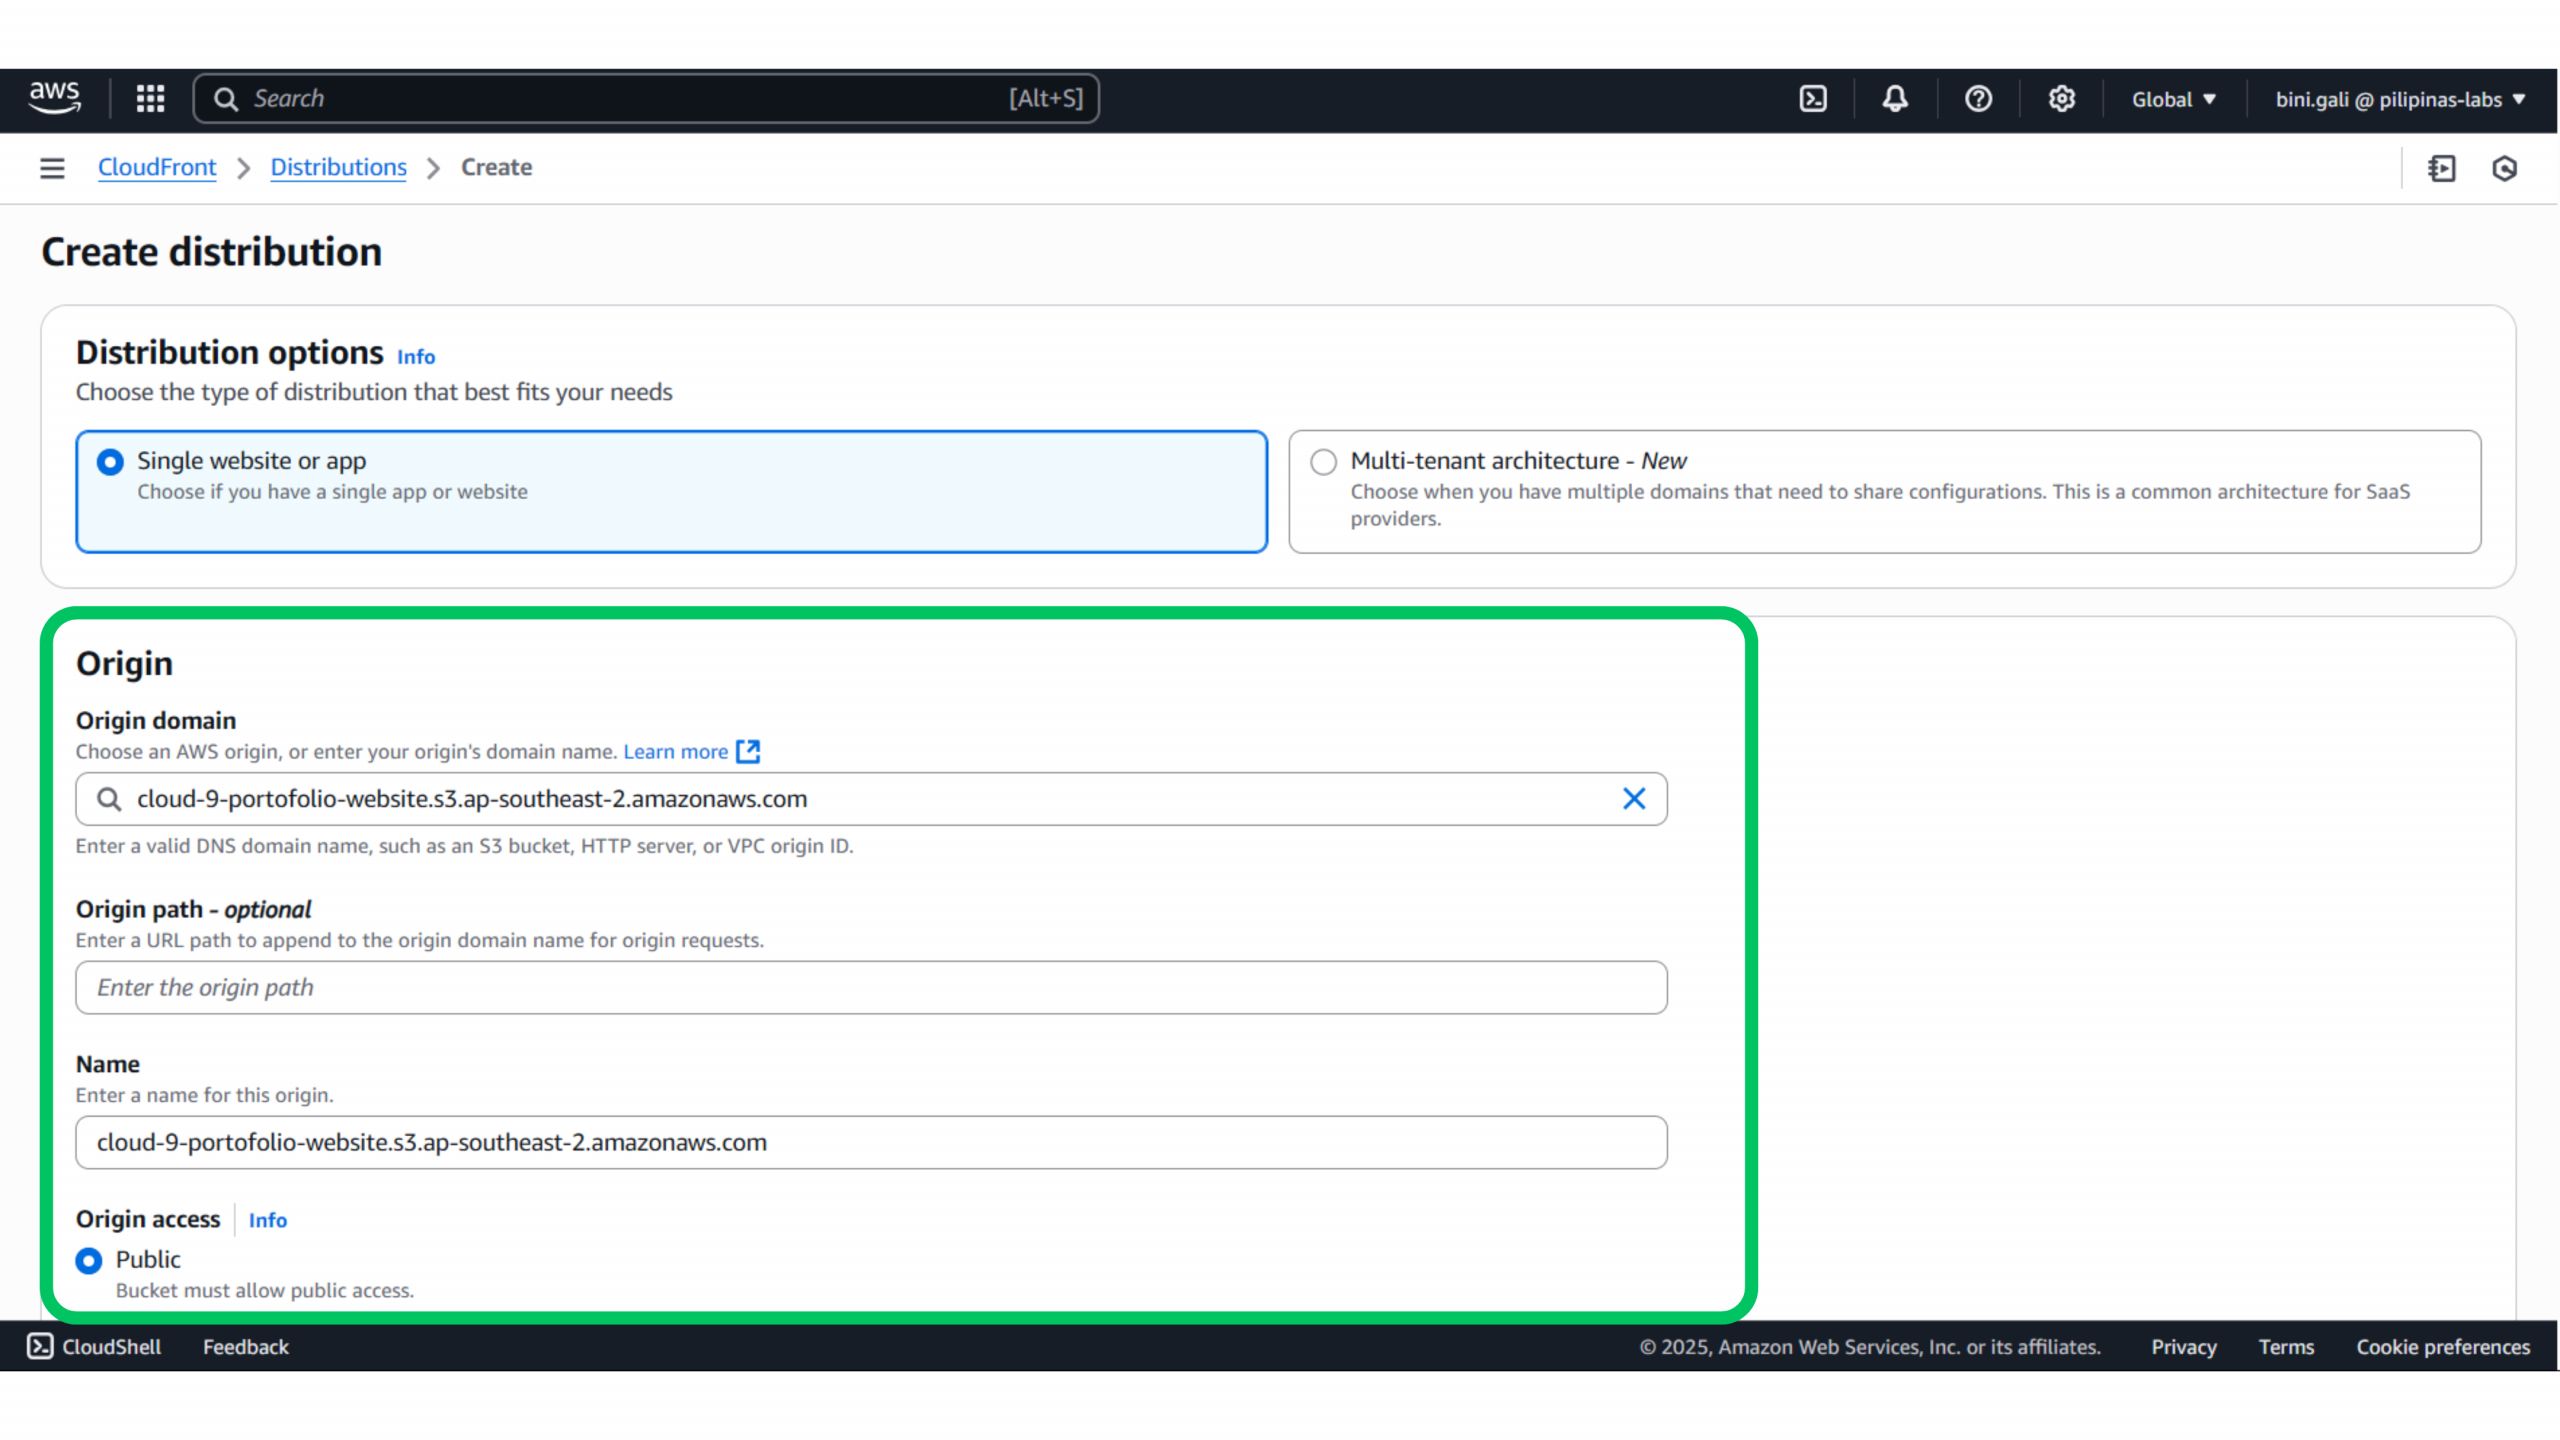
Under Origin domain:
-
For Amazon EC2: Enter your instance’s public DNS (e.g.,
ec2-18-xxx-xxx.compute.amazonaws.com). -
For Amazon S3: Choose your bucket from the list.
-
- (Optional) Set the Origin Path if your files are in a subdirectory (e.g.,
/site-files). -
Set Origin Access:
-
For Amazon EC2, this is typically left as-is.
-
For Amazon S3, choose between Public access or configure Origin Access Control for private buckets.
- Set Origin Protocol Policy to
Match ViewerorHTTPS Only.
-
Default Cache Behavior Settings:
-
Viewer Protocol Policy: Set to
Redirect HTTP to HTTPS. -
Cache Based on Headers:
-
Choose
Allfor dynamic content (Amazon EC2). -
Choose
Nonefor static files (Amazon S3).
-
-
Set Default Root Object (e.g.,
index.htmlfor Amazon S3 or leave blank for Amazon EC2-based WordPress). -
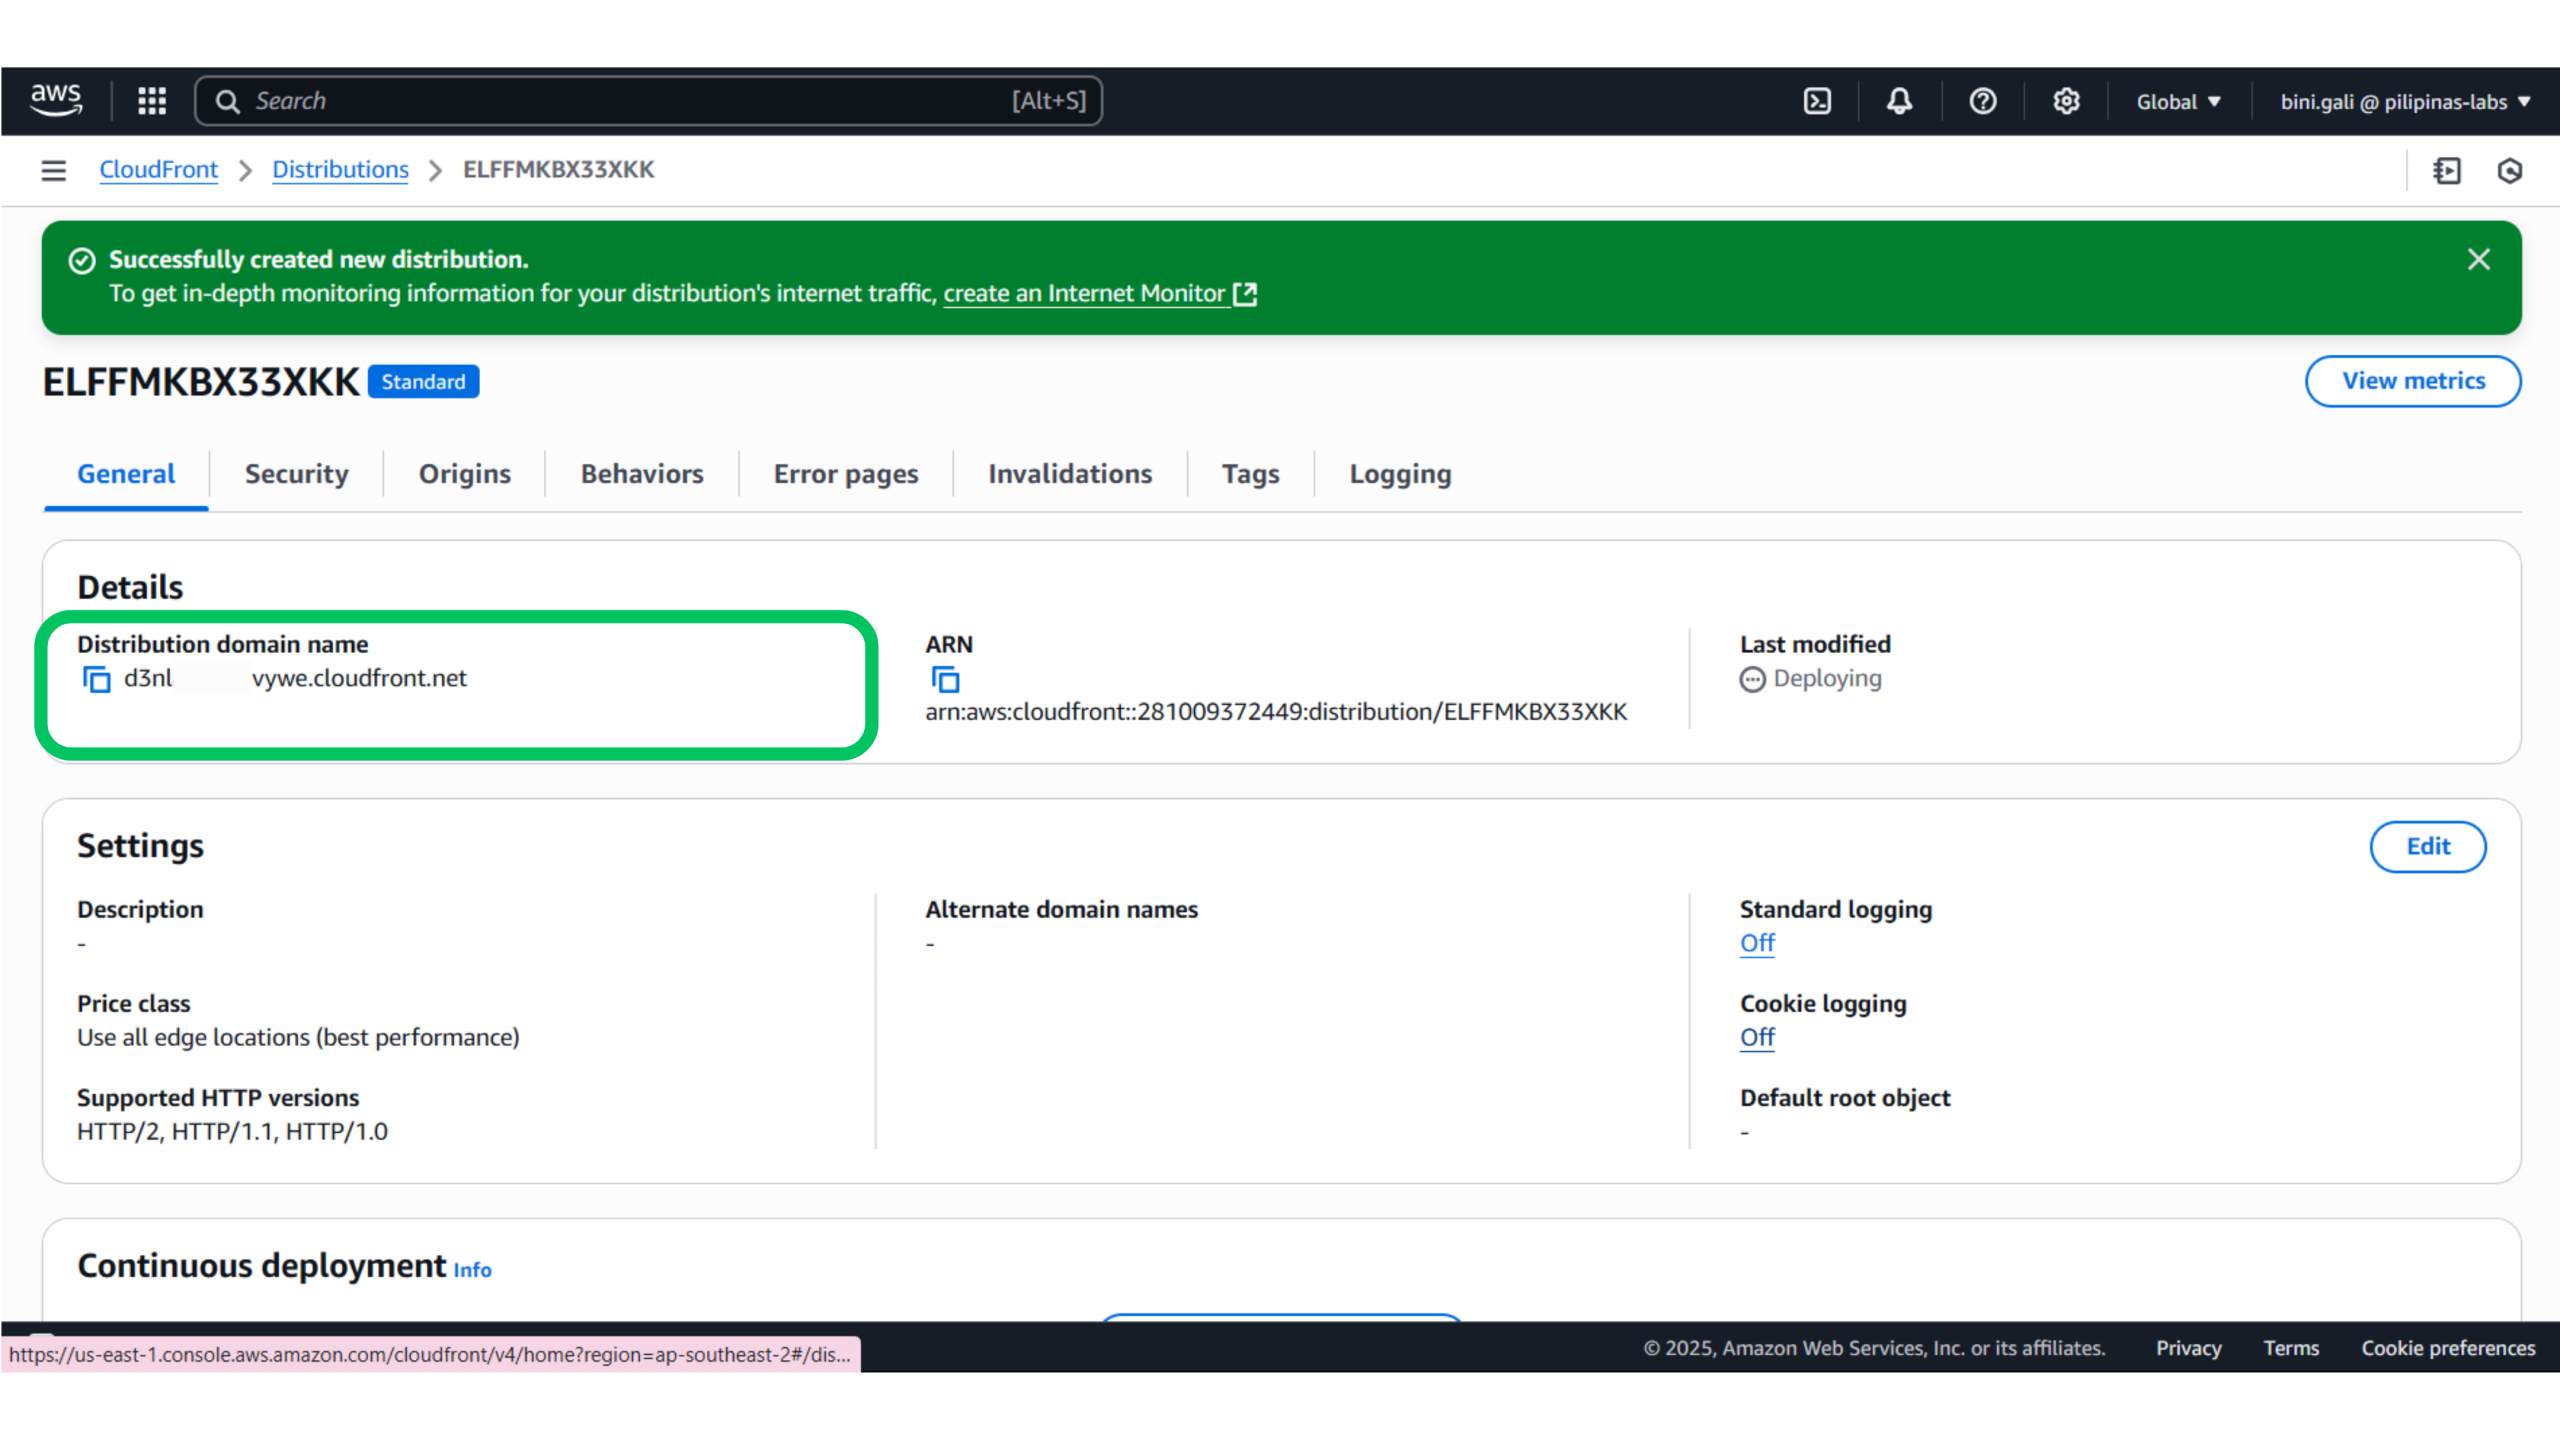
Click Create Distribution and wait for it to deploy.
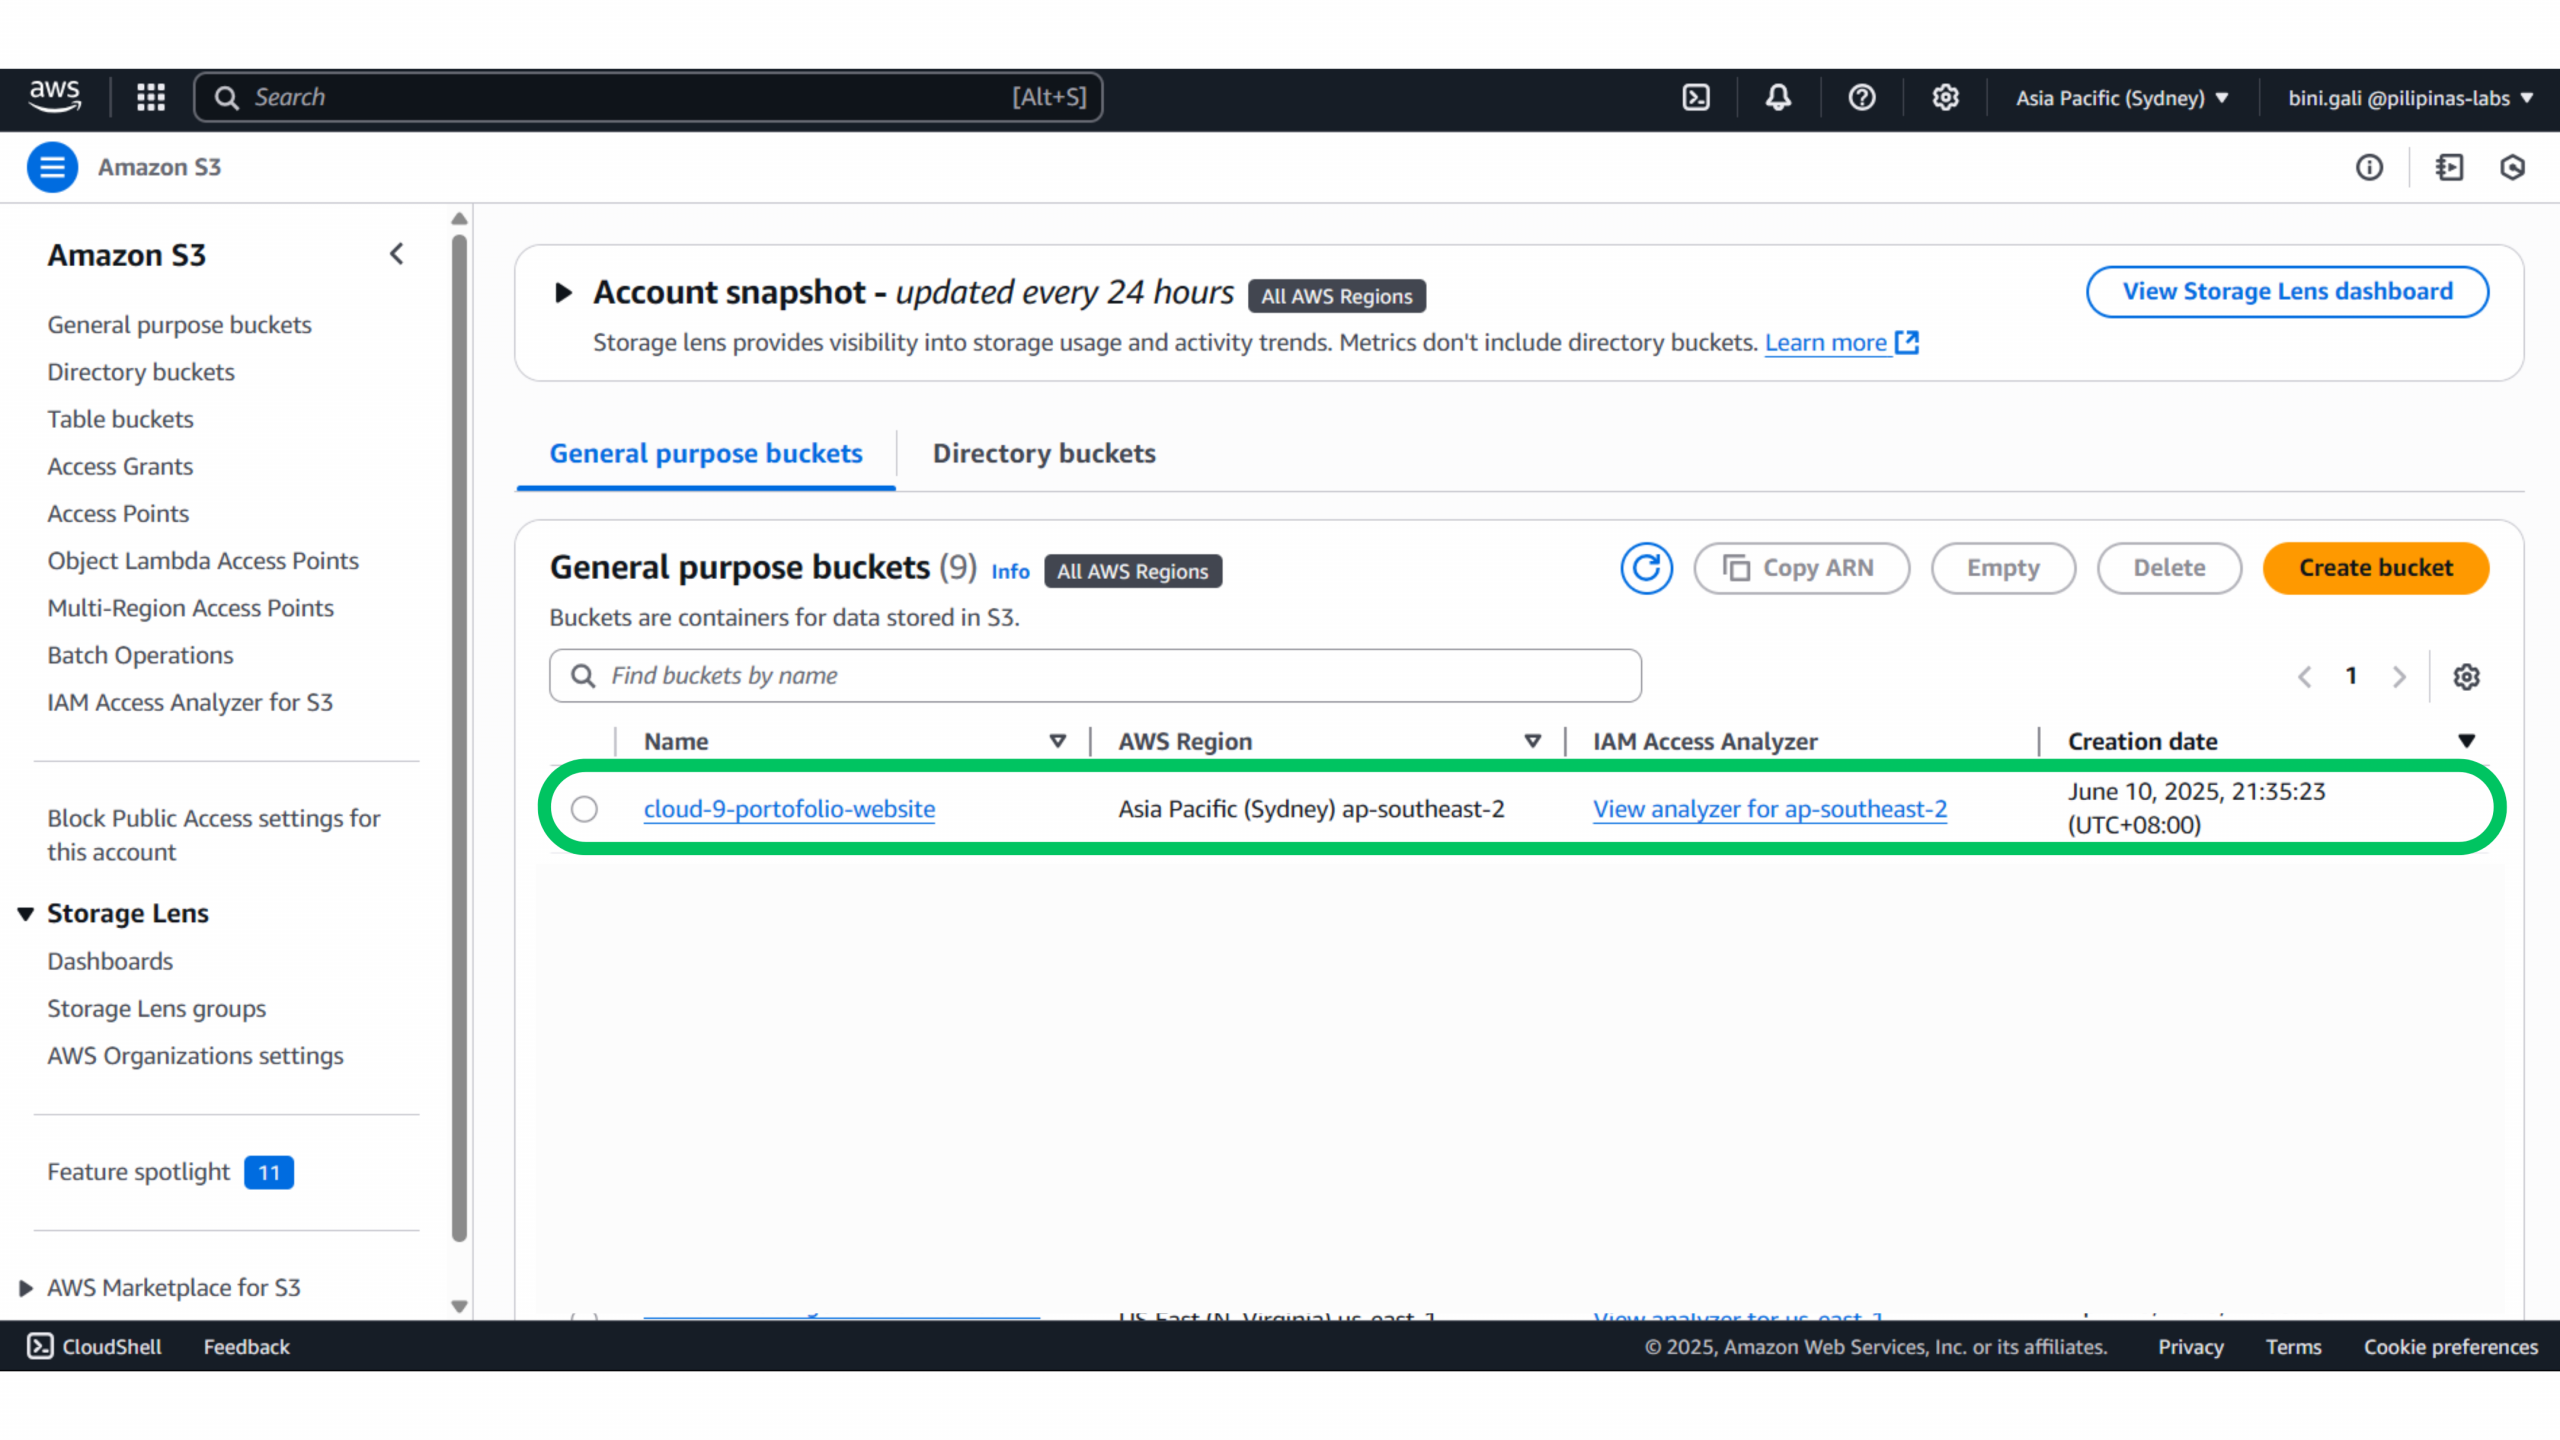
2. (Optional) Create an Amazon S3 Bucket (If Hosting Static Assets)
If you’re using Amazon S3 to host static files:
-
Go to Amazon S3 in the AWS Console.
-
Click Create bucket and use a globally unique name.
-
(Optional) Enable Static website hosting in the bucket’s Properties.
-
Upload your static files like
index.html,style.css, or image assets.
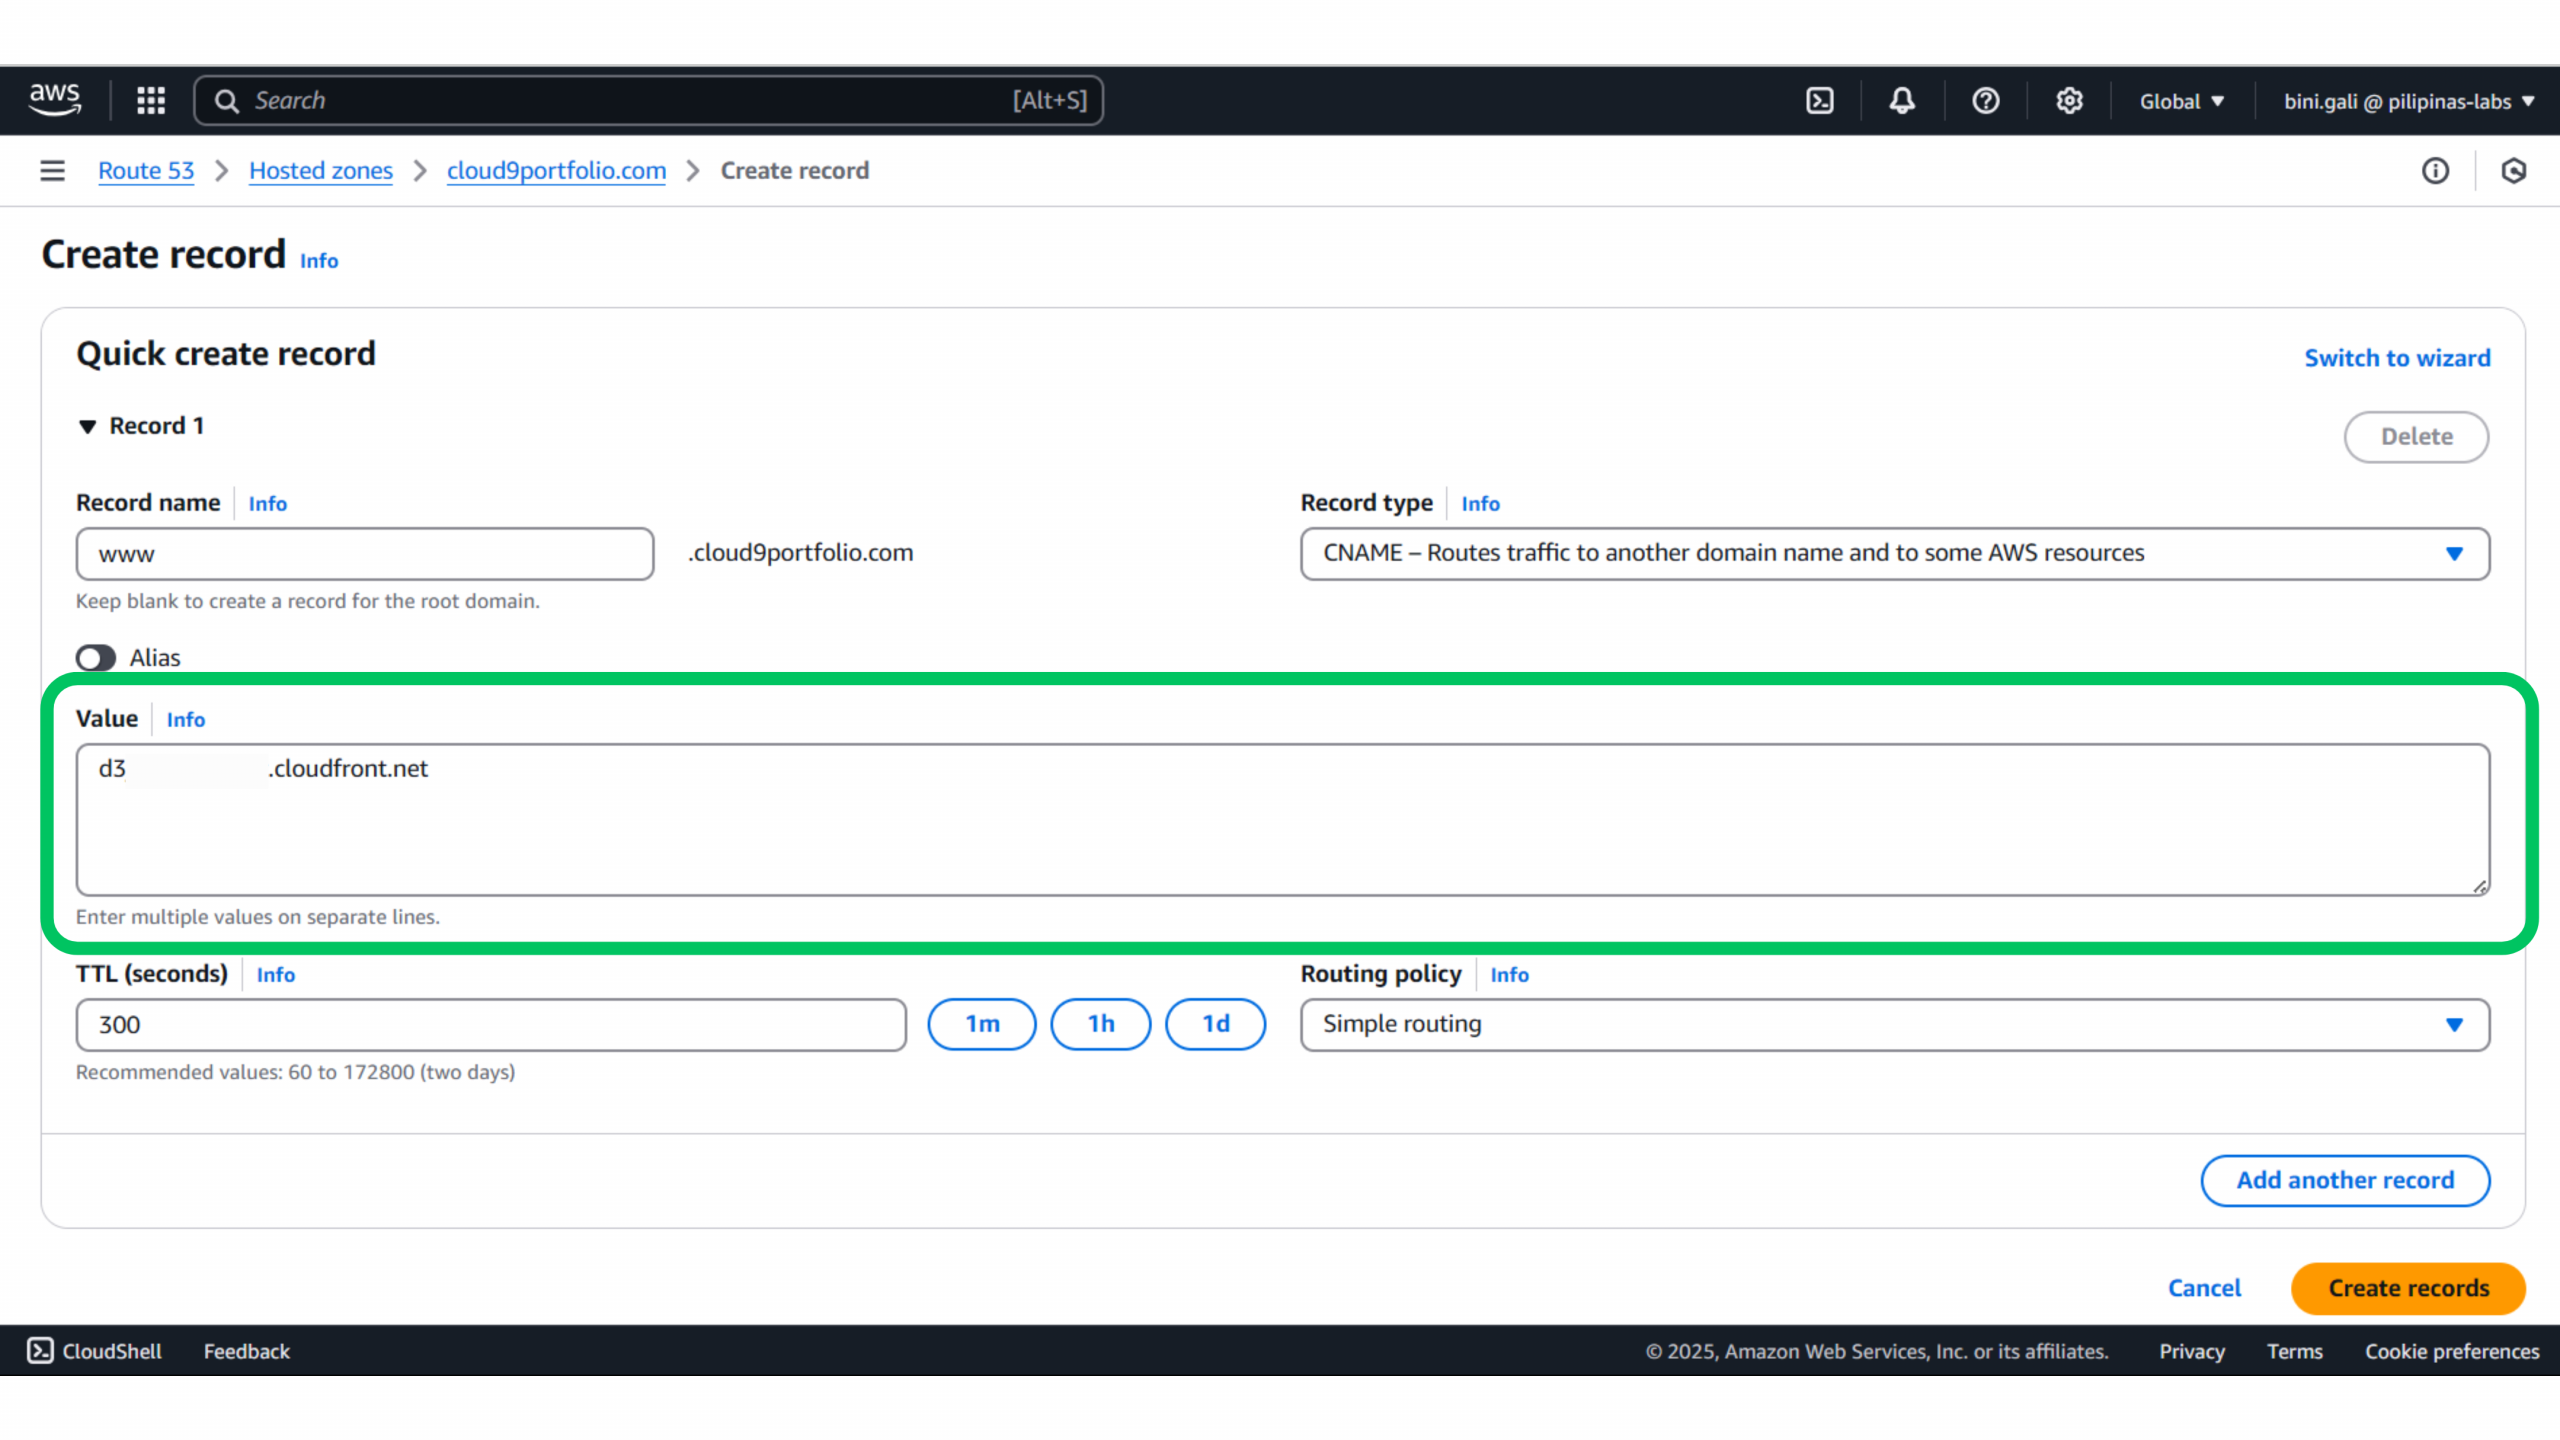
3. Set Up DNS with Amazon Route 53 (or Your Domain Registrar)
After your Amazon CloudFront distribution is deployed:
-
Copy the distribution’s domain name (e.g.,
d3abcxyz1234.cloudfront.net).
-
In Amazon Route 53:
-
Navigate to Hosted Zones > Your Domain > Create Record.
-
Set Record name to
www(or leave blank for root domain).
-
-
Choose CNAME as the record type.
-
Paste the Amazon CloudFront domain into the Value field.
-
Best Practices for Using Amazon CloudFront with WordPress
-
Cache Static Content: Amazon CloudFront works best when caching static content like images, JavaScript, and CSS. Ensure your caching rules are optimized to improve load times.
-
Configure SSL: For secure communication, use Amazon ACM (AWS Certificate Manager) to set up SSL for your Amazon CloudFront distribution.
-
Set Cache Expiry Headers: Adjust the cache expiration time for static assets to ensure they are refreshed only when necessary, reducing the load on your Amazon EC2 instance.
-
Monitor Performance: Use Amazon CloudWatch to monitor the performance and usage of your Amazon CloudFront distribution, ensuring it’s functioning as expected.
Congratulations on completing Cloud‑9: Create Your Portfolio Website with AWS!

Over just 9 comprehensive articles, you’ve successfully built and deployed a fully functional portfolio website. Here’s a recap of everything you learned and implemented:
AWS Services and Steps You Covered
-
Amazon Route 53 — Purchased and configured your custom domain
-
Amazon EC2 Instance Launch — Deployed your virtual server to host WordPress
-
Amazon EC2 Setup & Configuration — Installed necessary software (Nginx, PHP, MySQL, etc.)
-
WordPress Installation — Automated deployment using shell scripting
-
Troubleshooting — Addressed common errors and configuration issues
-
WordPress Dashboard – Managing your content and customizing settings
-
WordPress Plugins and Themes – Enhancing your site’s design and functionality
- Amazon ElastiCache – Speeding up your WordPress site with in-memory caching
-
Amazon CloudFront – Using a CDN to improve speed and deliver content globally
Whether this is your first time deploying a site on AWS or enhancing an existing one, you’ve gained a strong foundation in cloud web hosting. Celebrate your achievement — you’re now officially on Cloud‑9! ☁️
Keep building!
Frequently Asked Questions
- Do I need to update my website’s theme to use CloudFront?
- No, CloudFront integration doesn’t require changes to your WordPress theme. It works by caching and delivering static content.
- Is CloudFront free to use?
- No, Amazon CloudFront is a paid service. However, AWS offers a free usage tier, and you can monitor your usage to stay within budget.
- Can I use CloudFront with other CMS platforms?
- Yes, CloudFront can be integrated with any CMS or custom website, not just WordPress.
- How long does it take for CloudFront to propagate changes?
- It can take anywhere from a few minutes to an hour for changes to propagate, depending on your cache settings.
🤖 $3.49 eBooks Start Here – Get Up to 30% OFF All AI & Machine Learning Reviewers

Turn Your Team Into Cloud-Ready Professionals Today

Learn AWS with our PlayCloud Hands-On Labs

$2.99 AWS and Azure Exam Study Guide eBooks

New Claude Certified Architect Foundations CCA-F

Learn GCP By Doing! Try Our GCP PlayCloud

Learn Azure with our Azure PlayCloud

FREE AI and AWS Digital Courses

FREE AWS, Azure, GCP Practice Test Samplers


Subscribe to our YouTube Channel

Follow Us On Linkedin


